52 Frames: Week 43: Details!

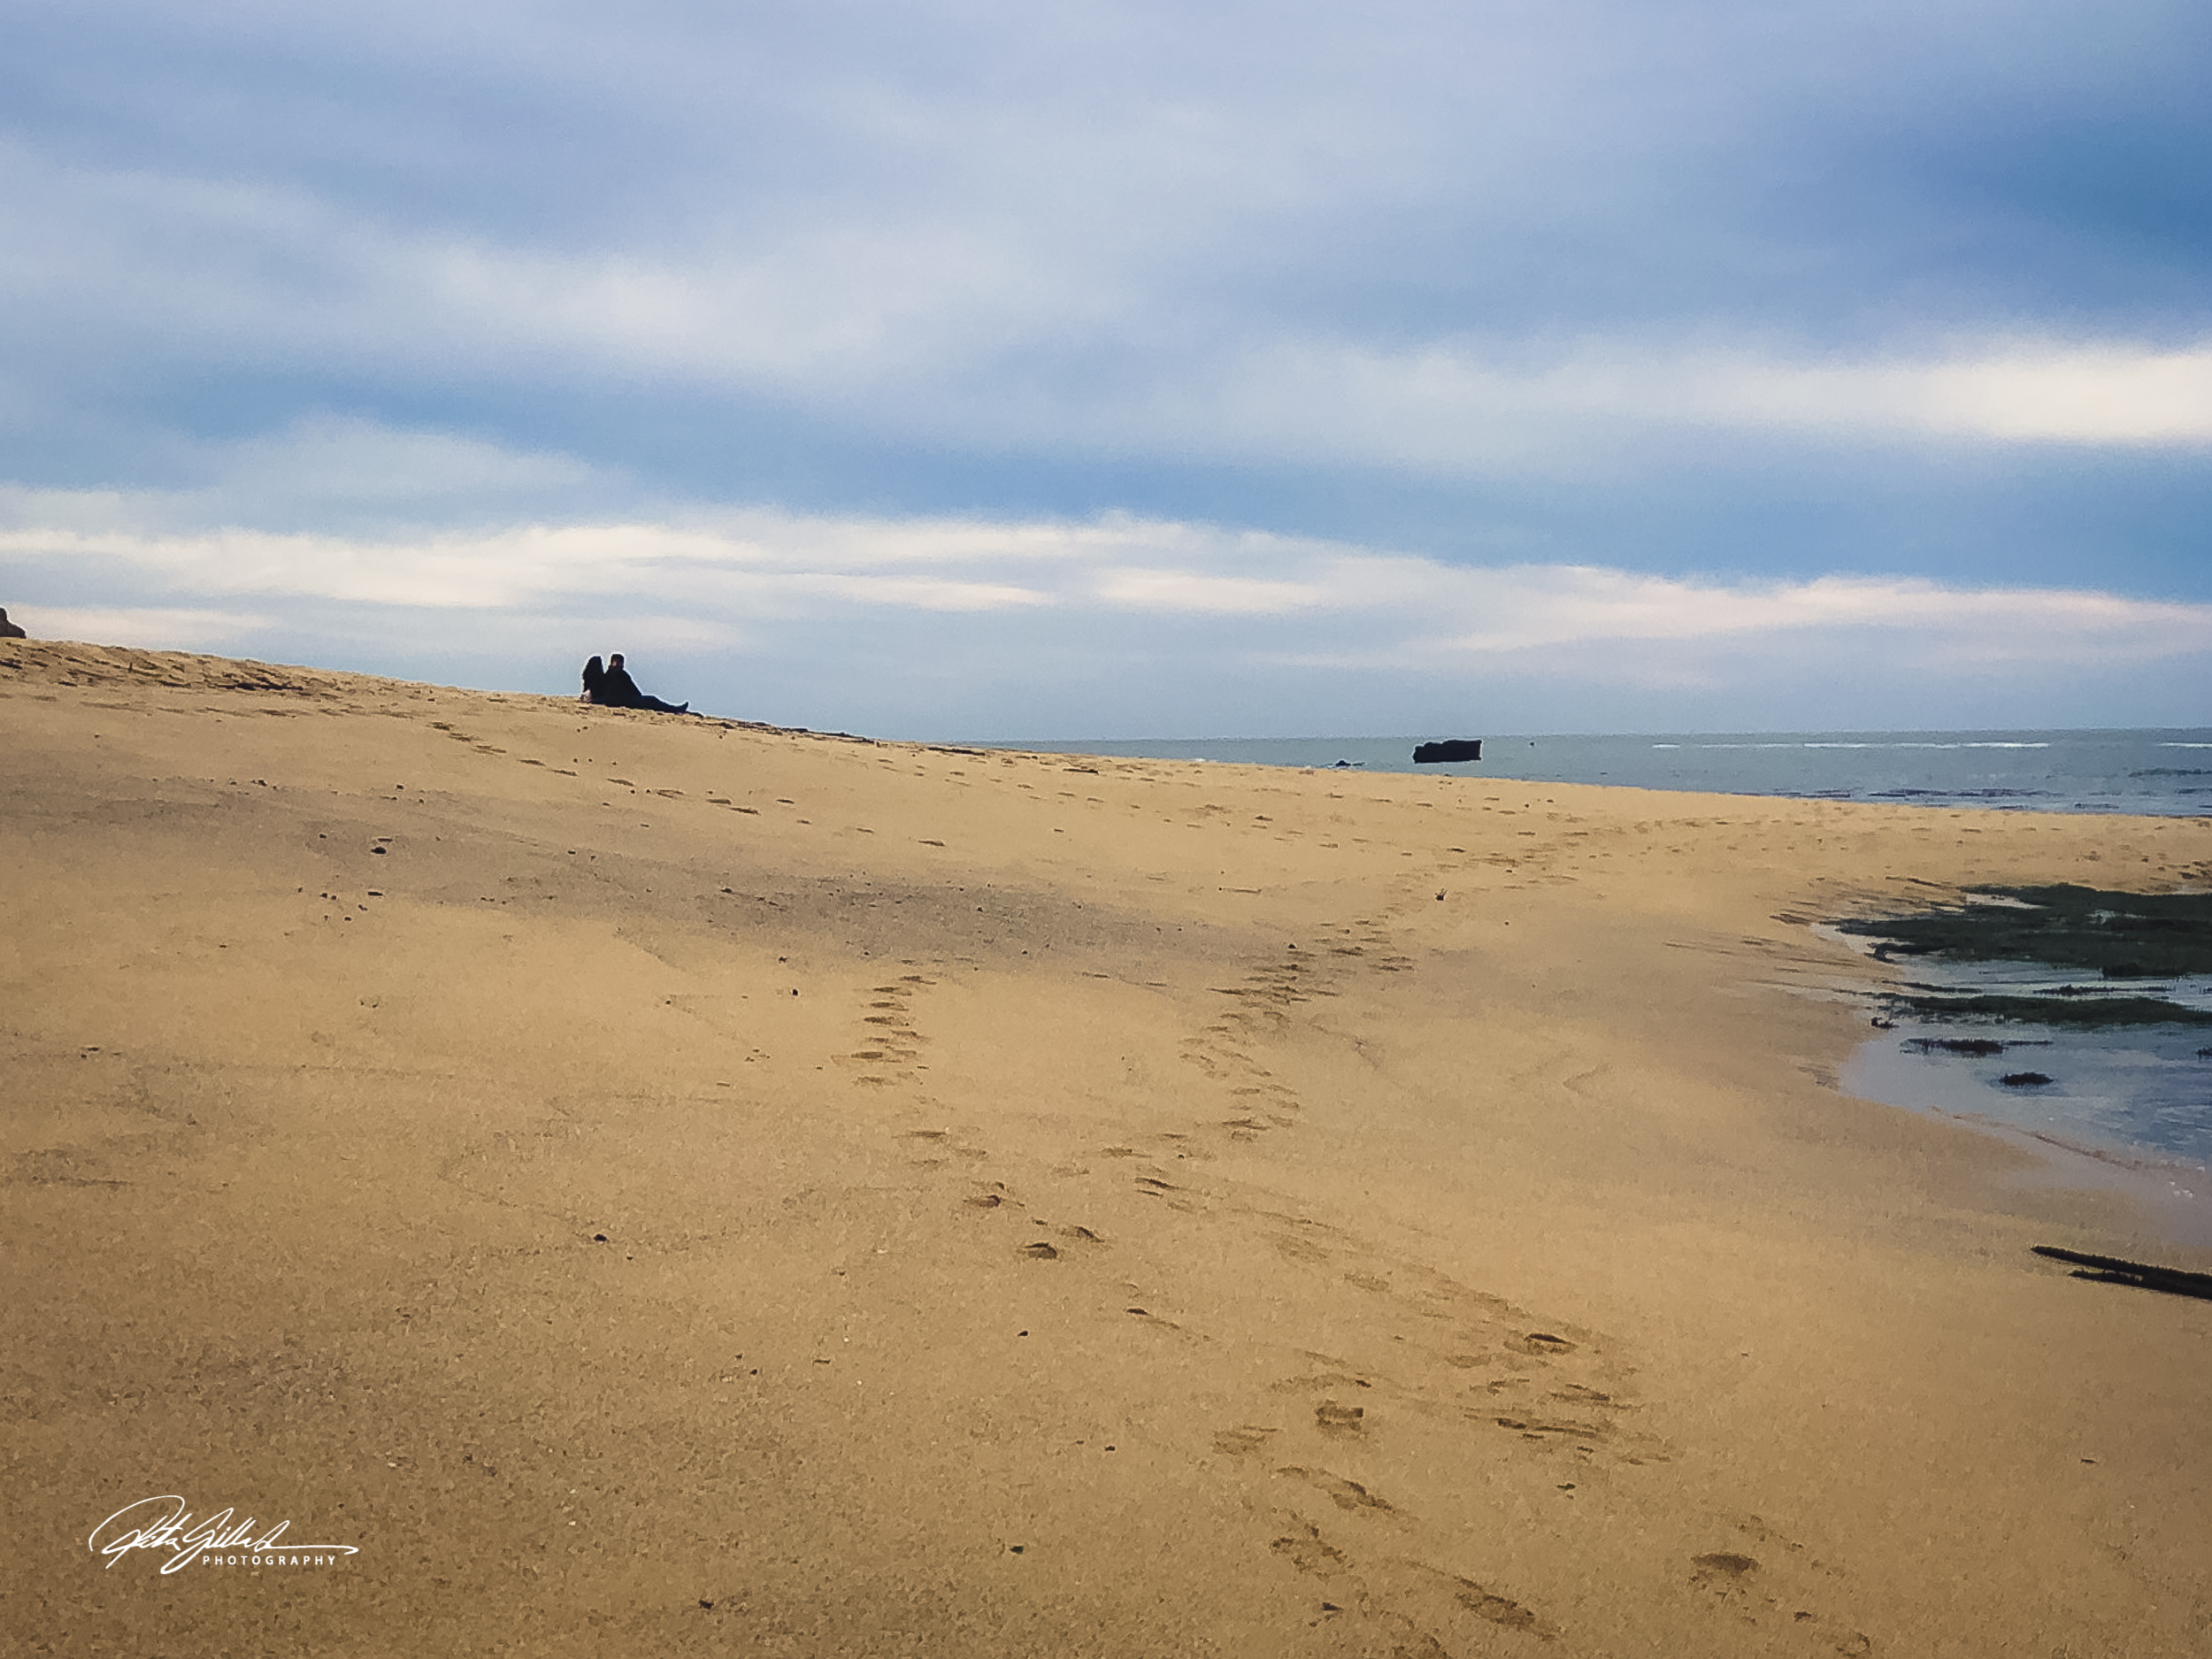
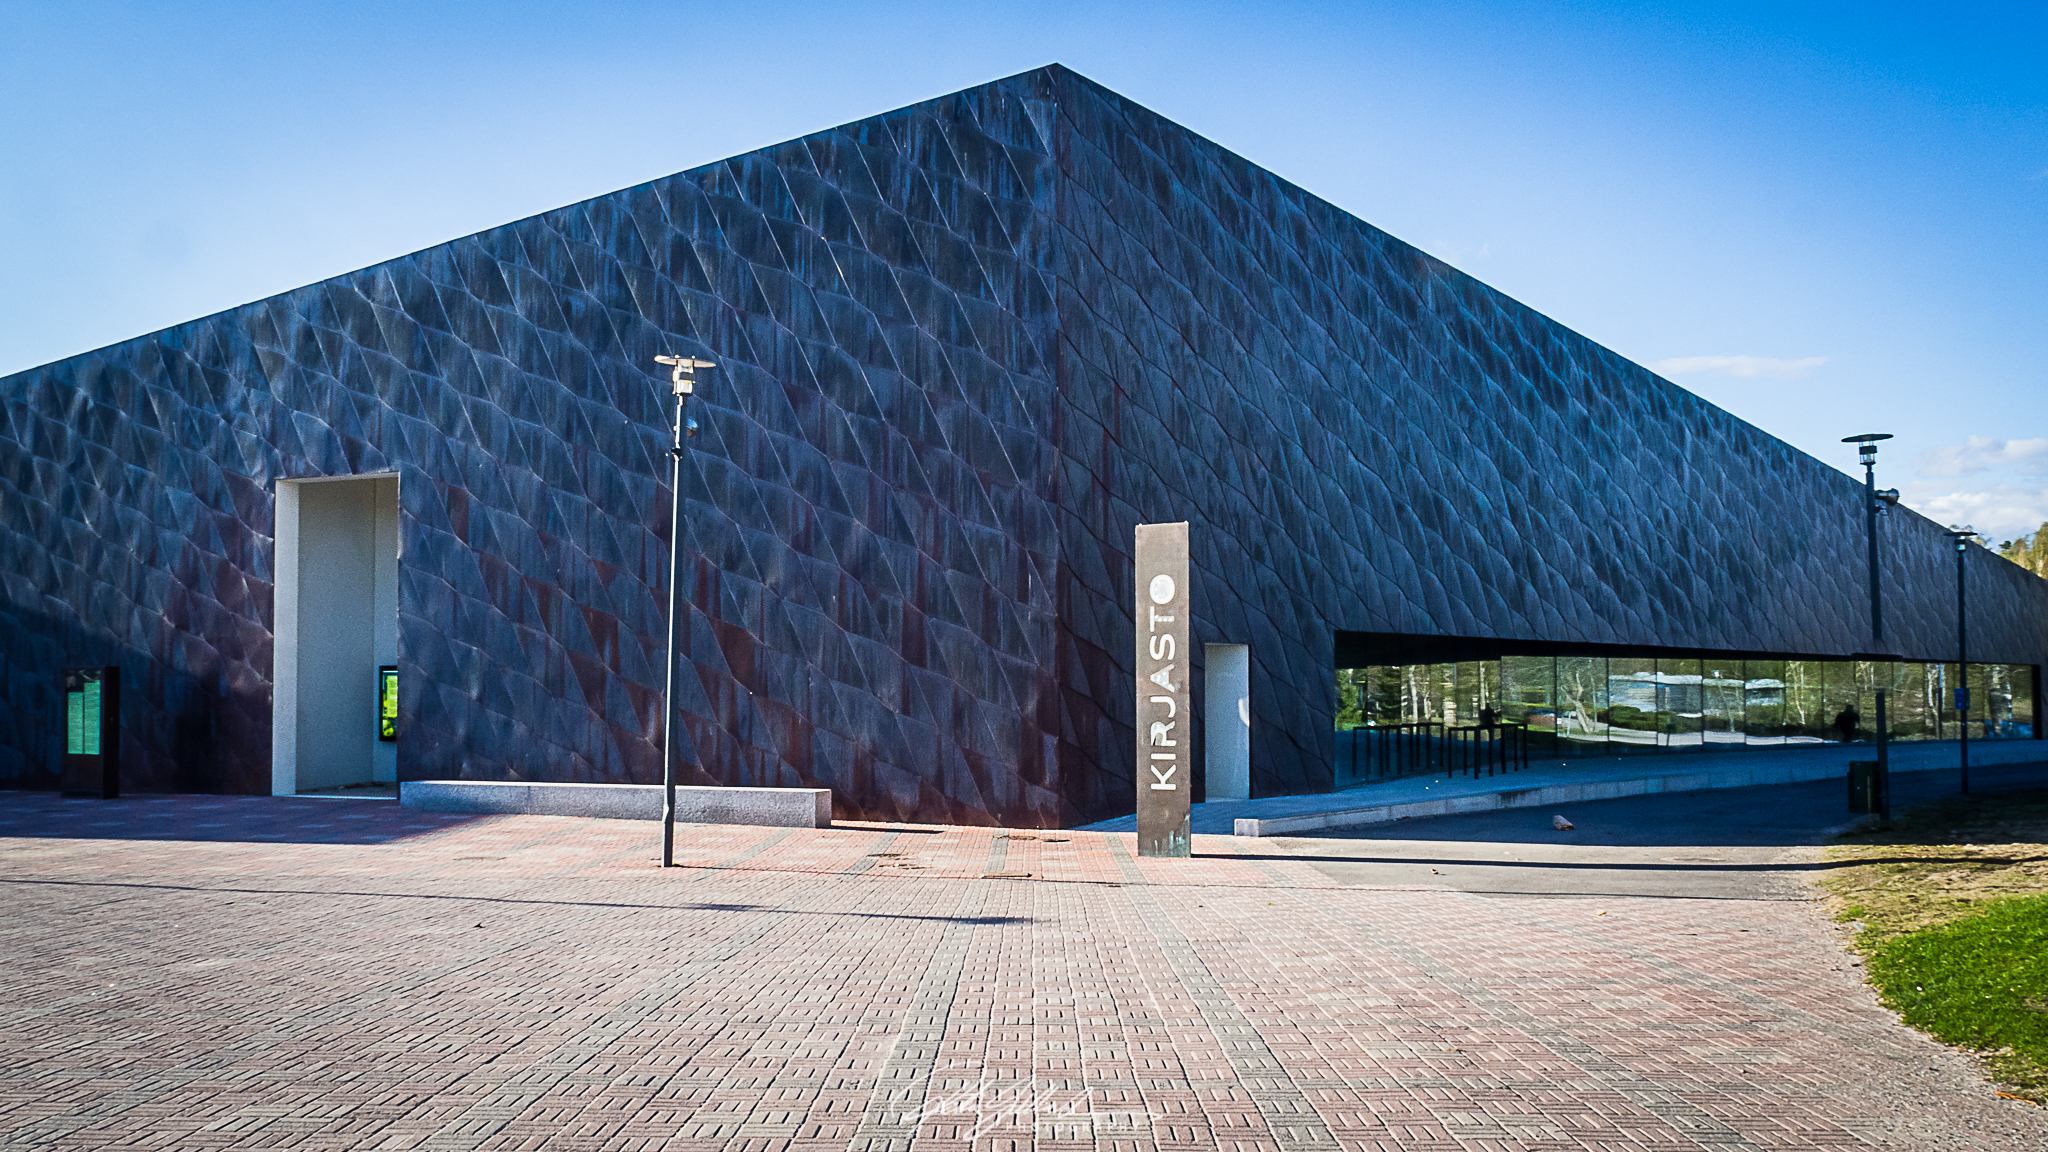
Take a moment. Look at something, anything around you – what do you see? What do you notice? That’s right – our eyes take in the big picture, but then move in closer to see the Details. That’s just how we humans work – we instinctively want to look at things and then parts of those things.

Frost on leaf pedal

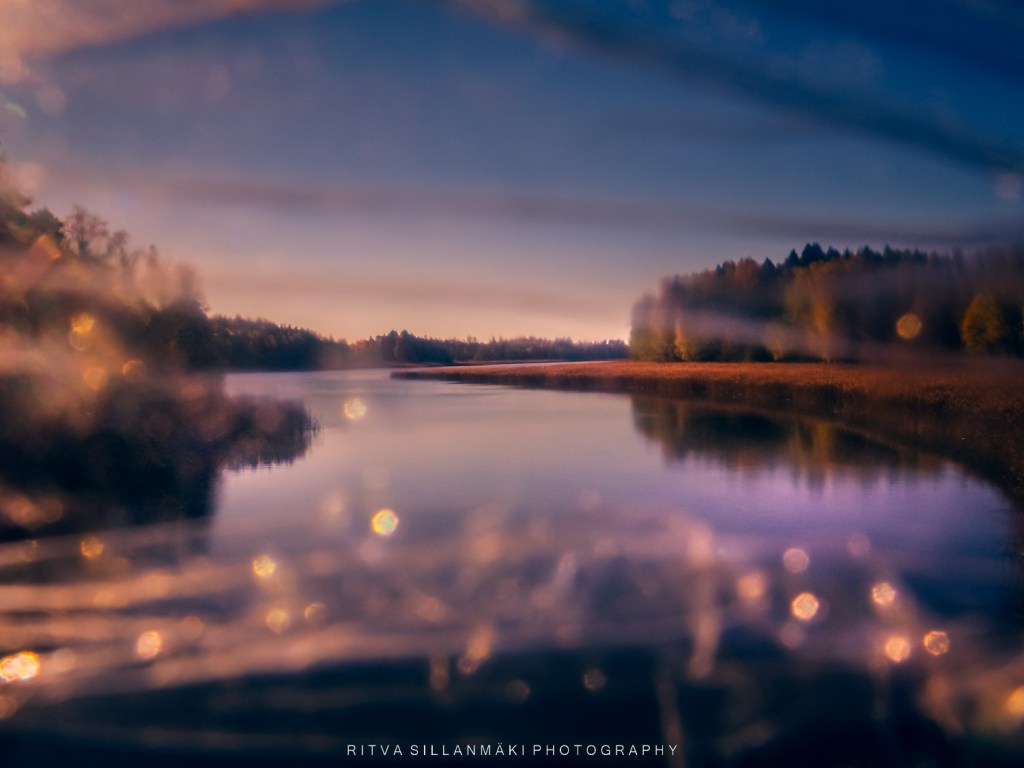
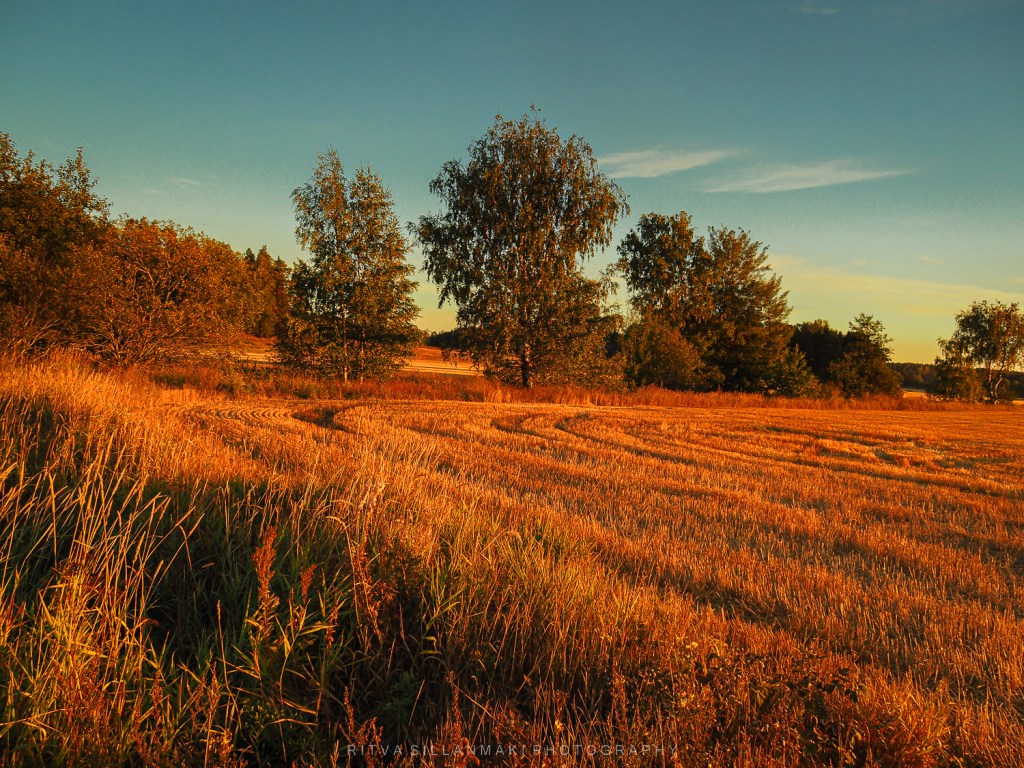
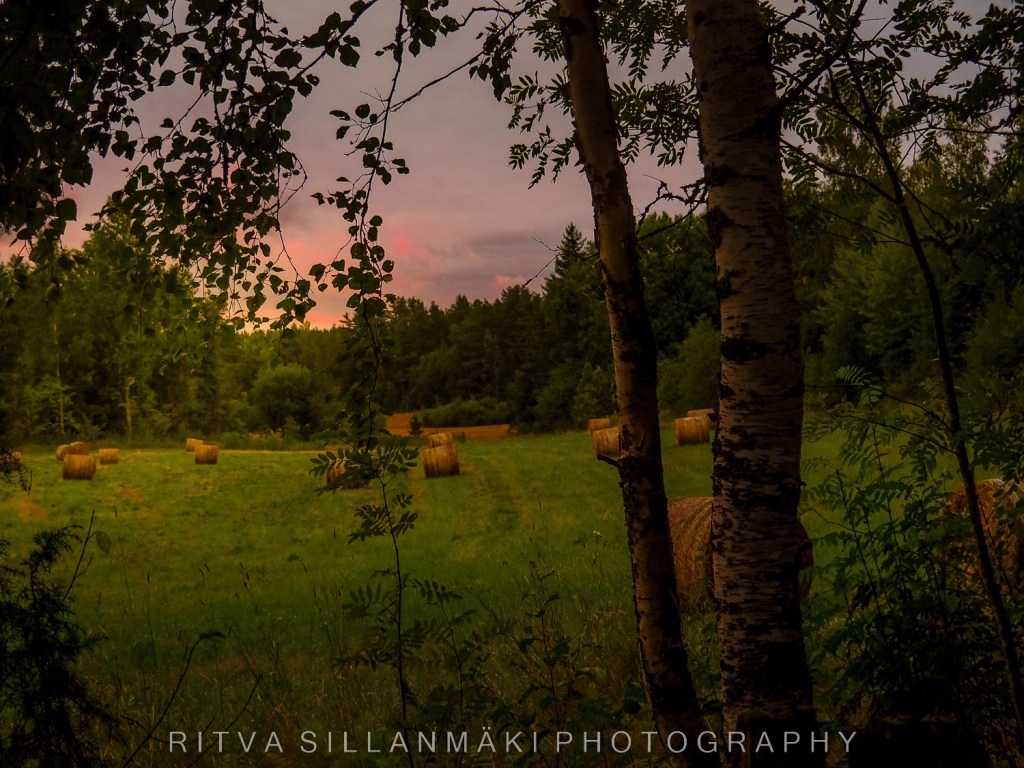
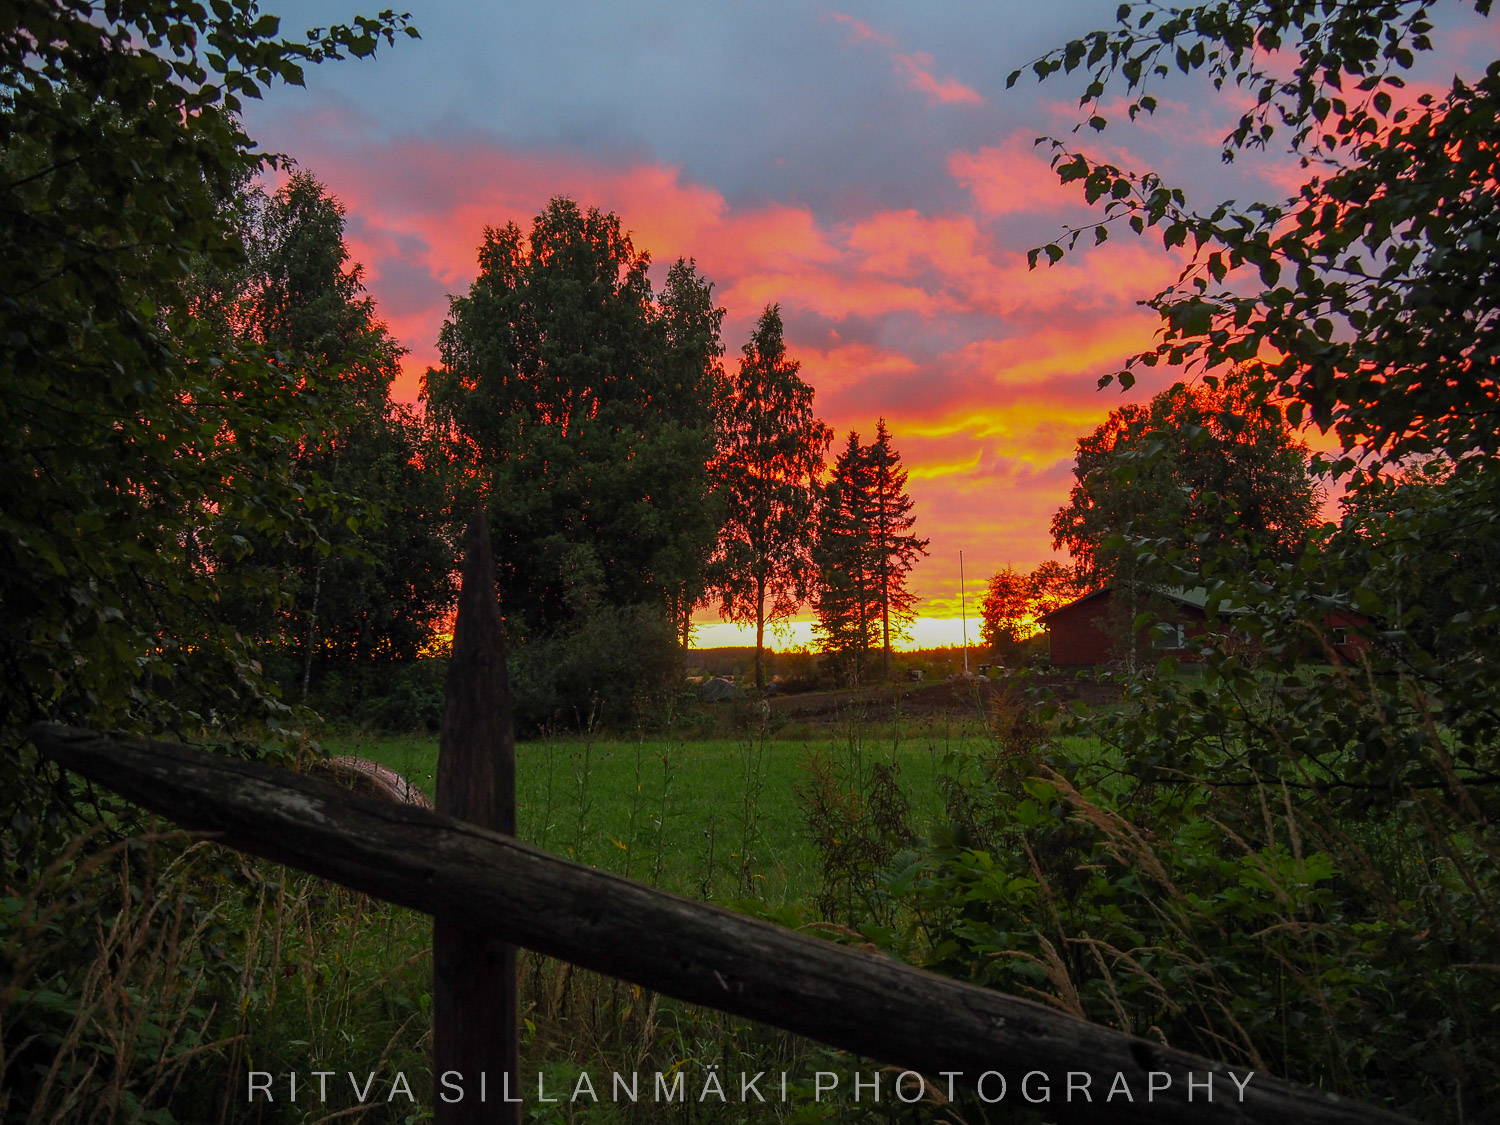
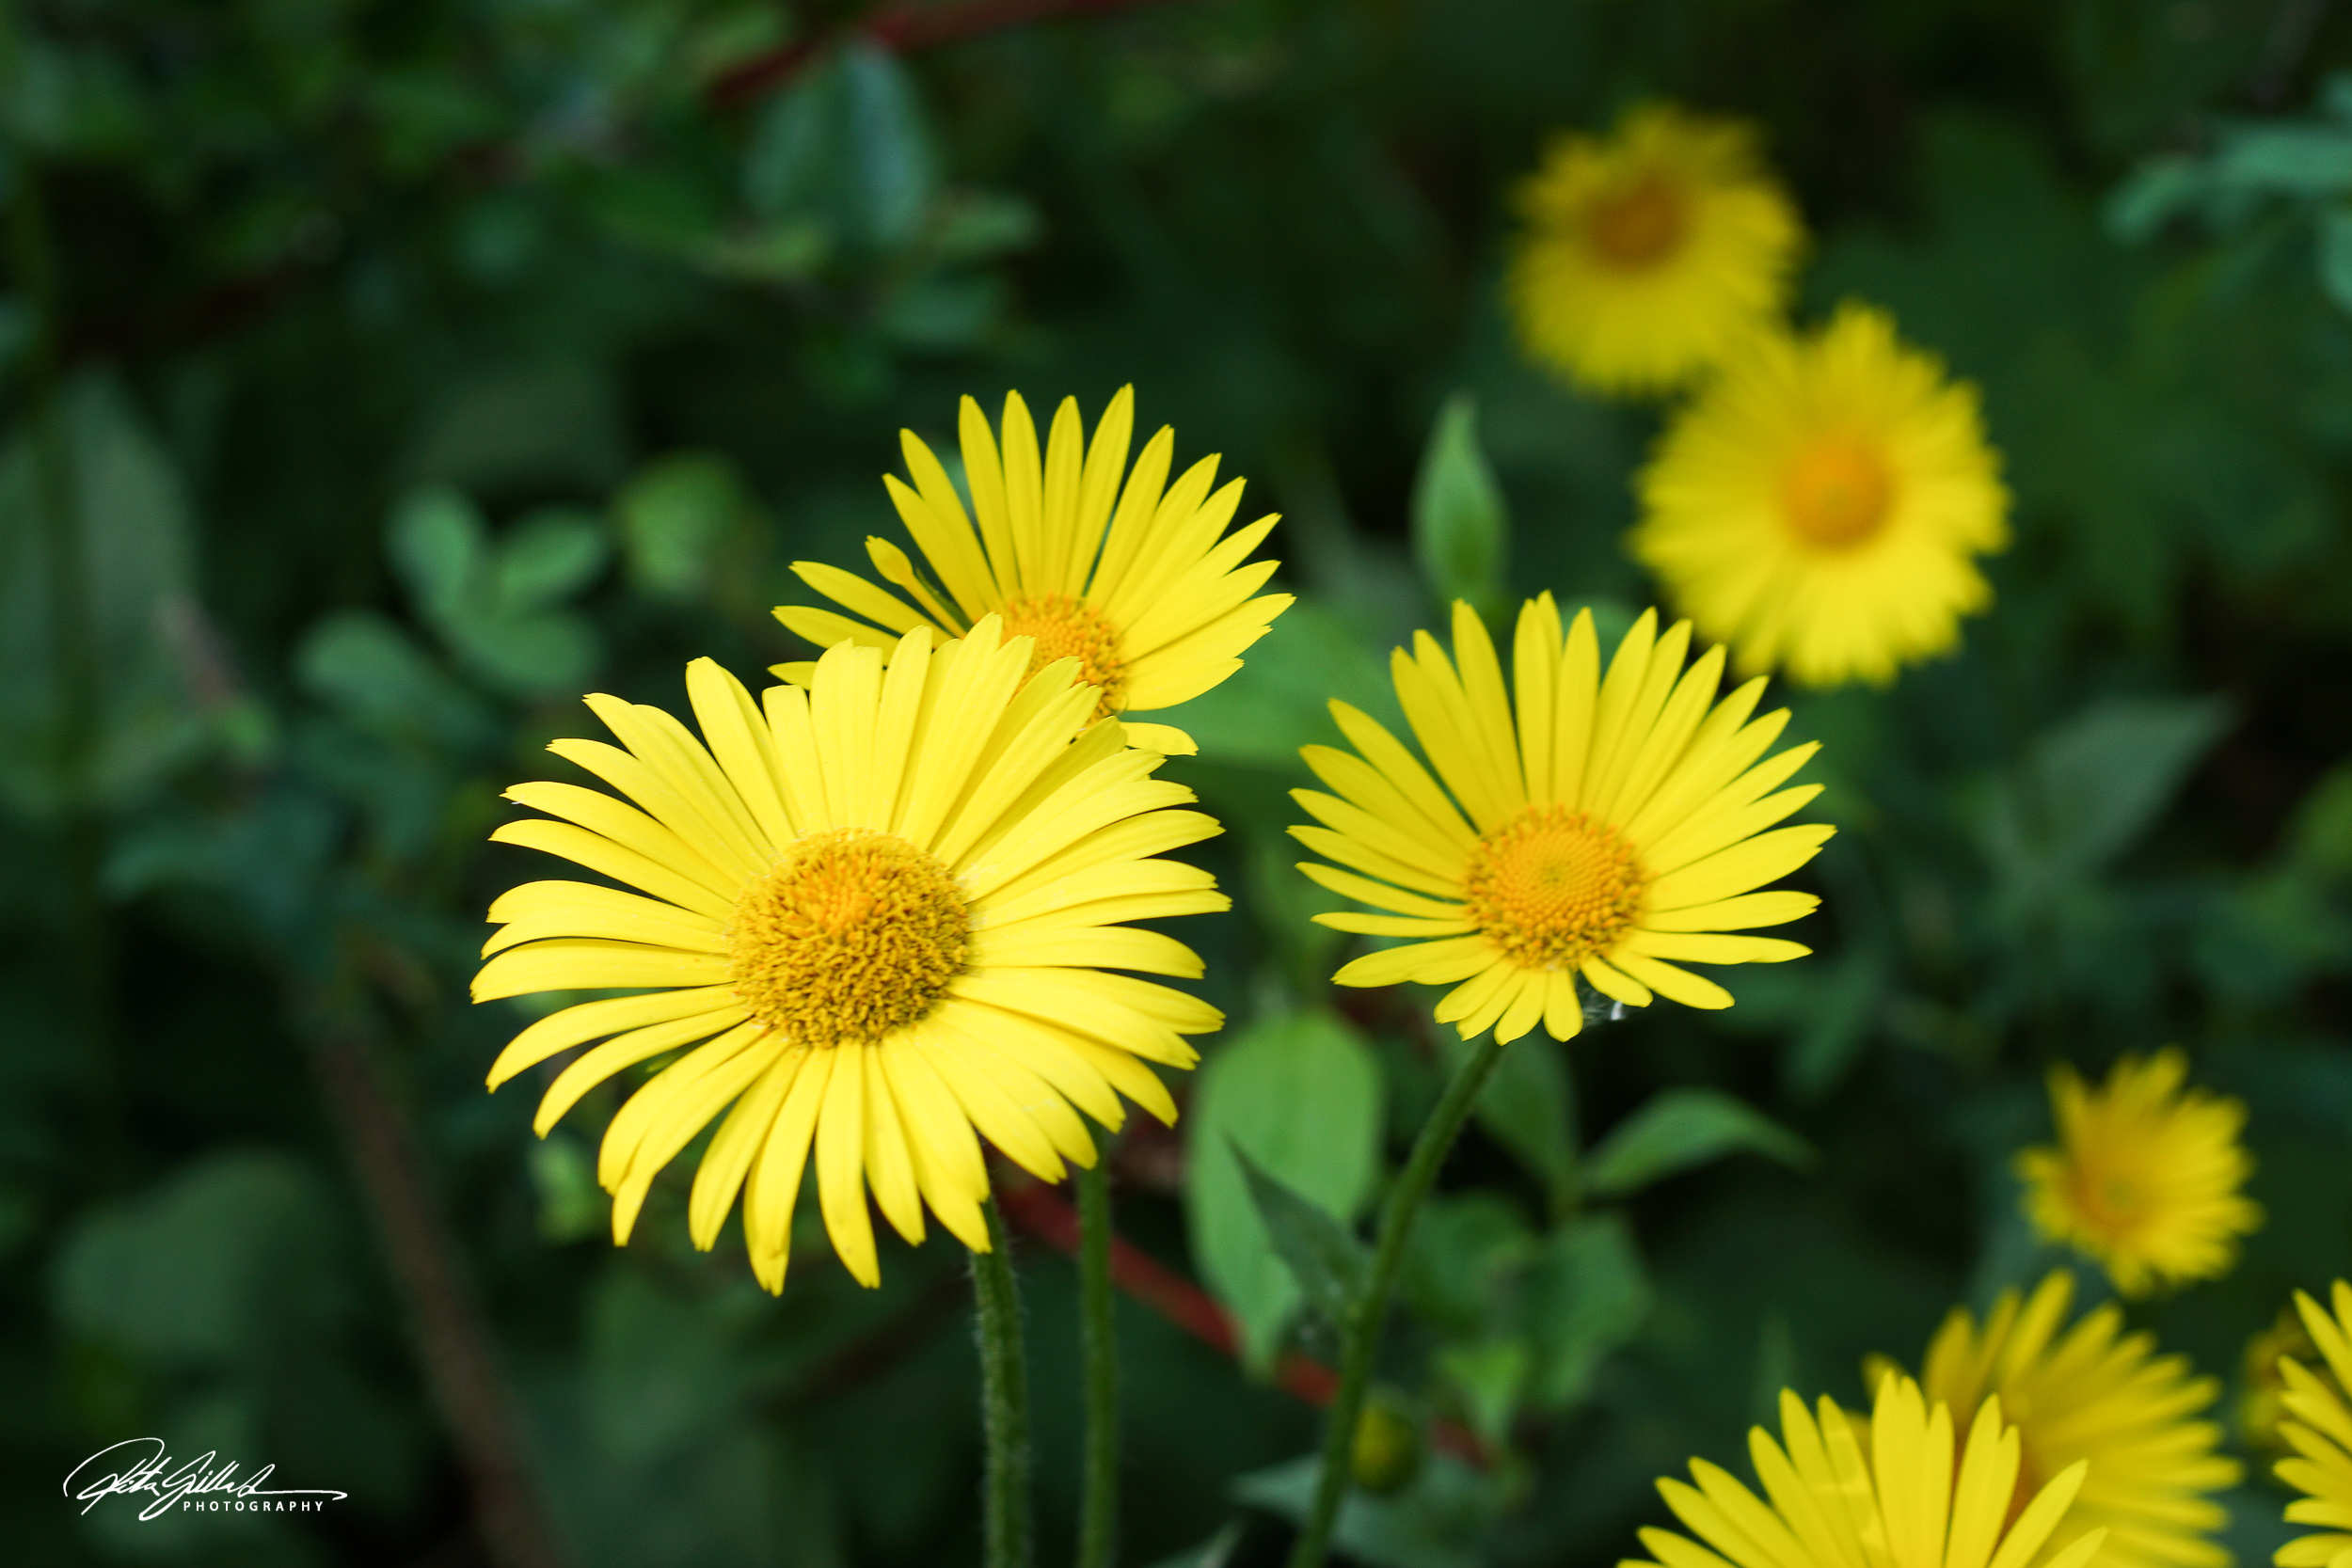
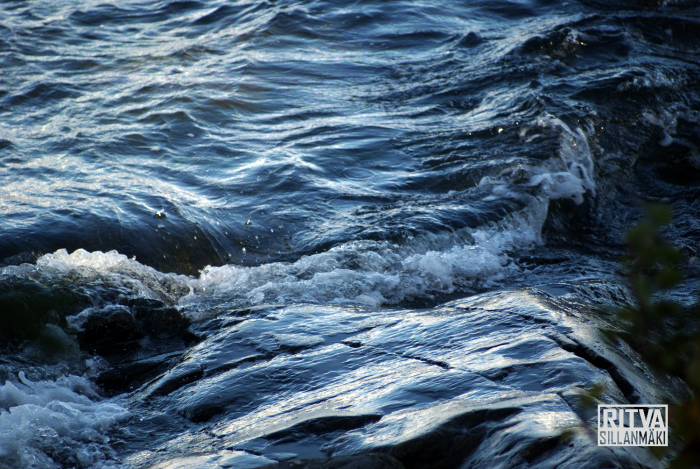
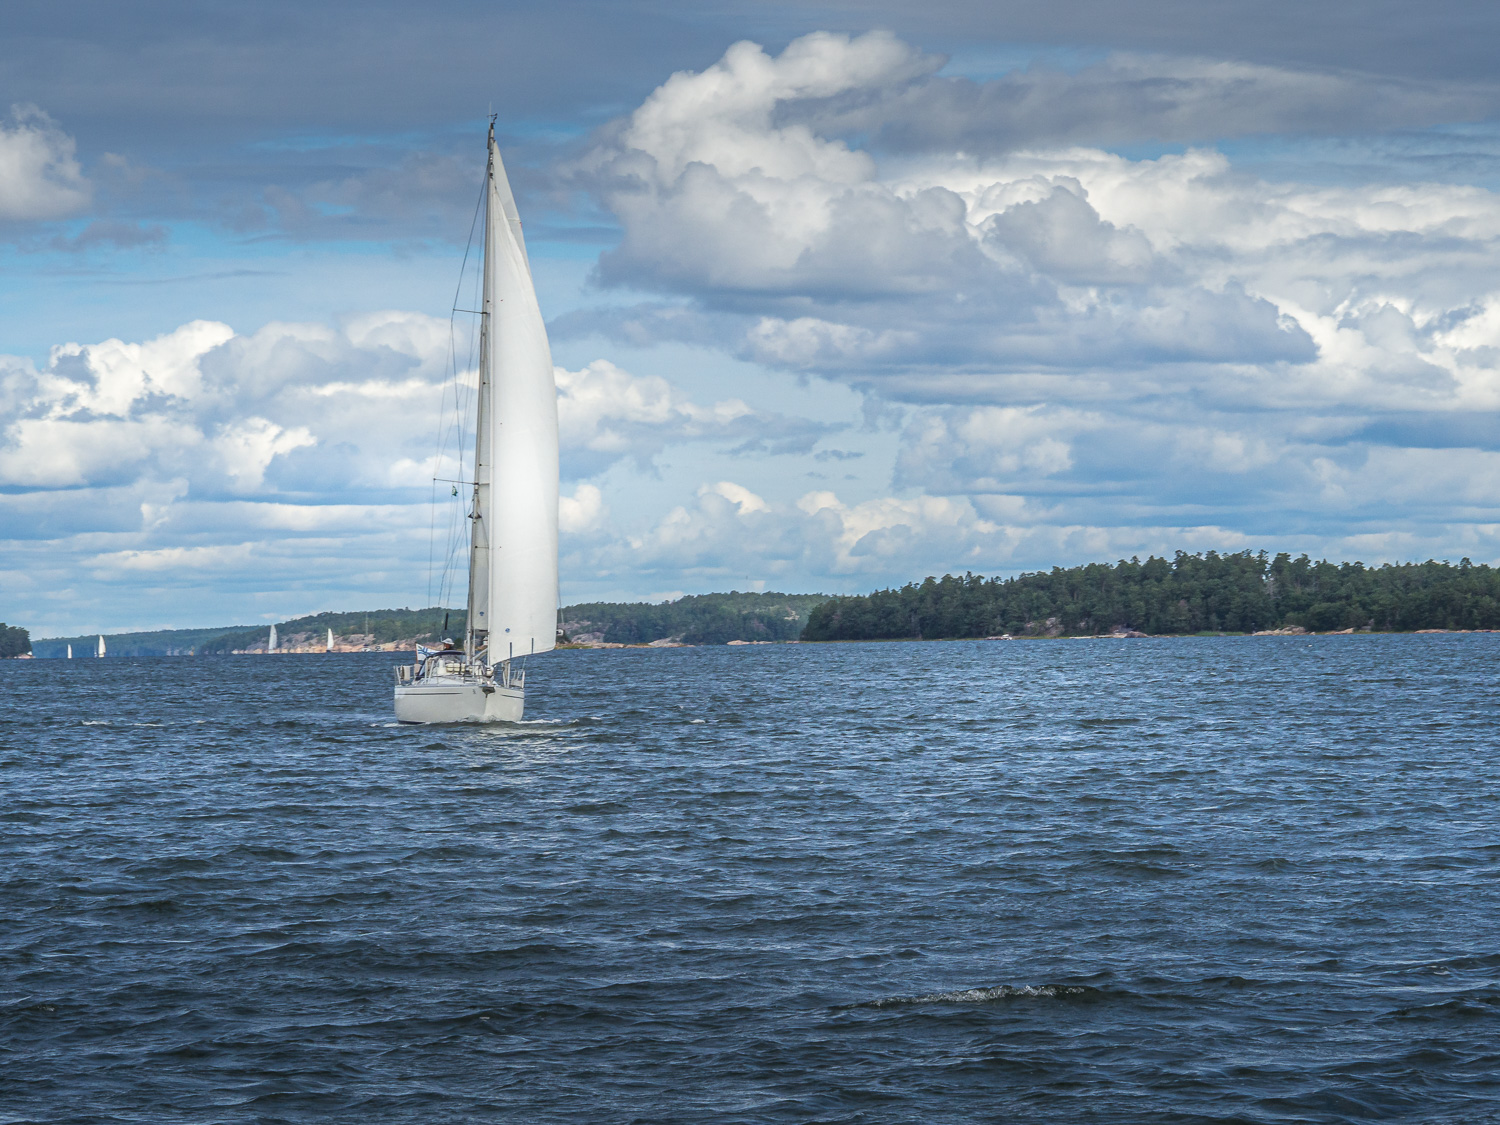
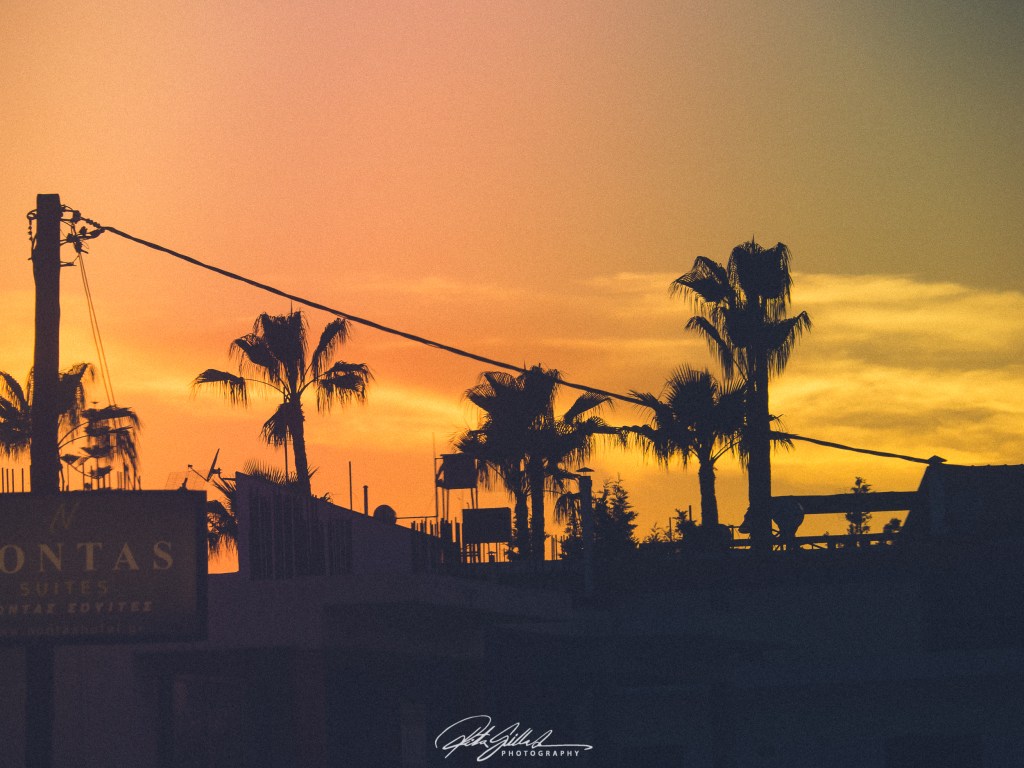
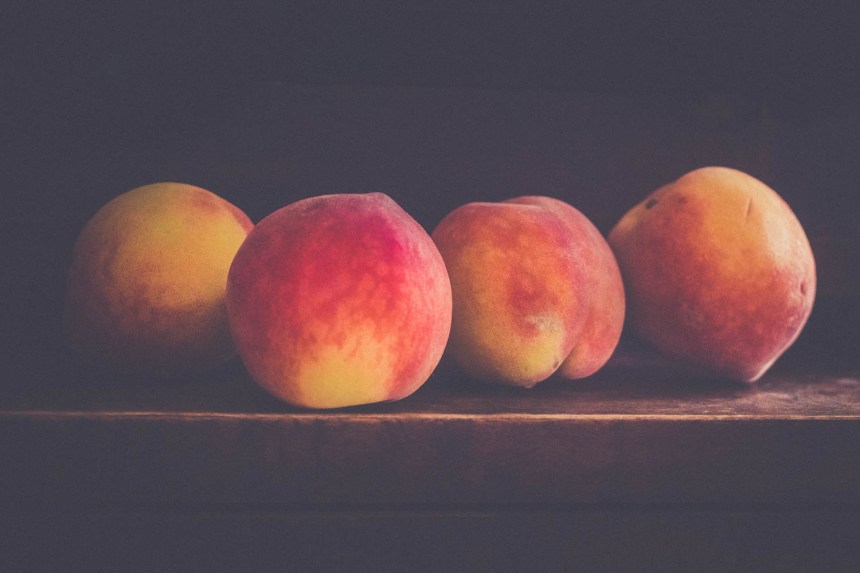
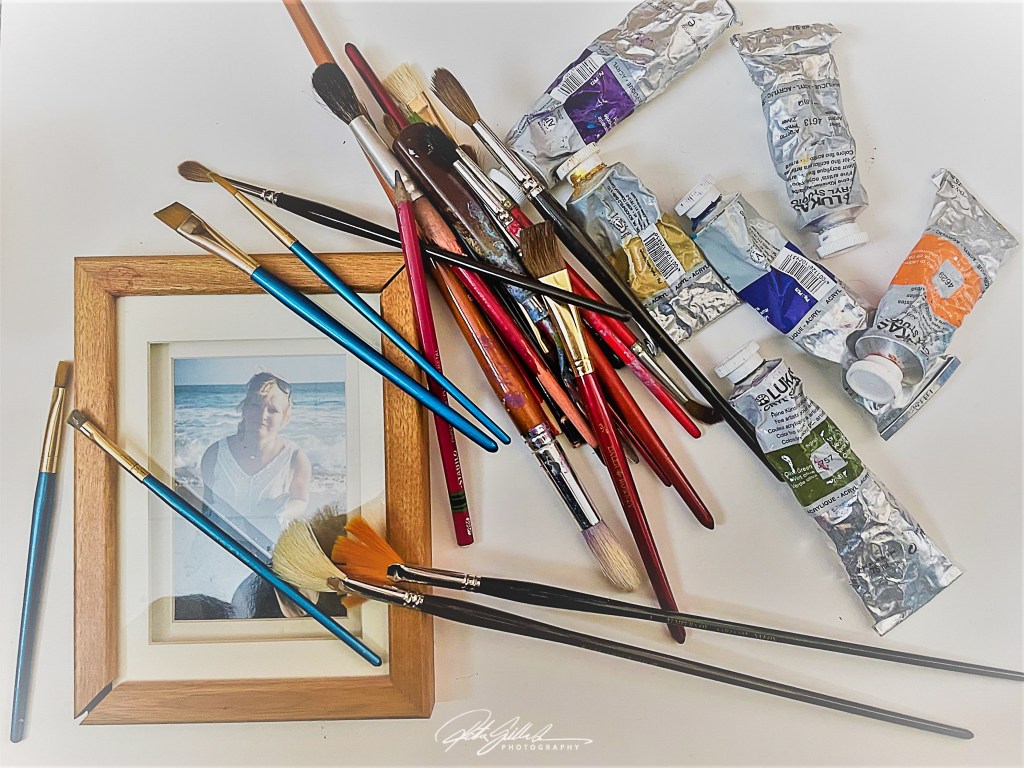
I am often post details, one of my favorite ways to show you how I see the world around me. So much beauty can found near and far in small or sometimes big details.

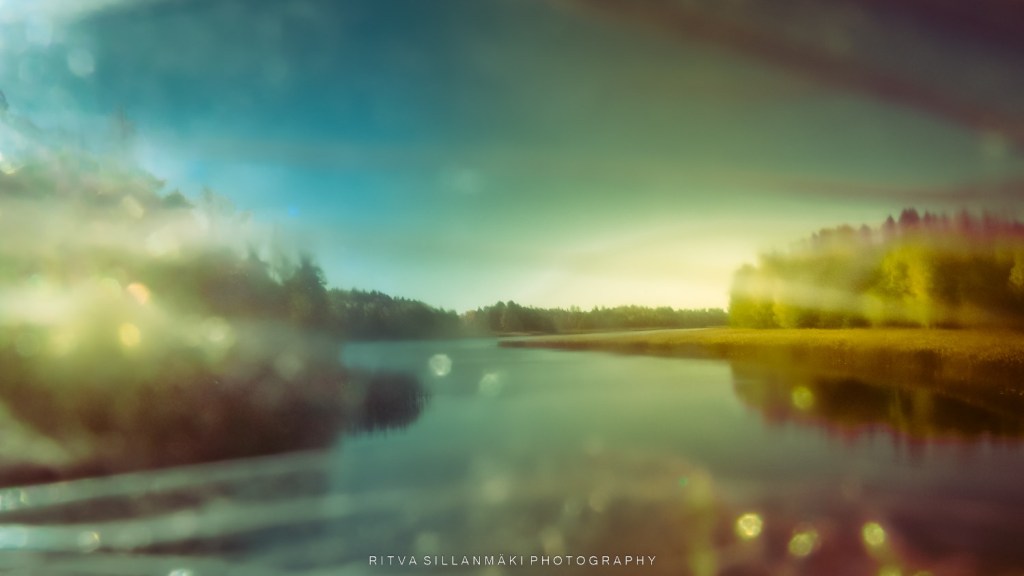
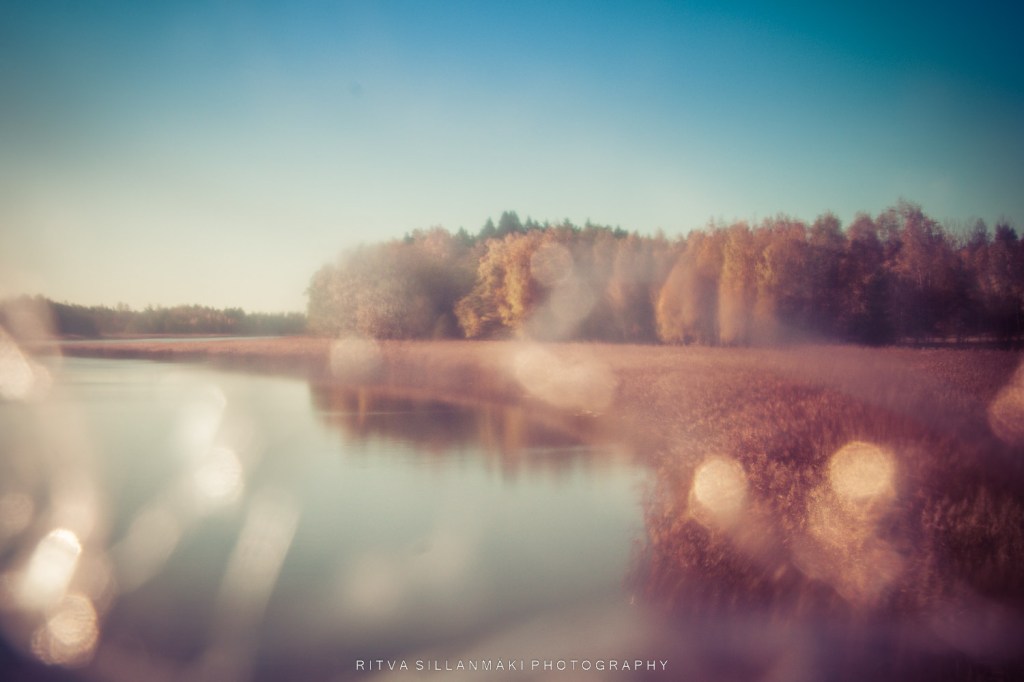
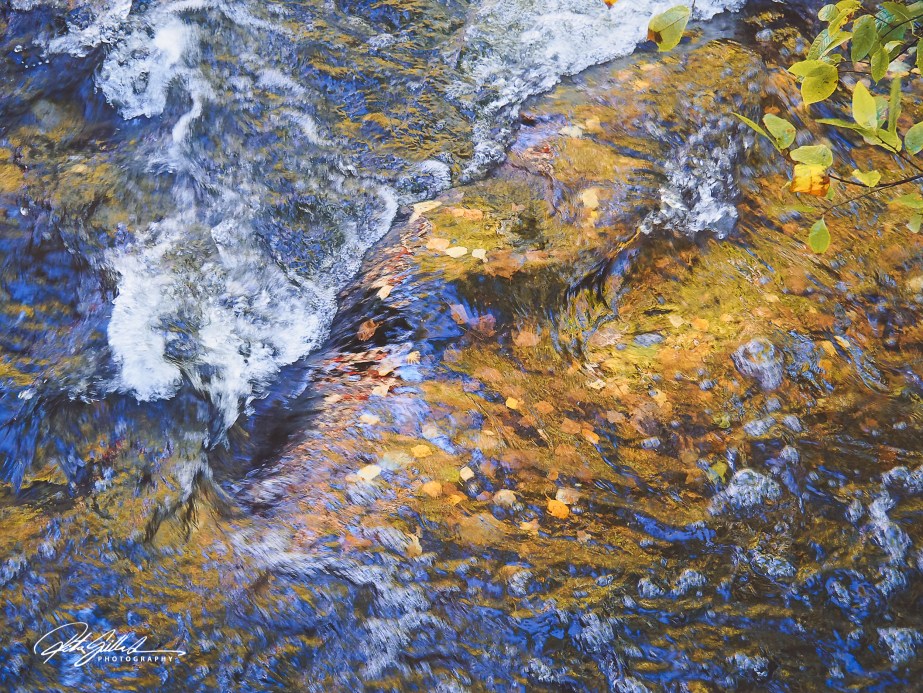
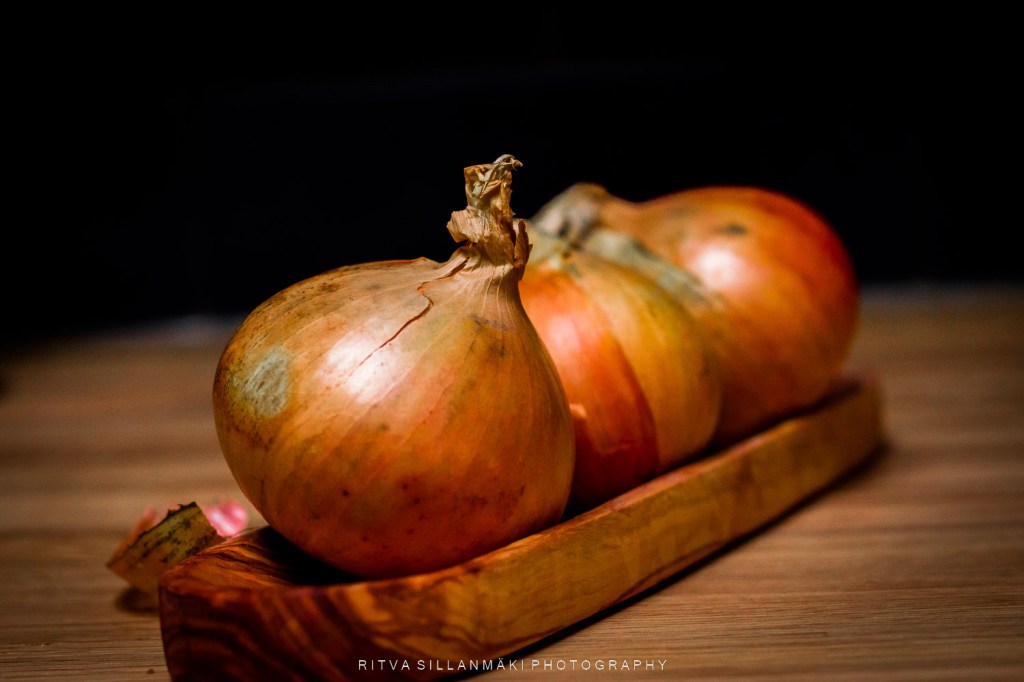
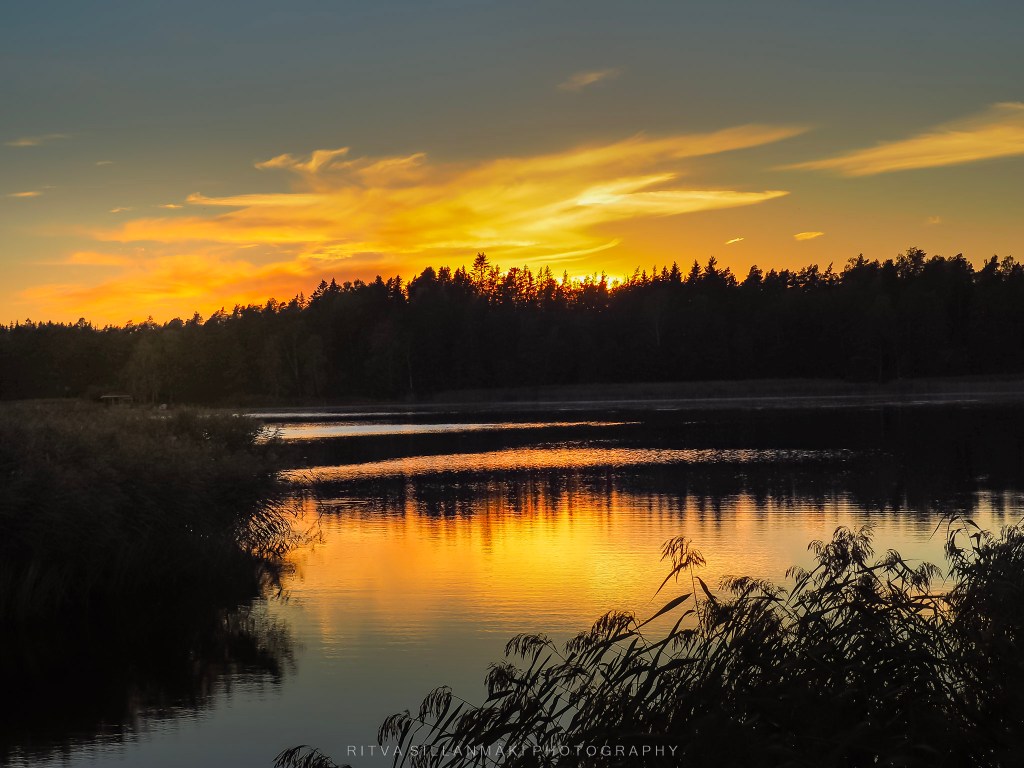
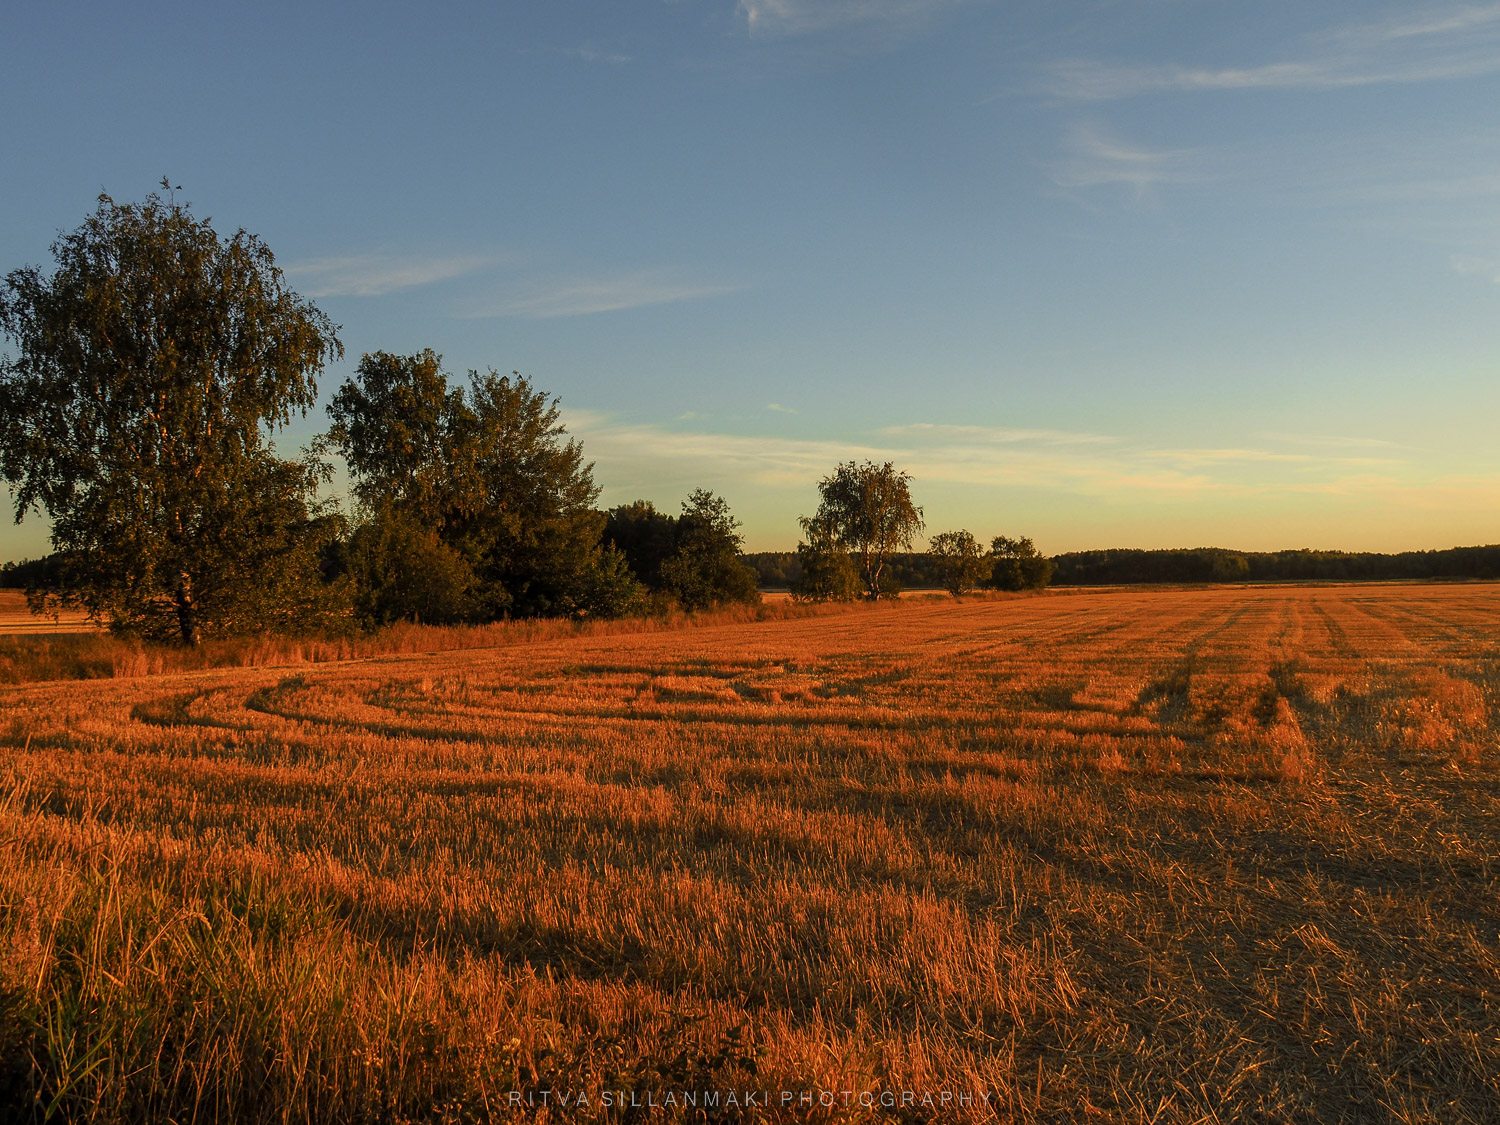
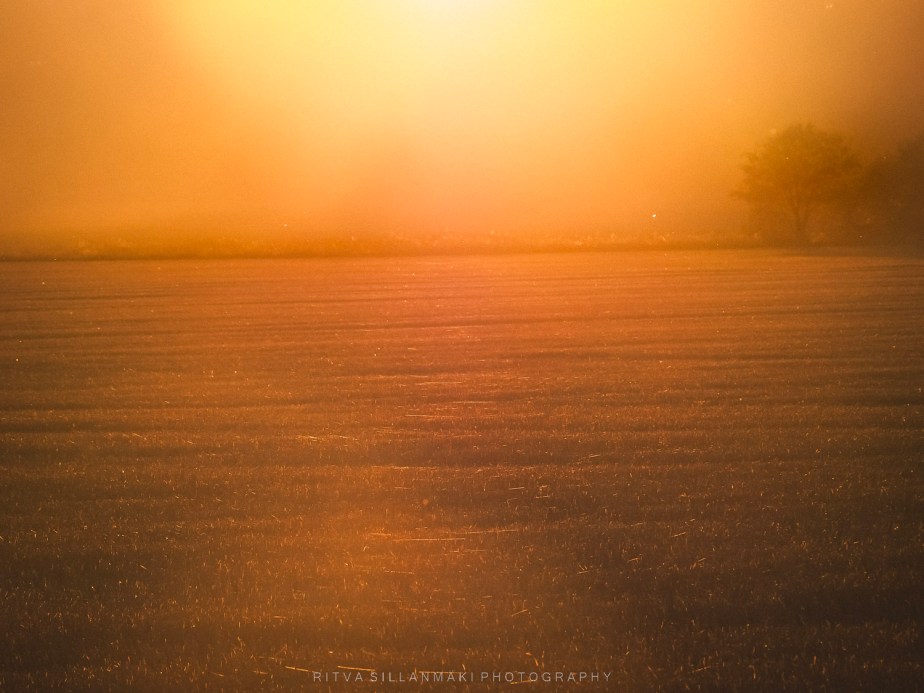
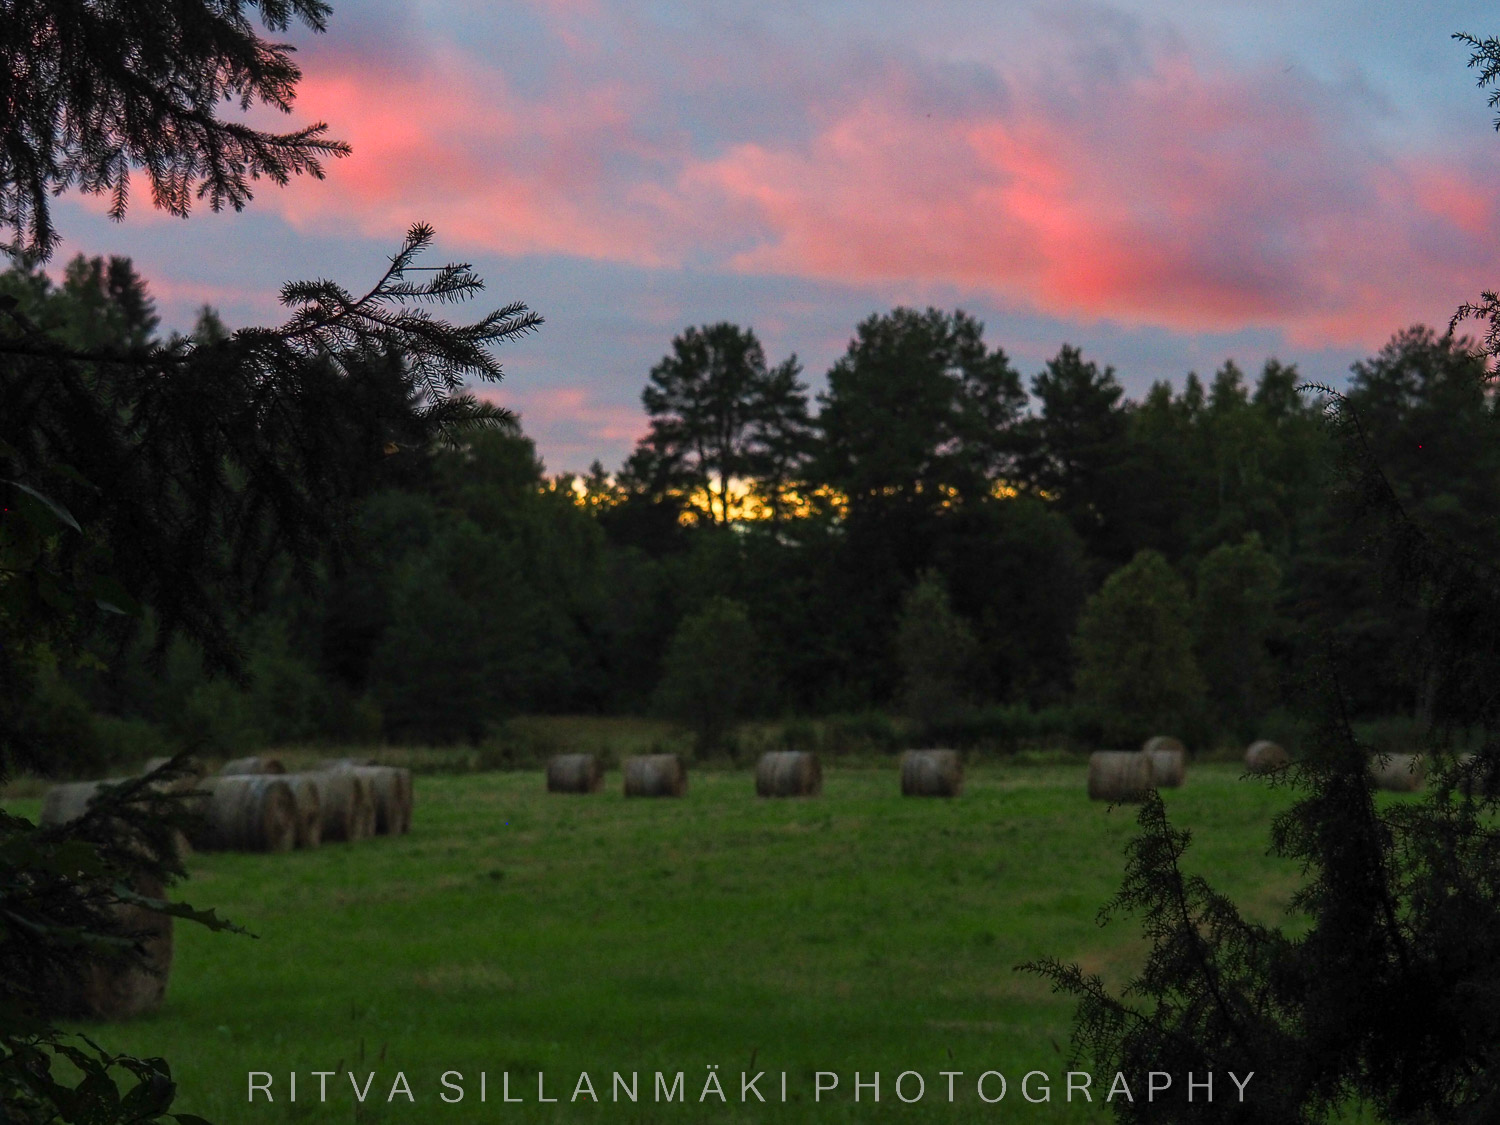
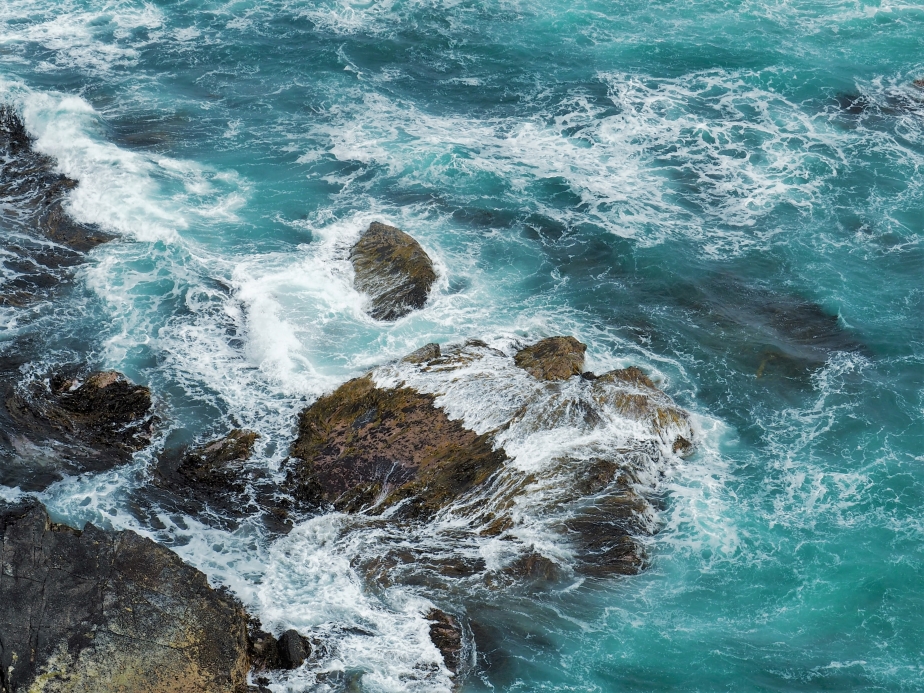
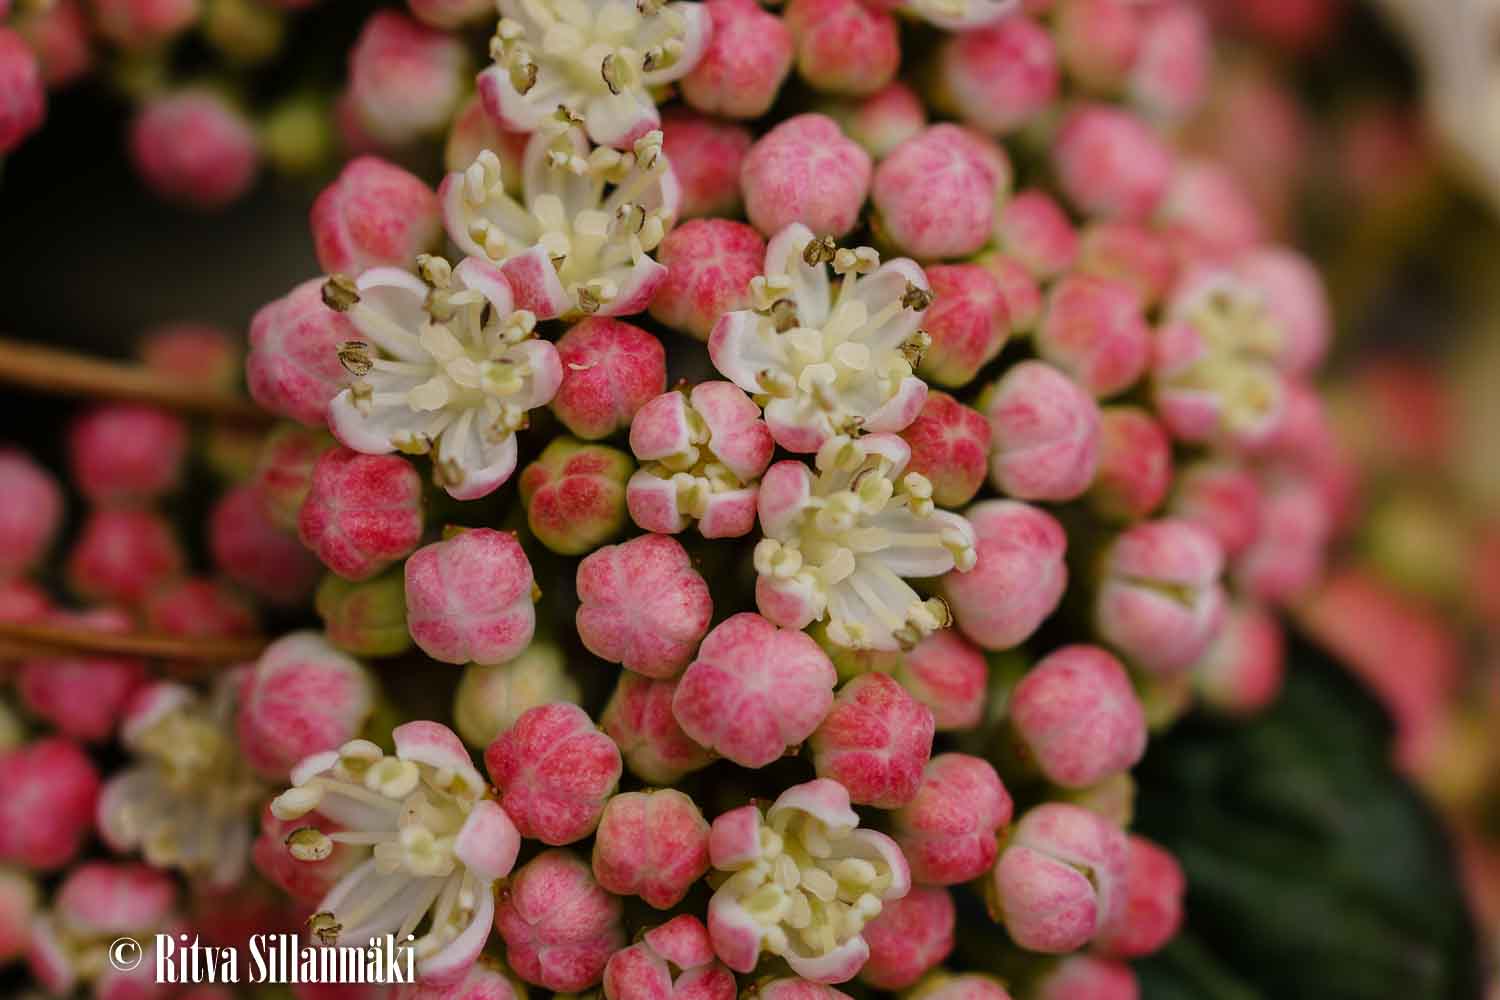
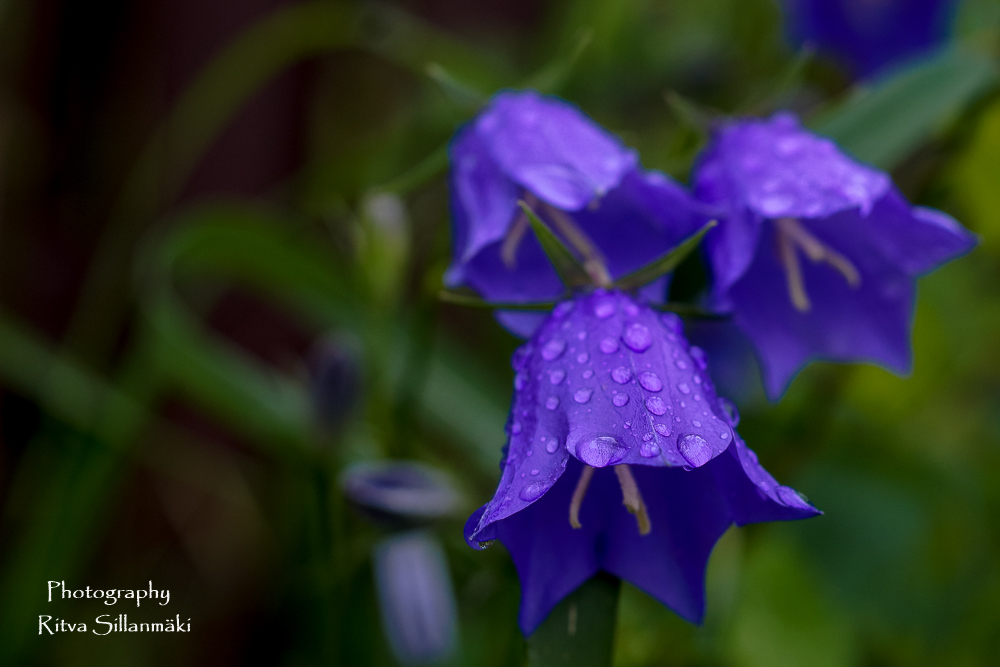
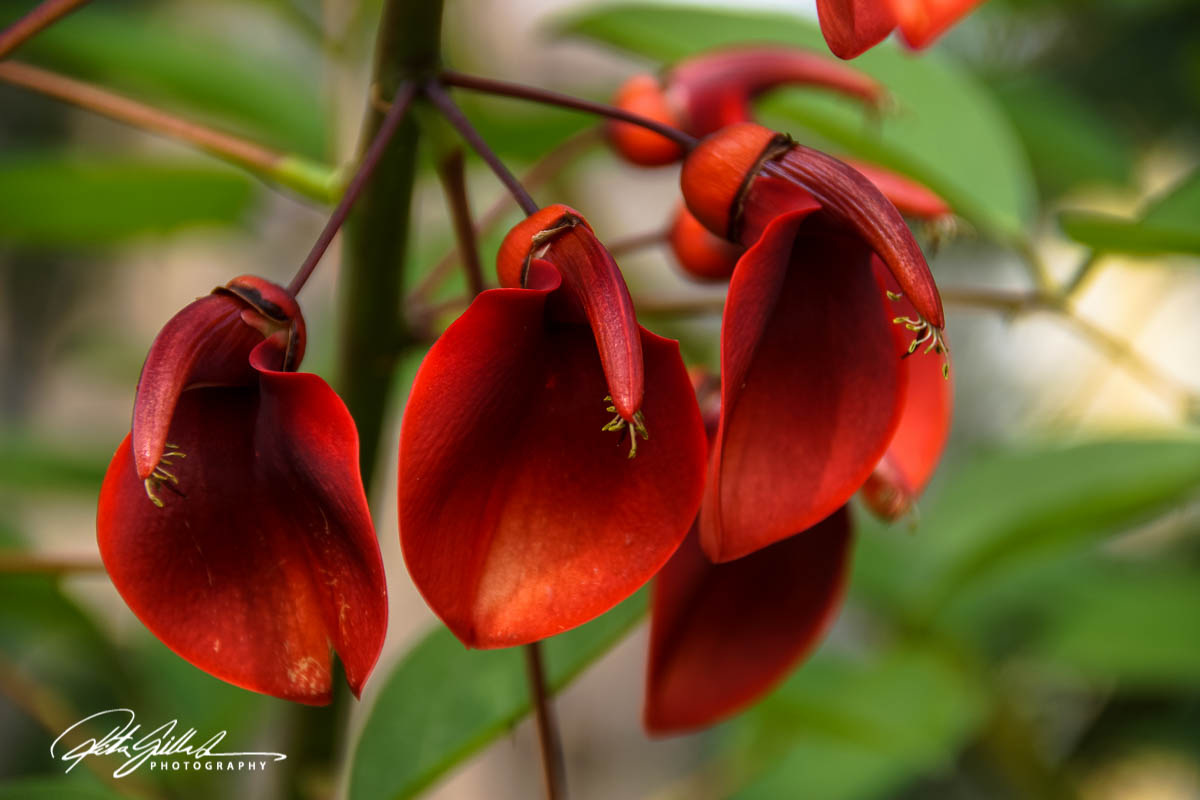
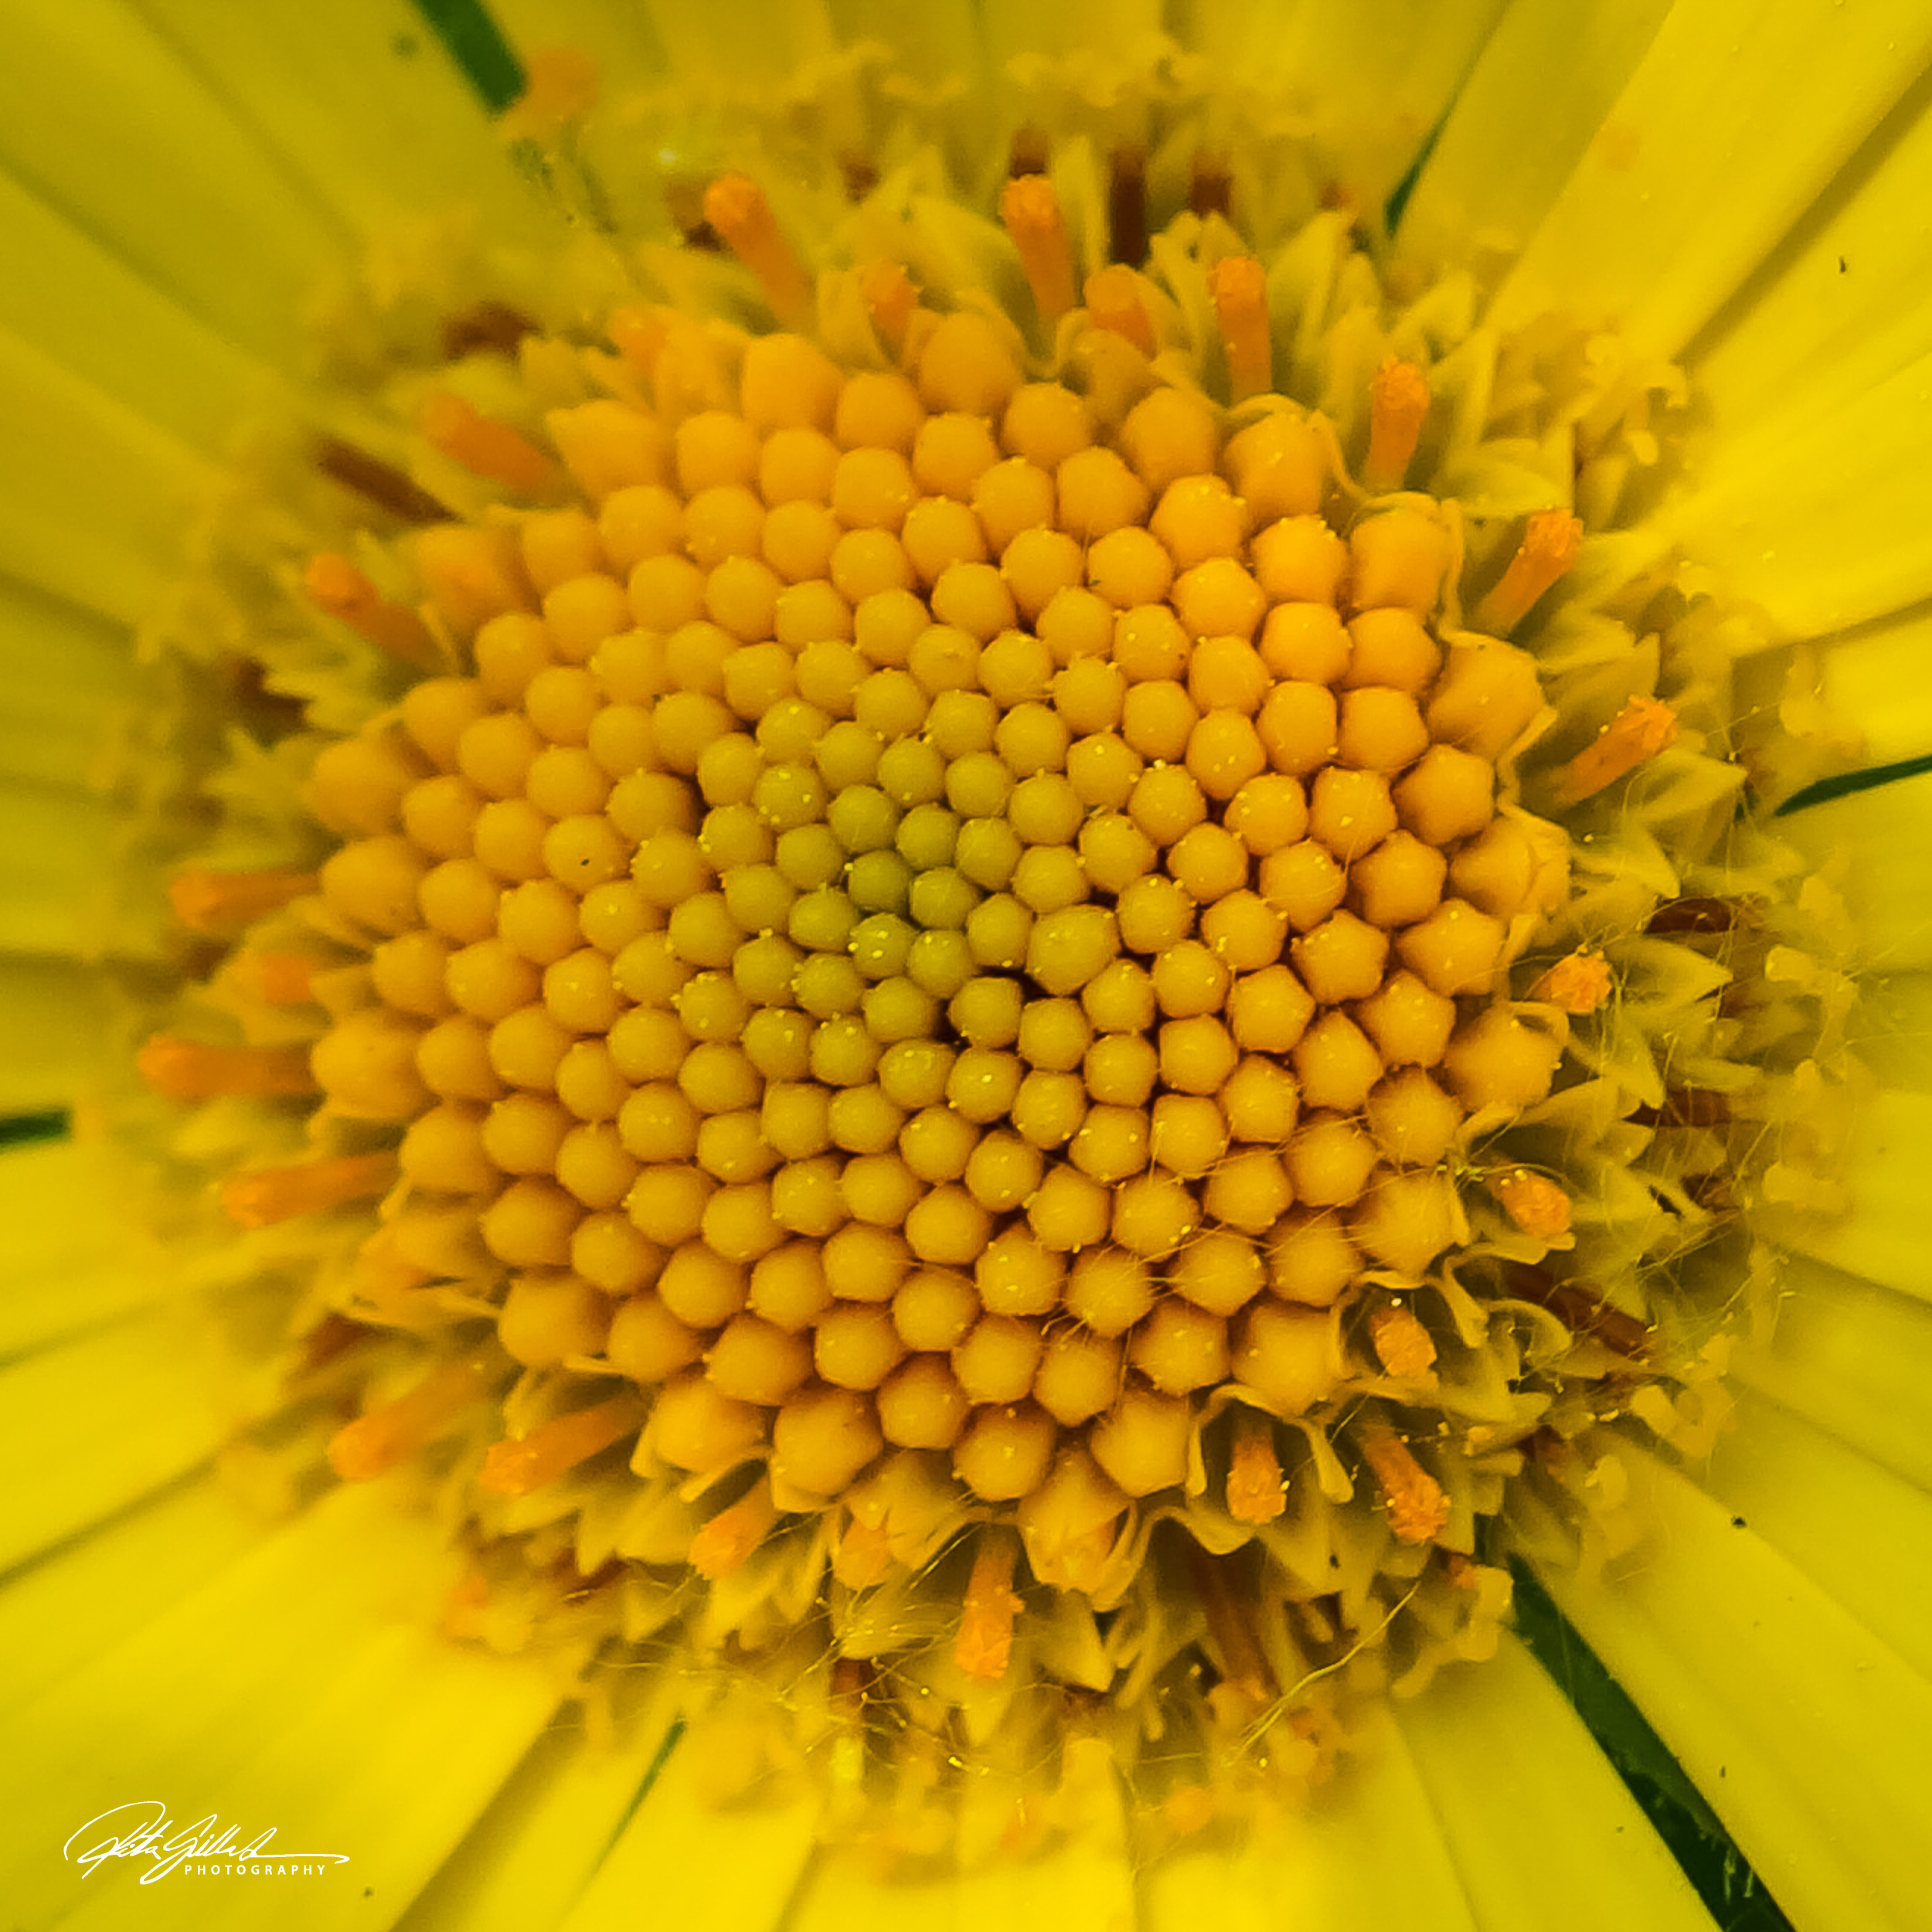
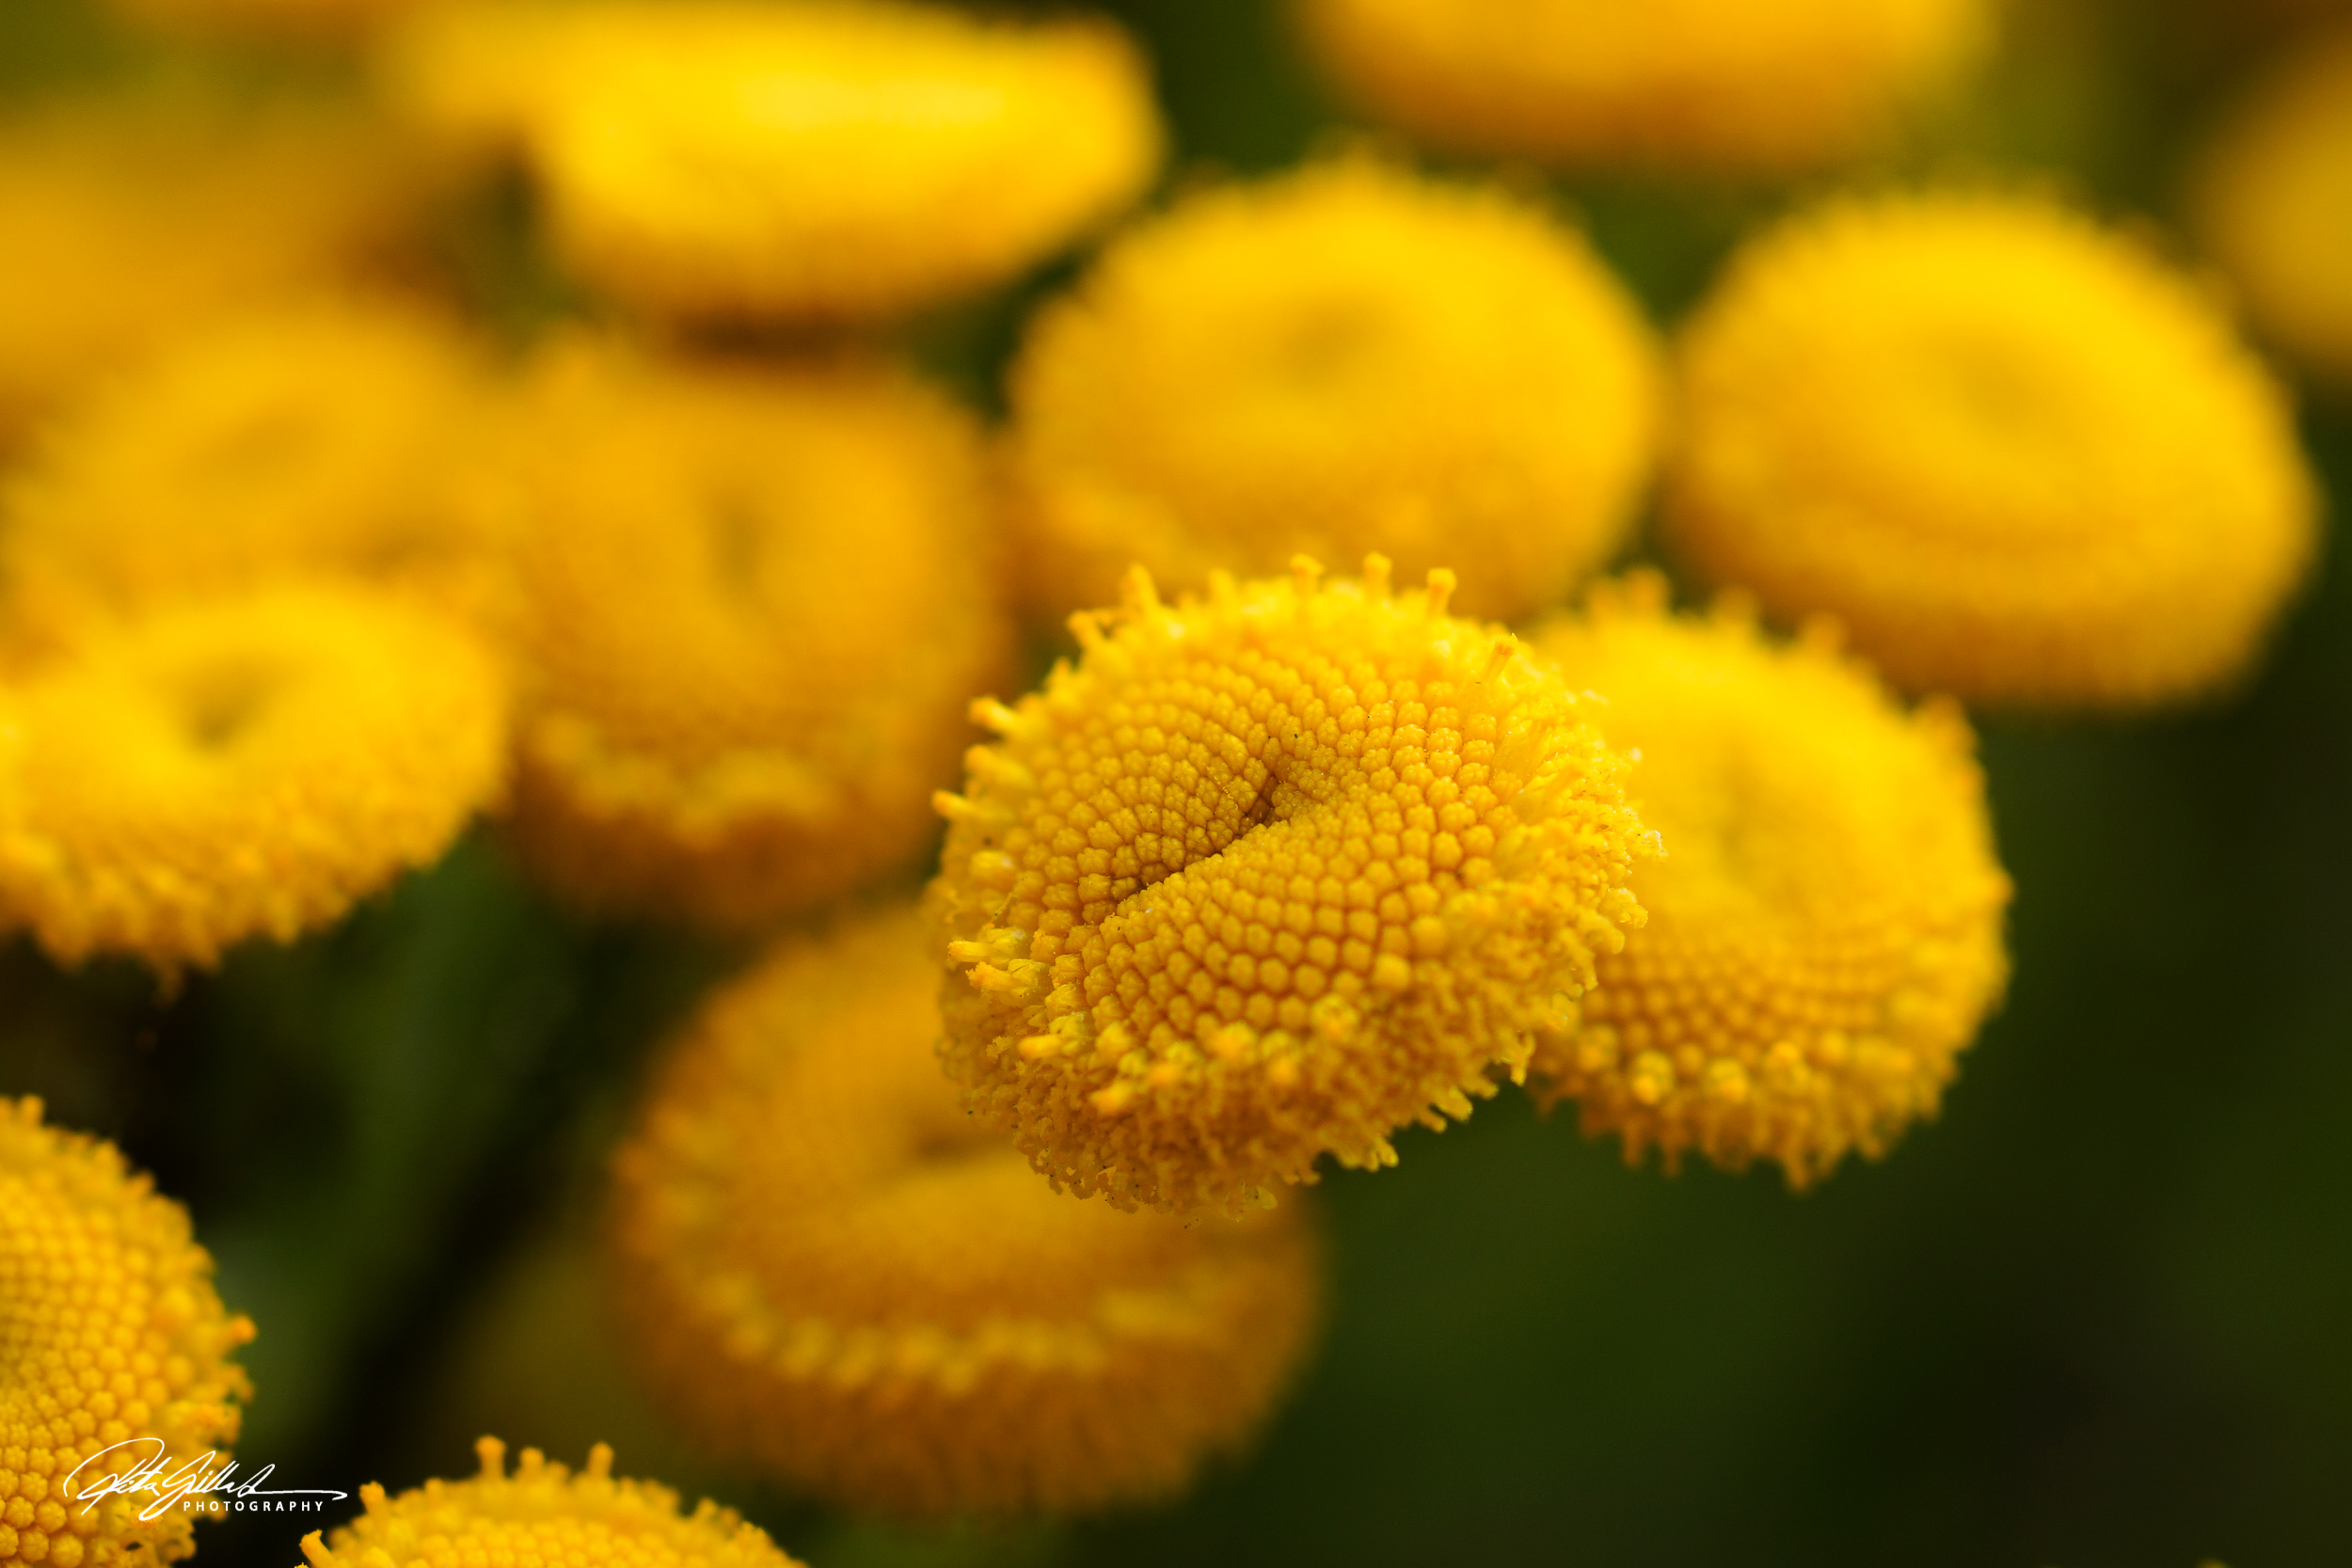
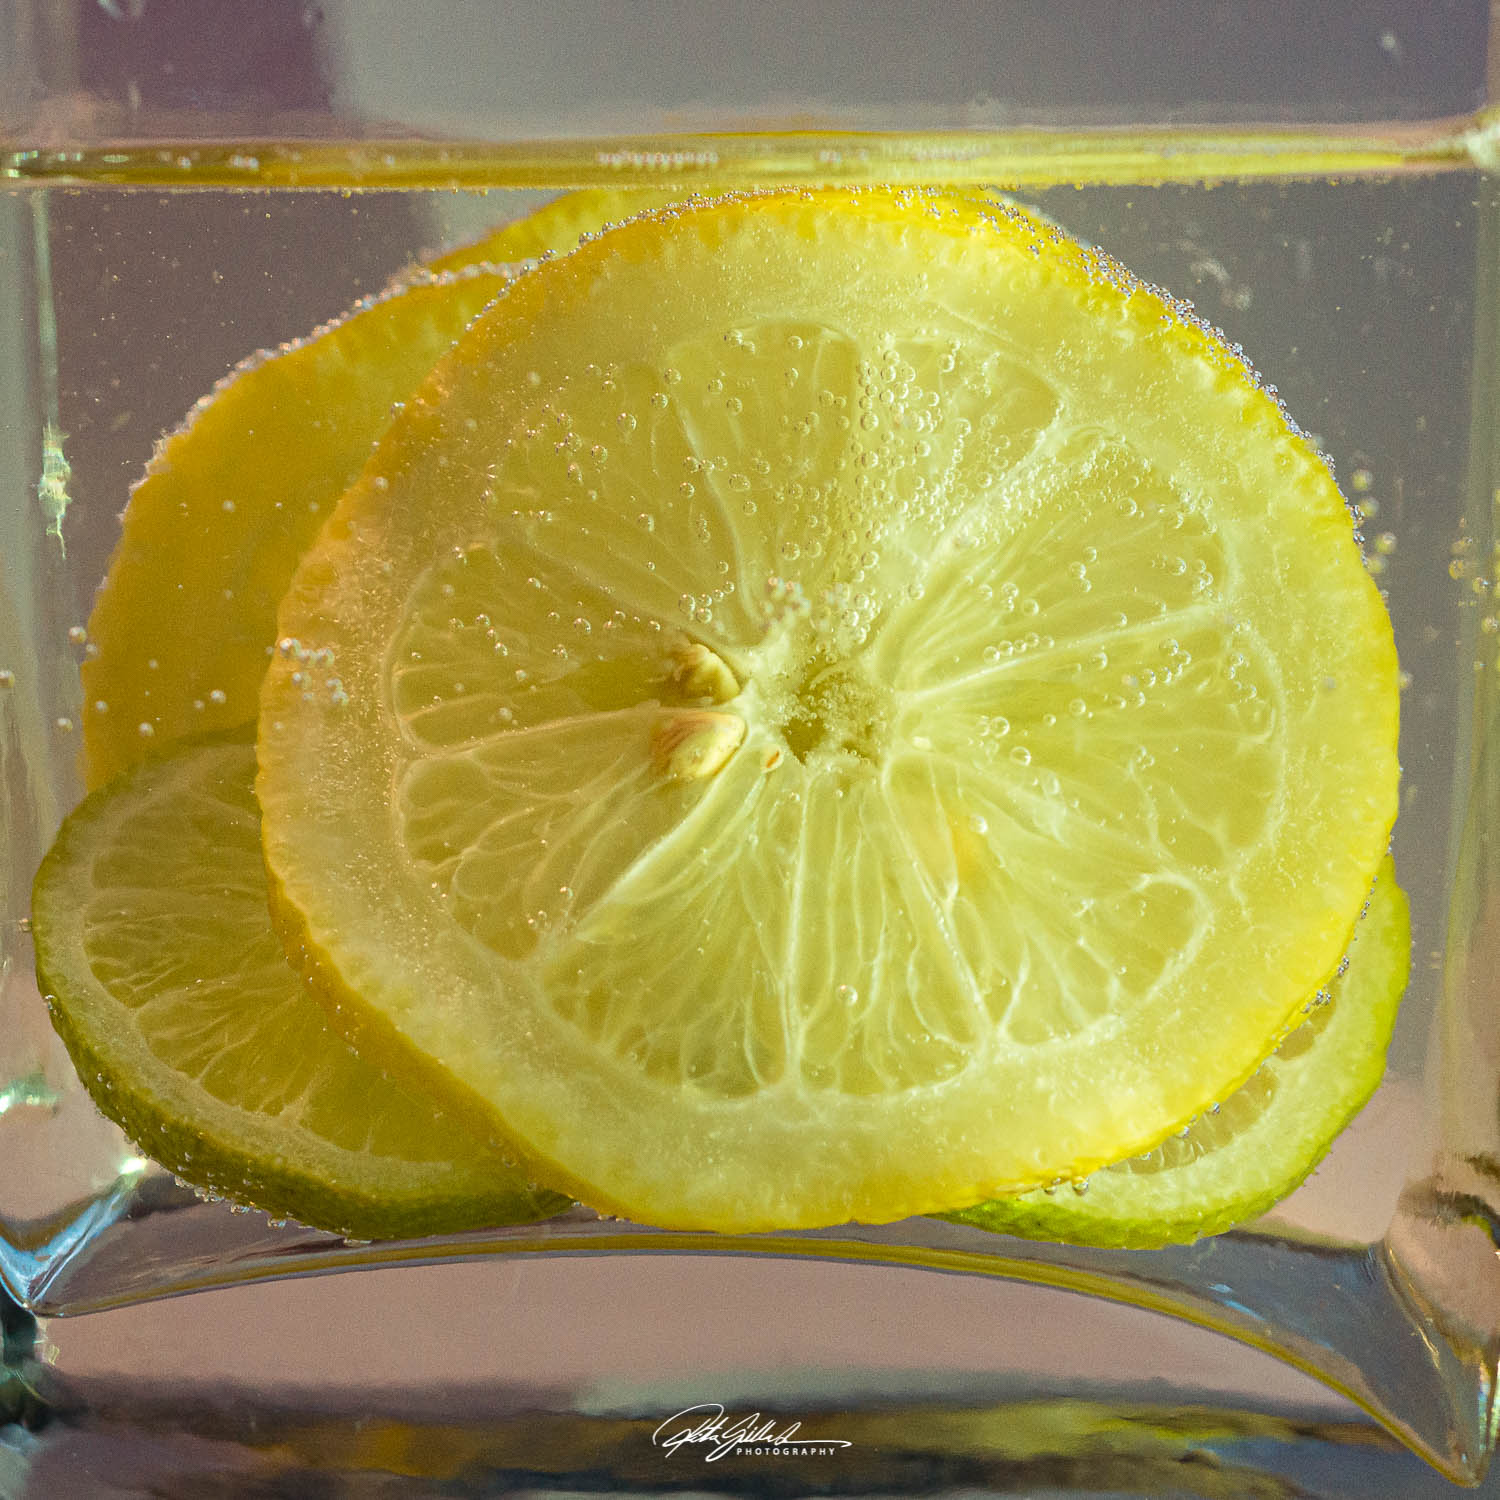
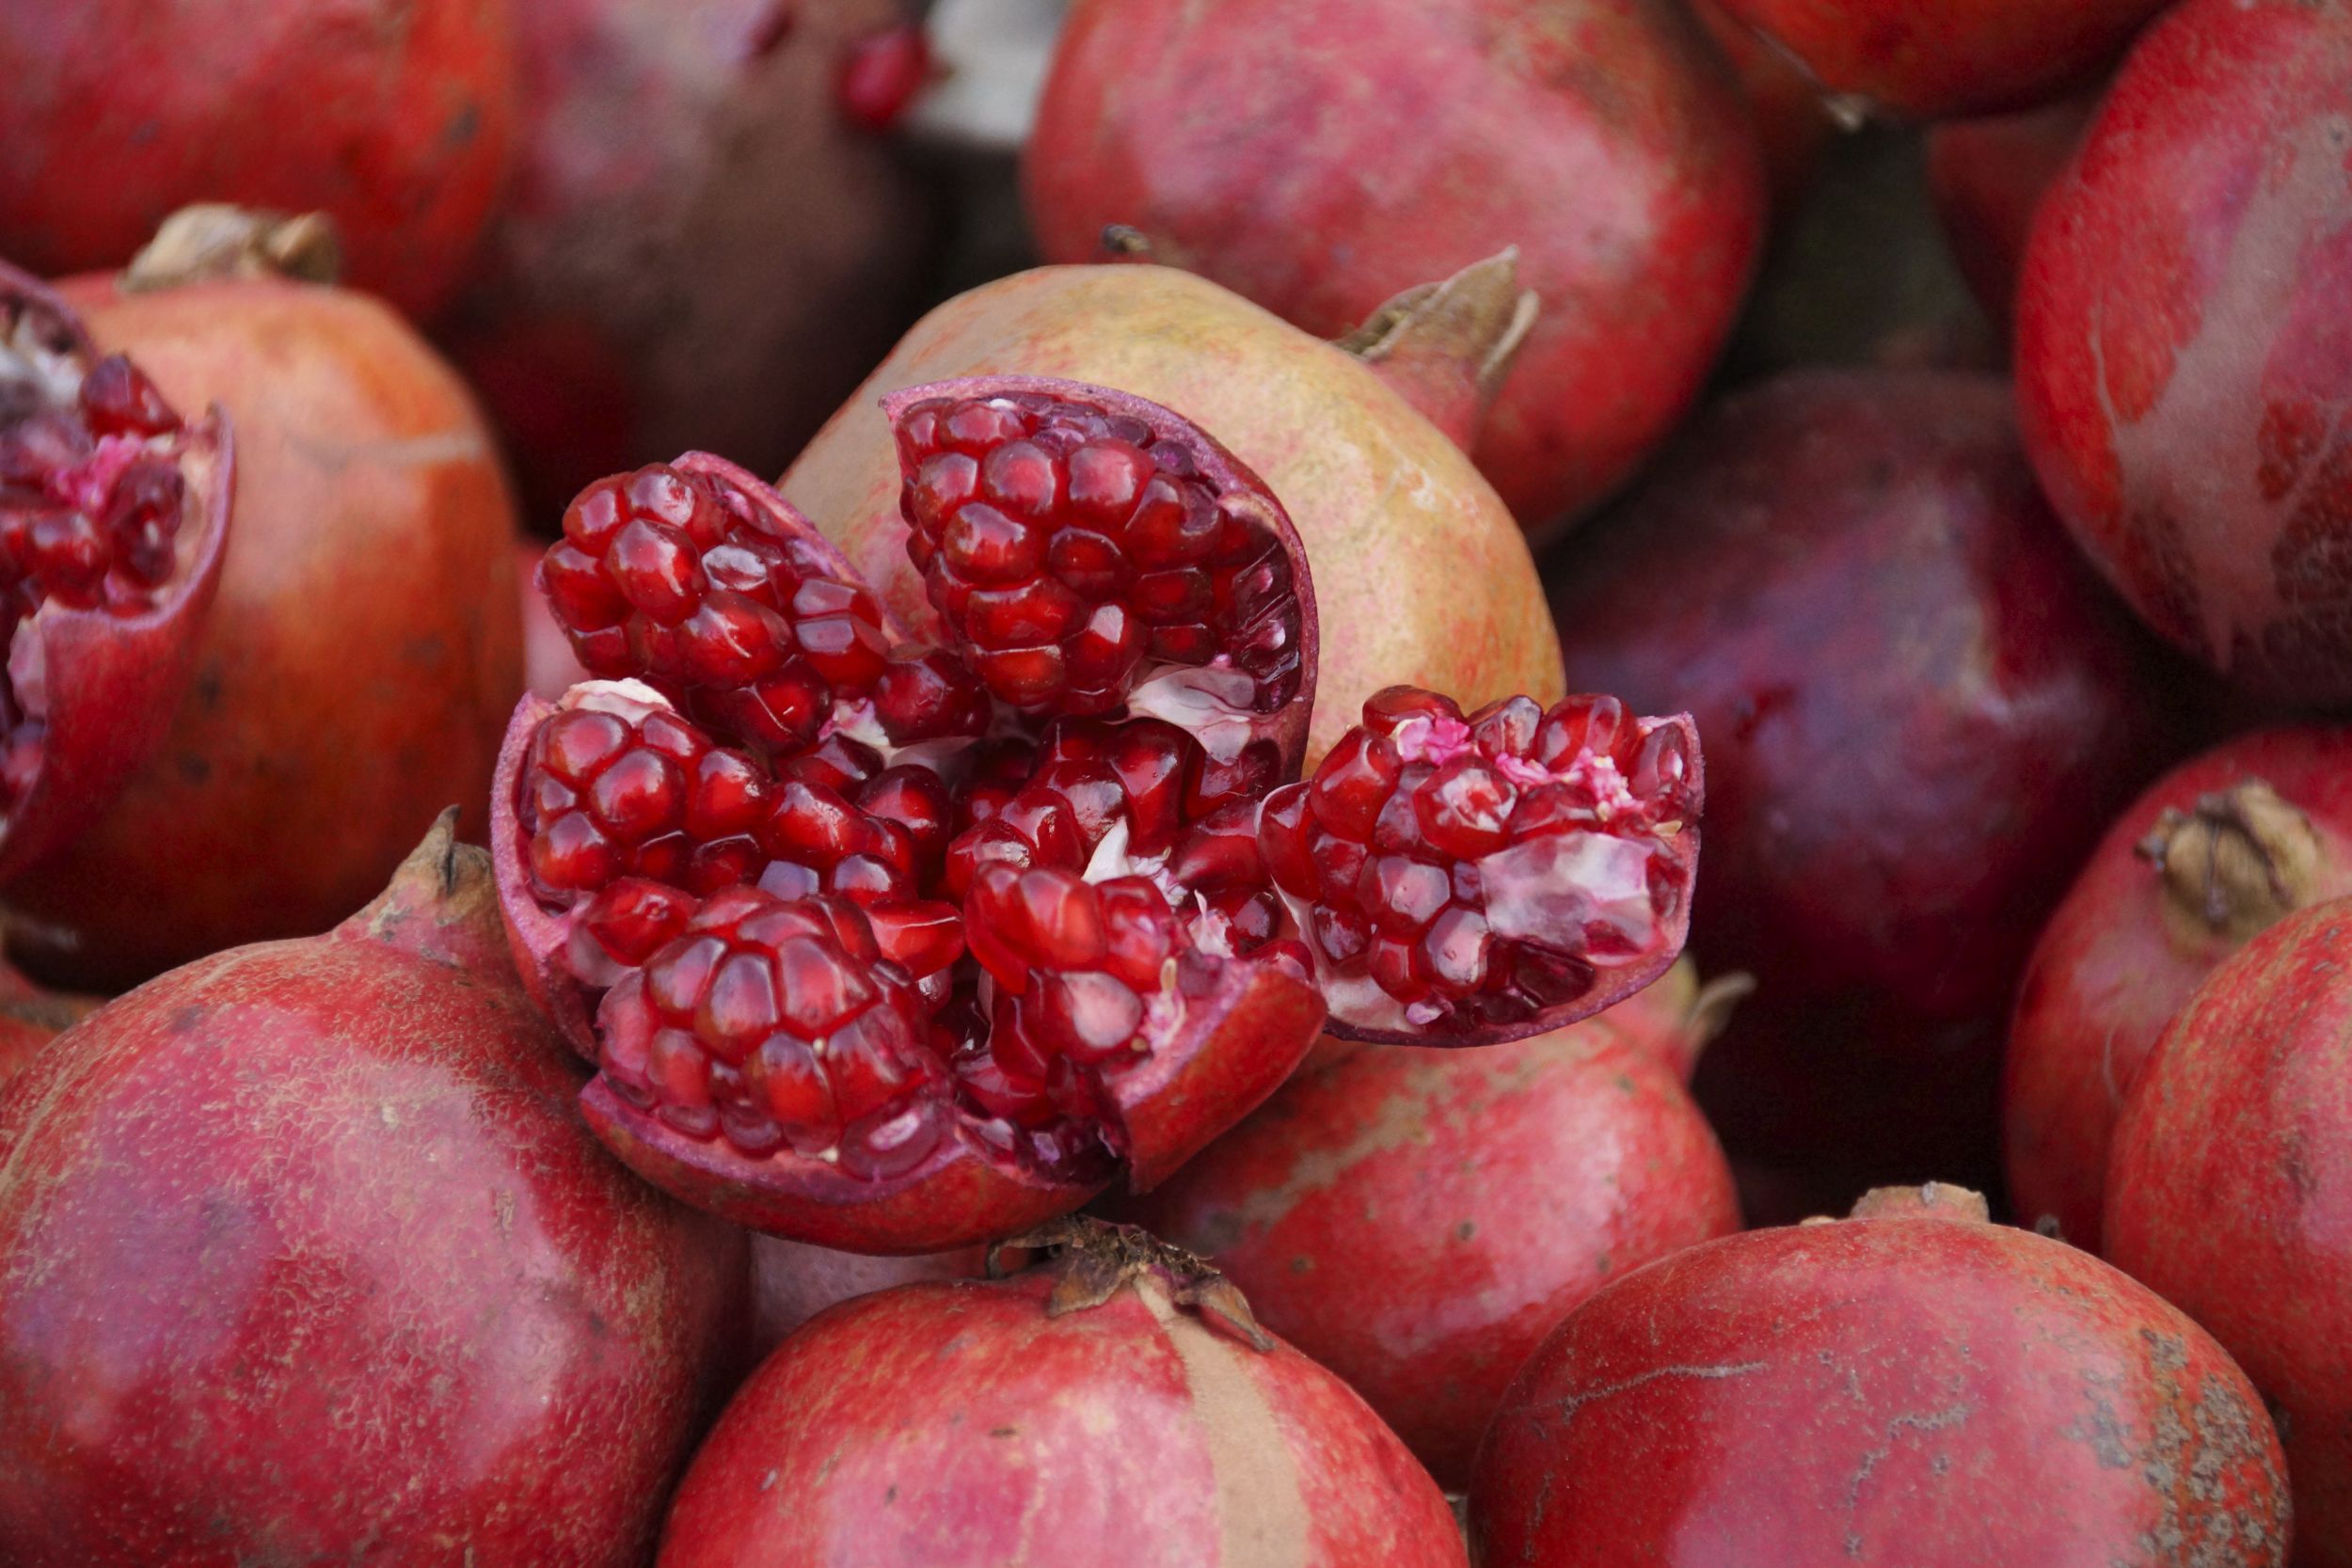
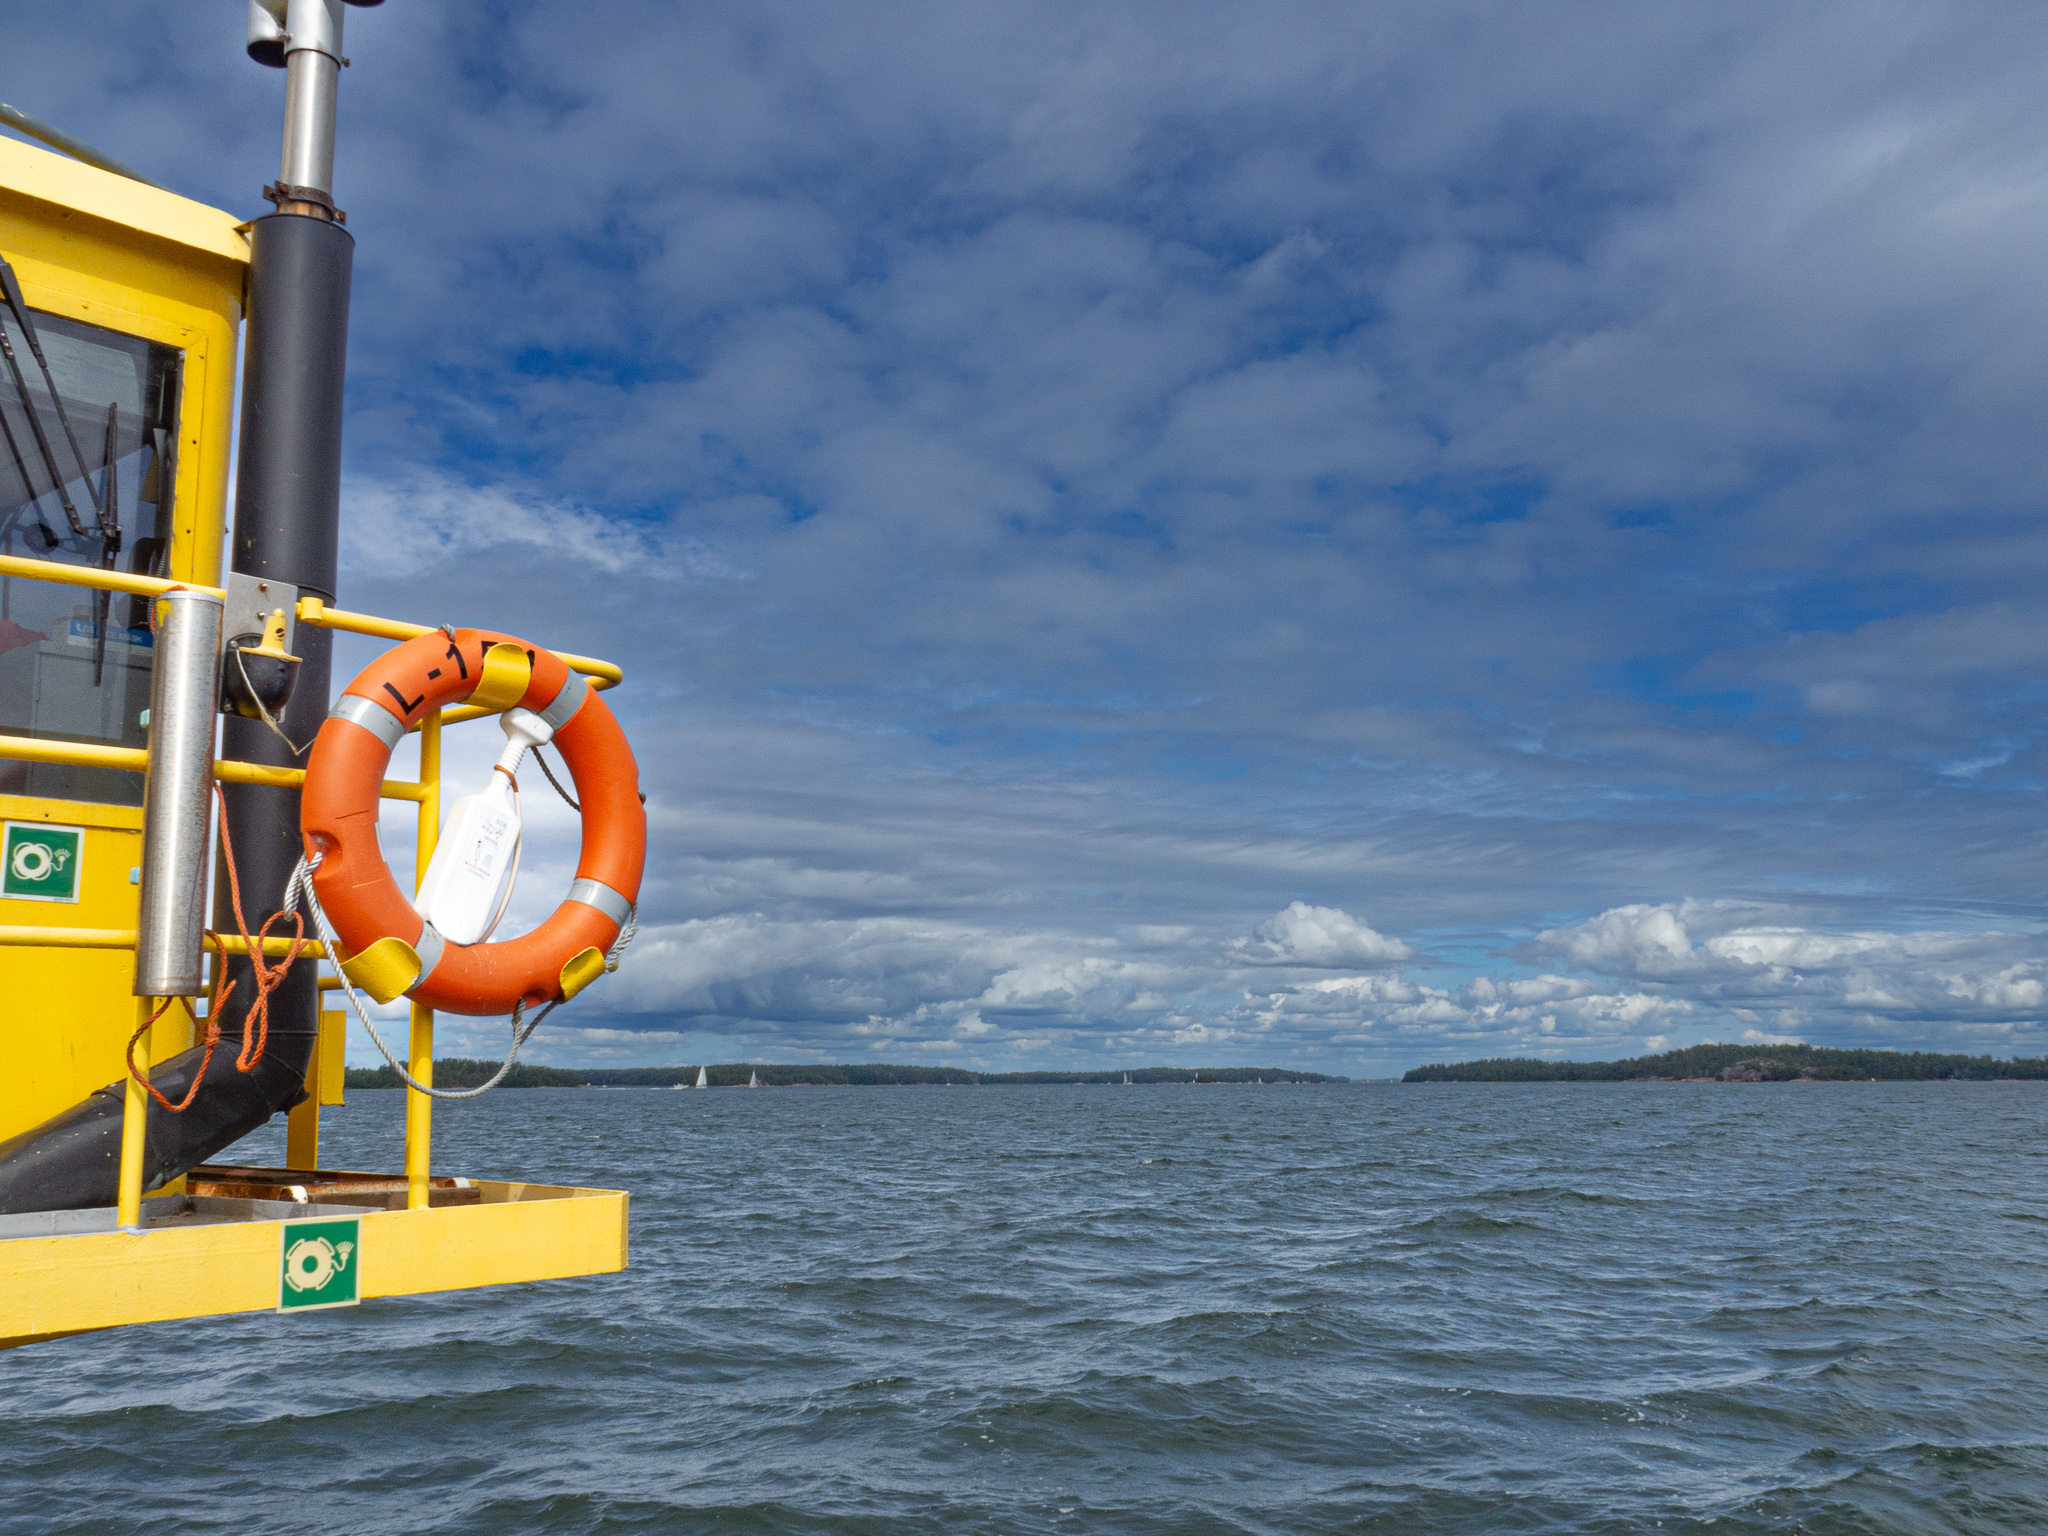
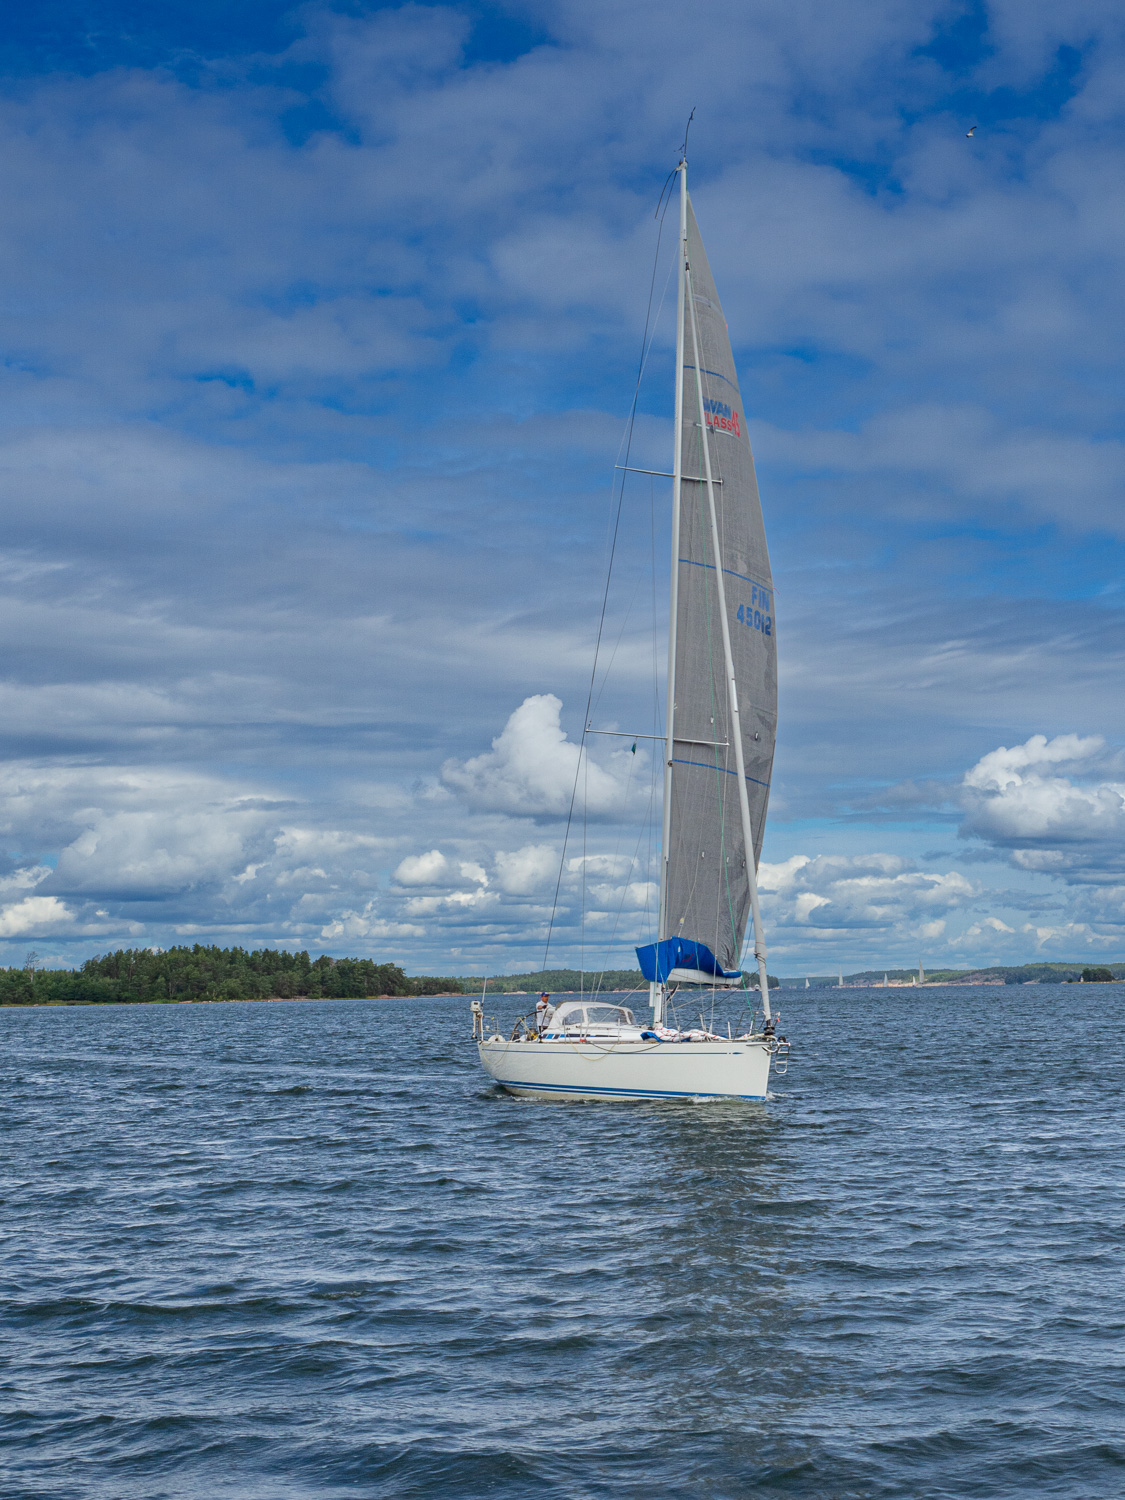
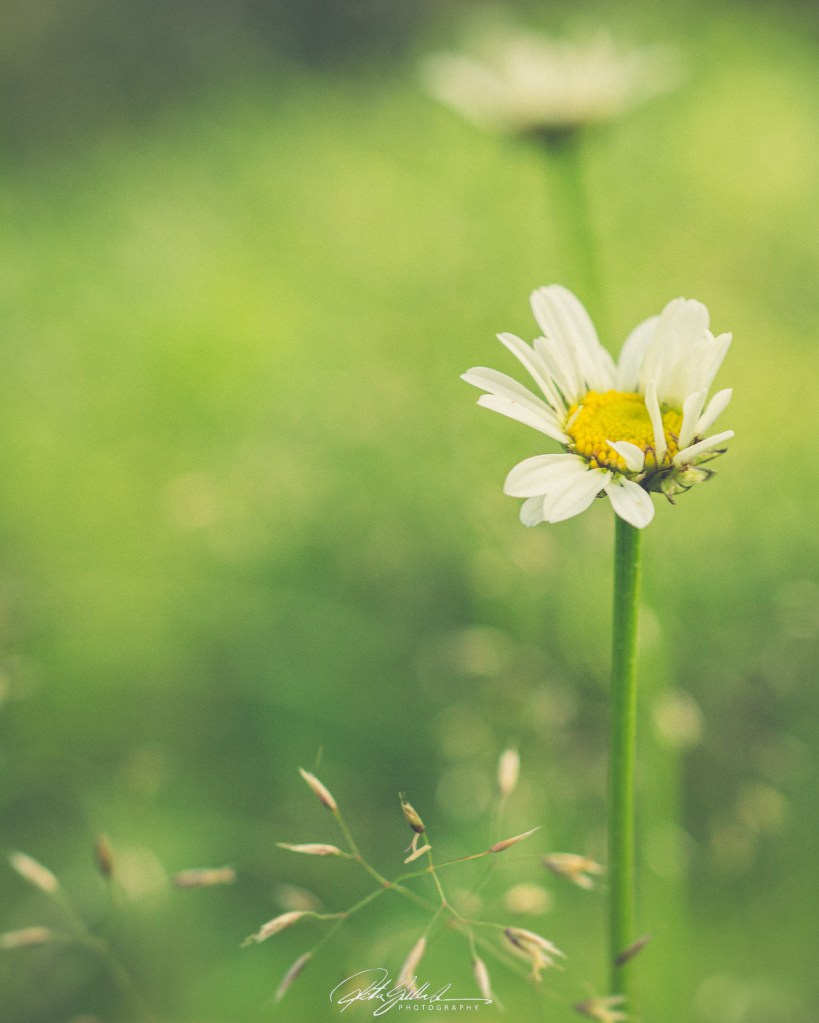
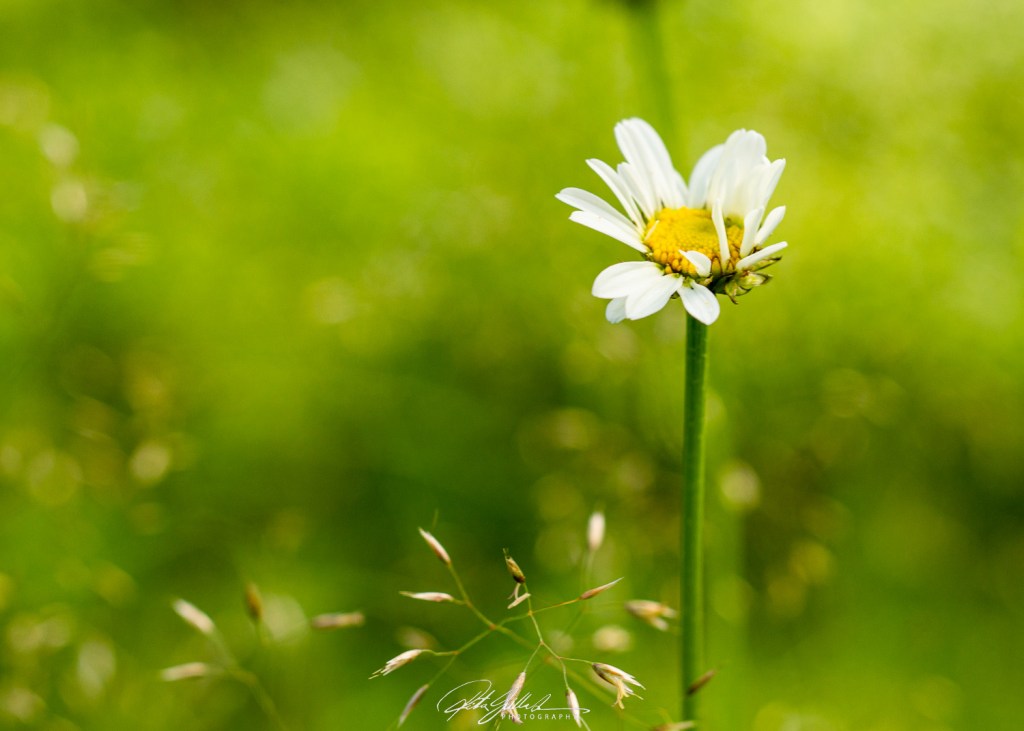
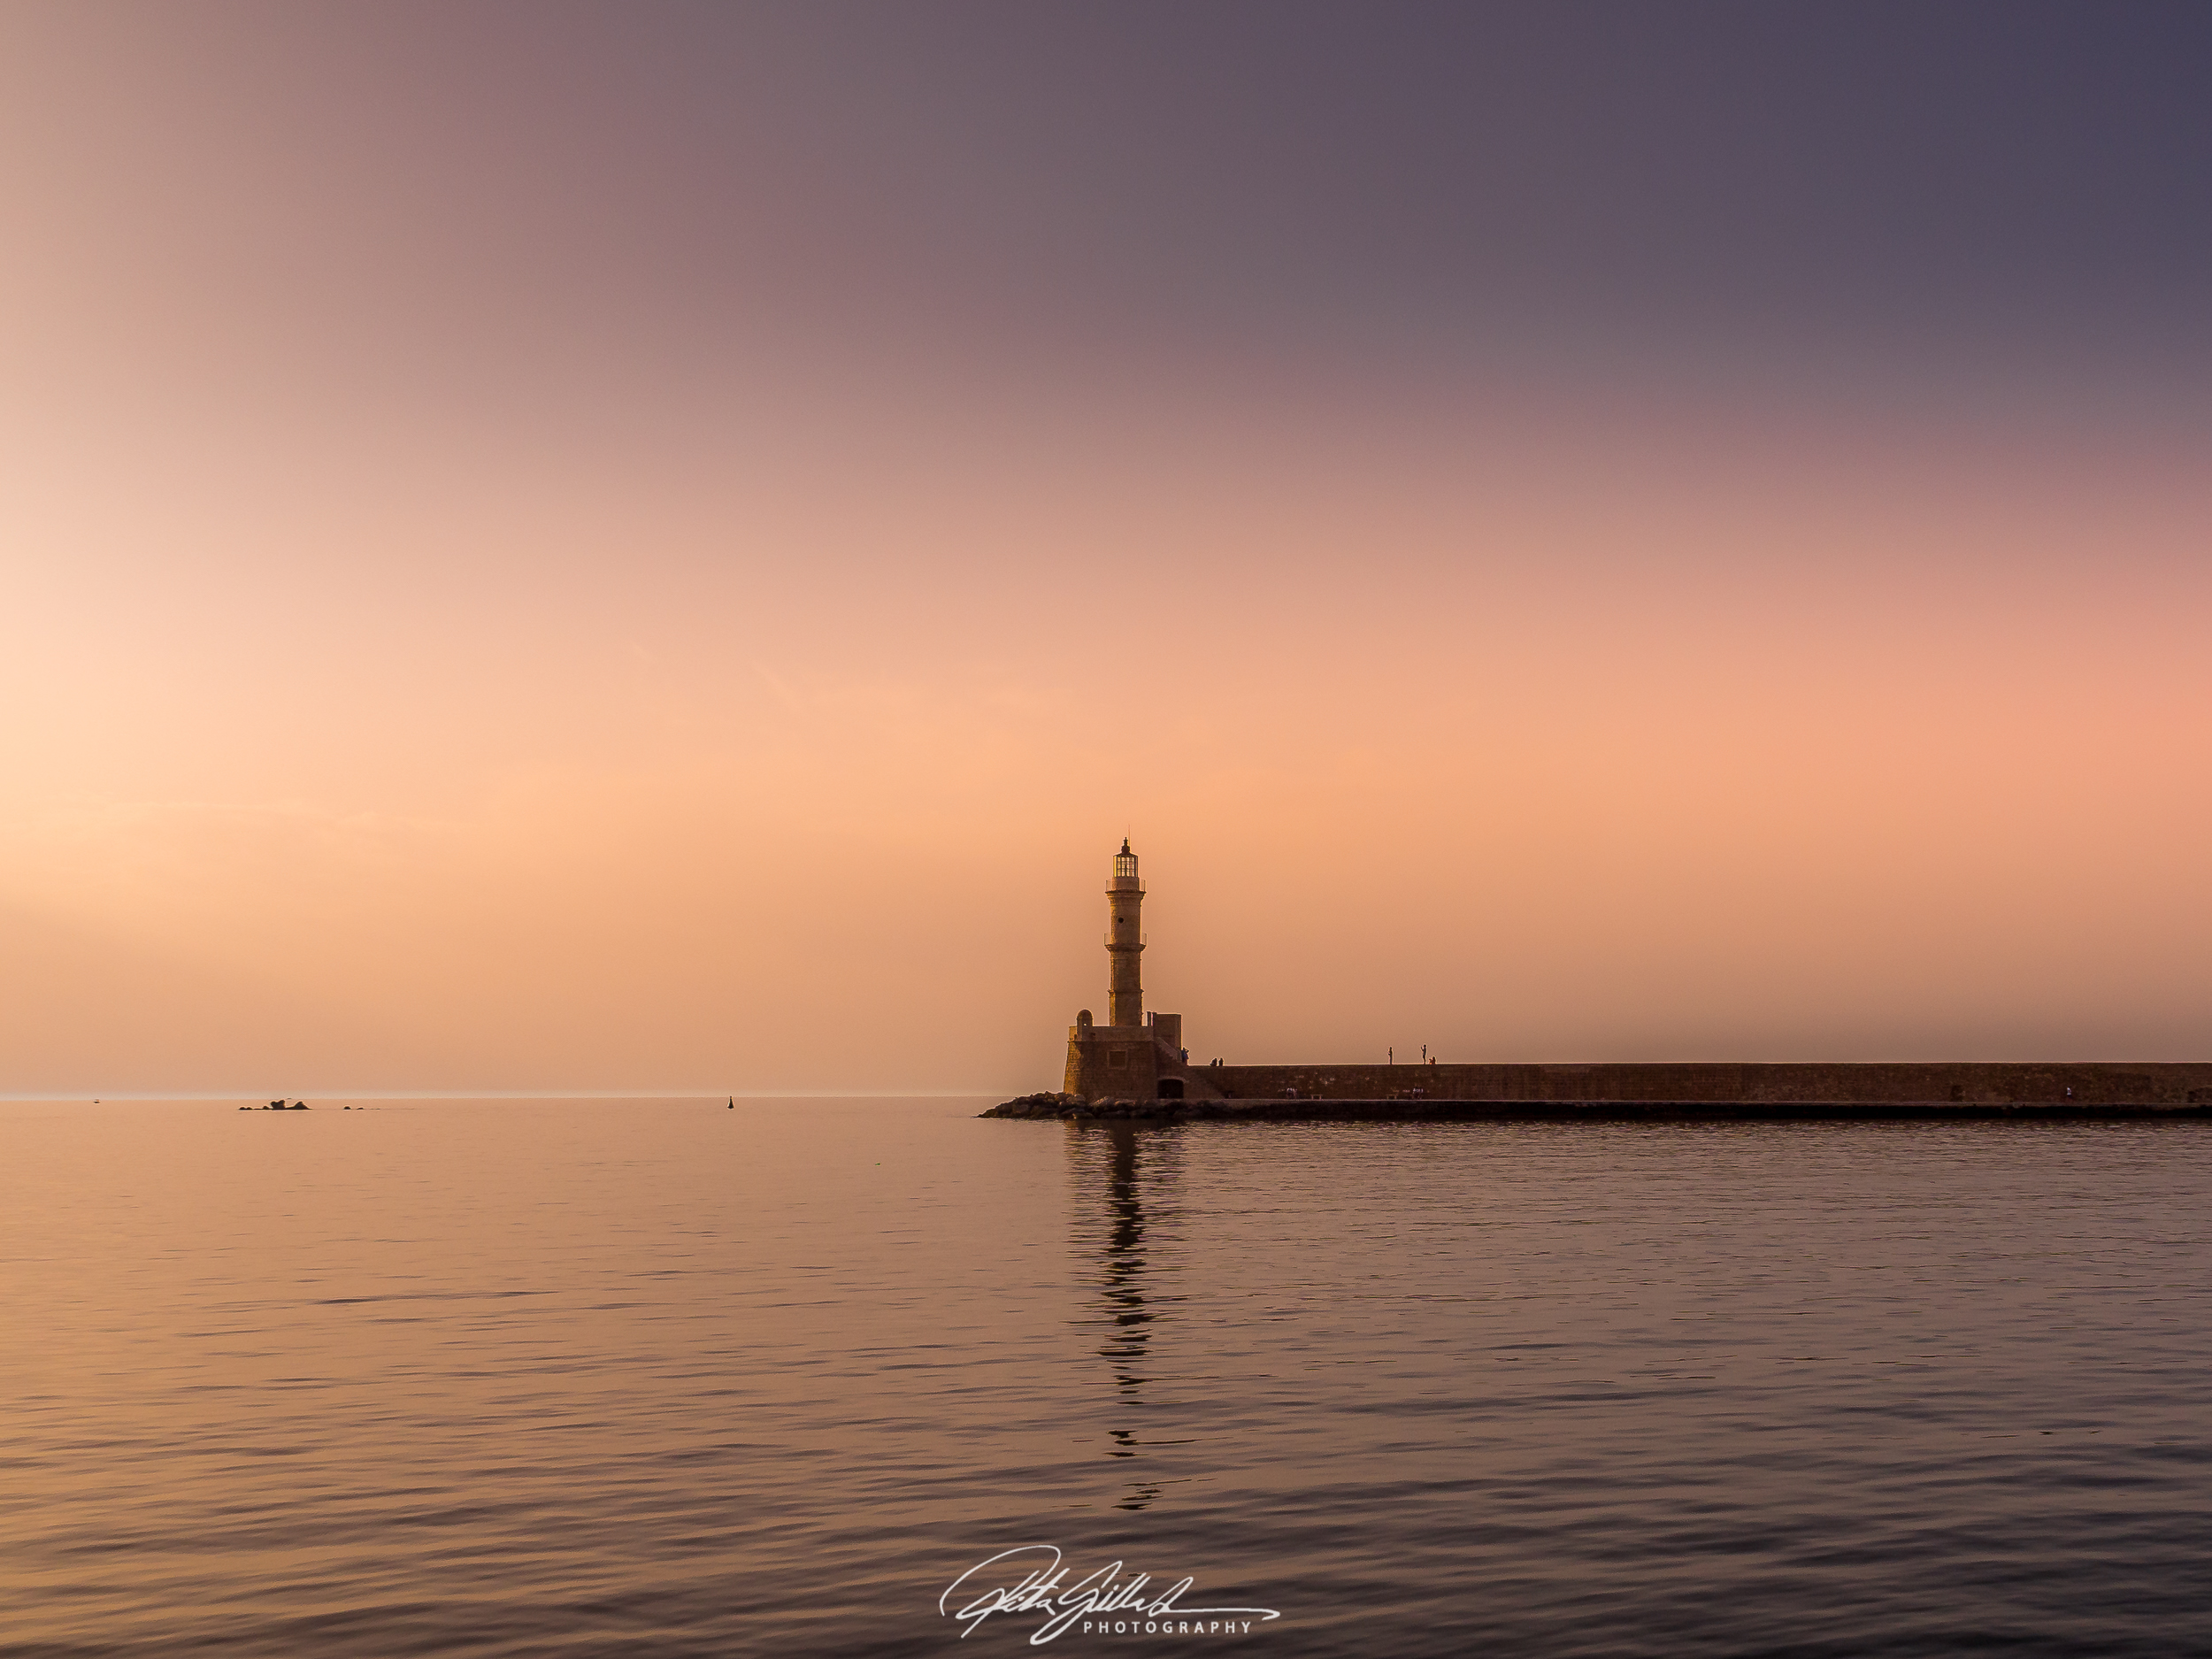
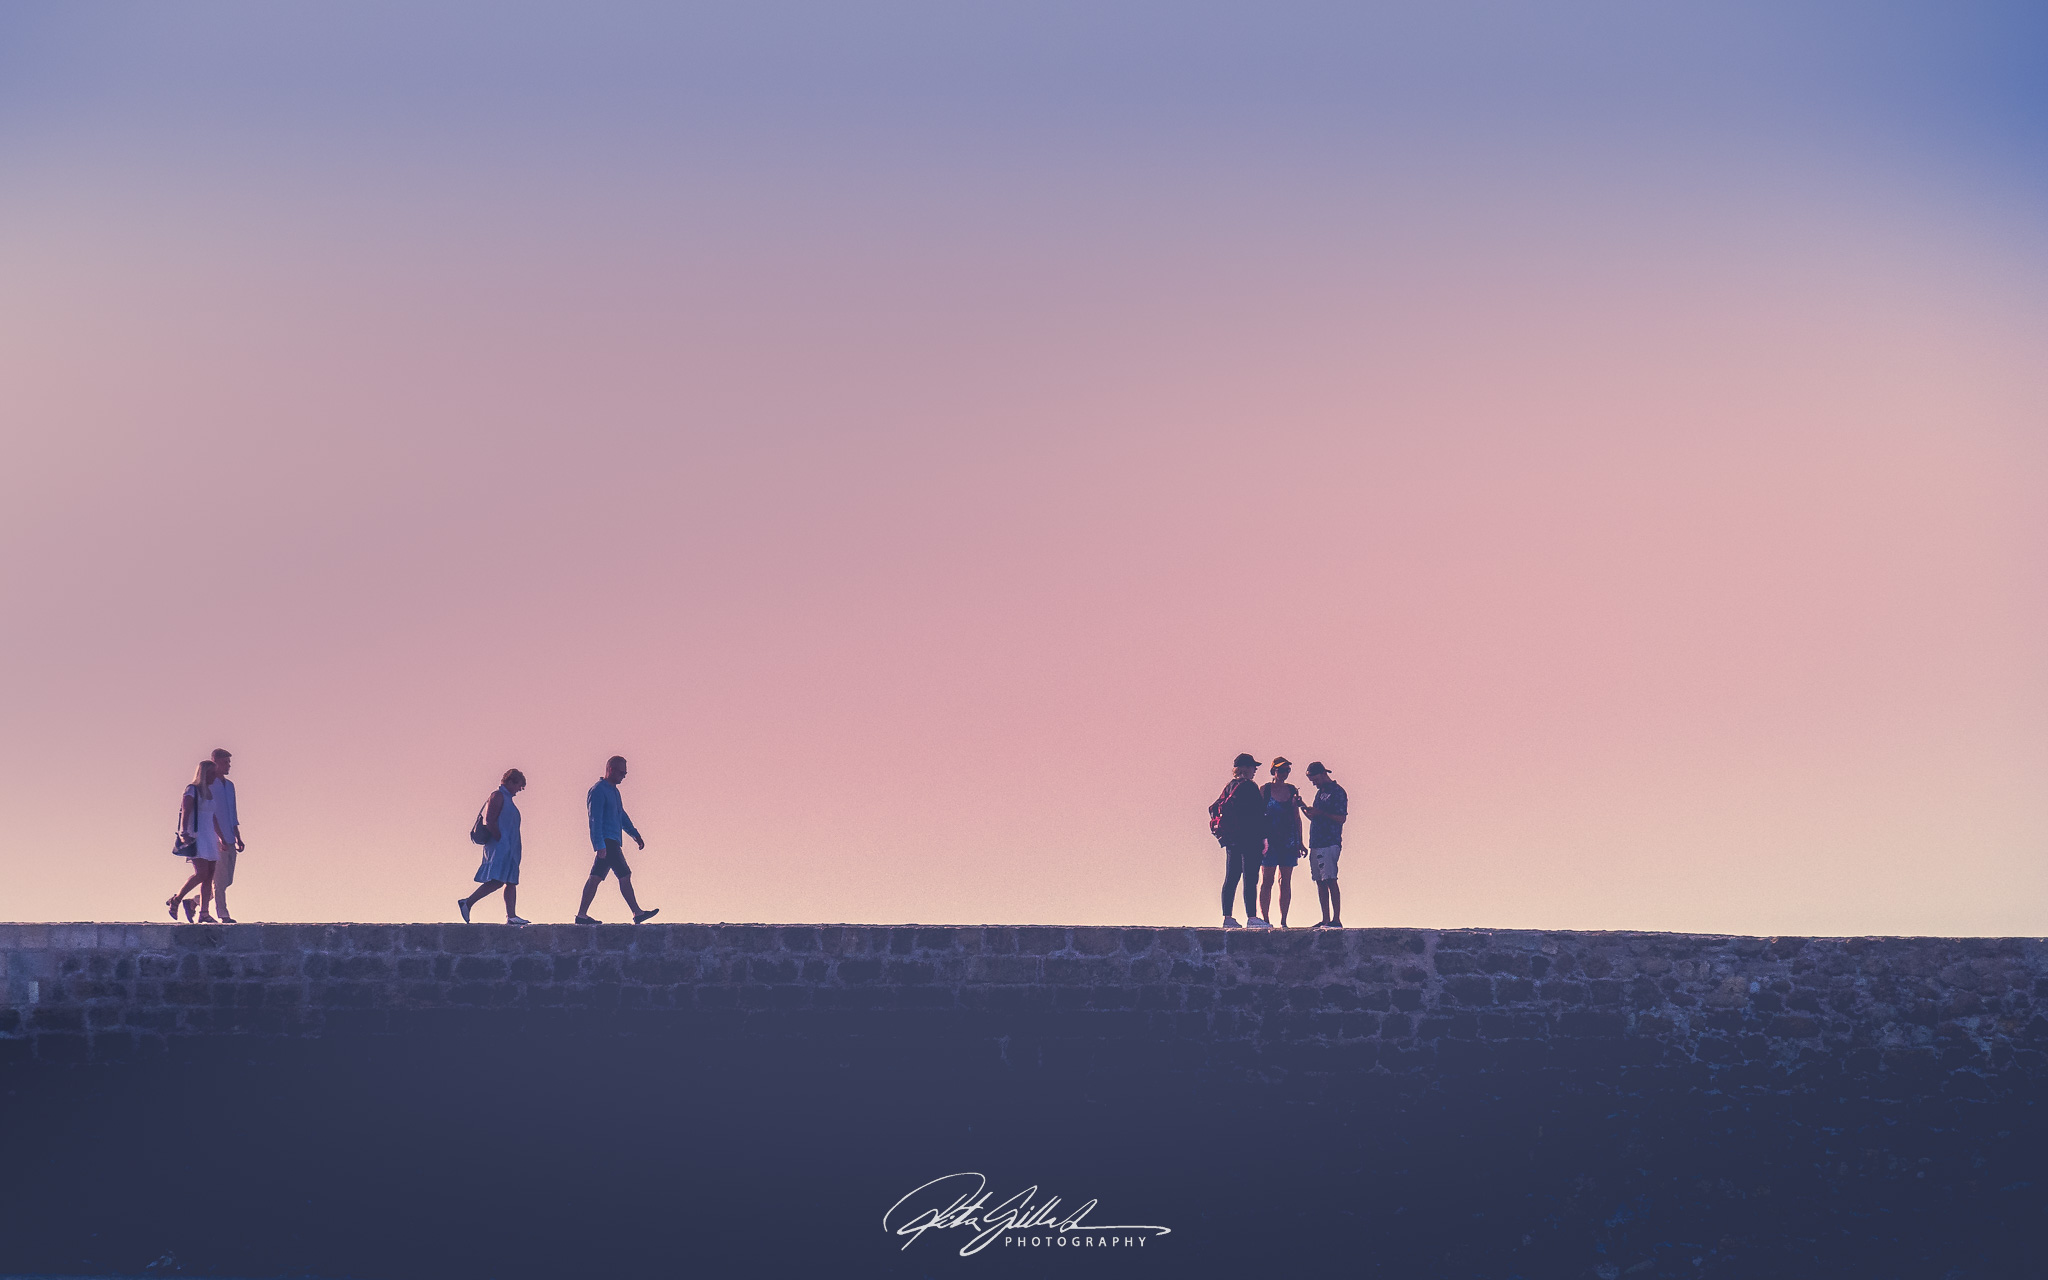
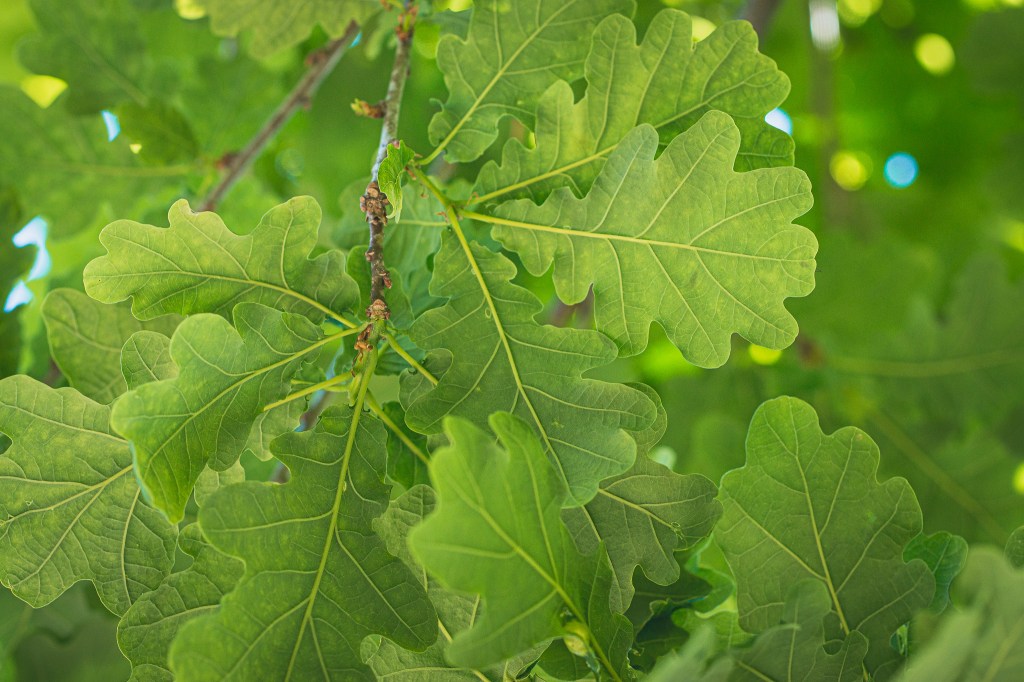
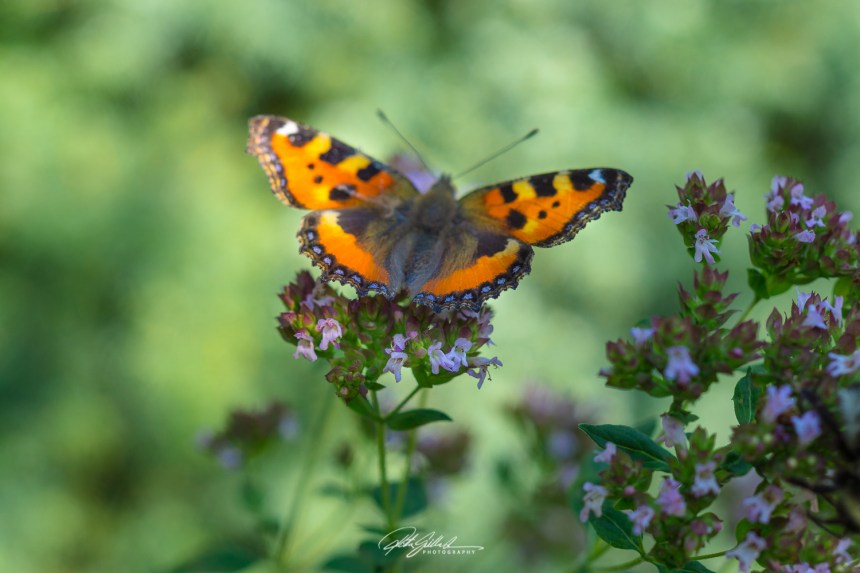
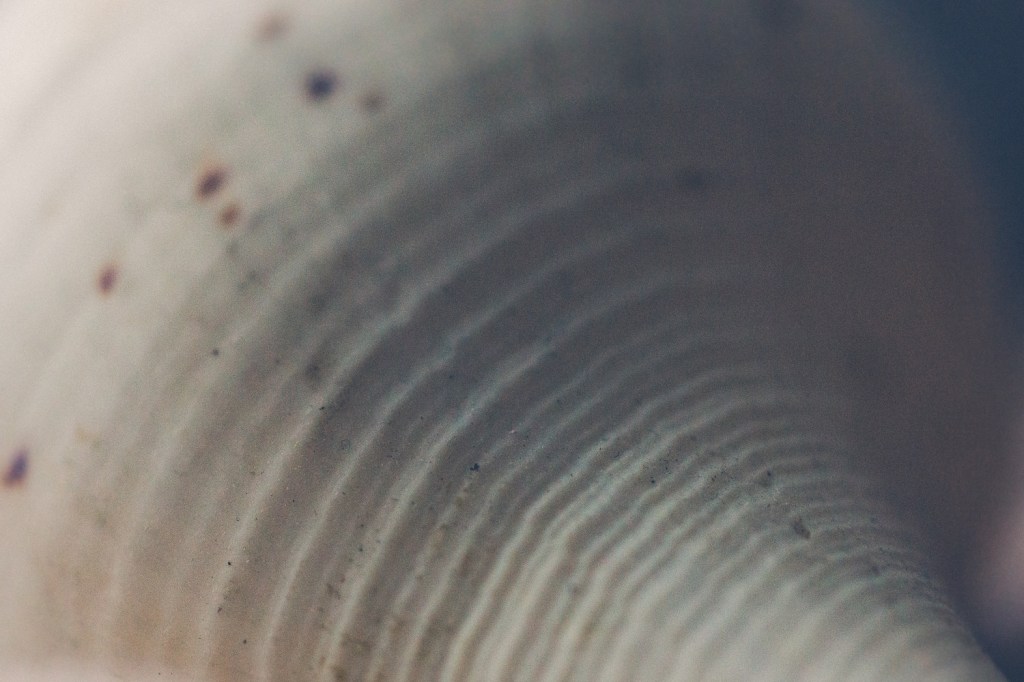
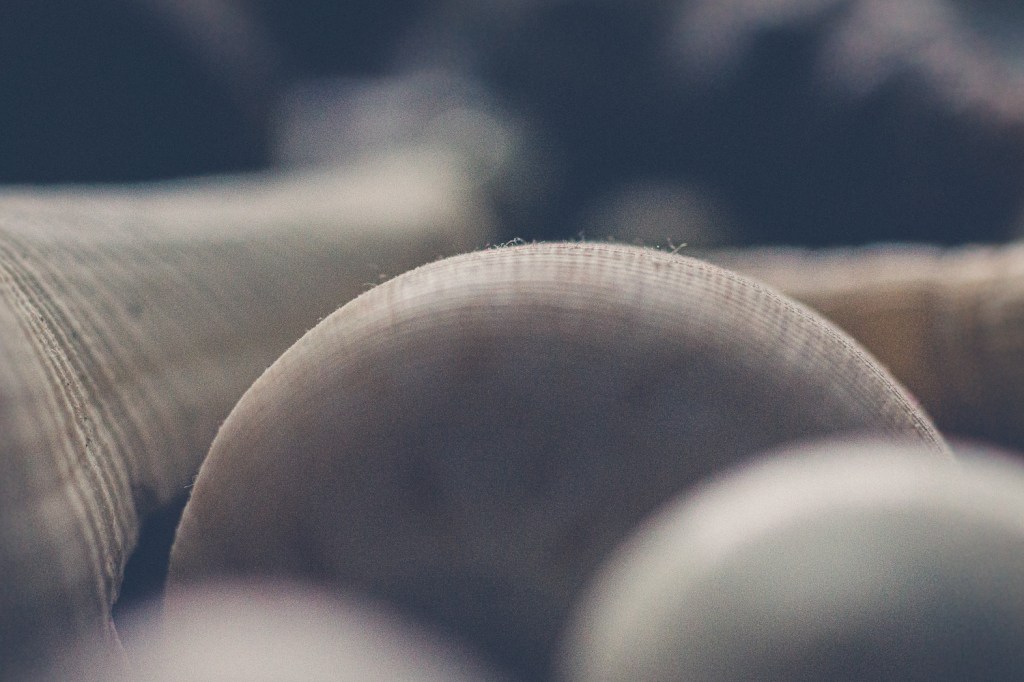
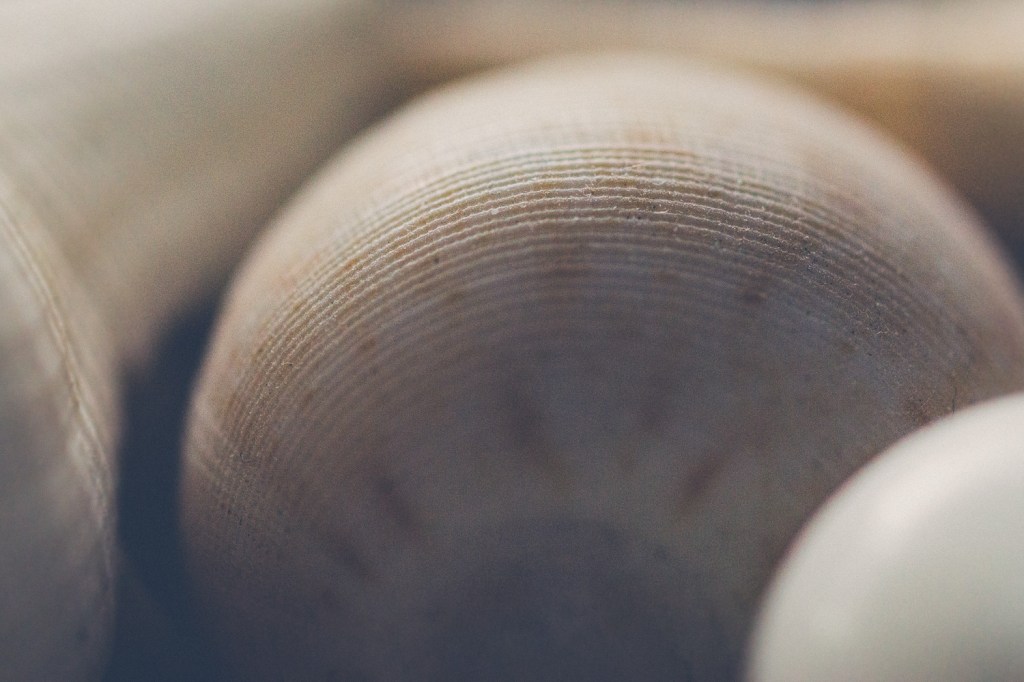
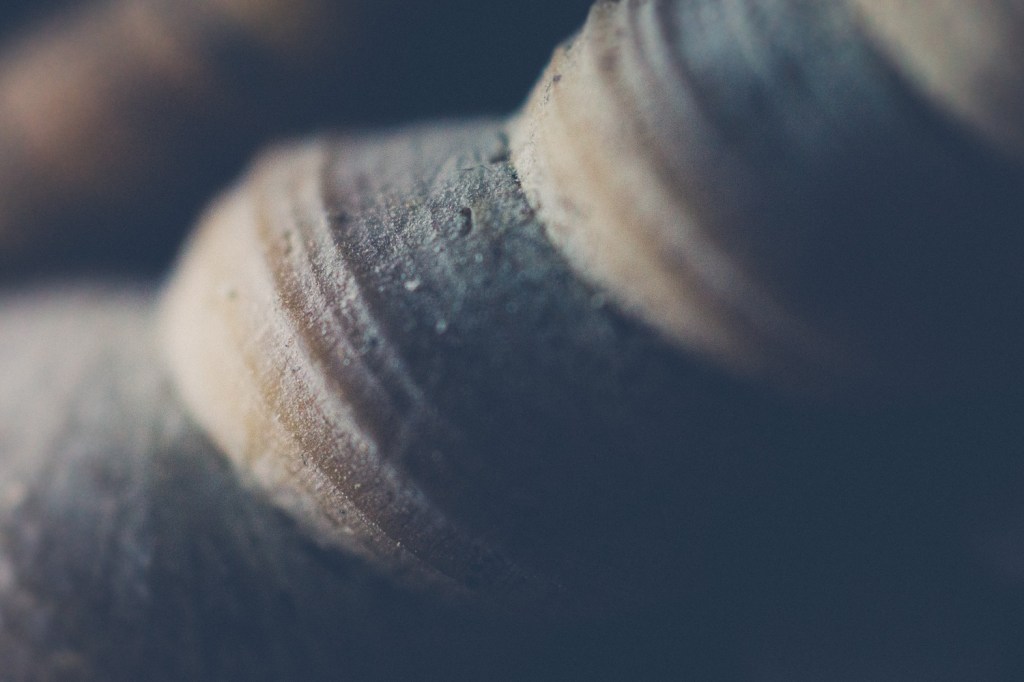
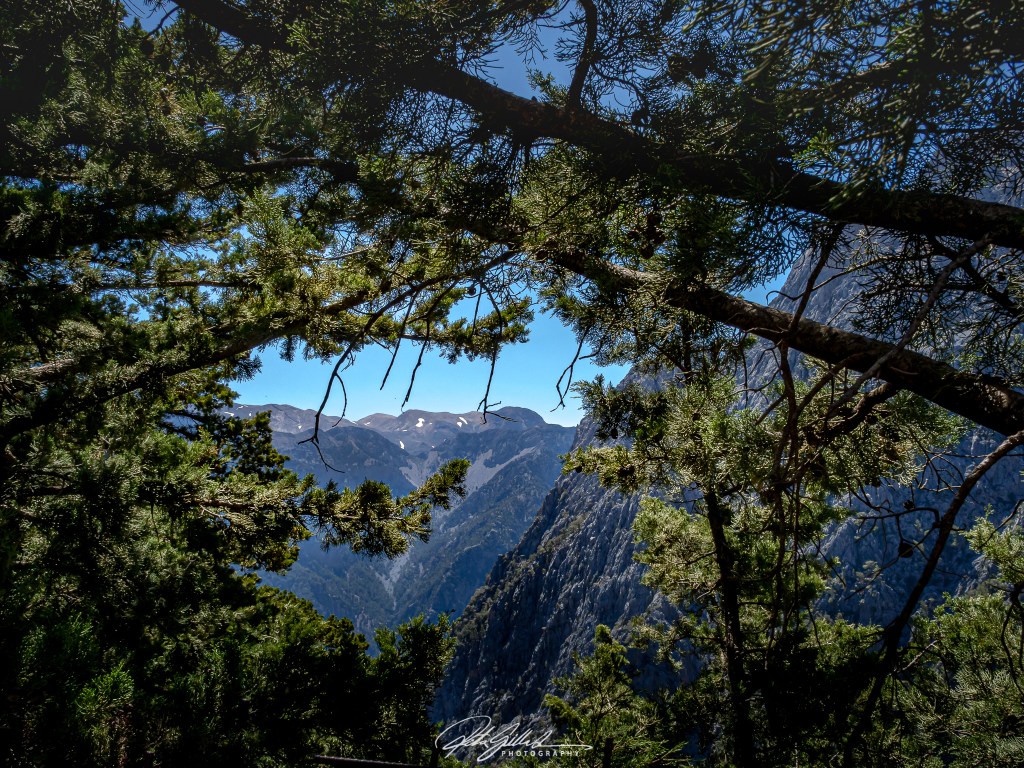
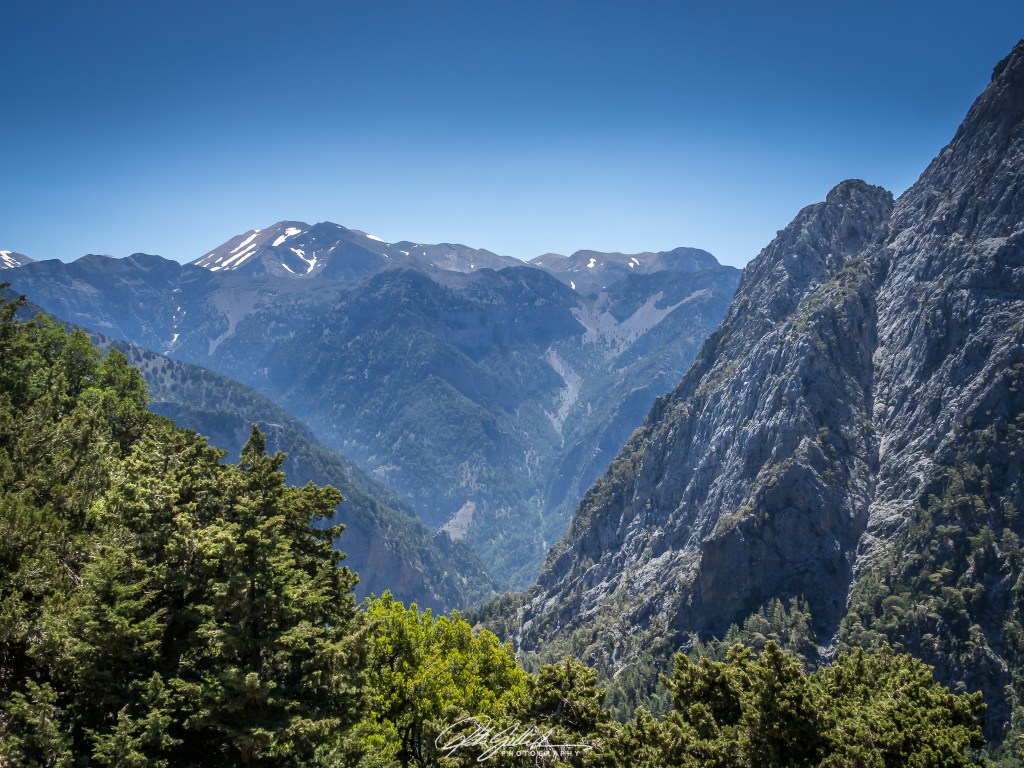
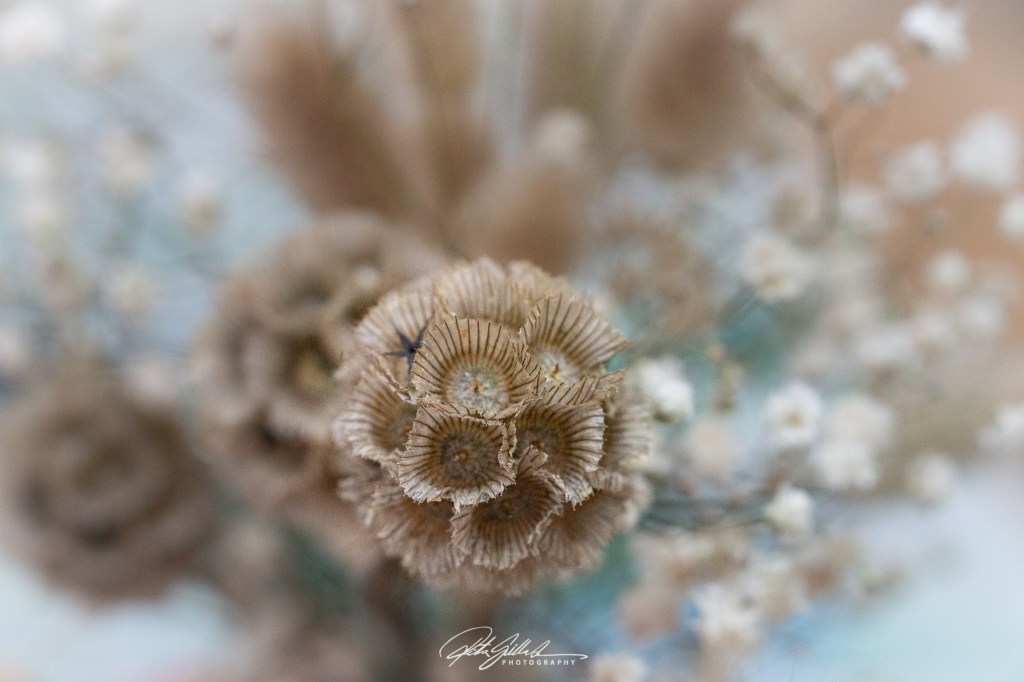
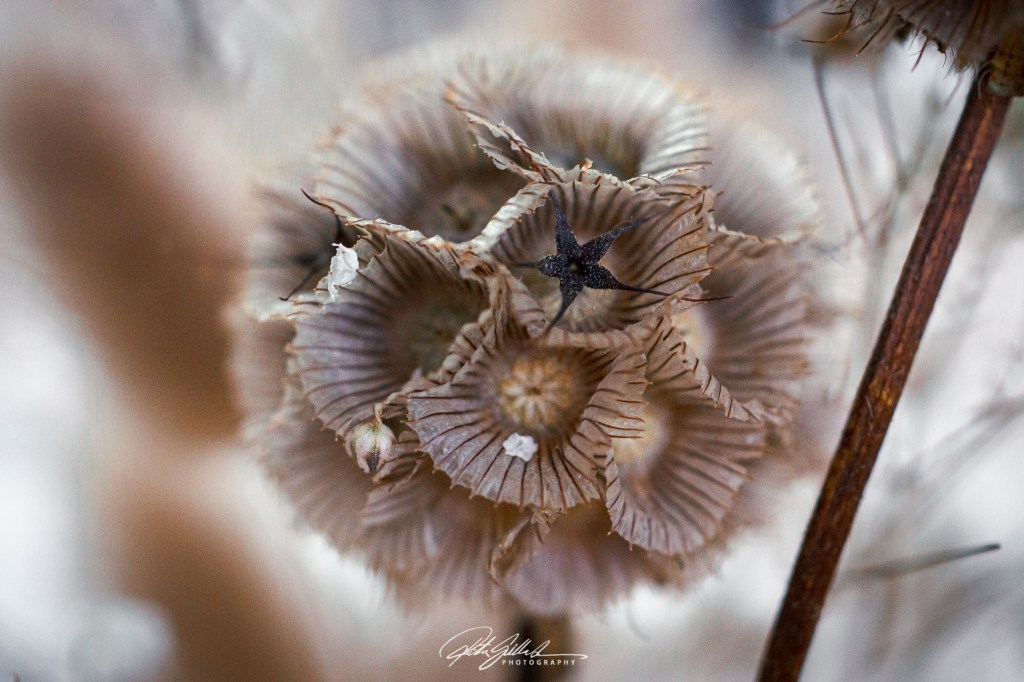
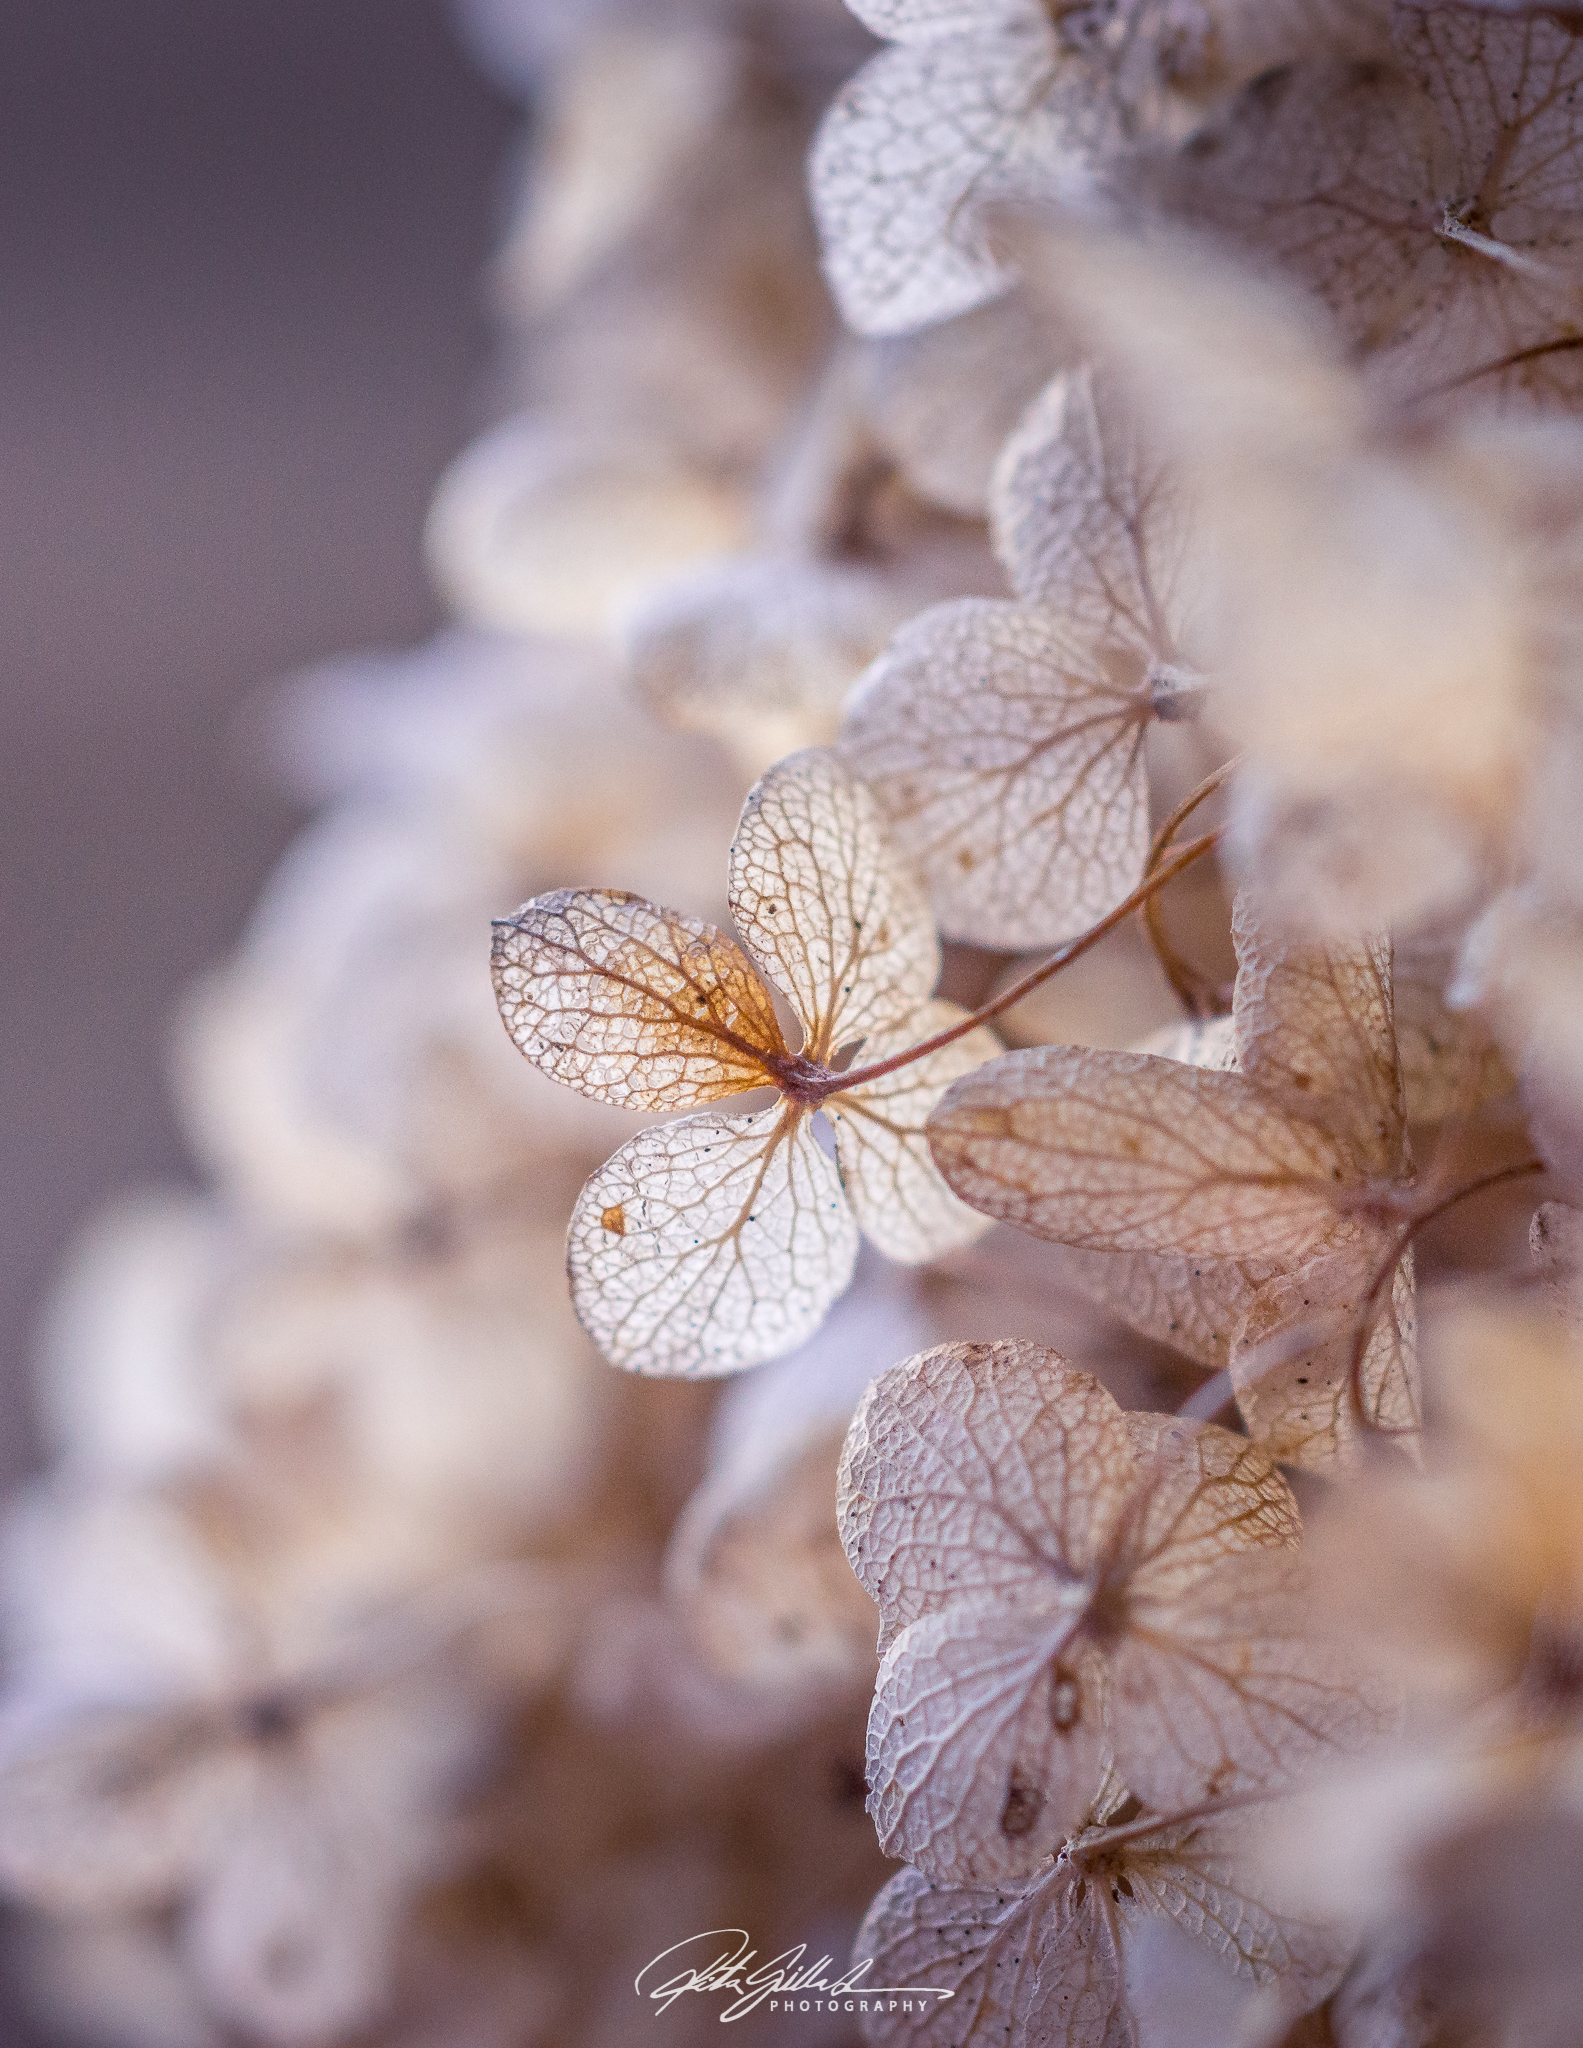
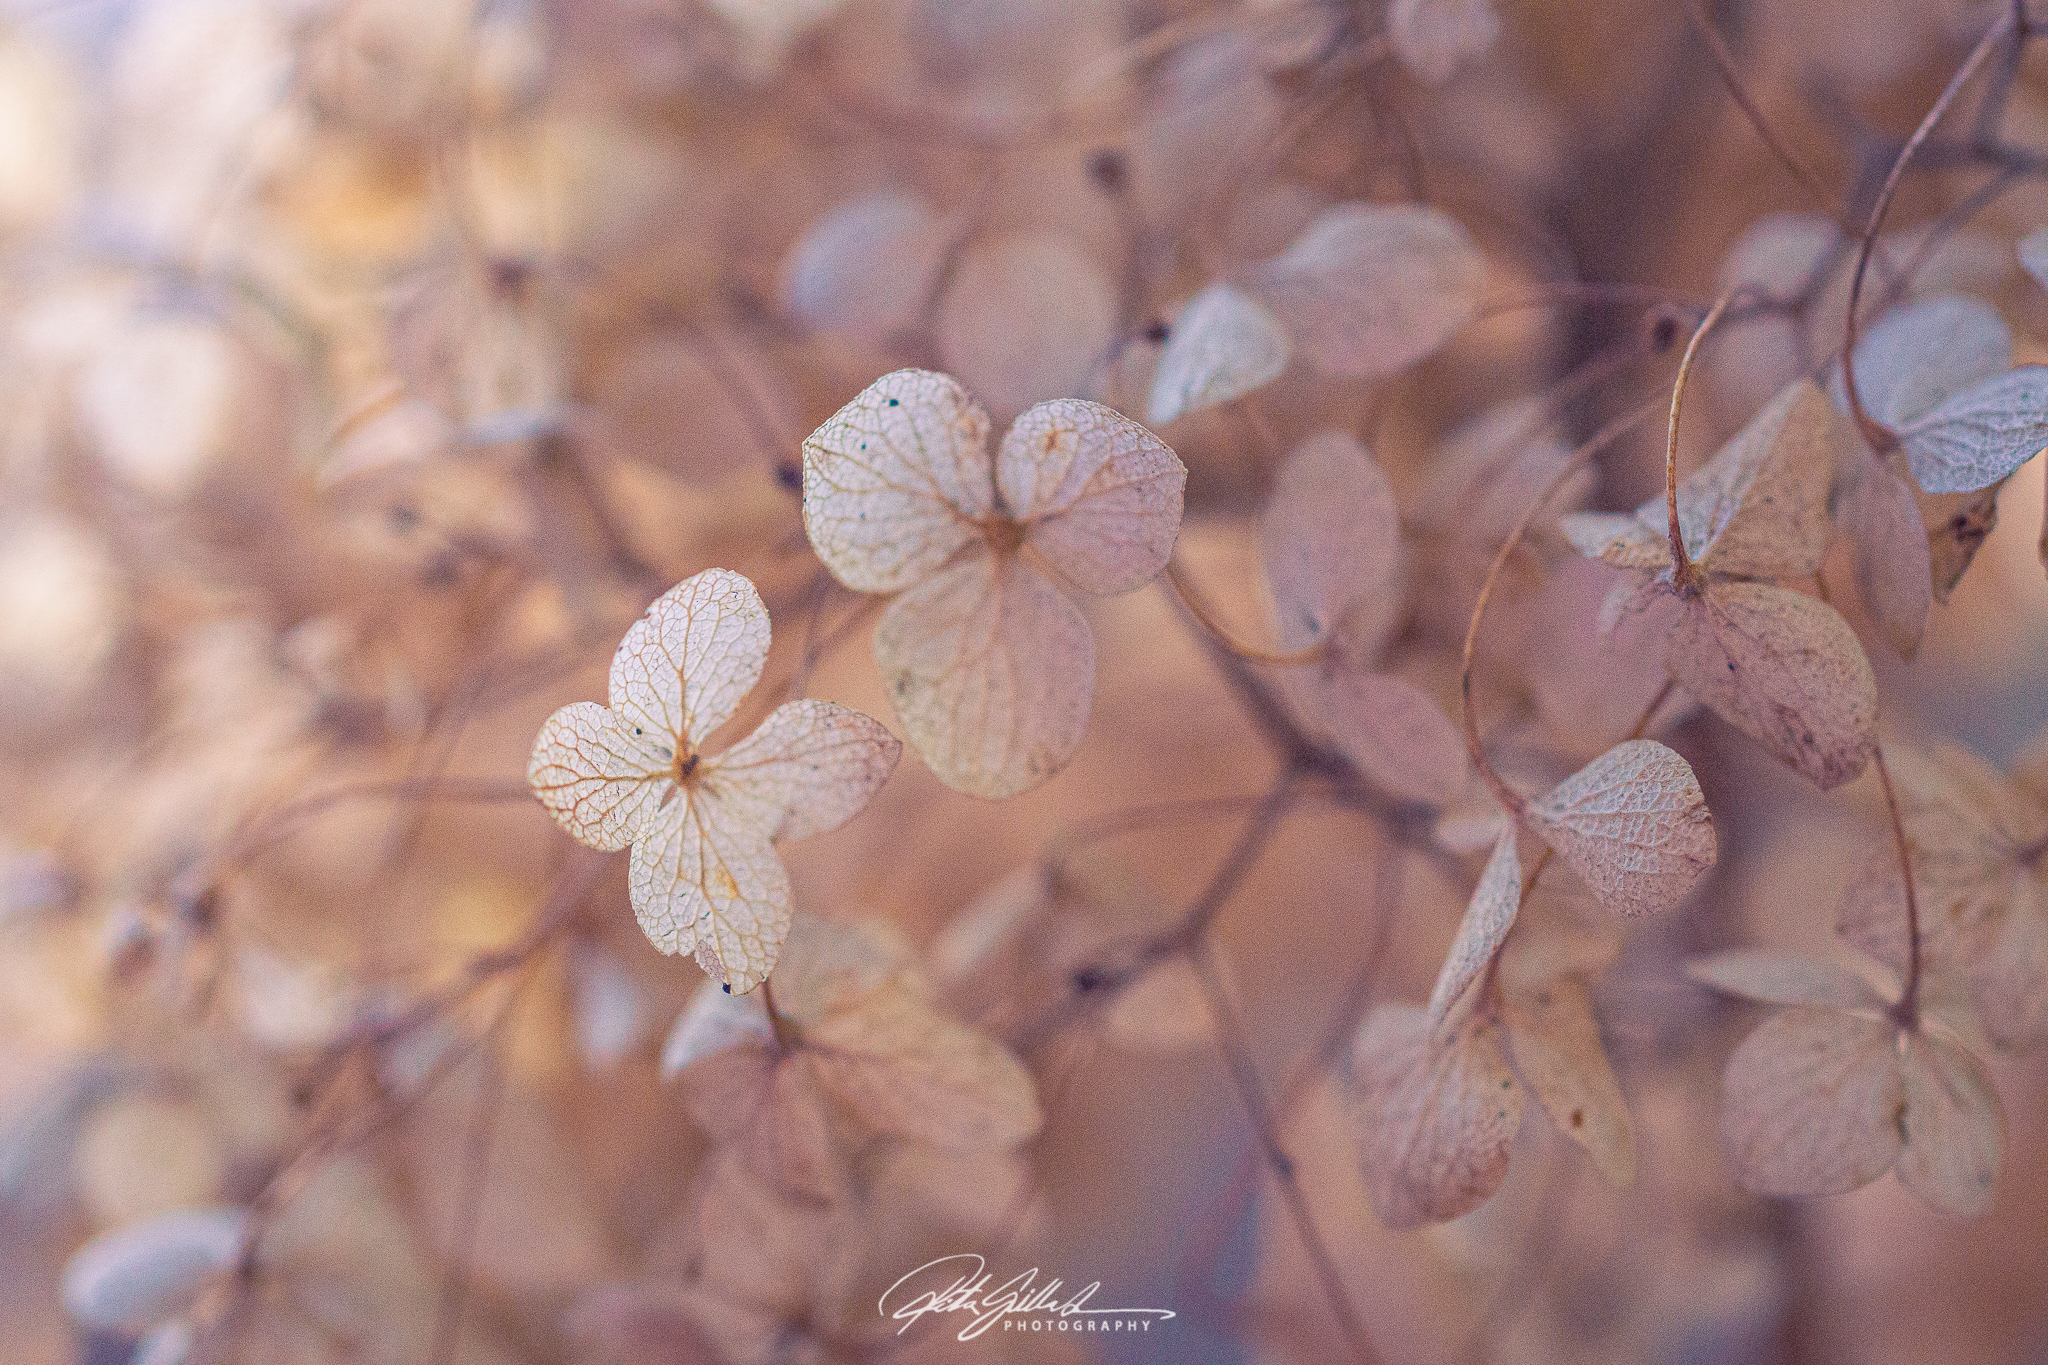
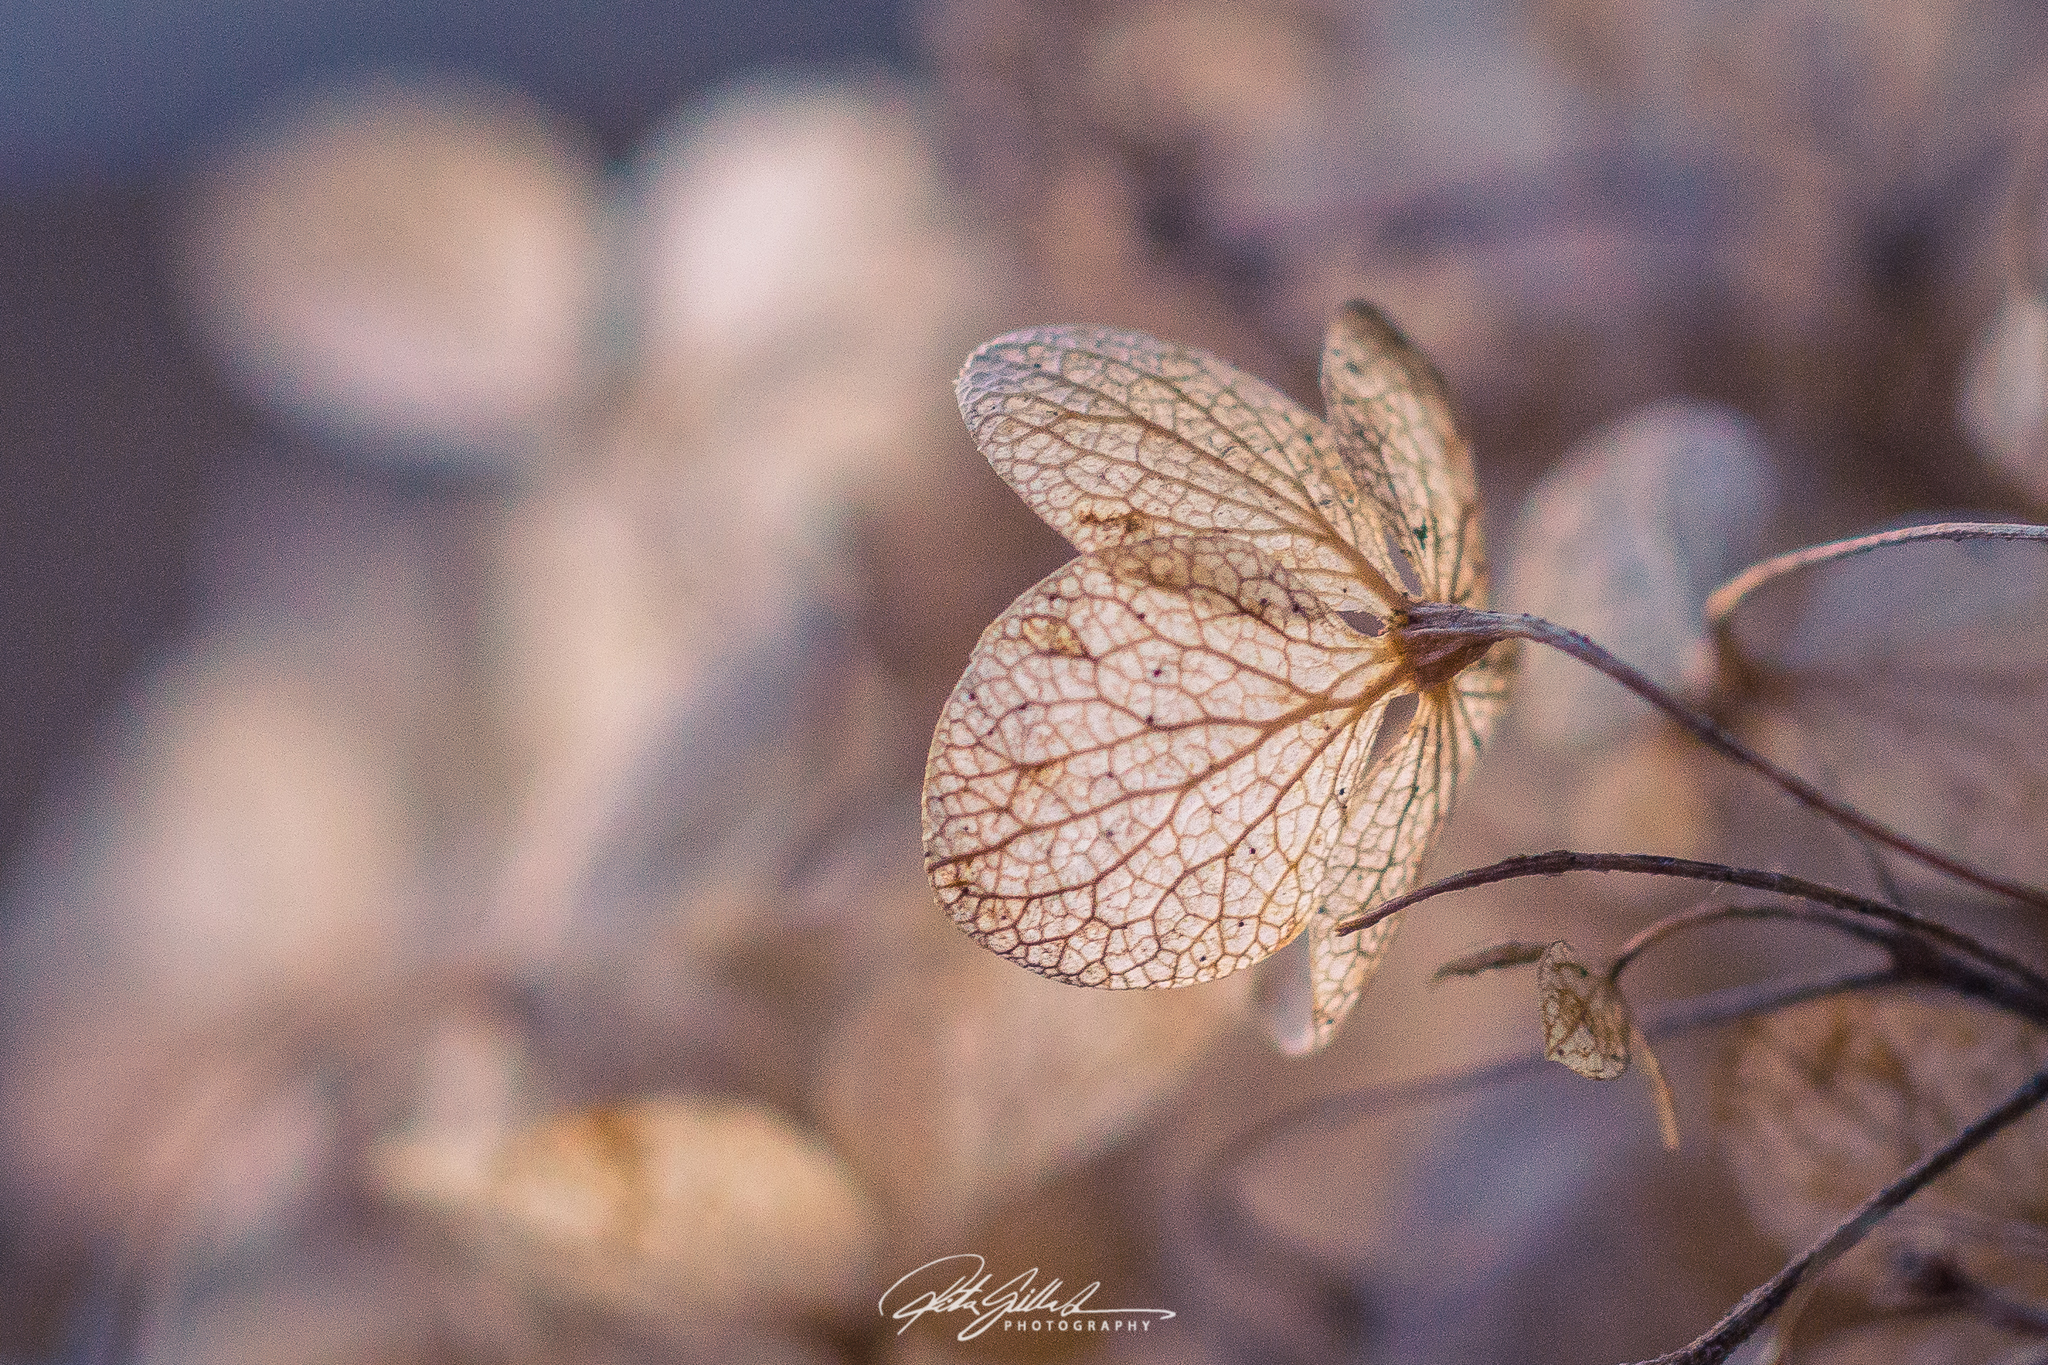
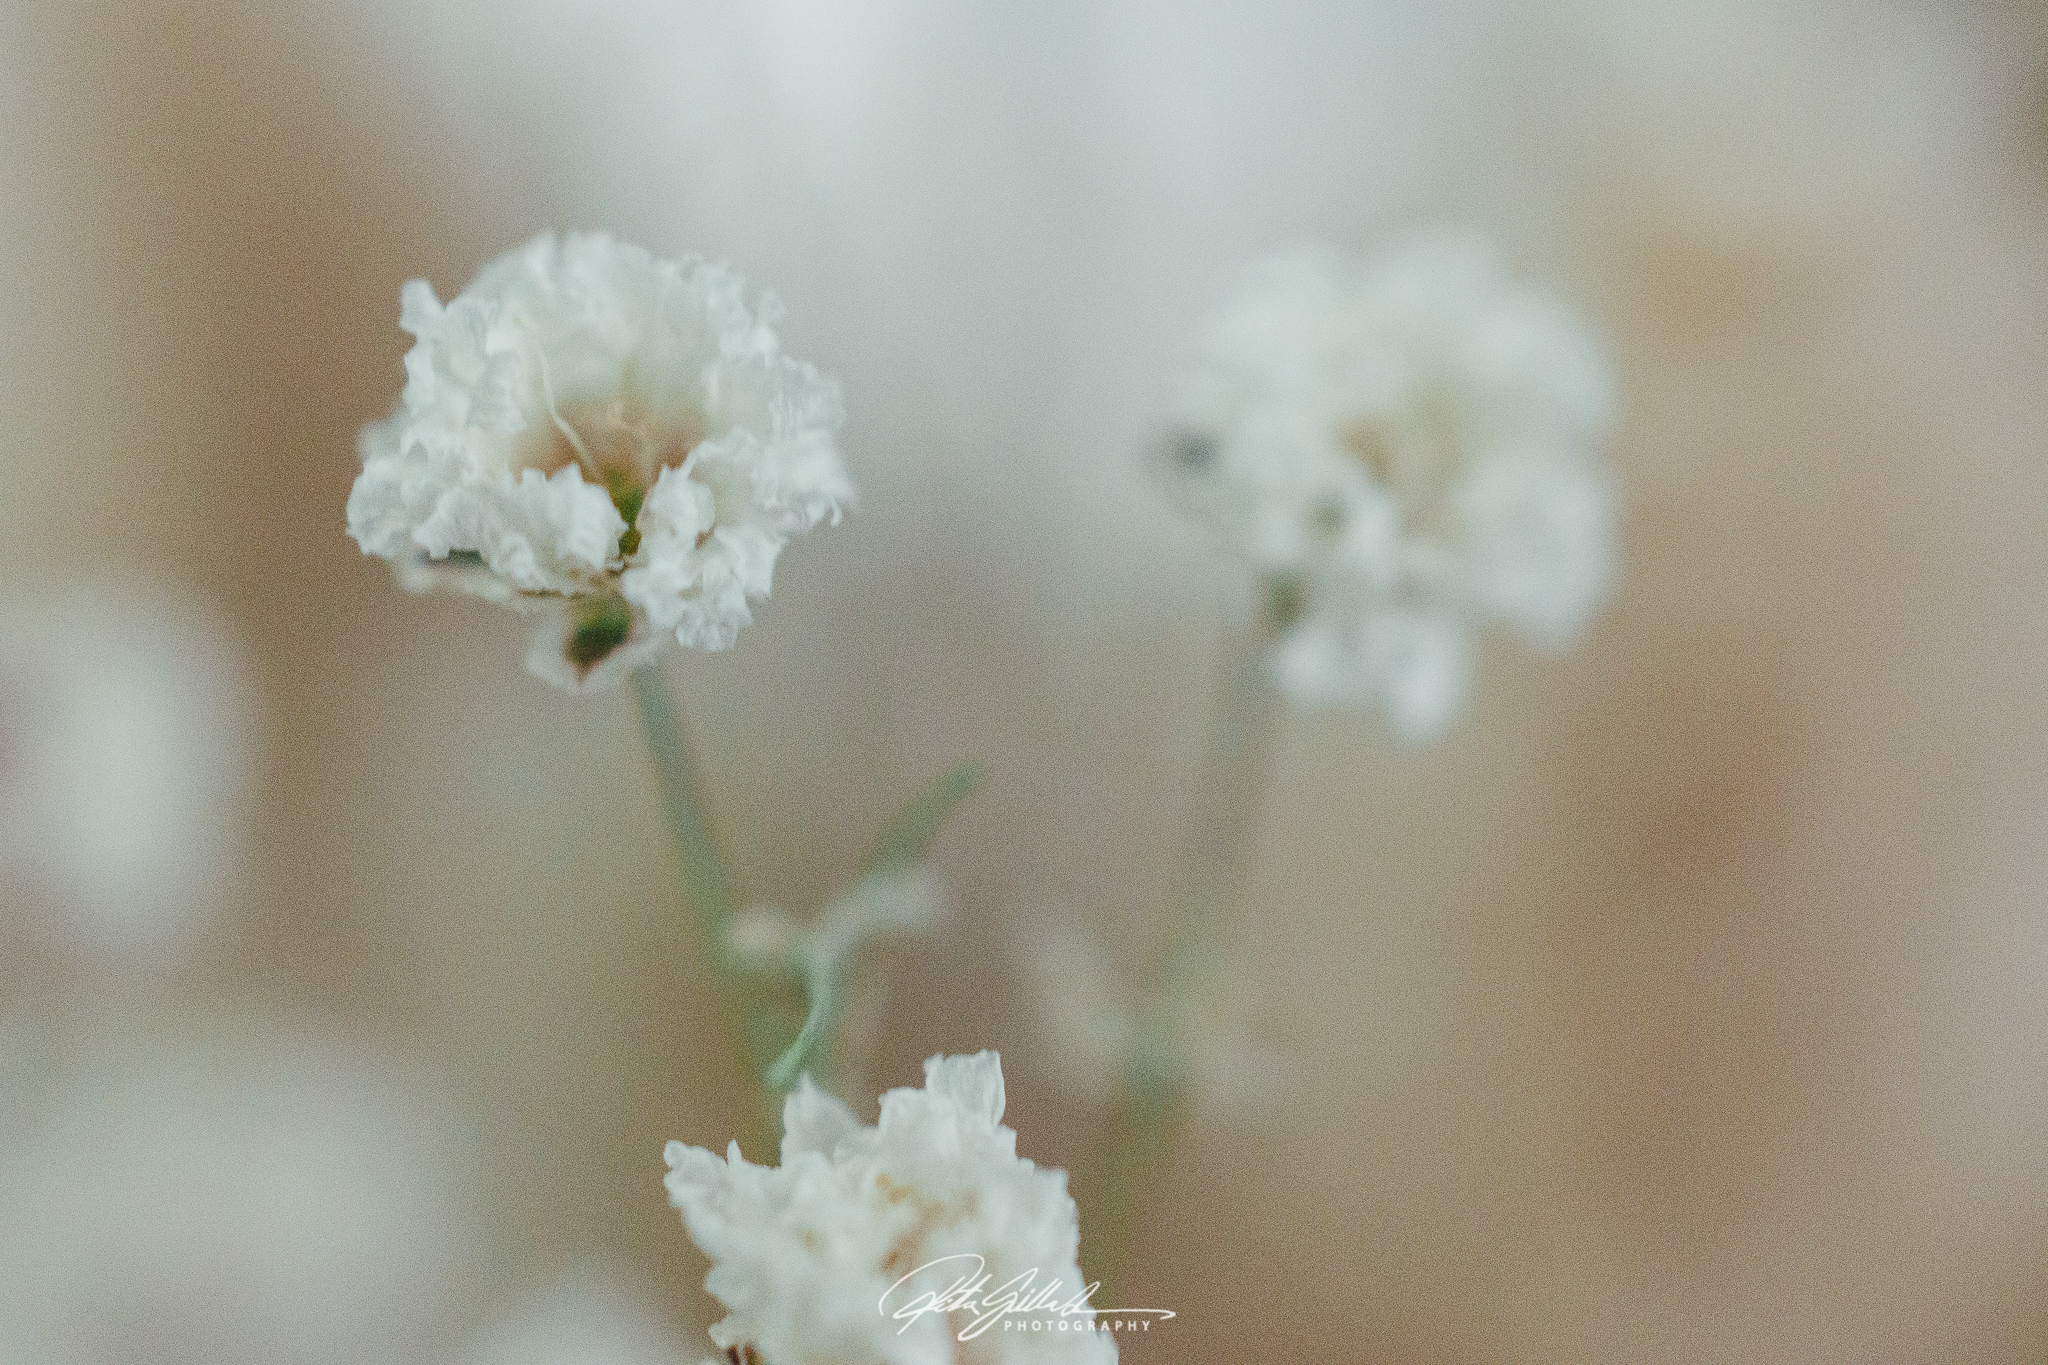
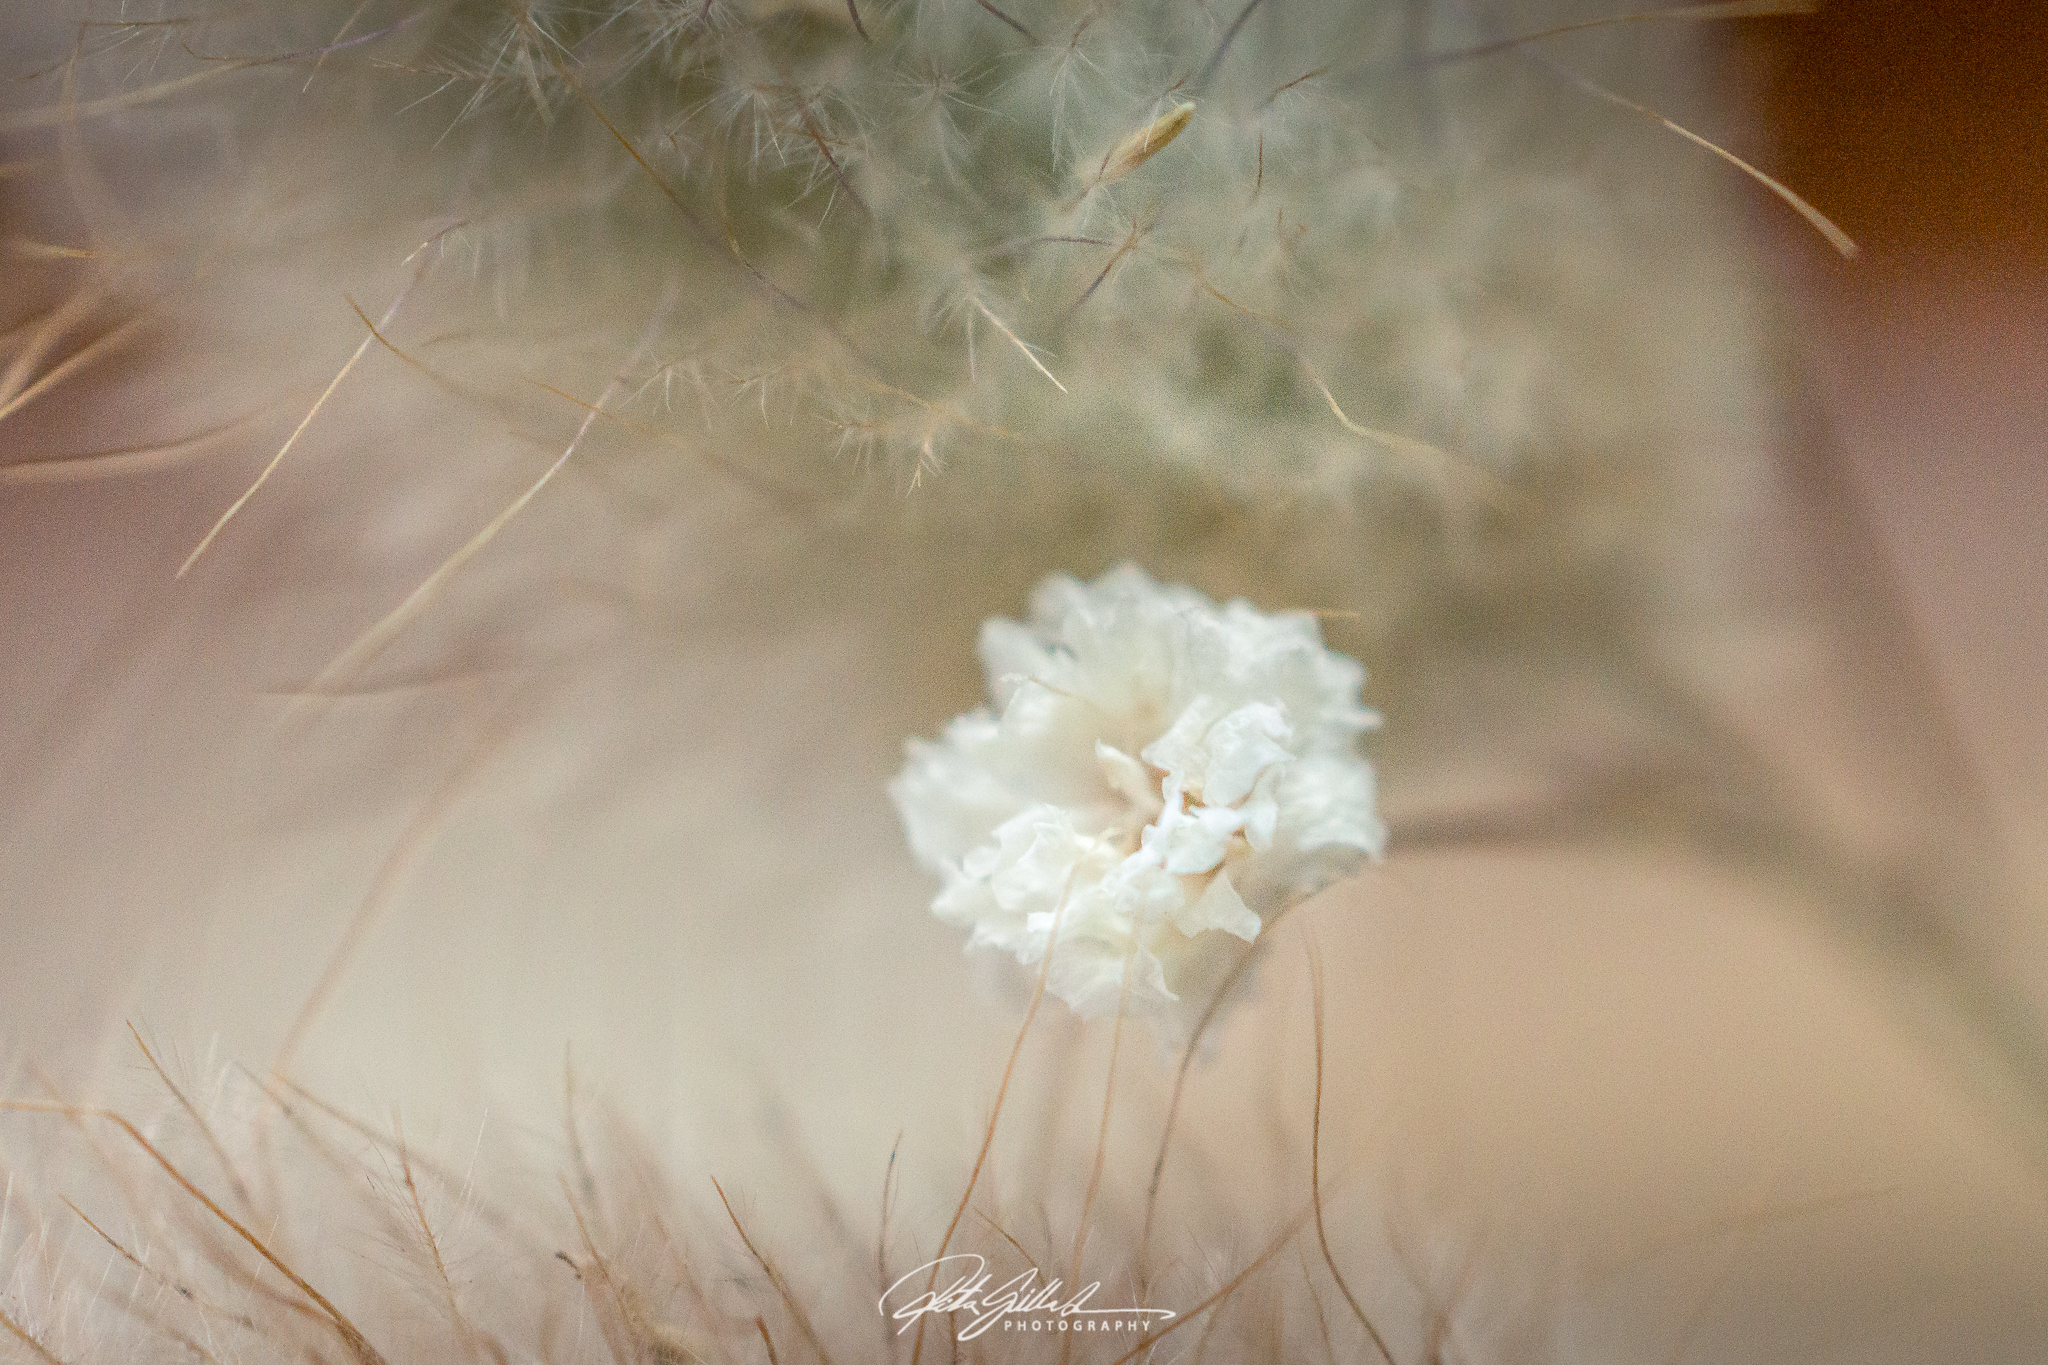
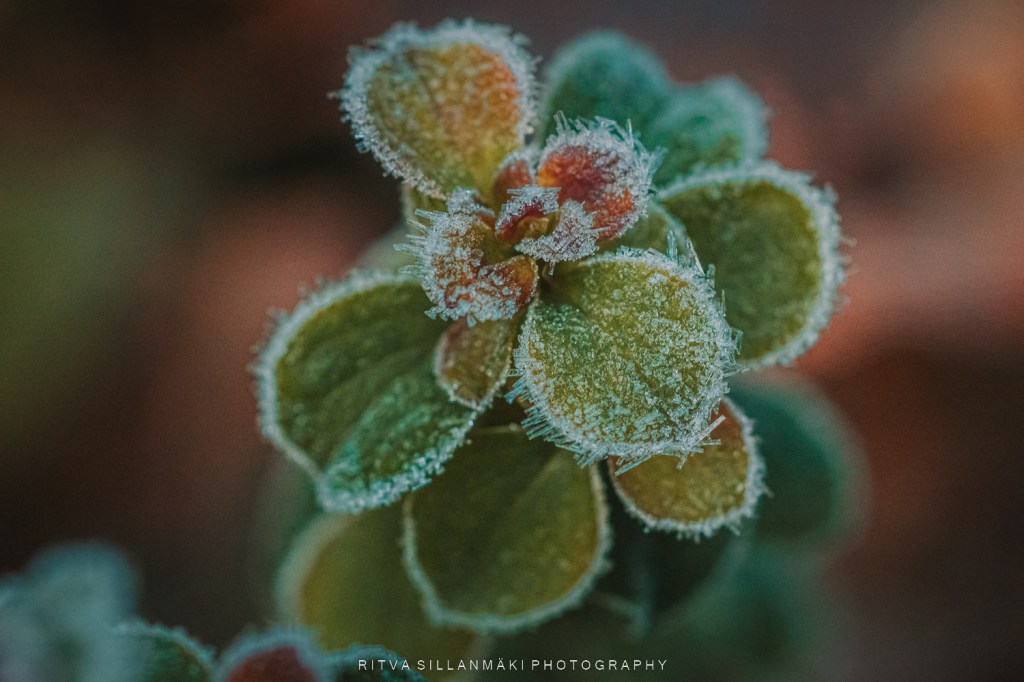
I have taken macro shots of nature this week and it fits this topic ever so well. The others are from my archives.

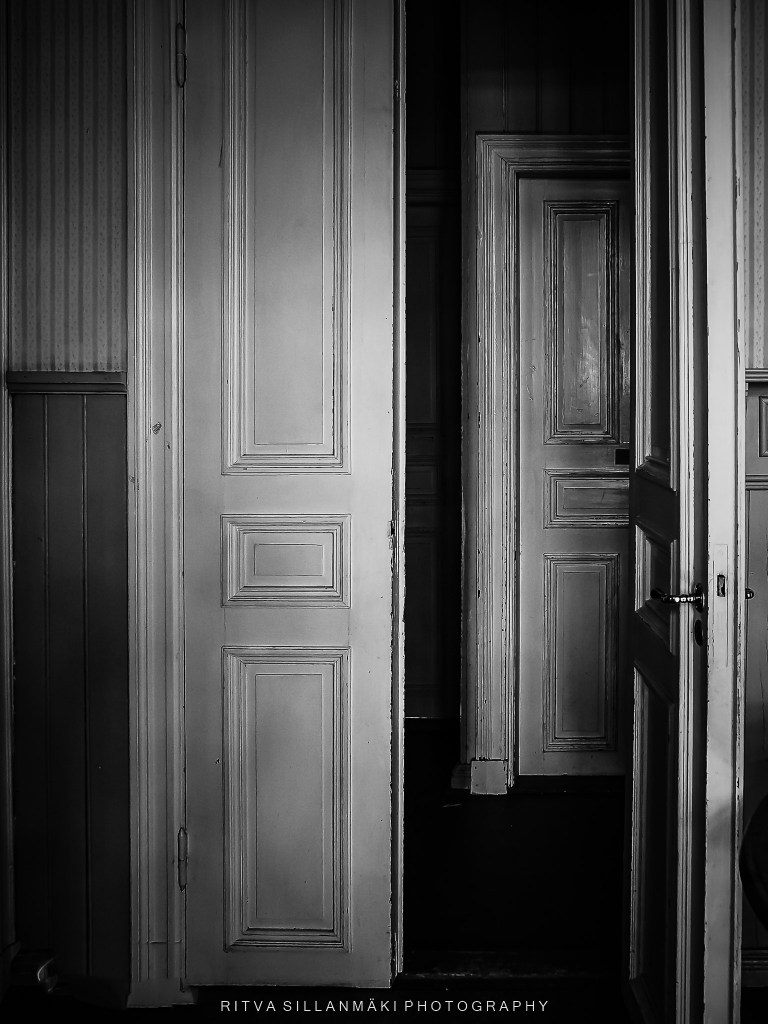
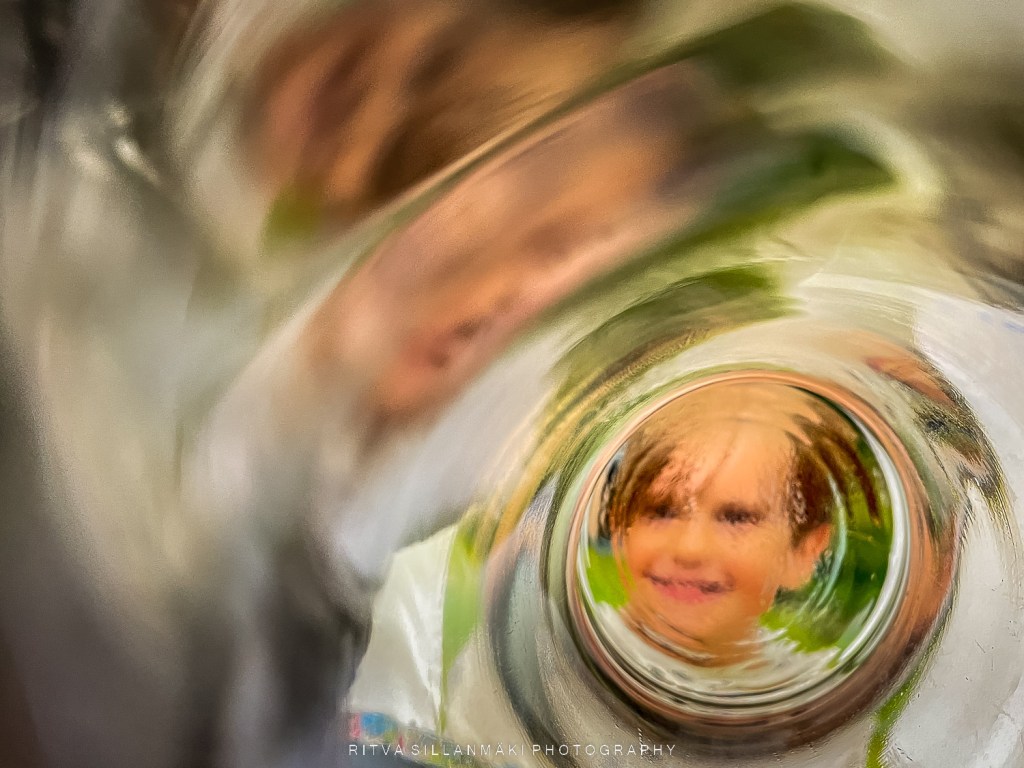
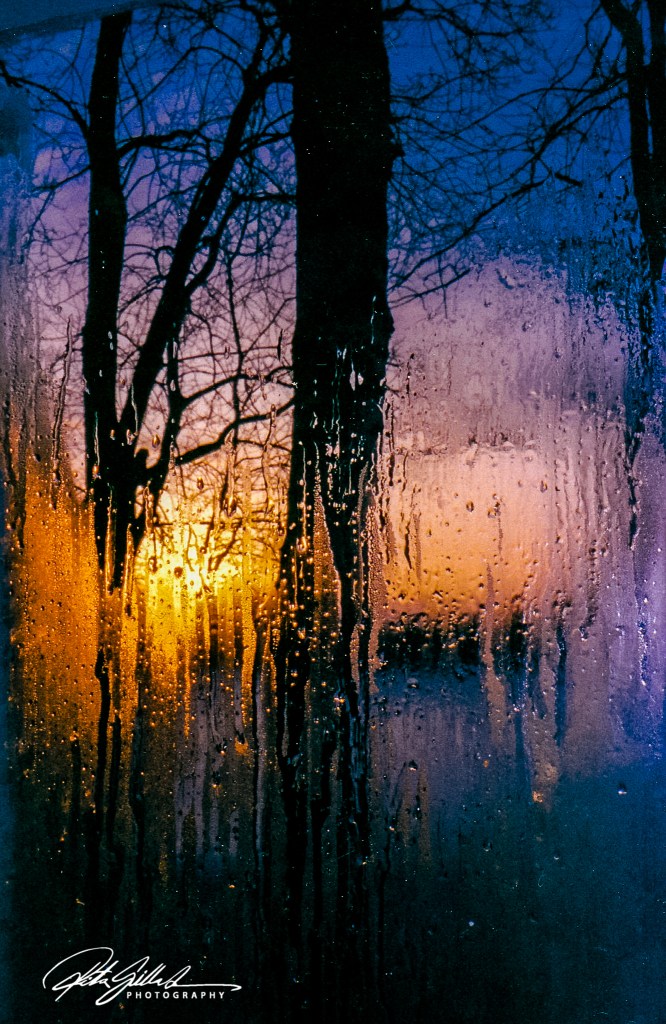
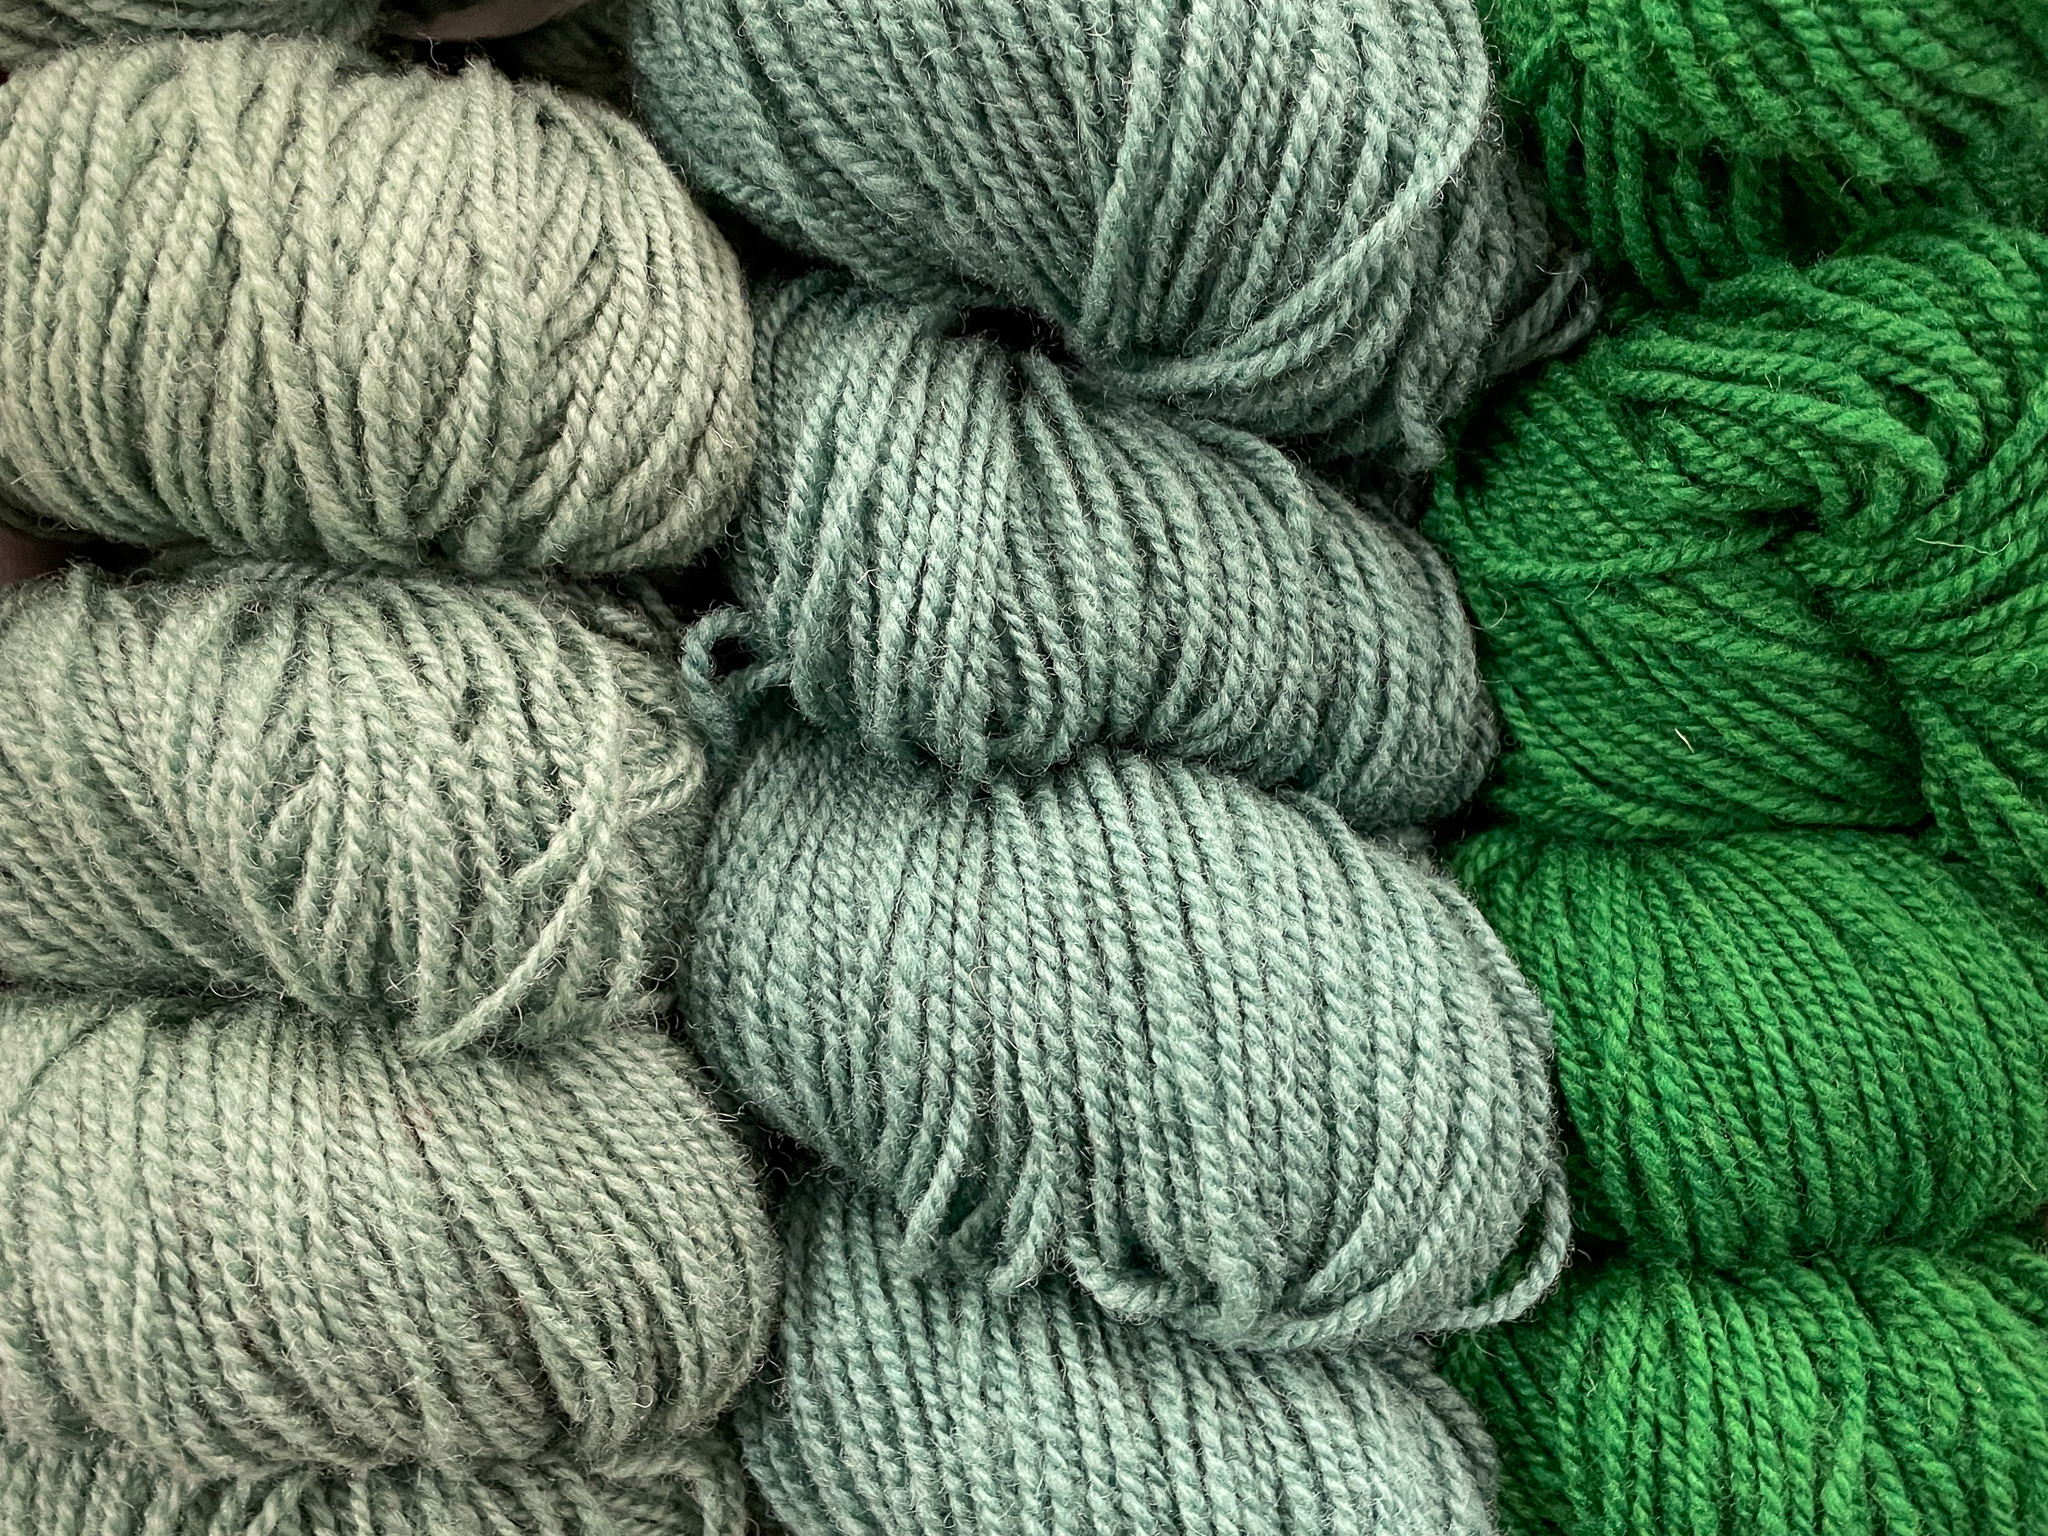
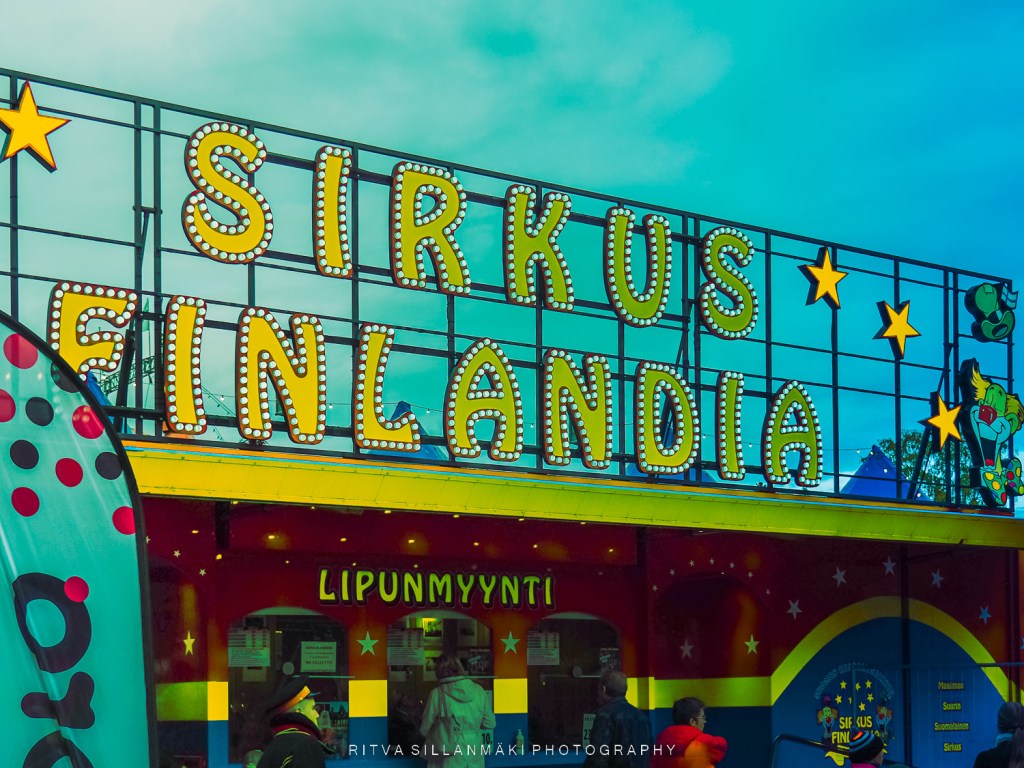
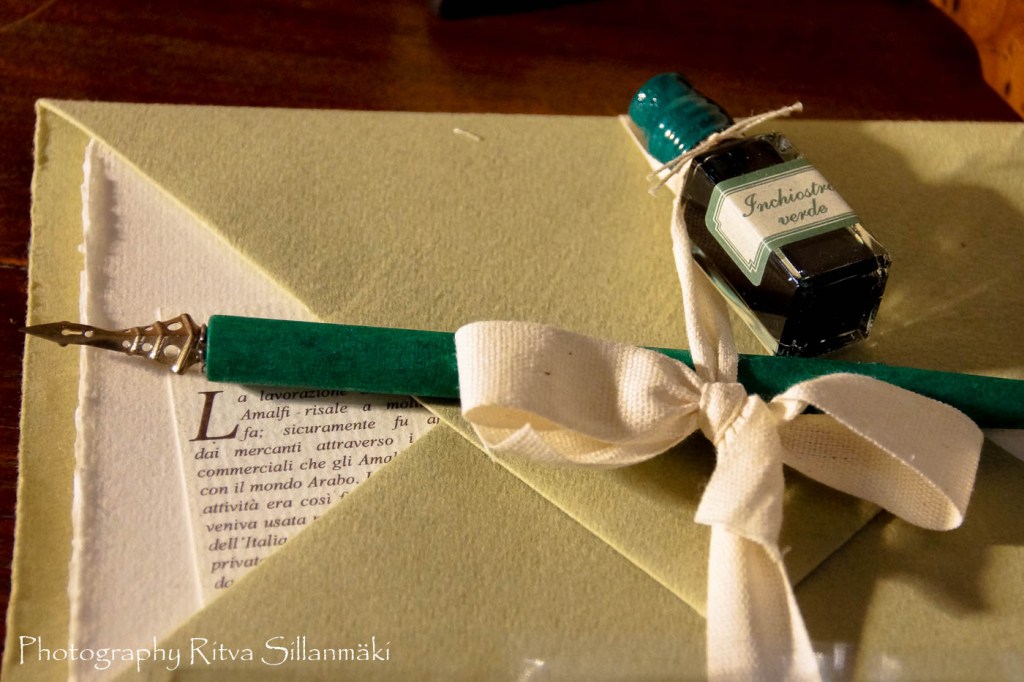
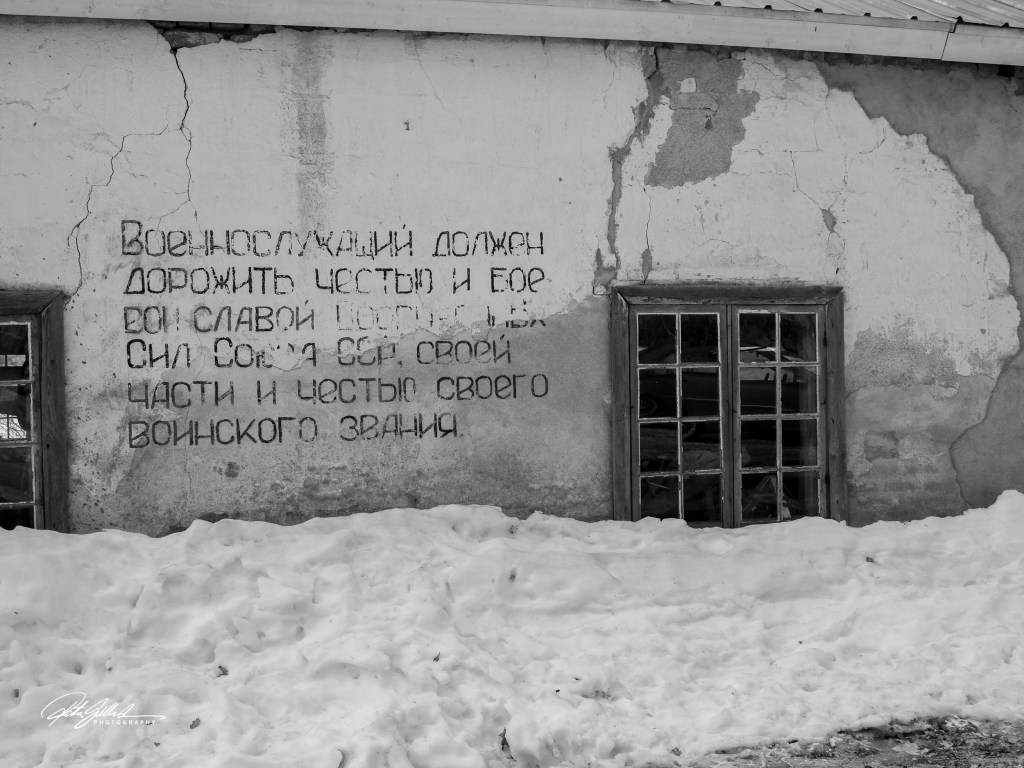
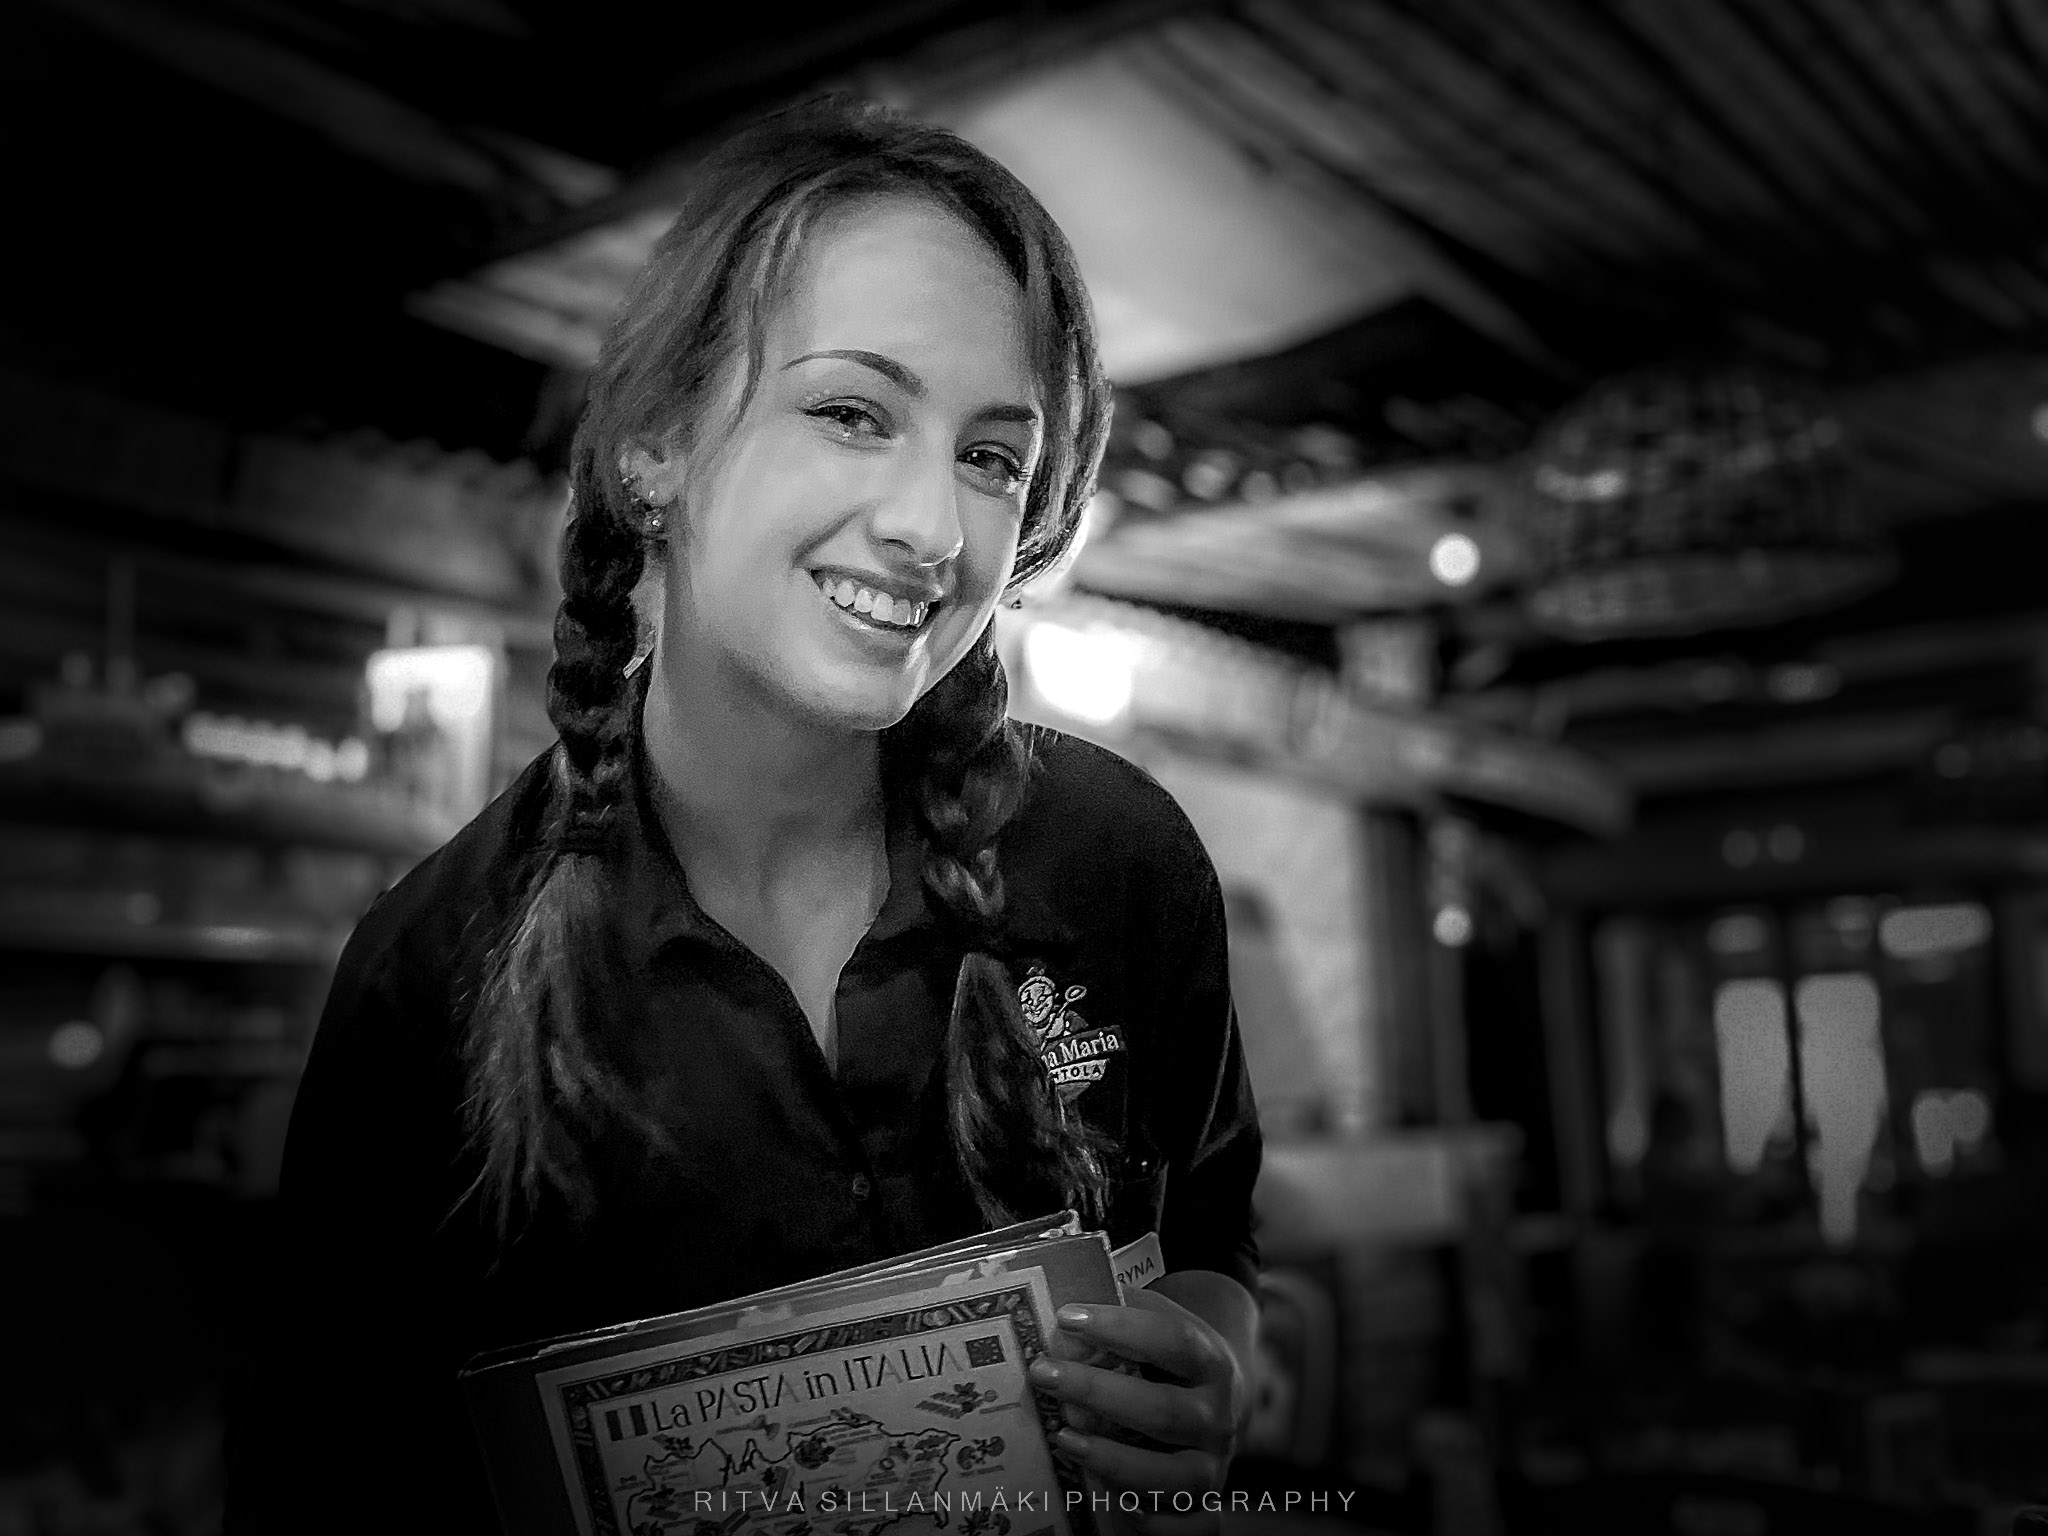
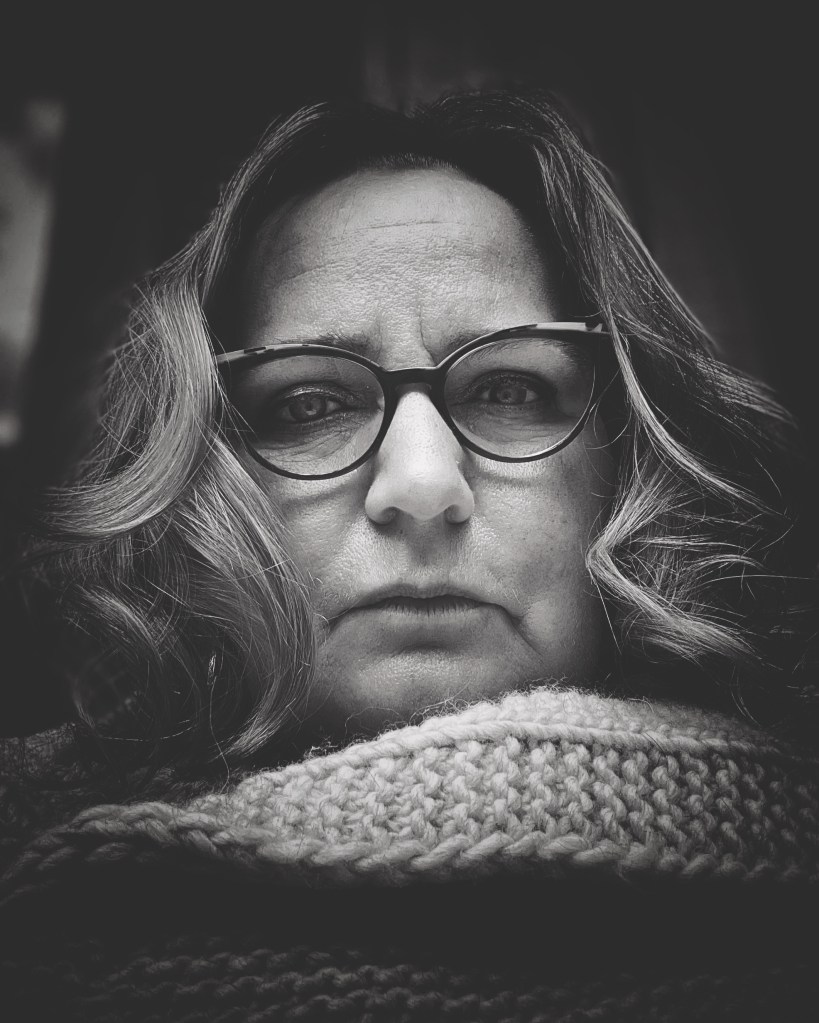
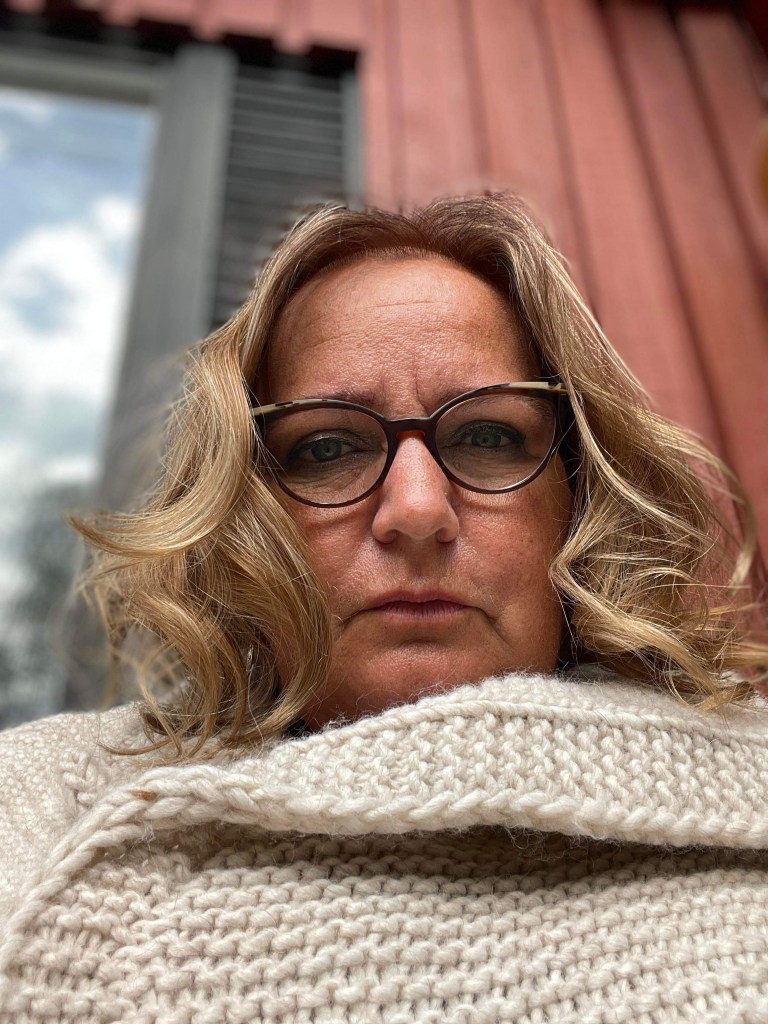
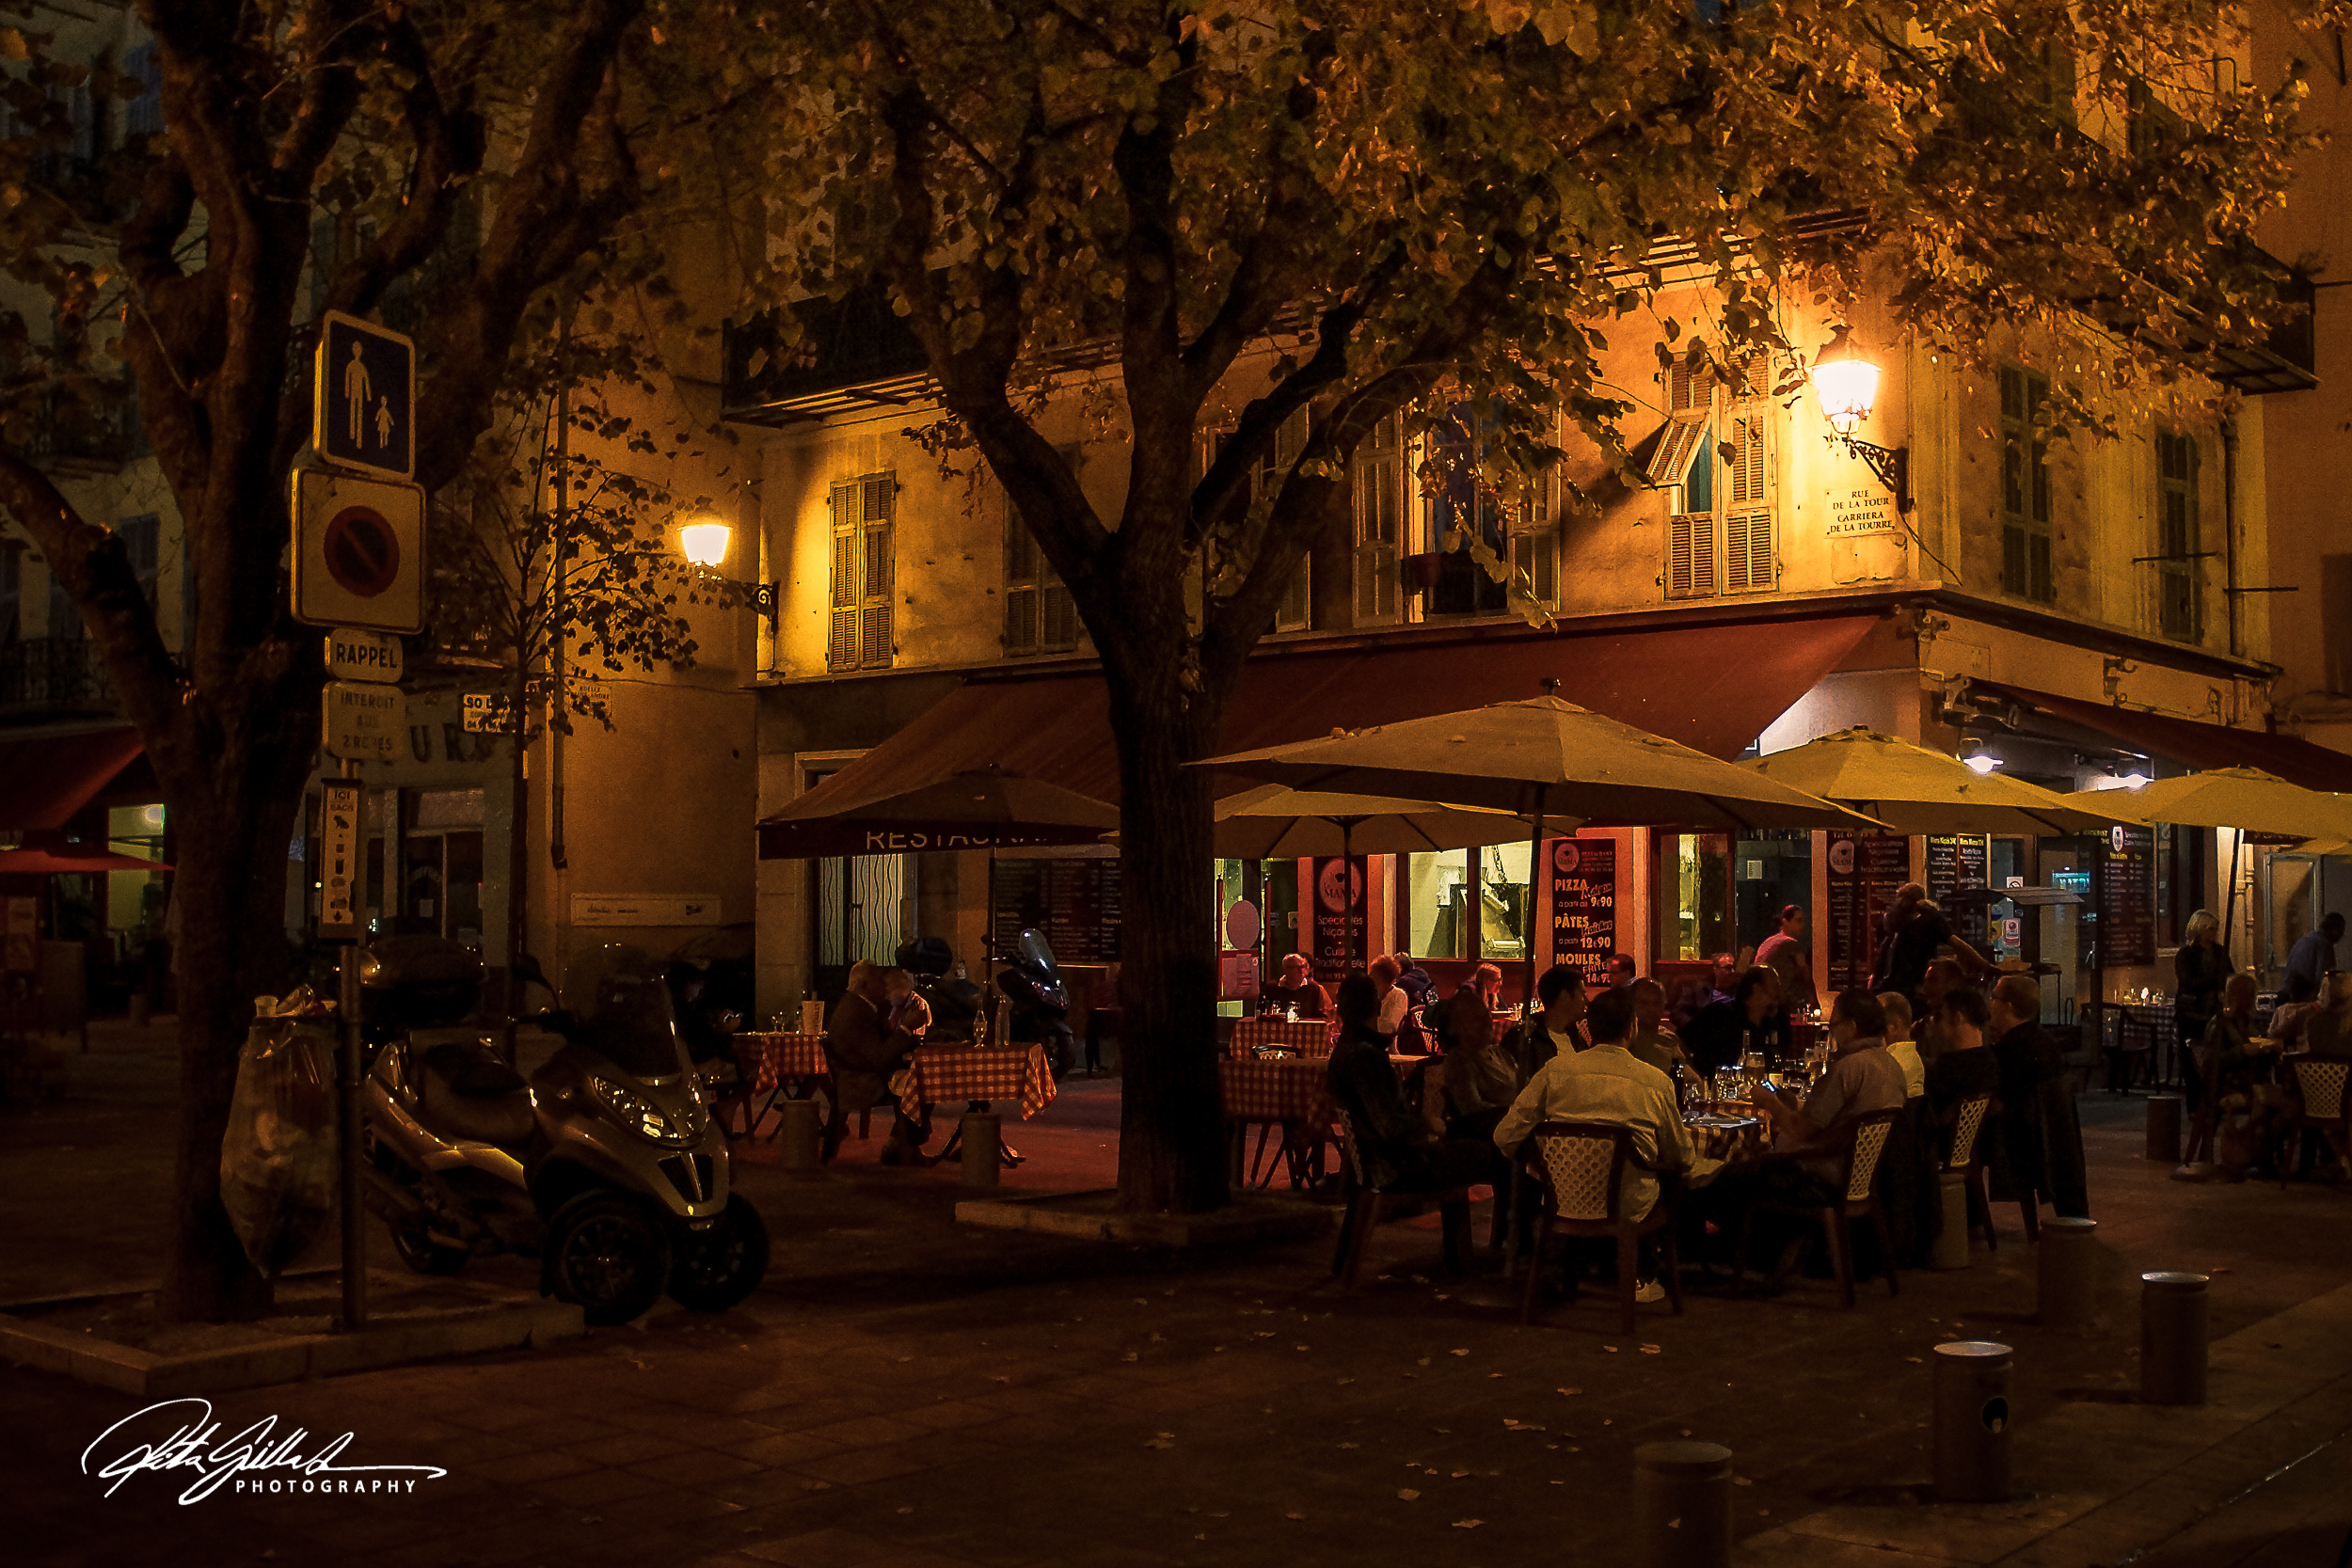
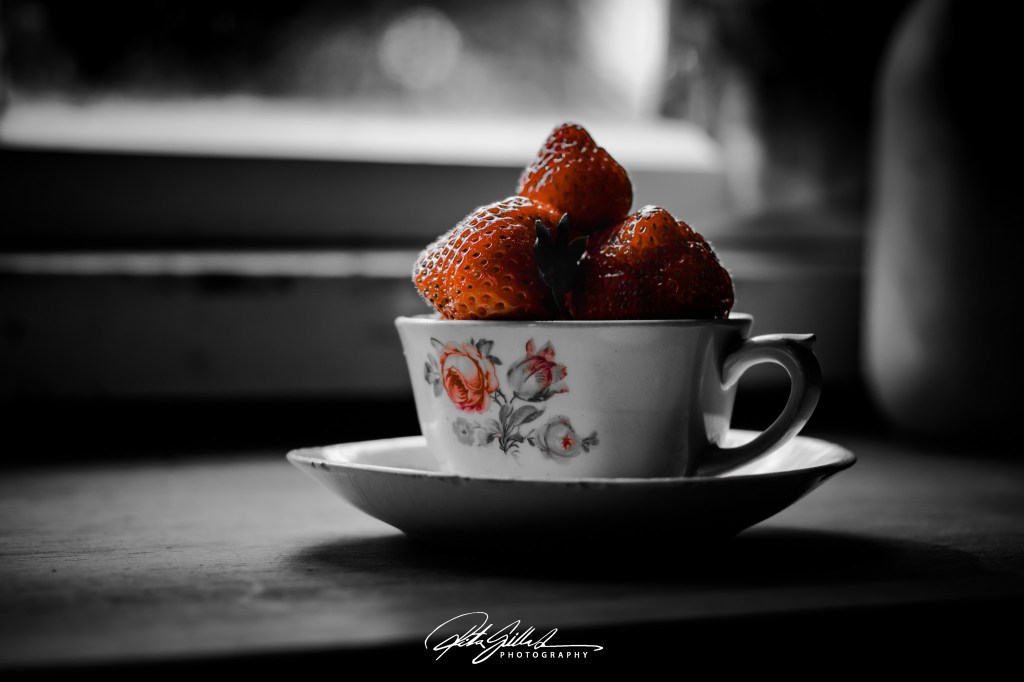
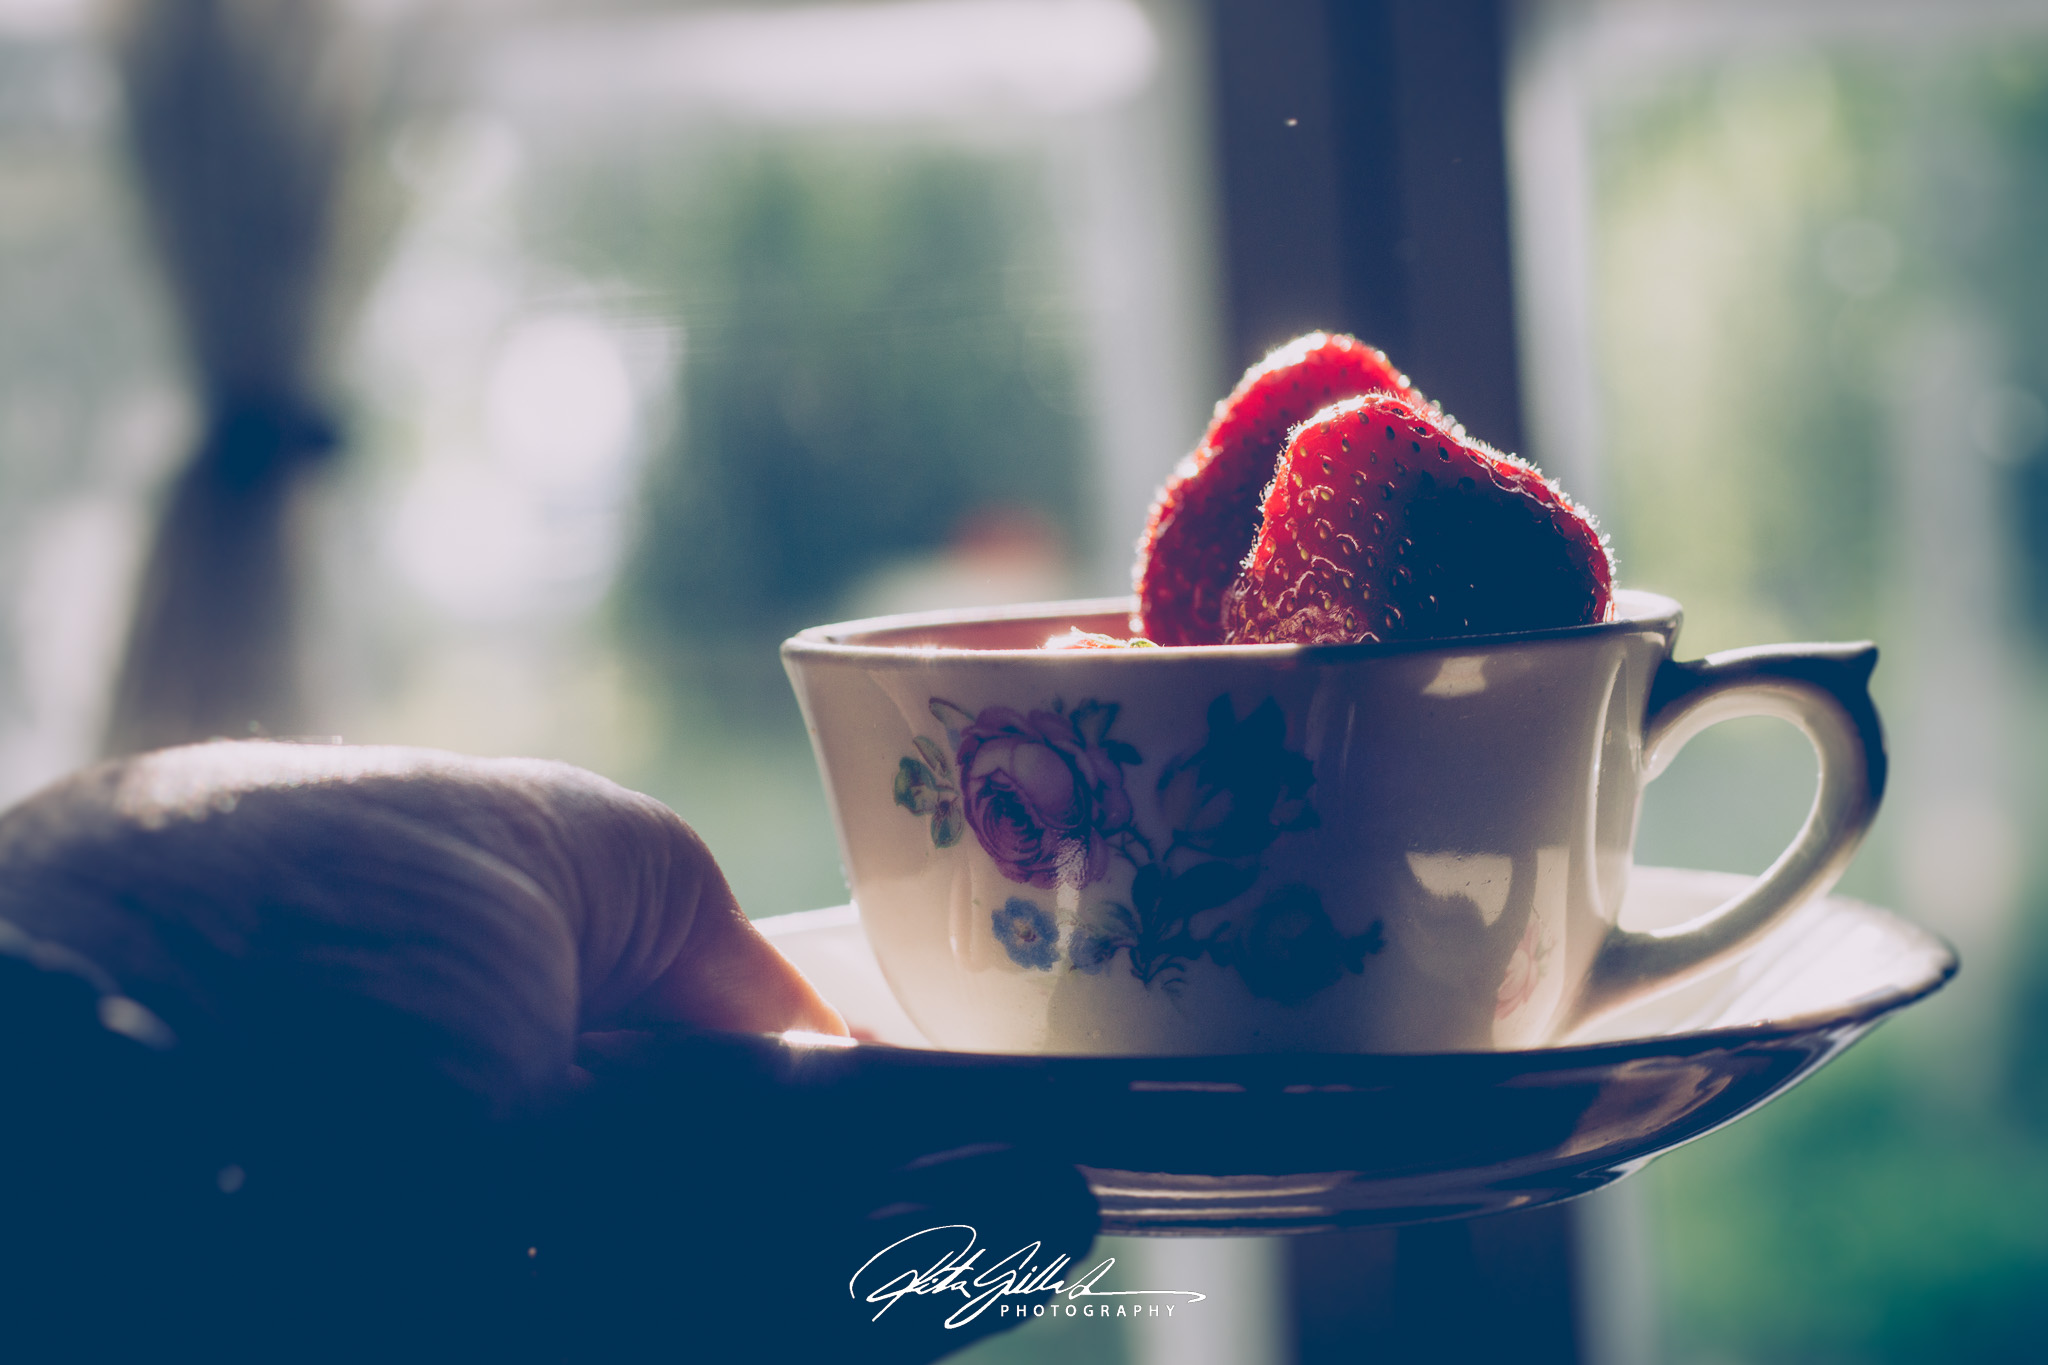
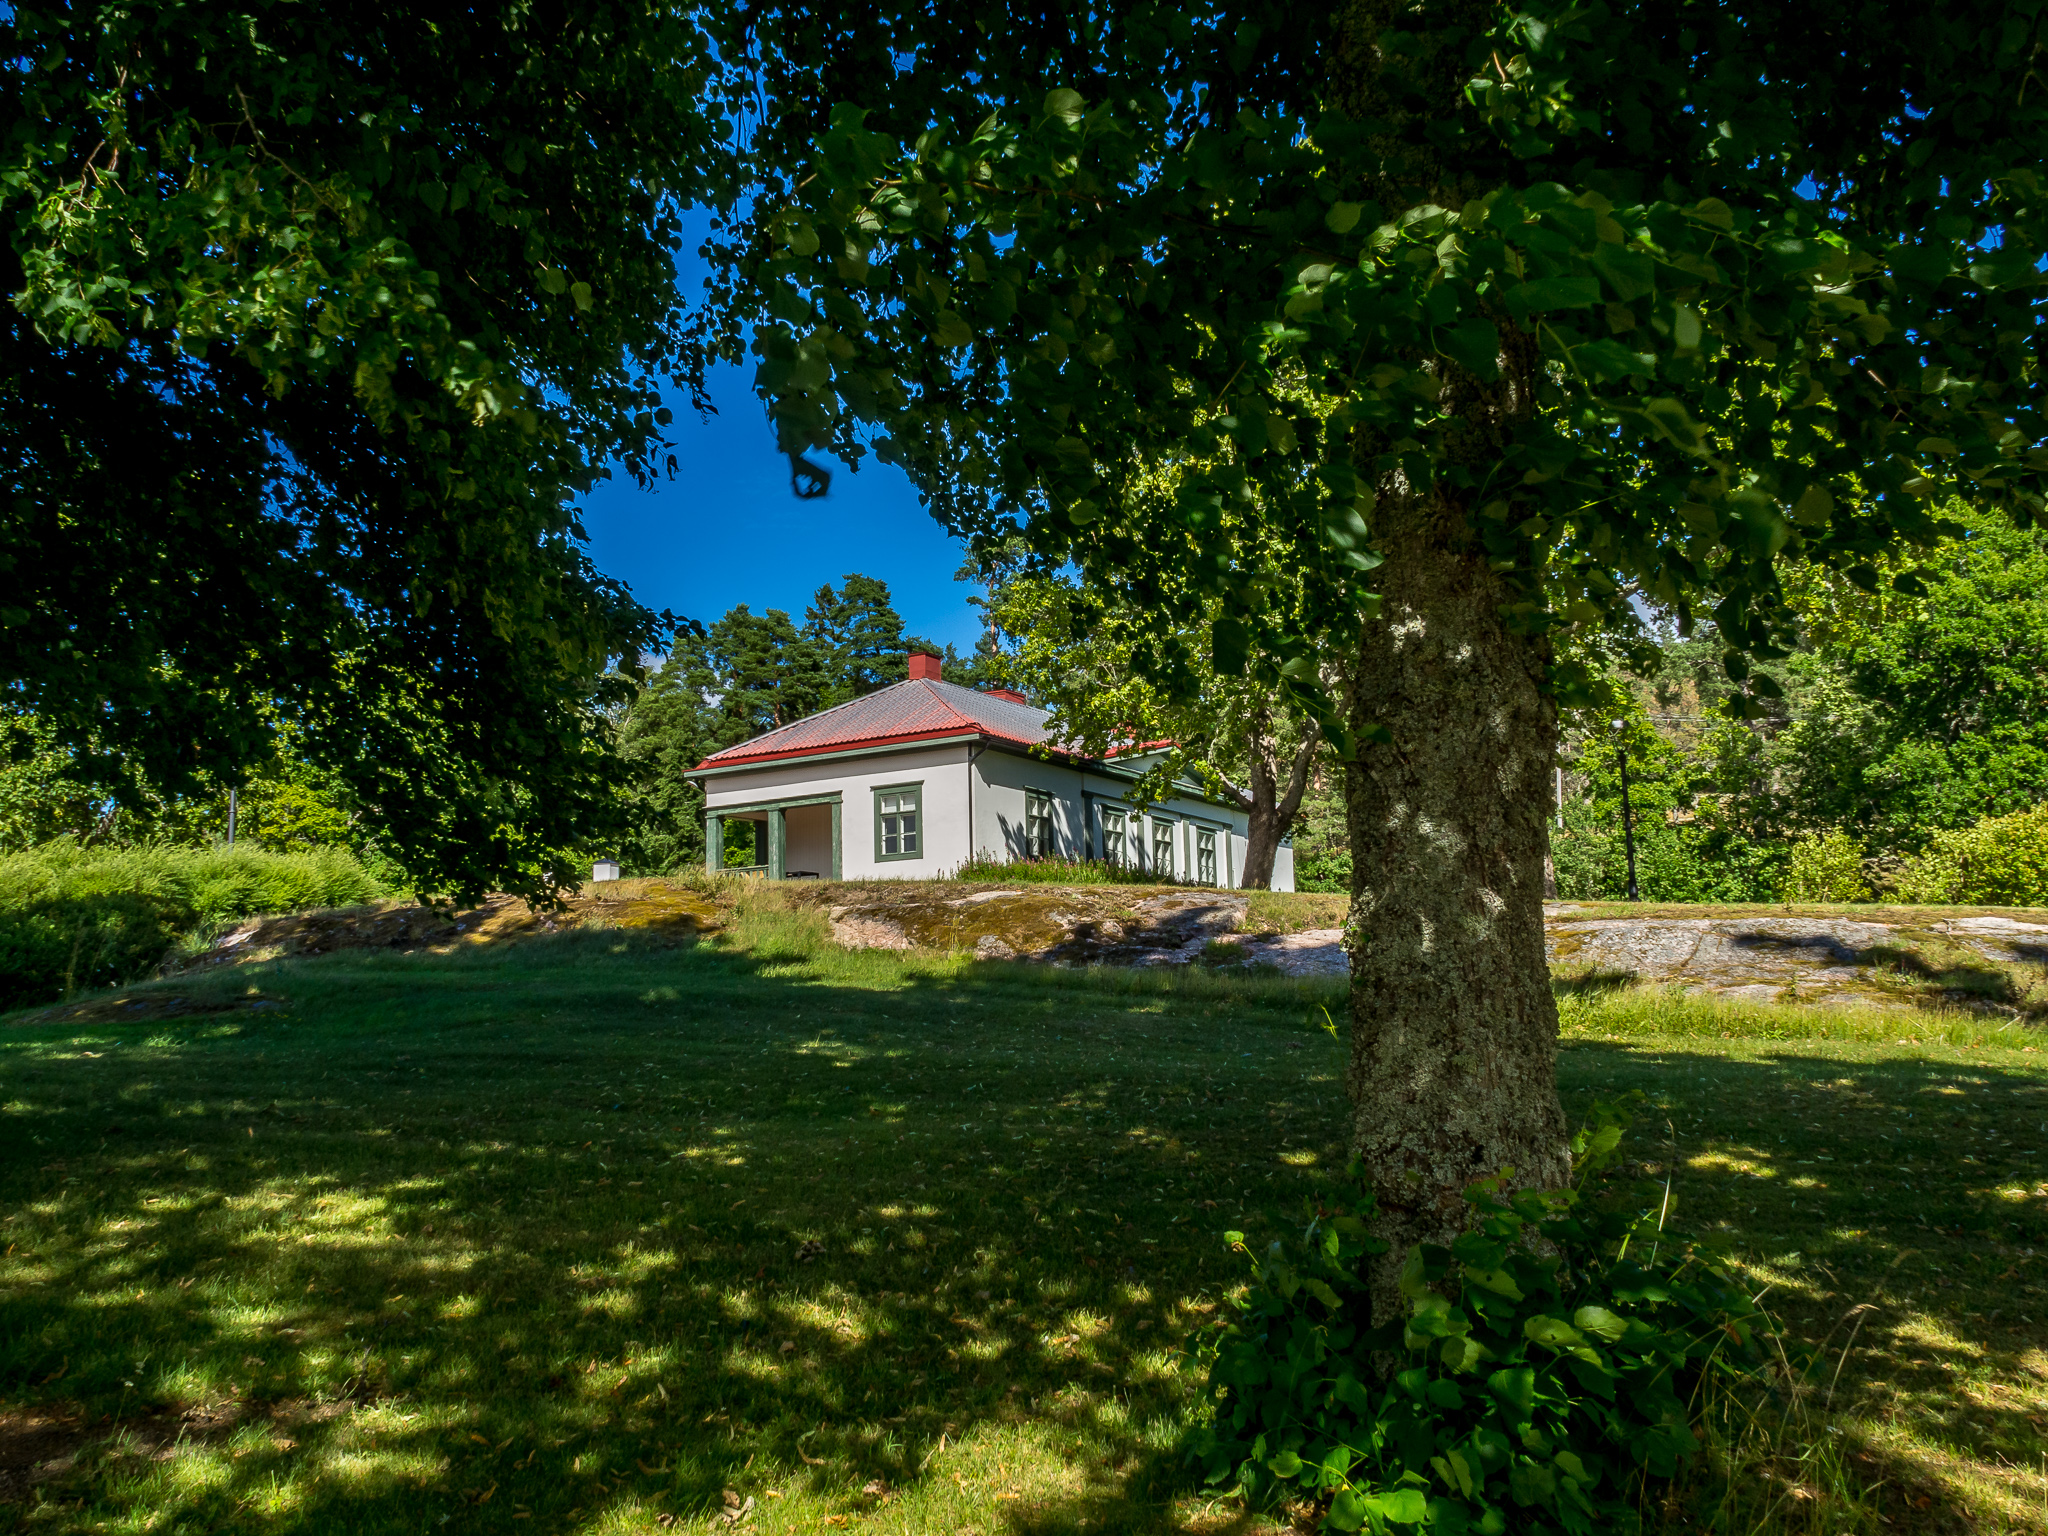
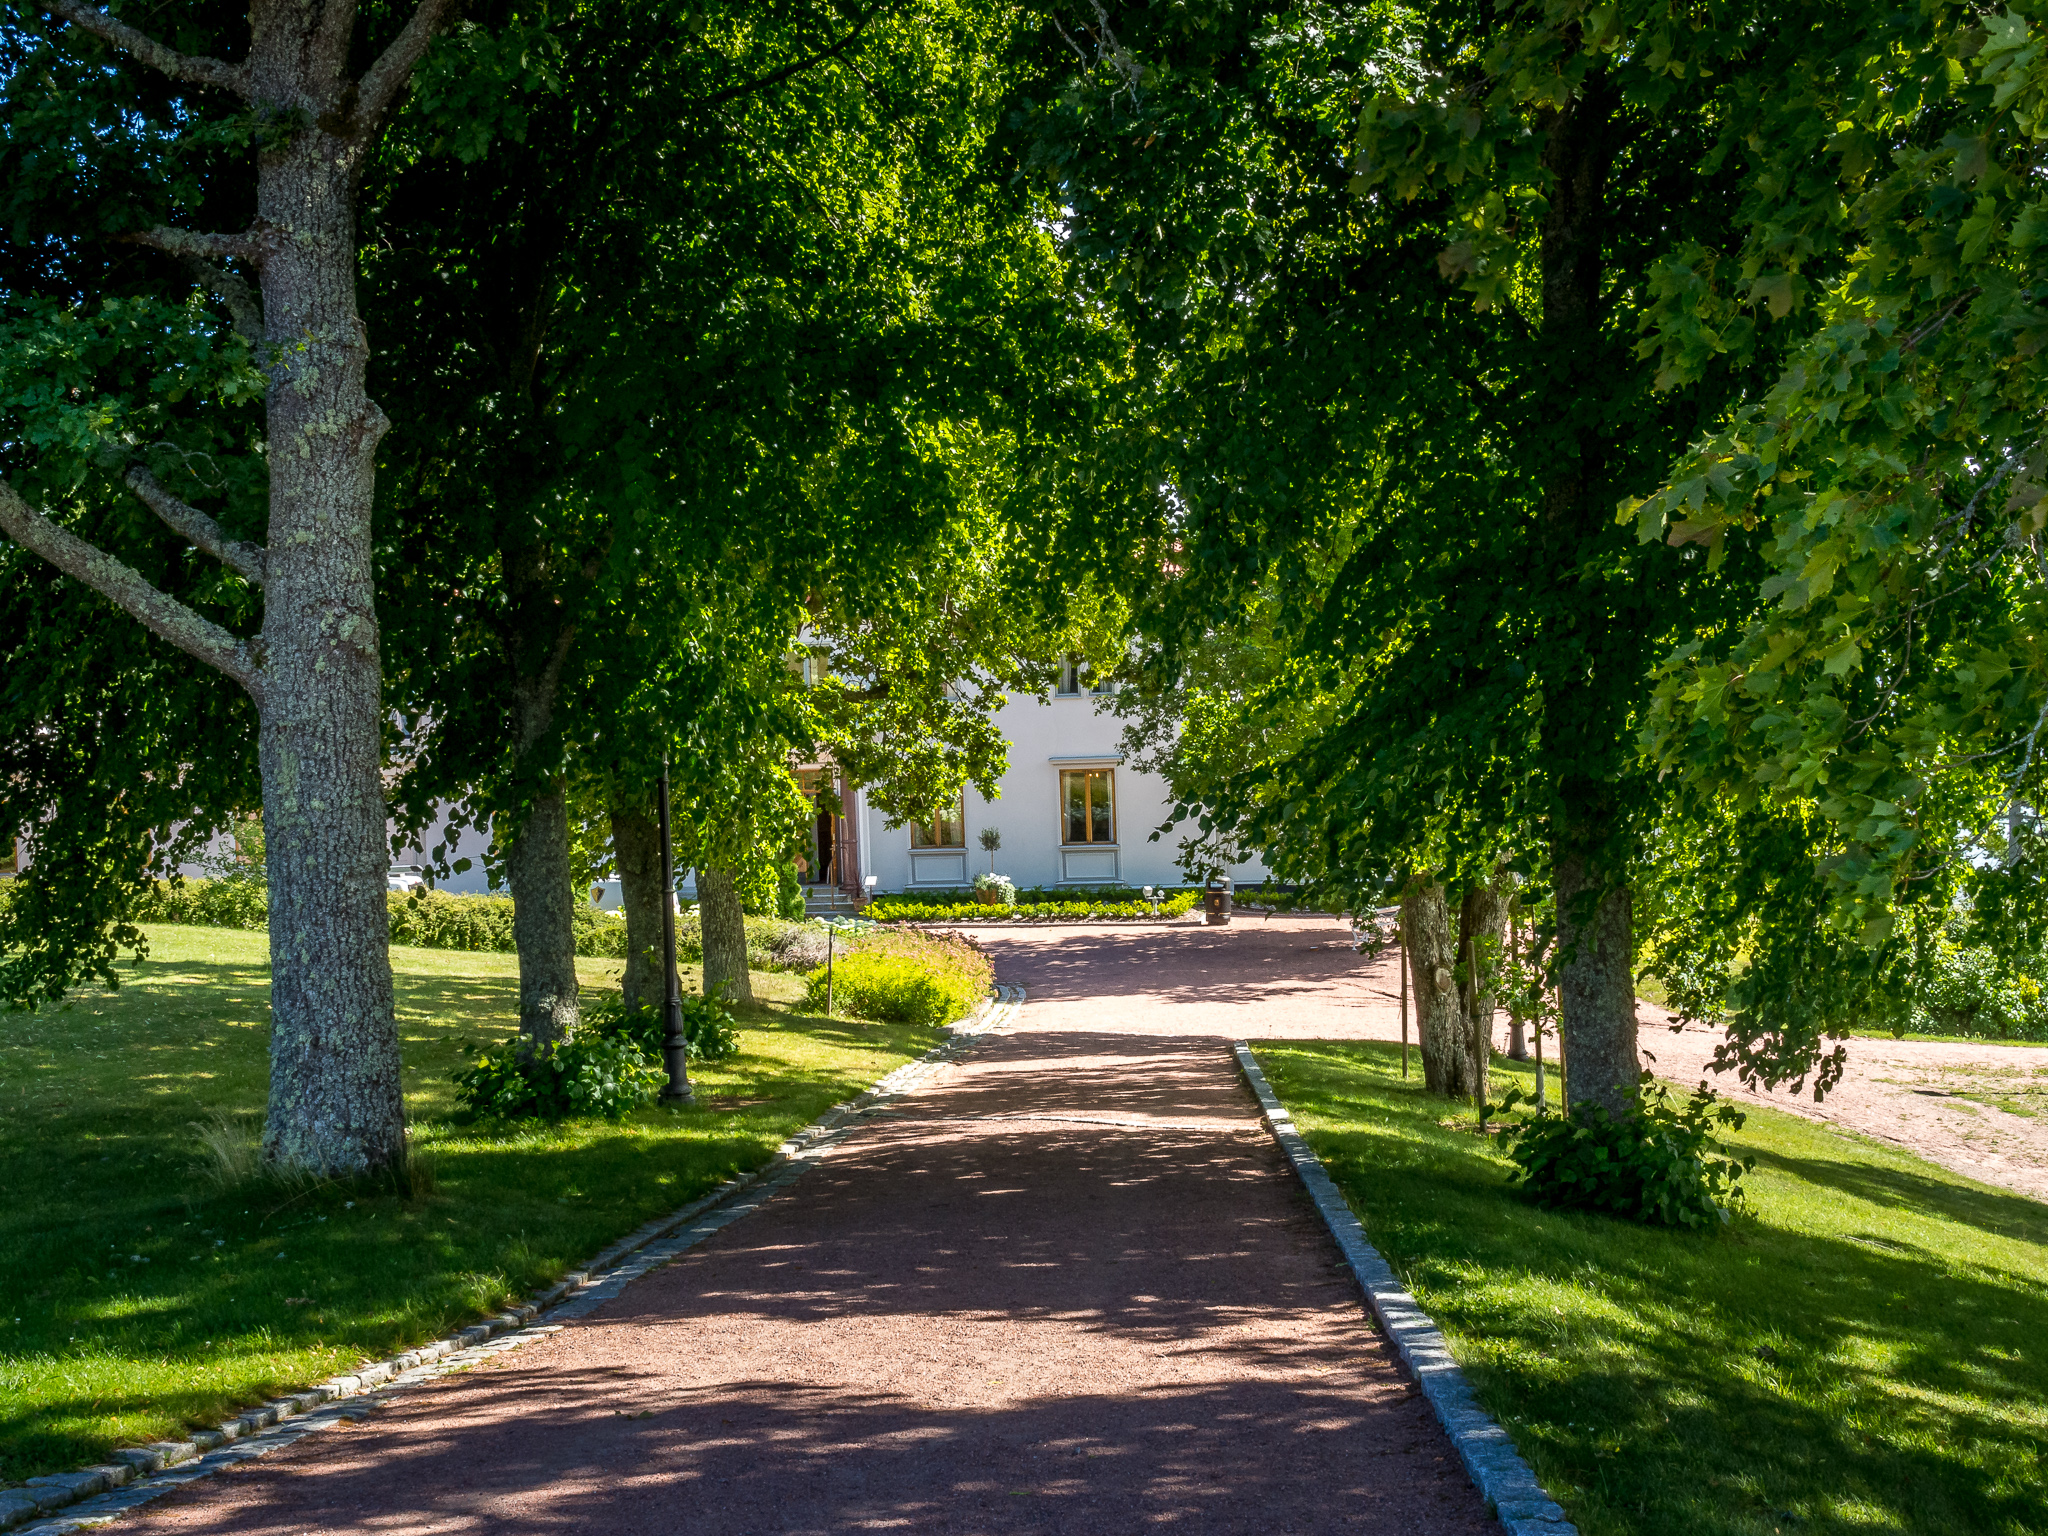
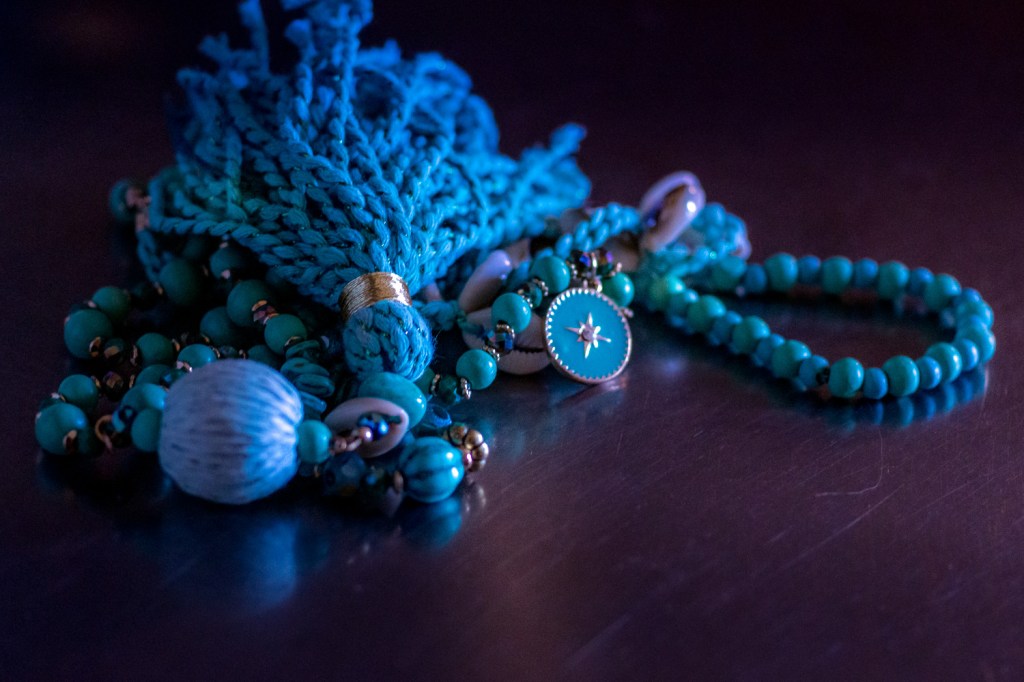
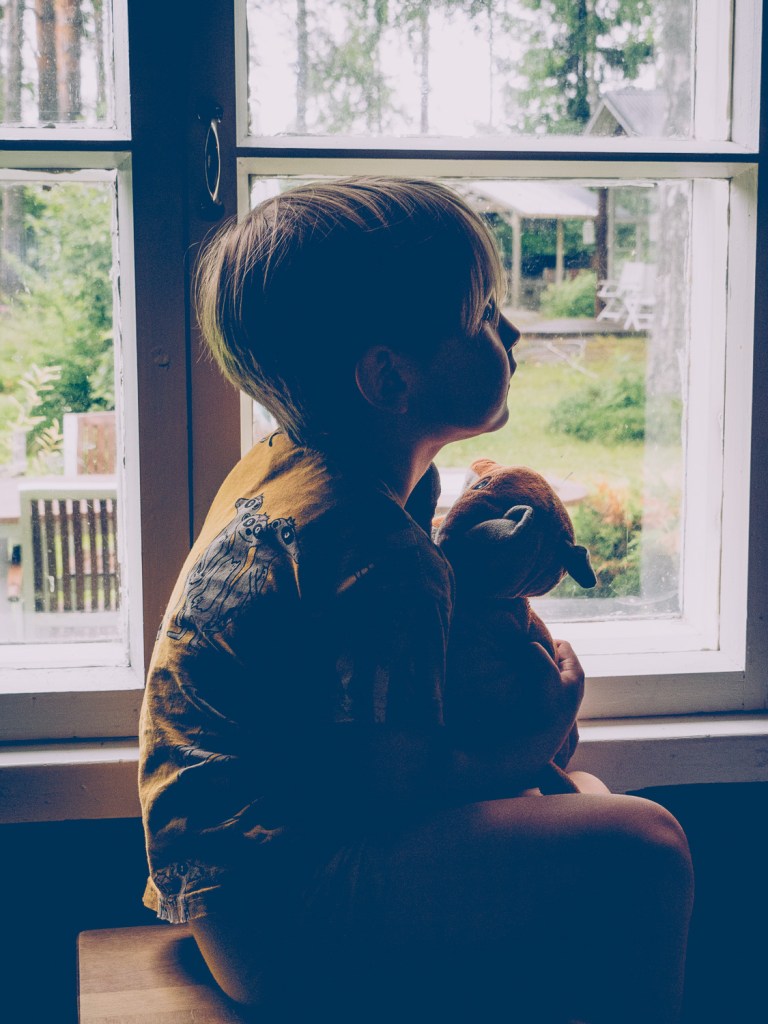
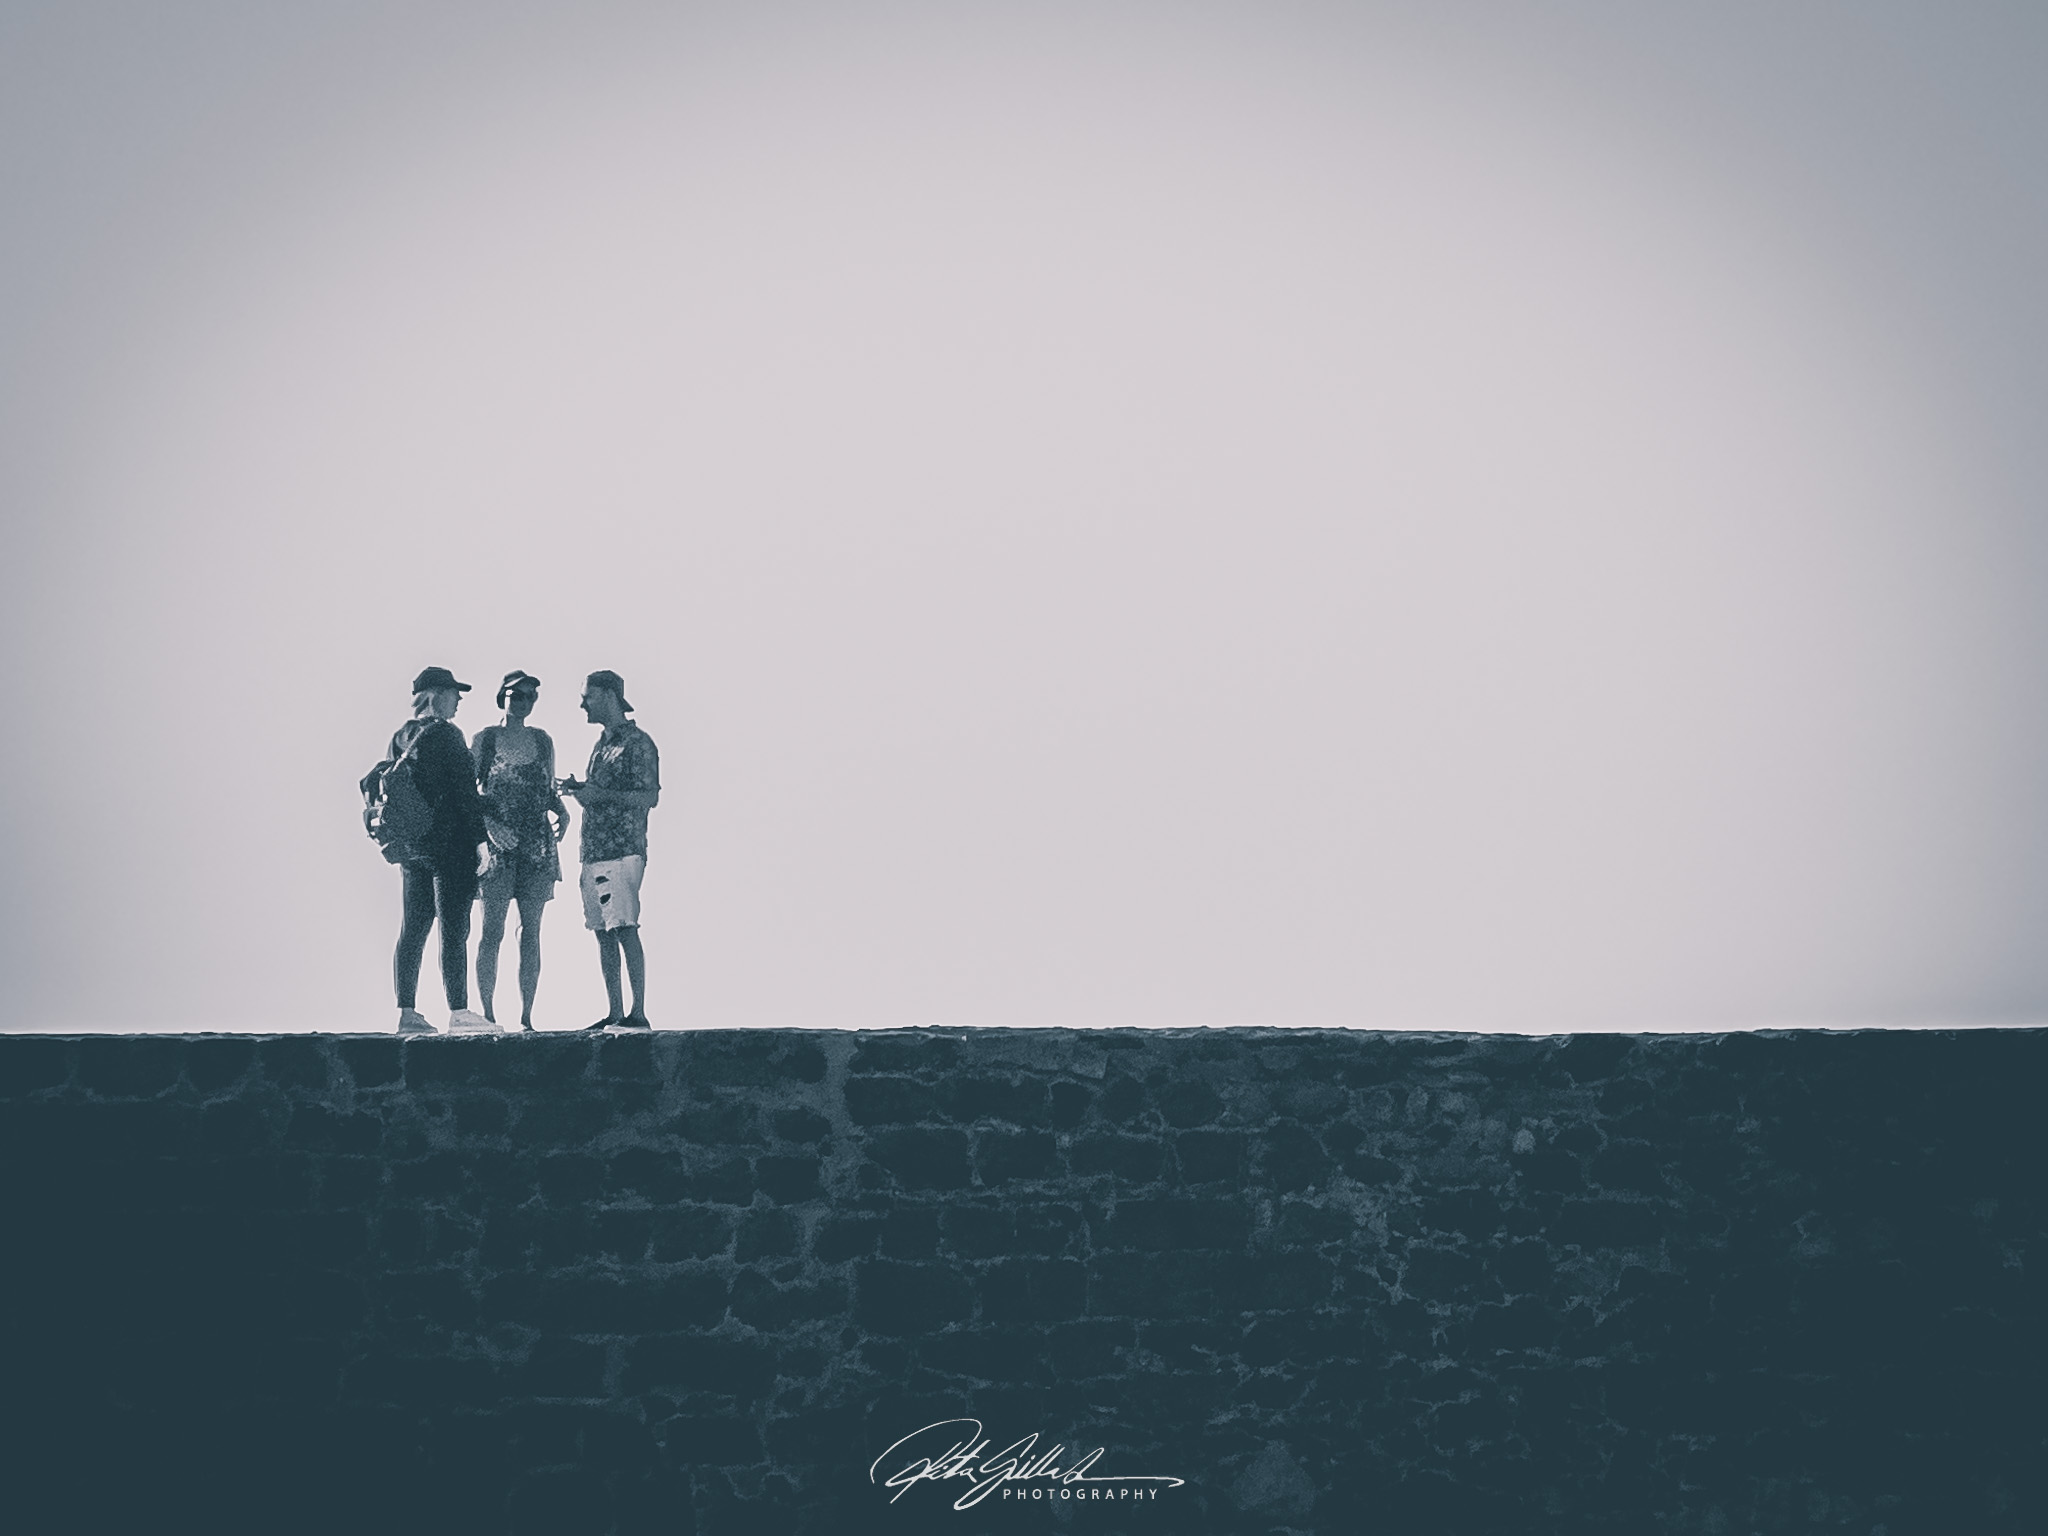
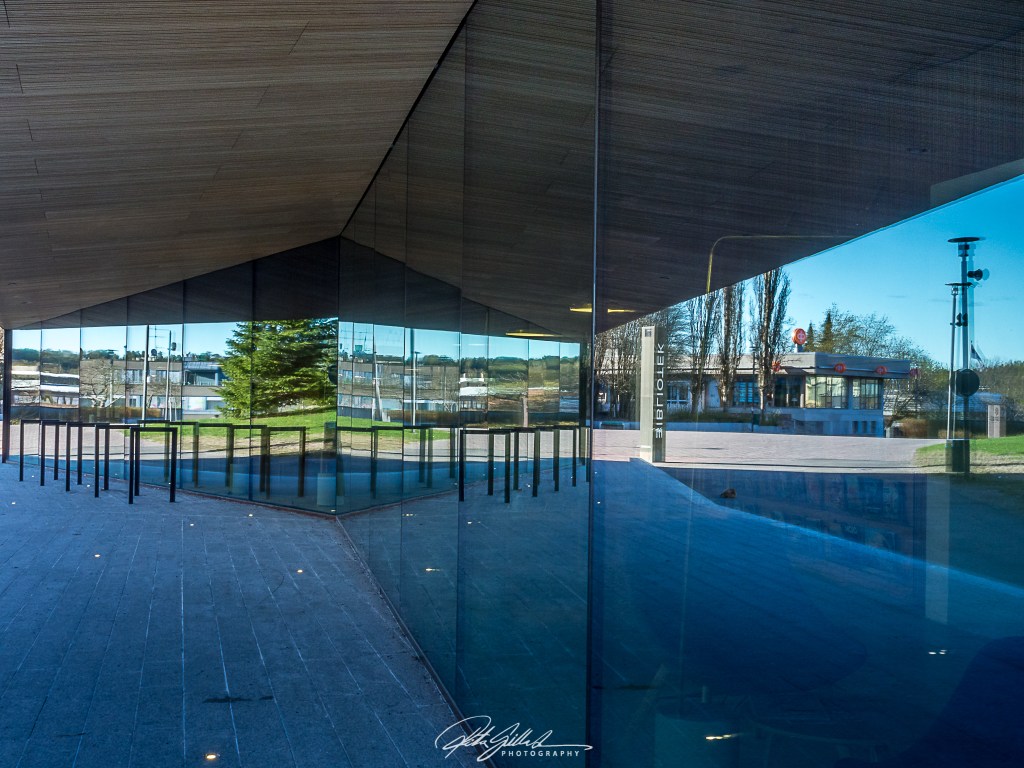
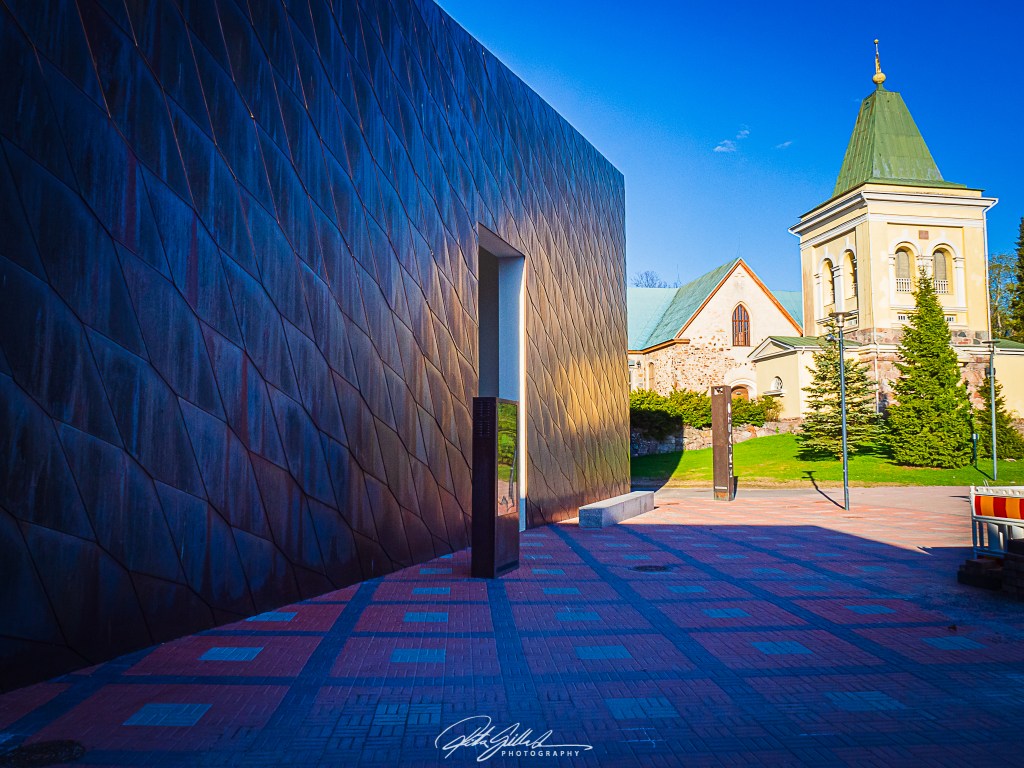
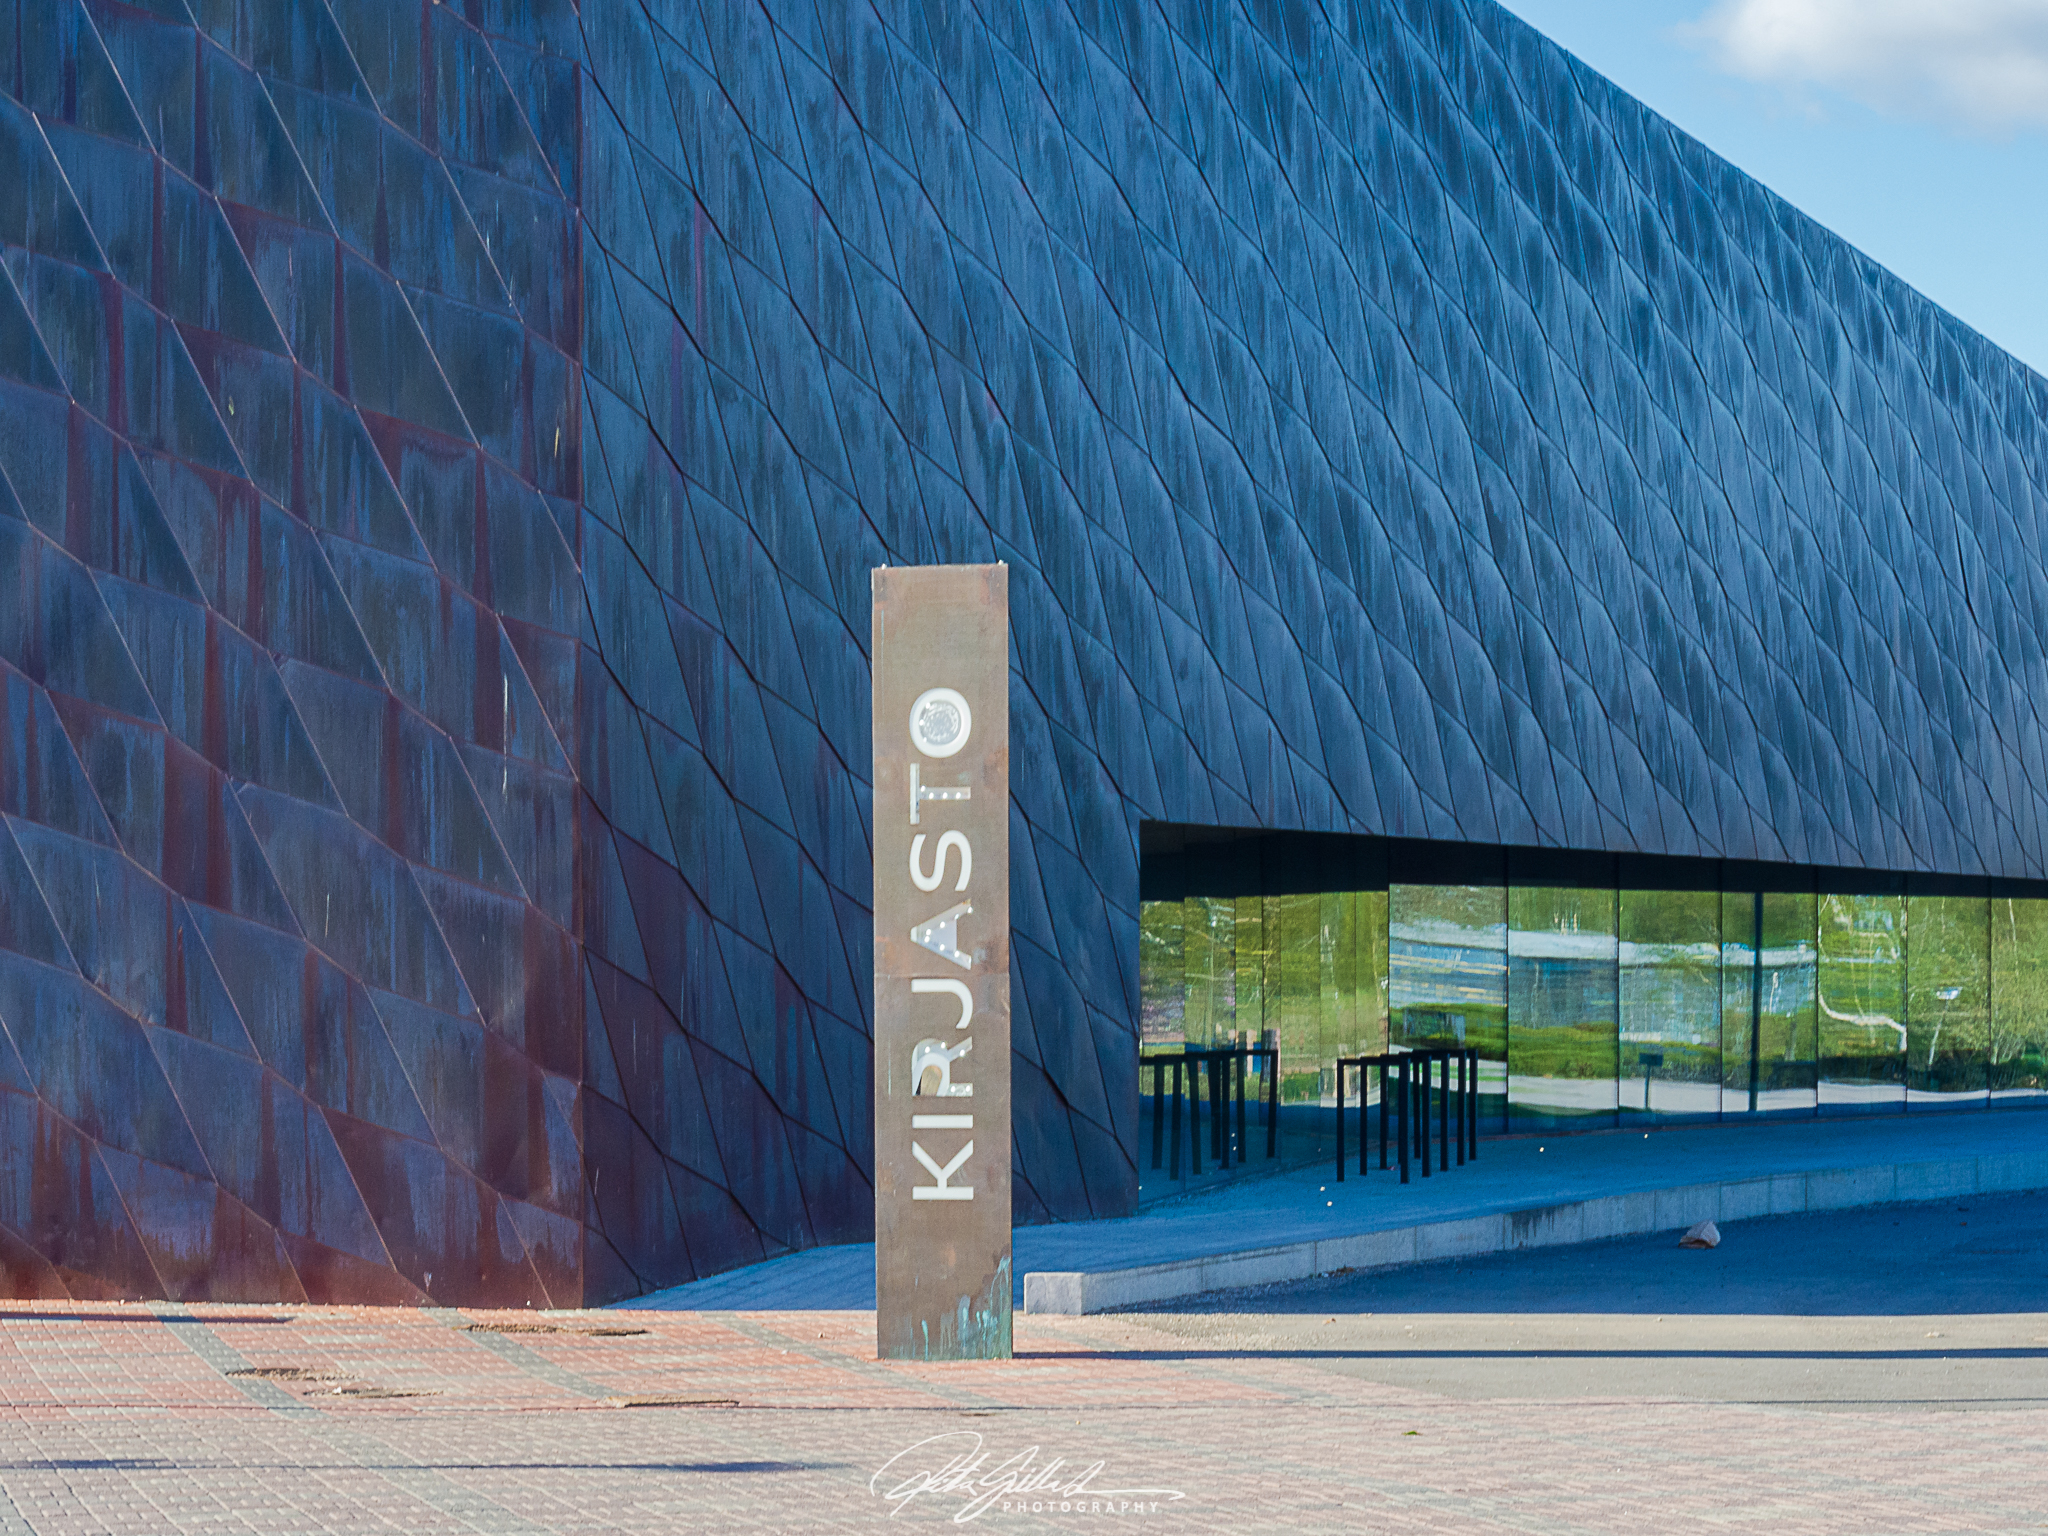
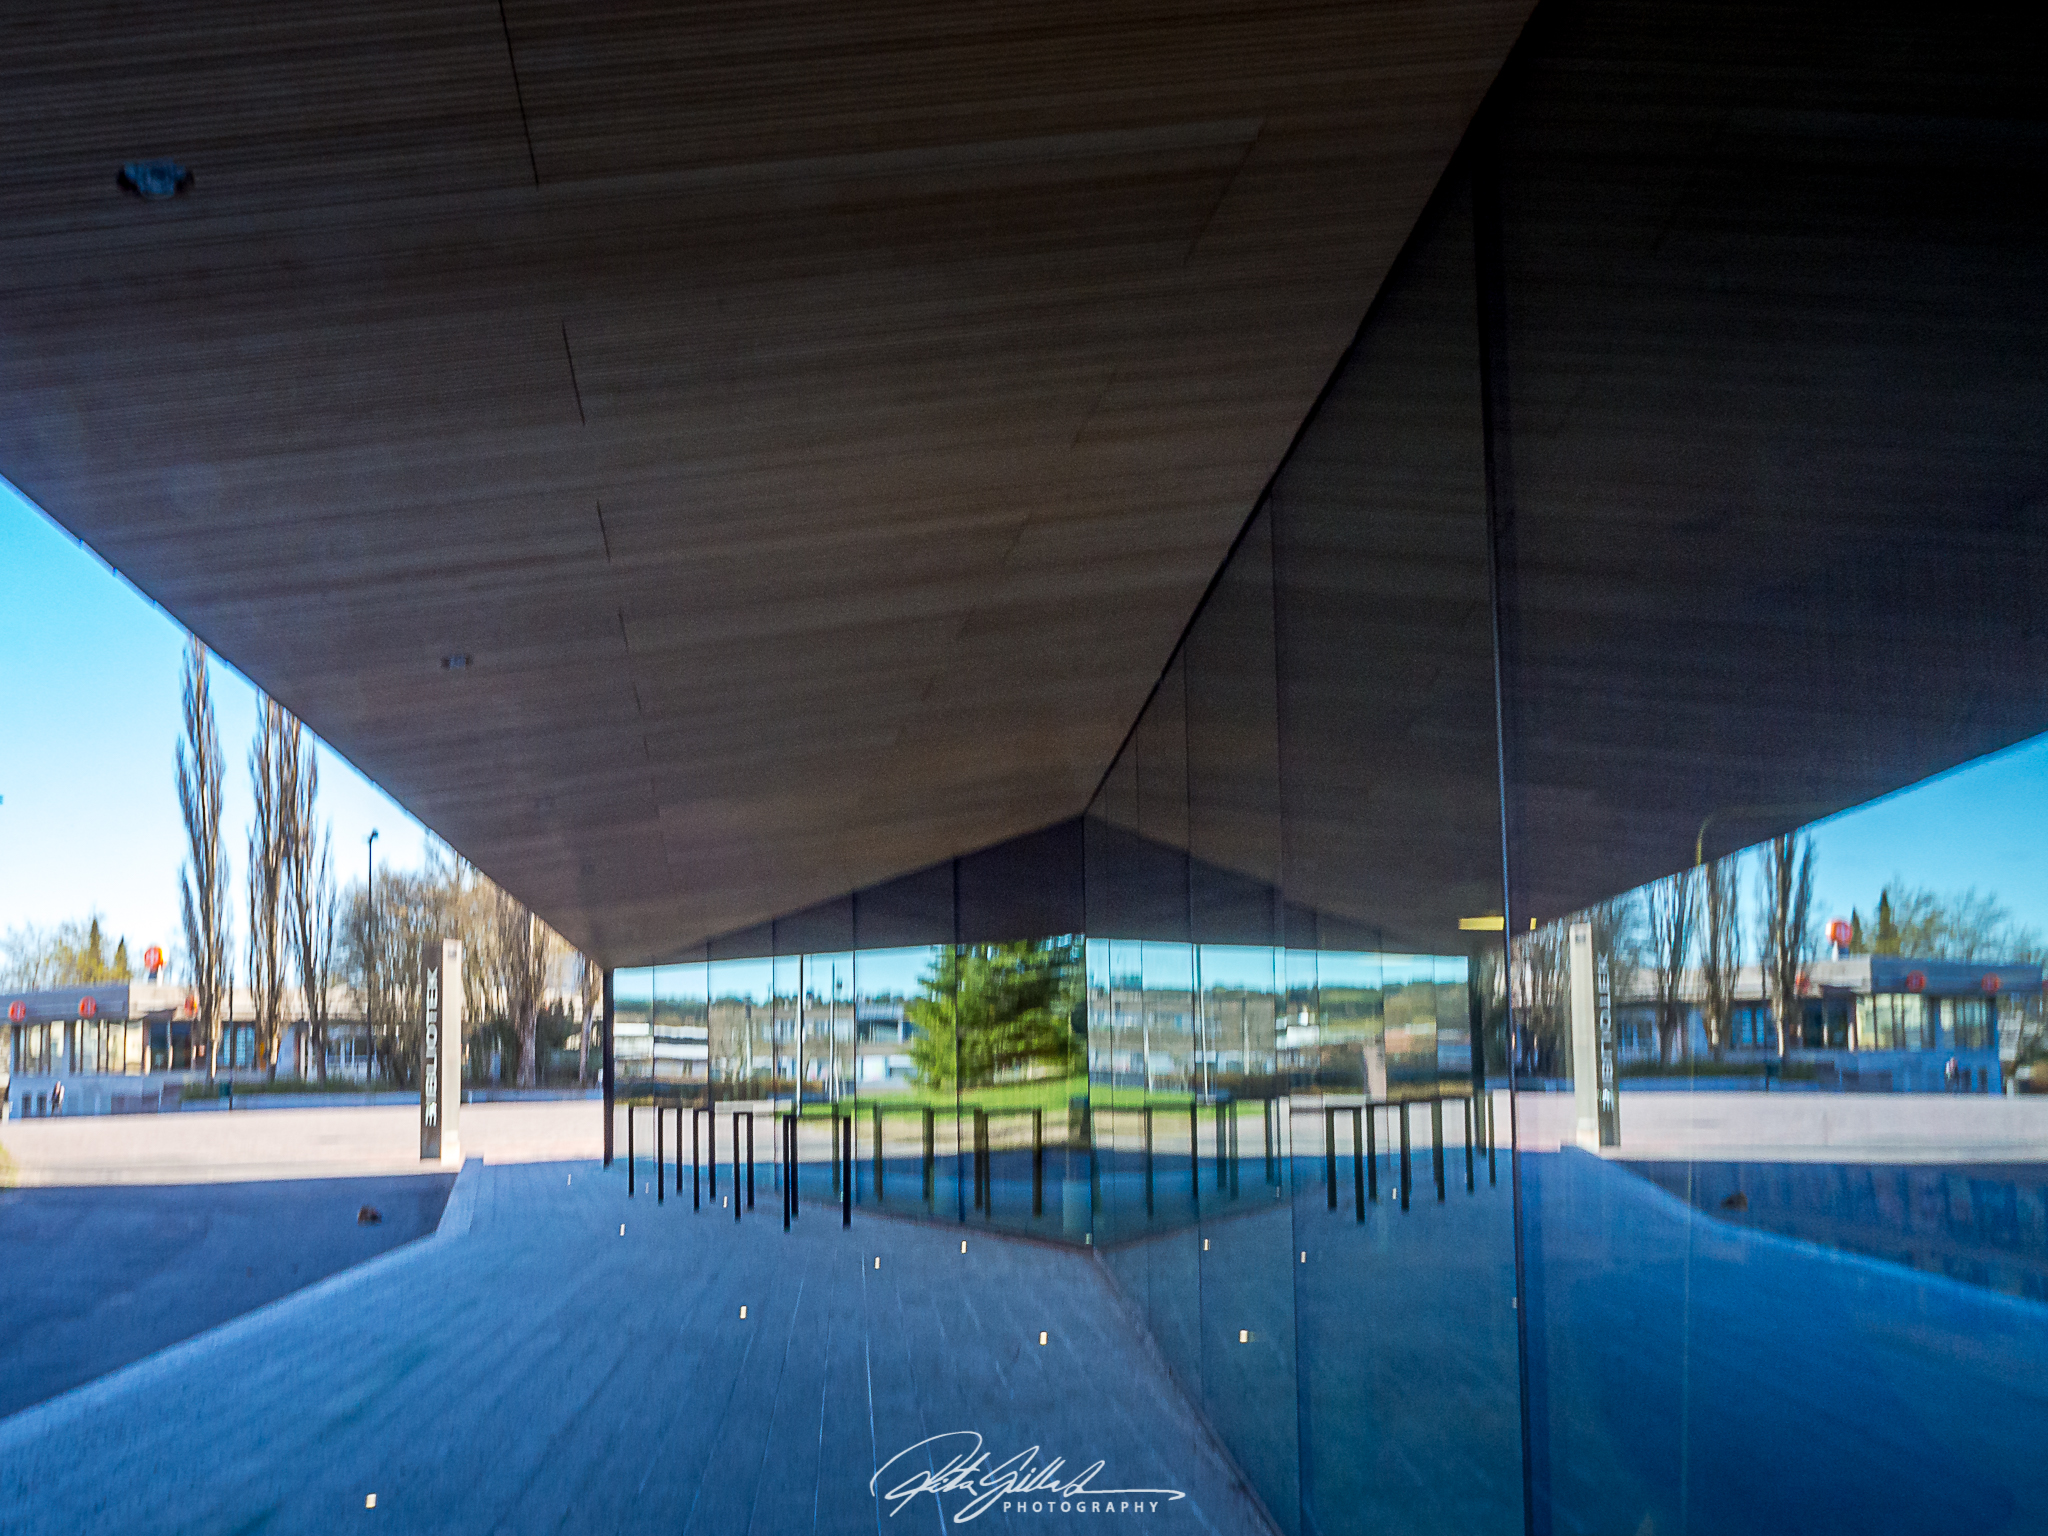
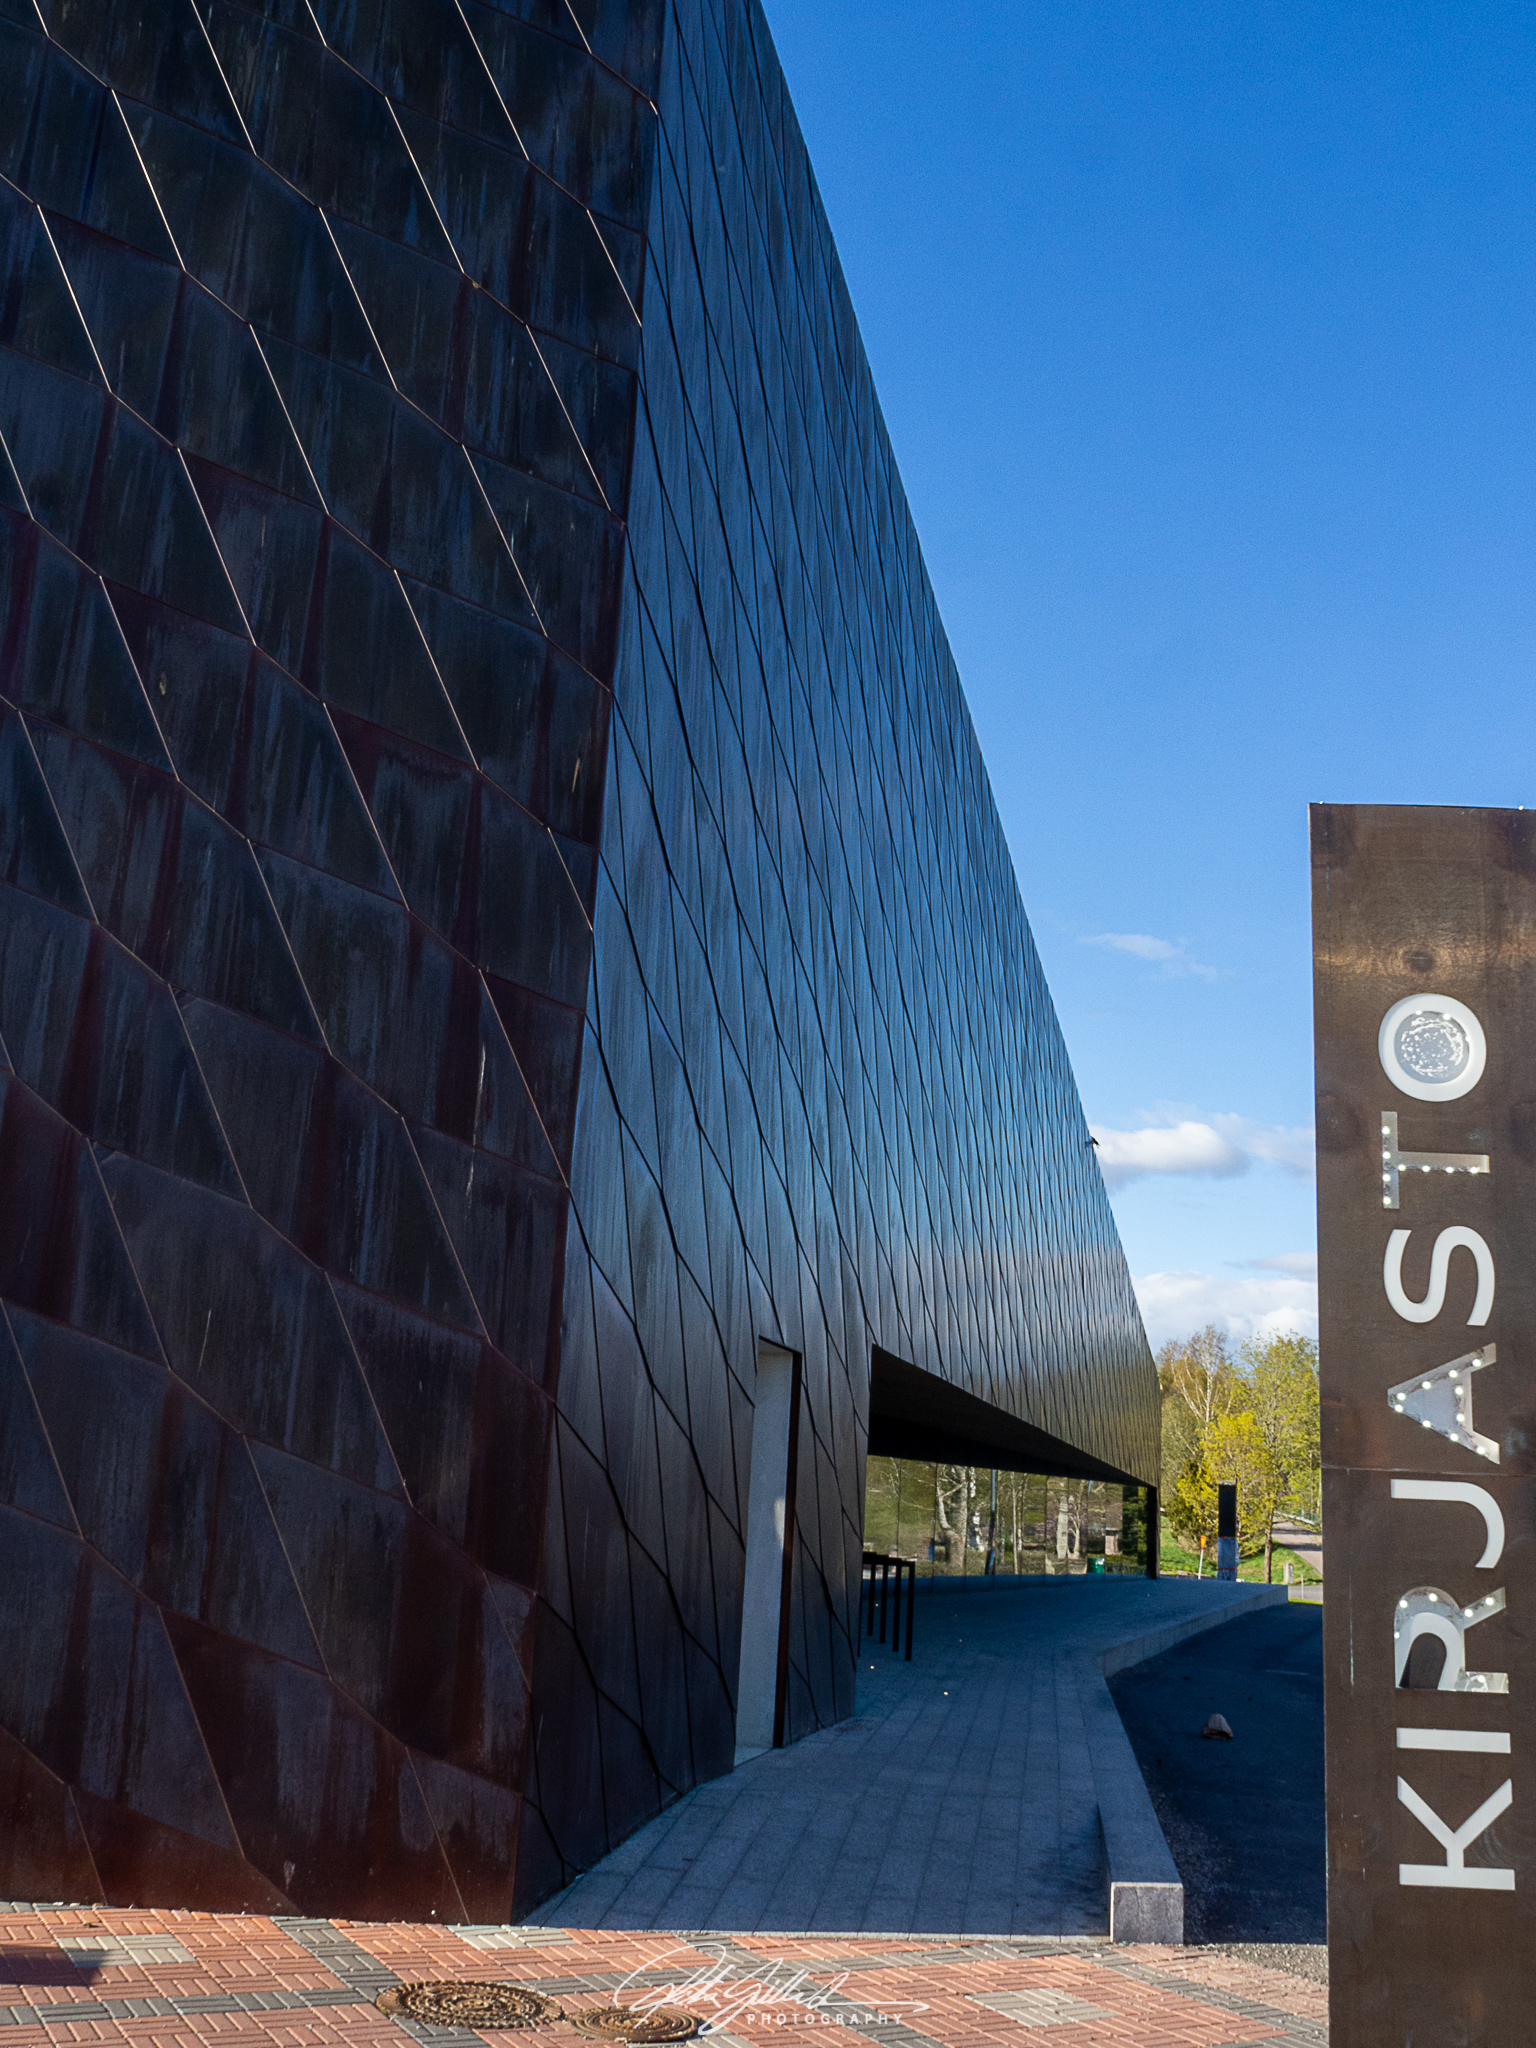
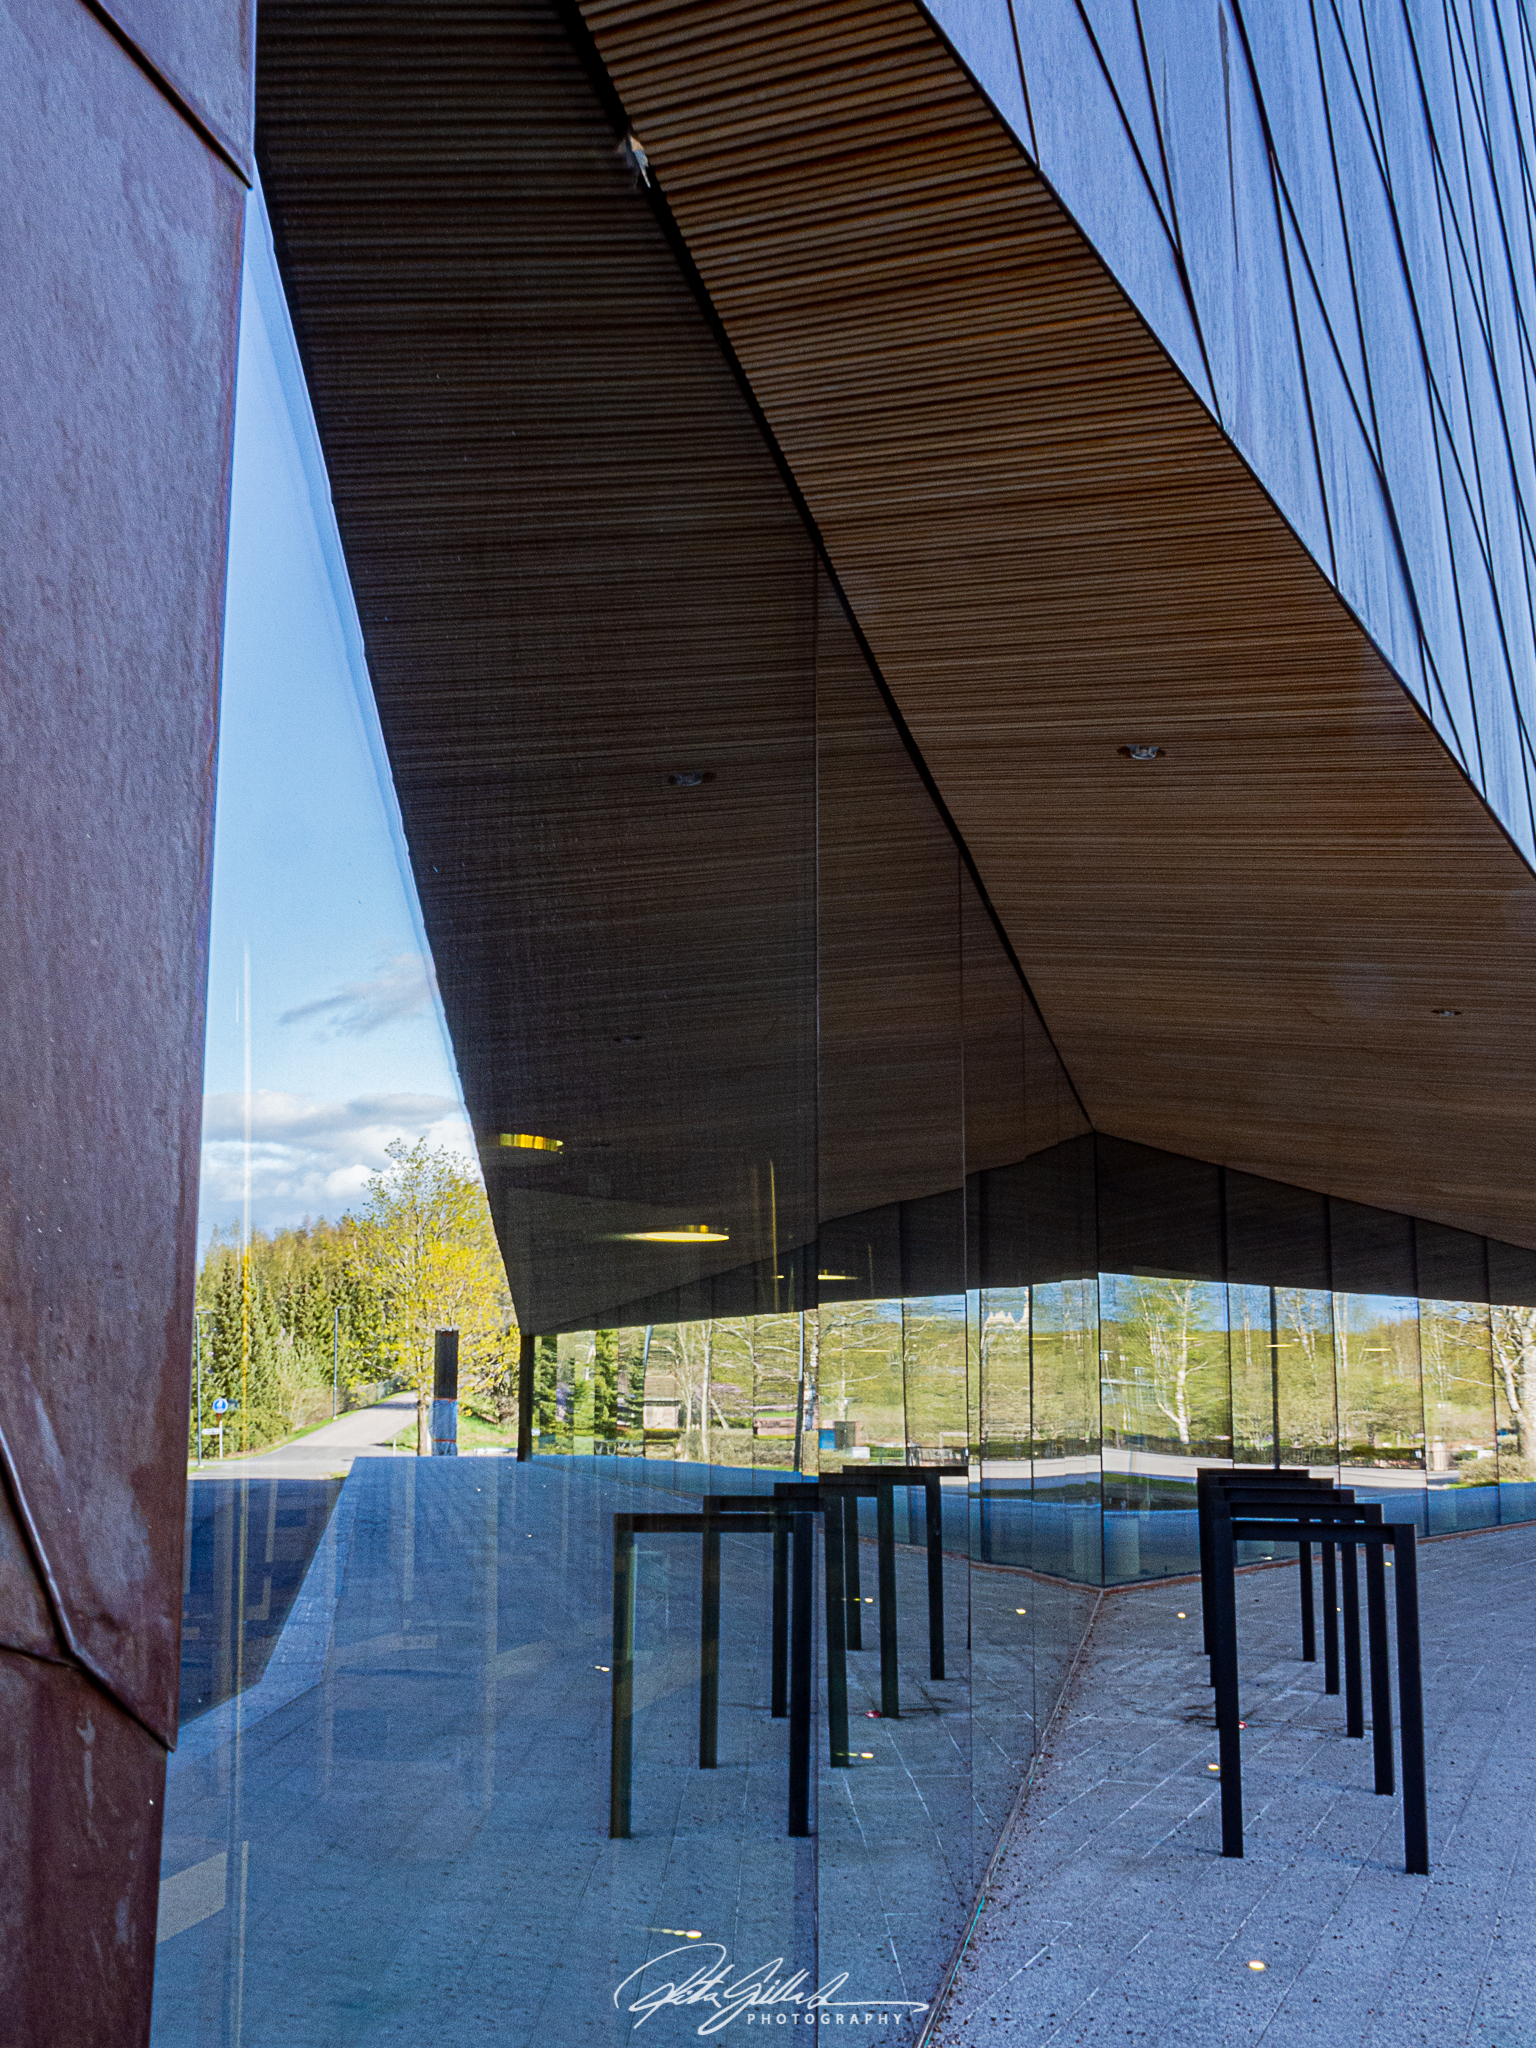
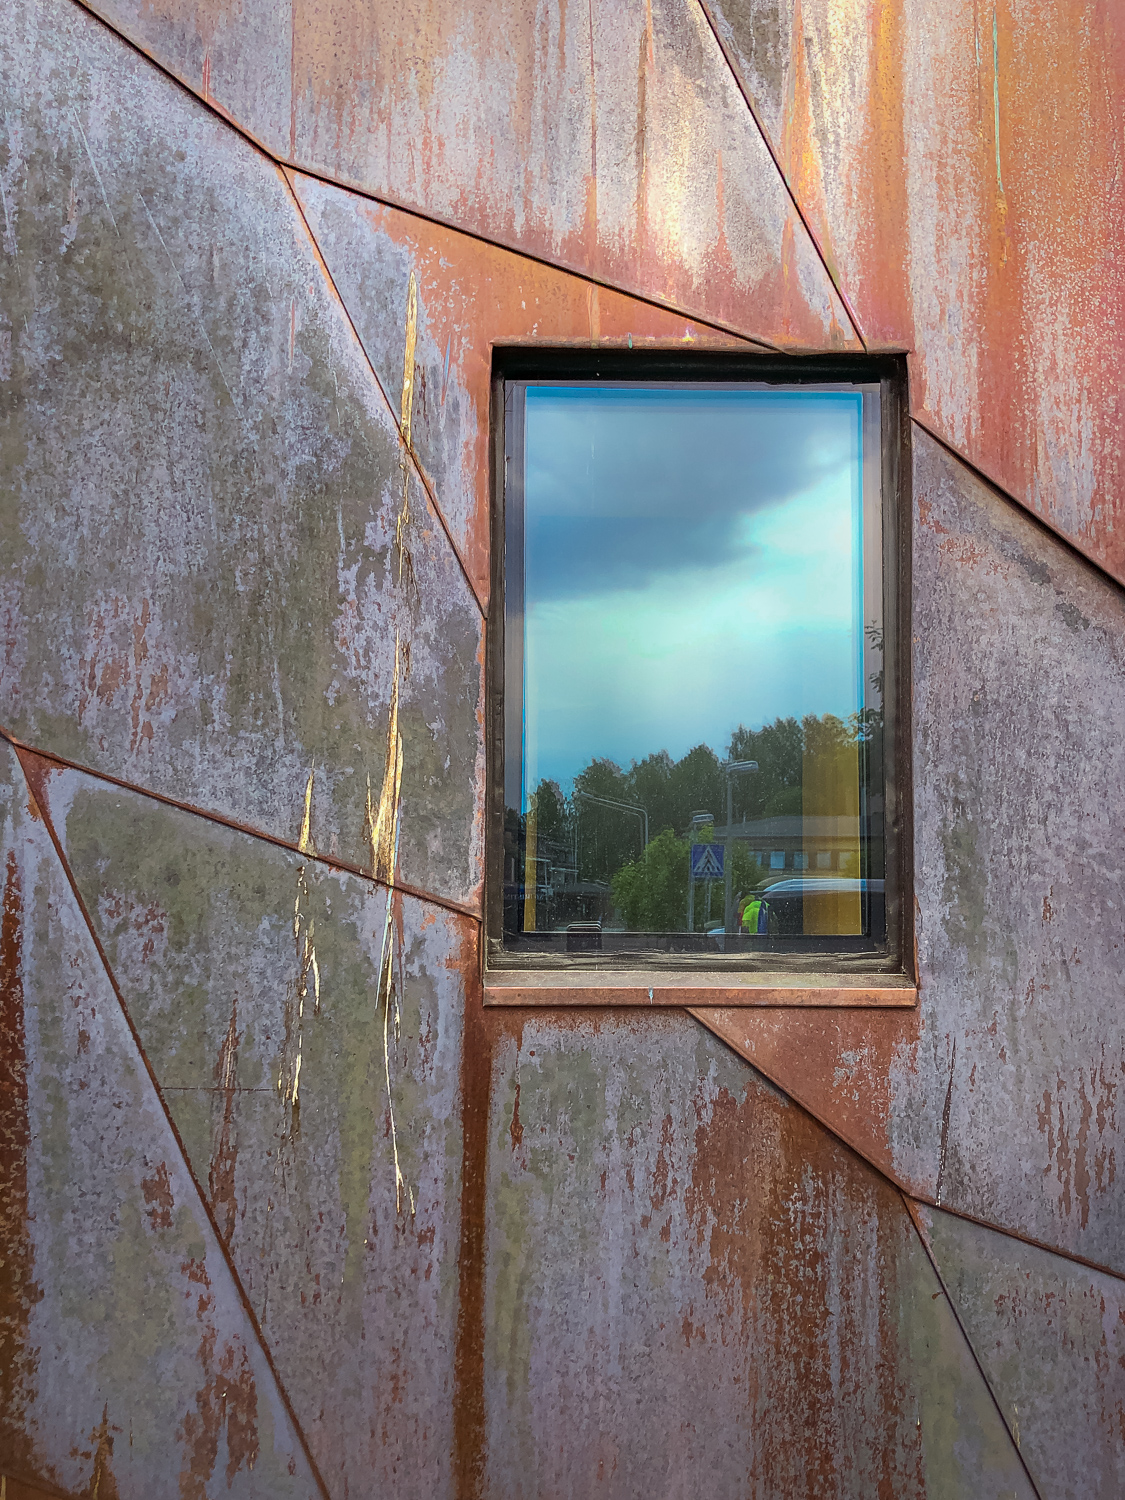
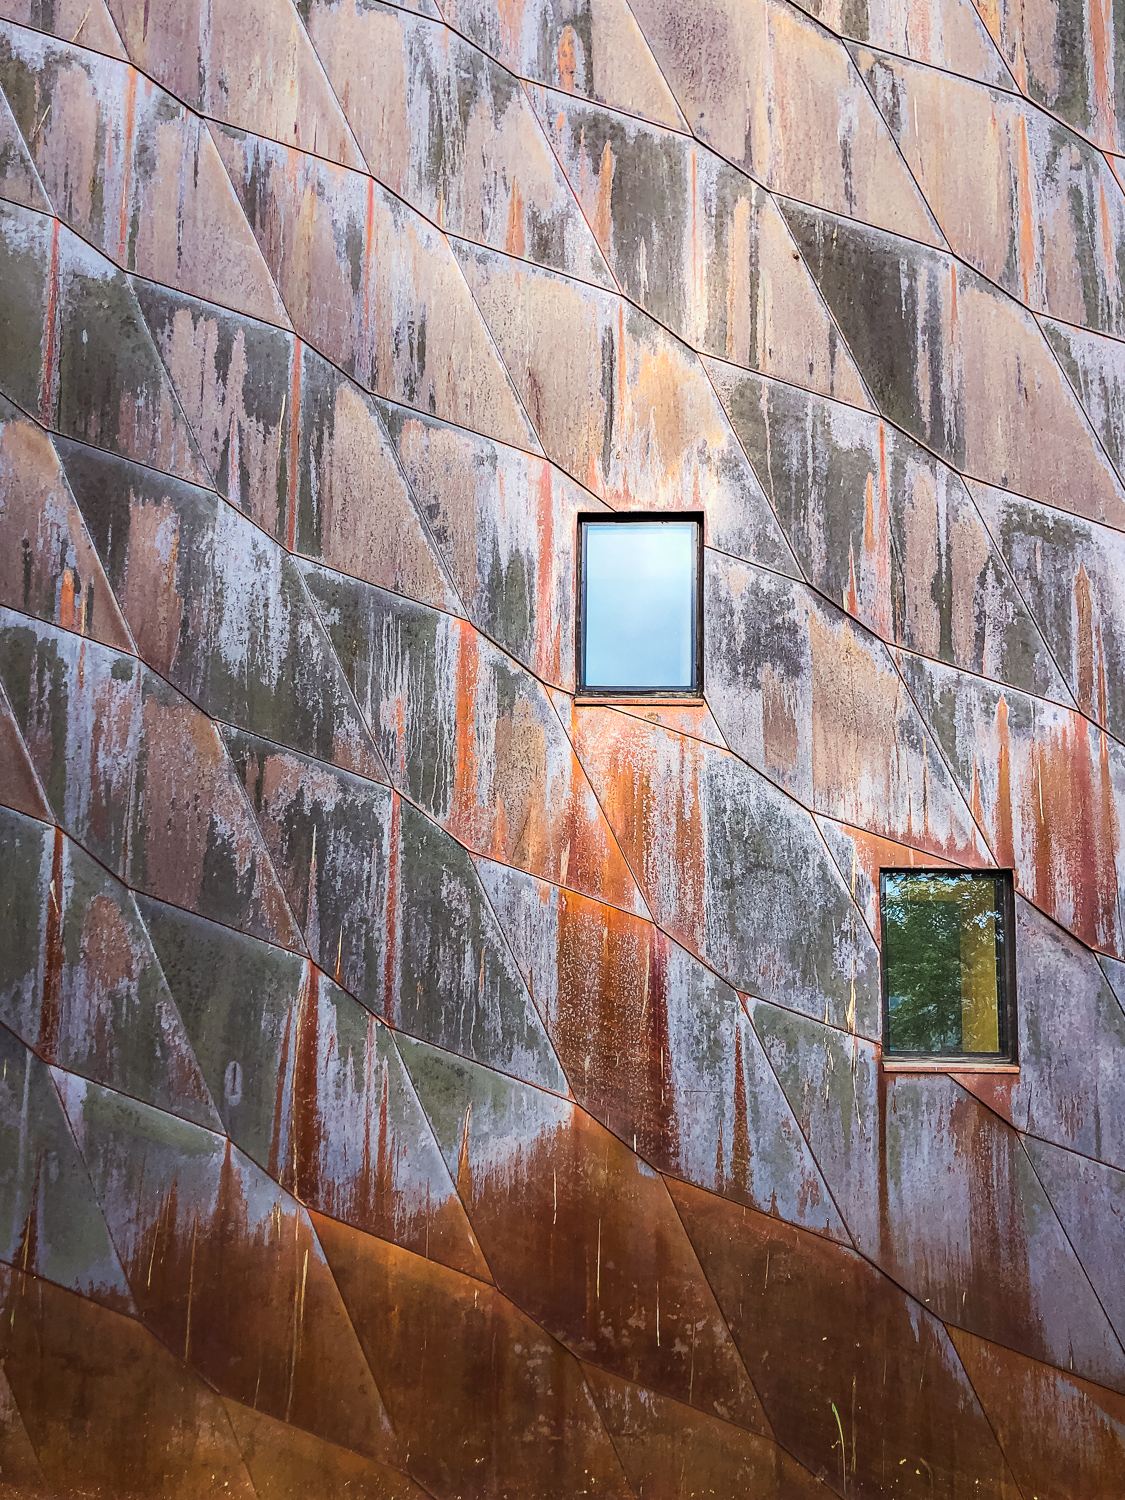
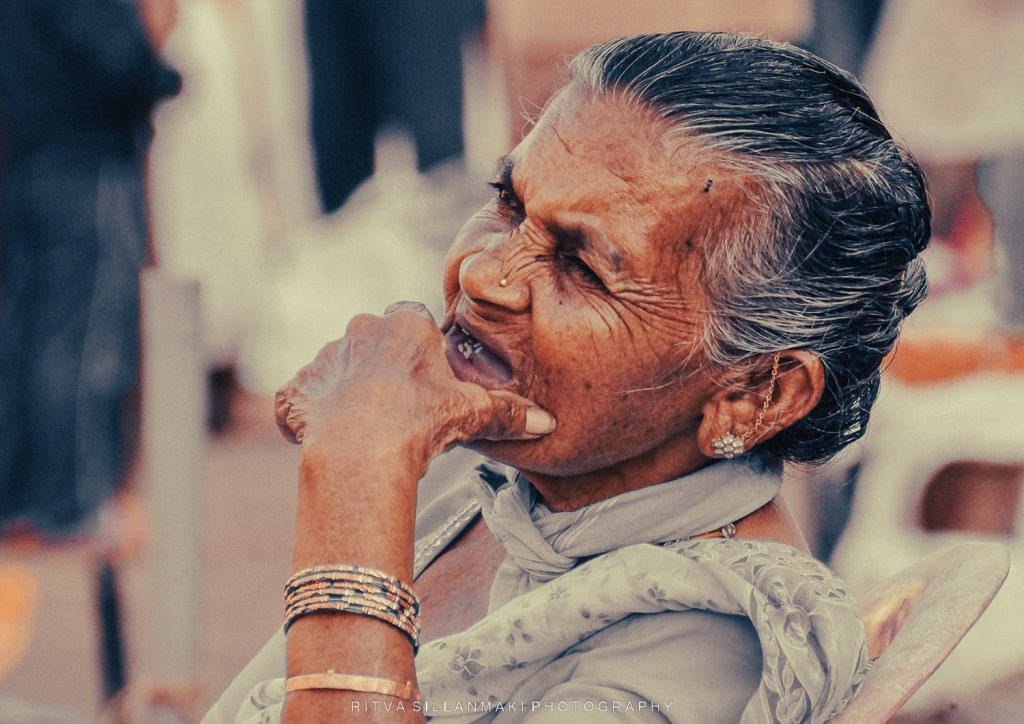
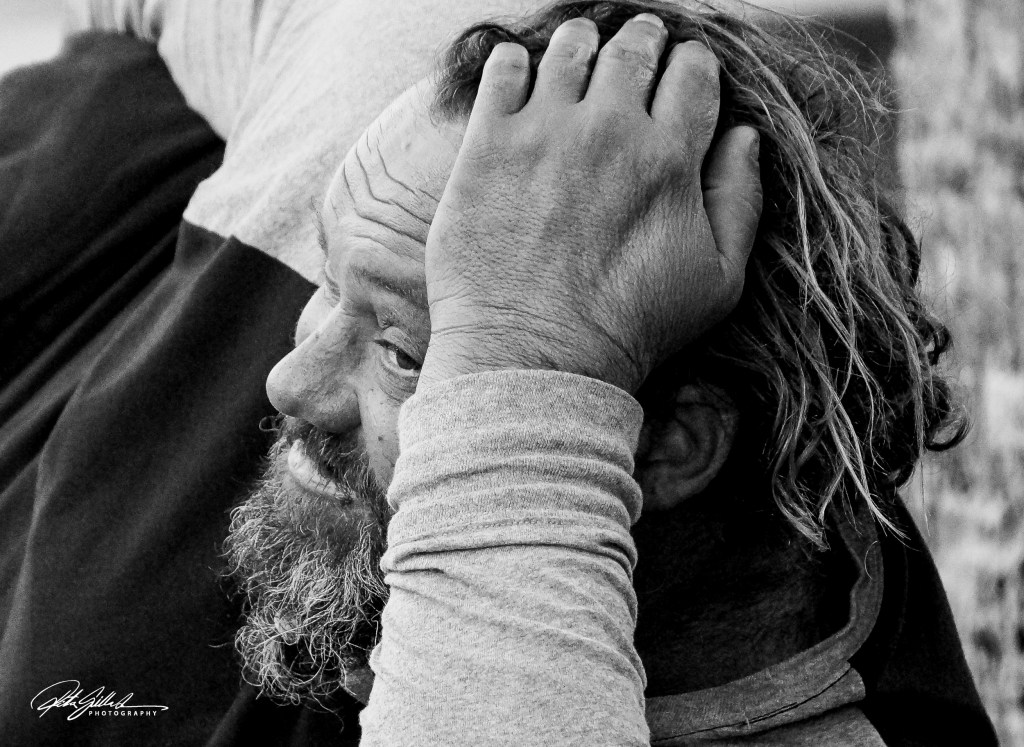
The wrinkles, special features and texture of our faces in portrait. Capturing fine, rarely seen details in a macro shot – maybe abstract, or in Nature. Maybe it’s that detail on the building you pass every day, but rarely take a moment to notice.

wrinkes around the eys
rough life?

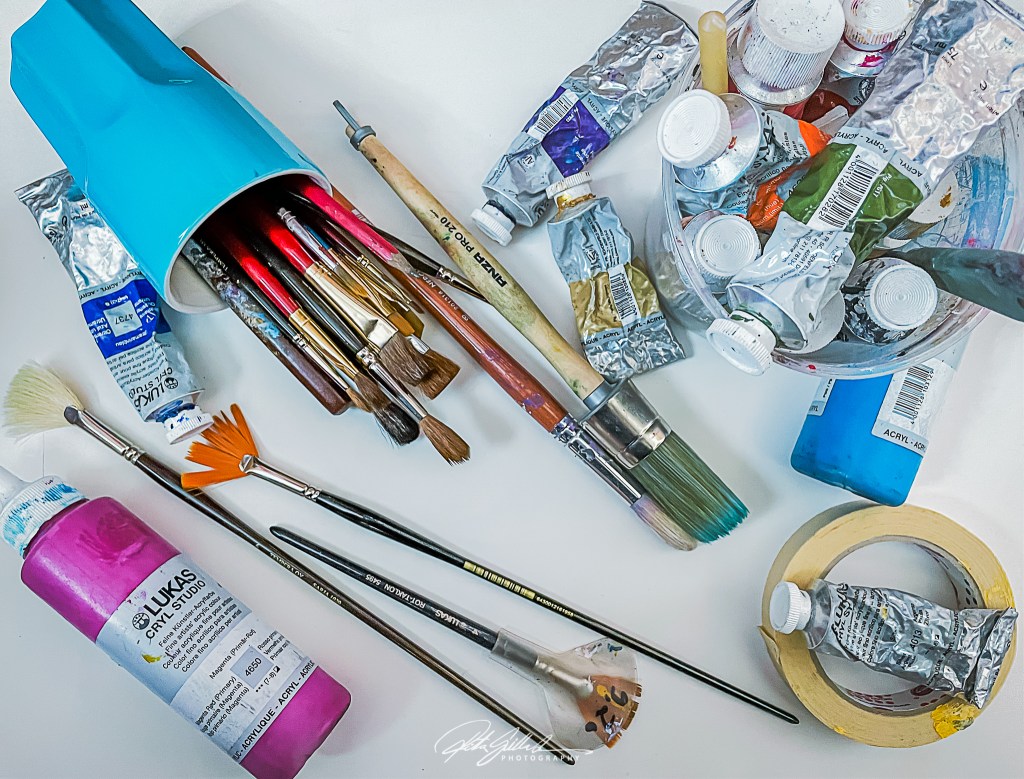
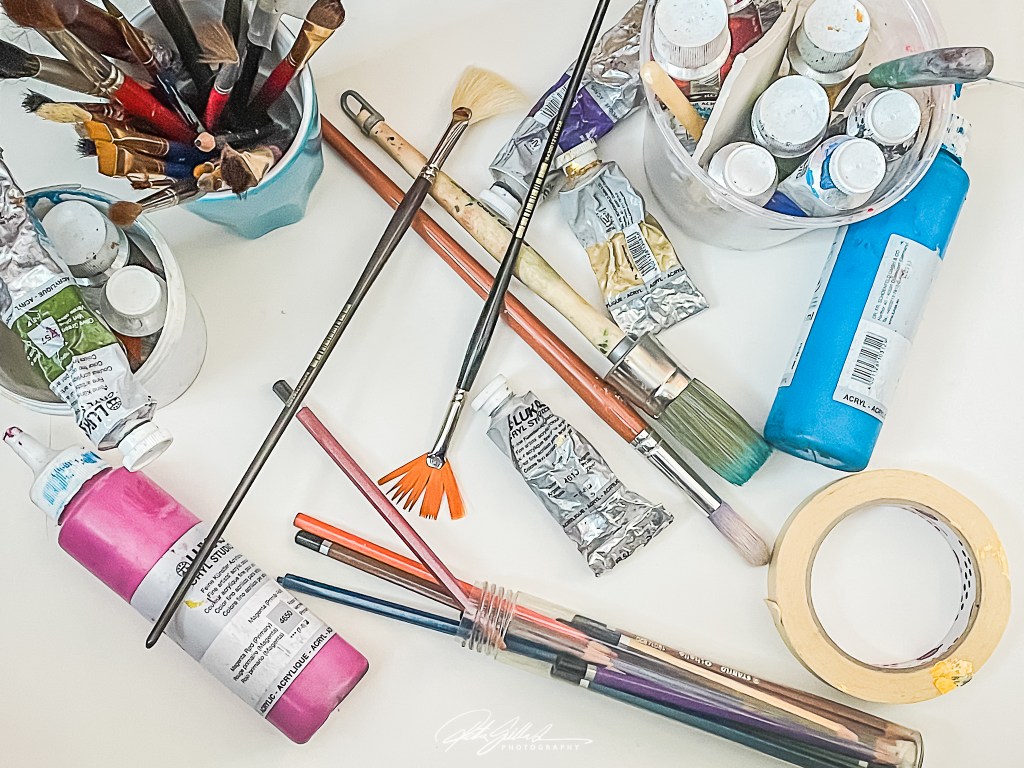
Craft an image that shows off the details of your choice of subject. Focus, contrast and composition will play a key role , so it’s both a creative and technical challenge

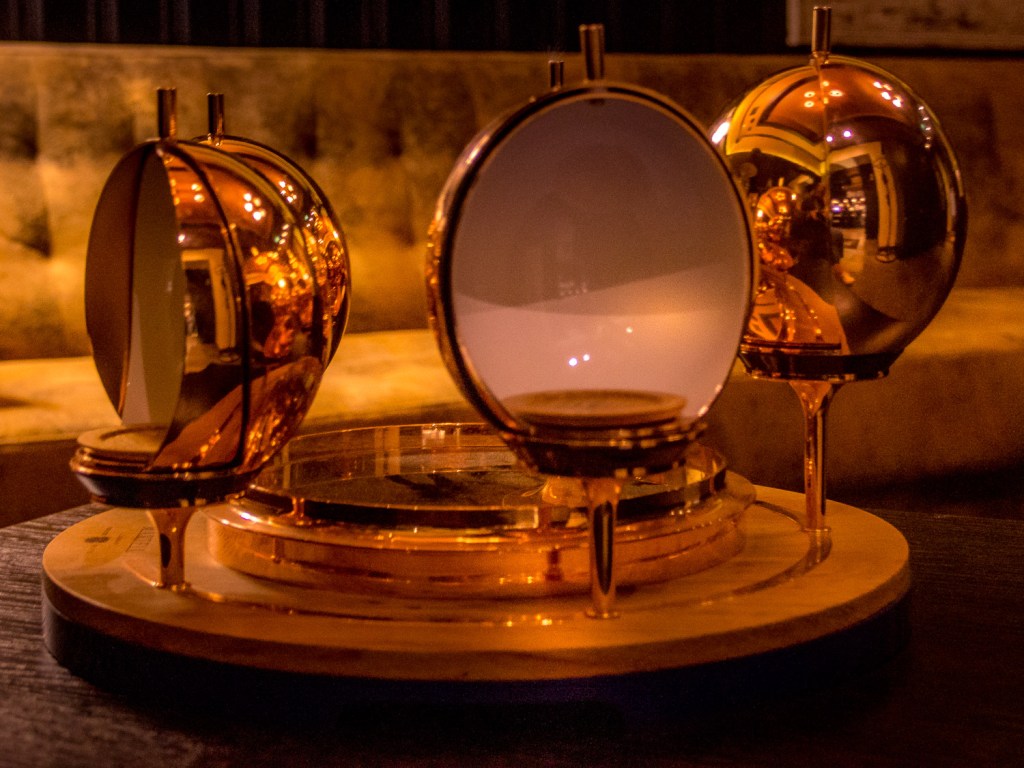
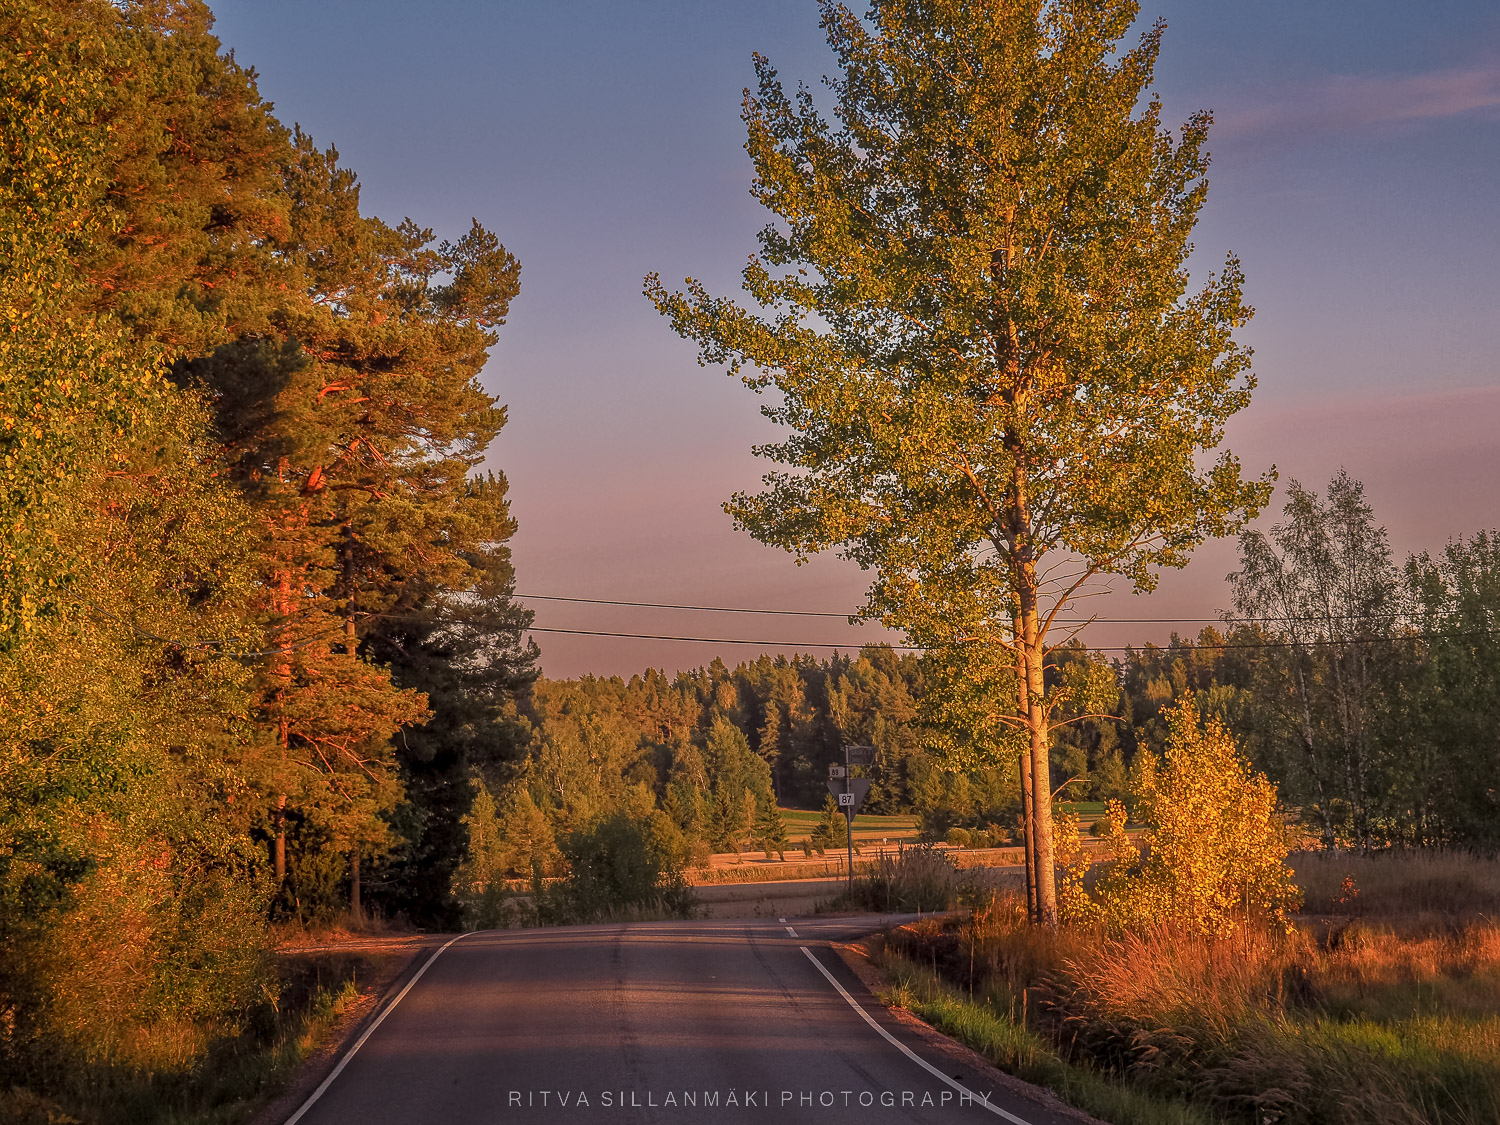
By capturing an image and looking for the picture within a picture, you’ll be able to capture exquisite details that you’d probably normally overlook. When you start noticing the details, a world of new and possible images opens up to you.

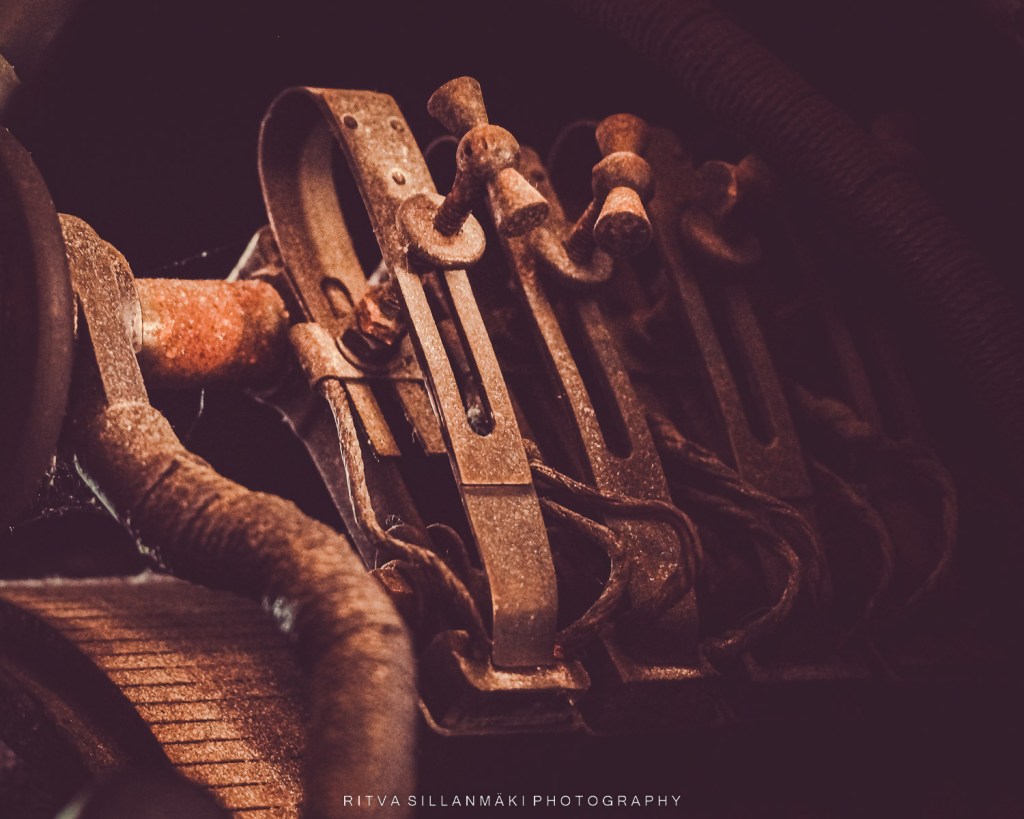
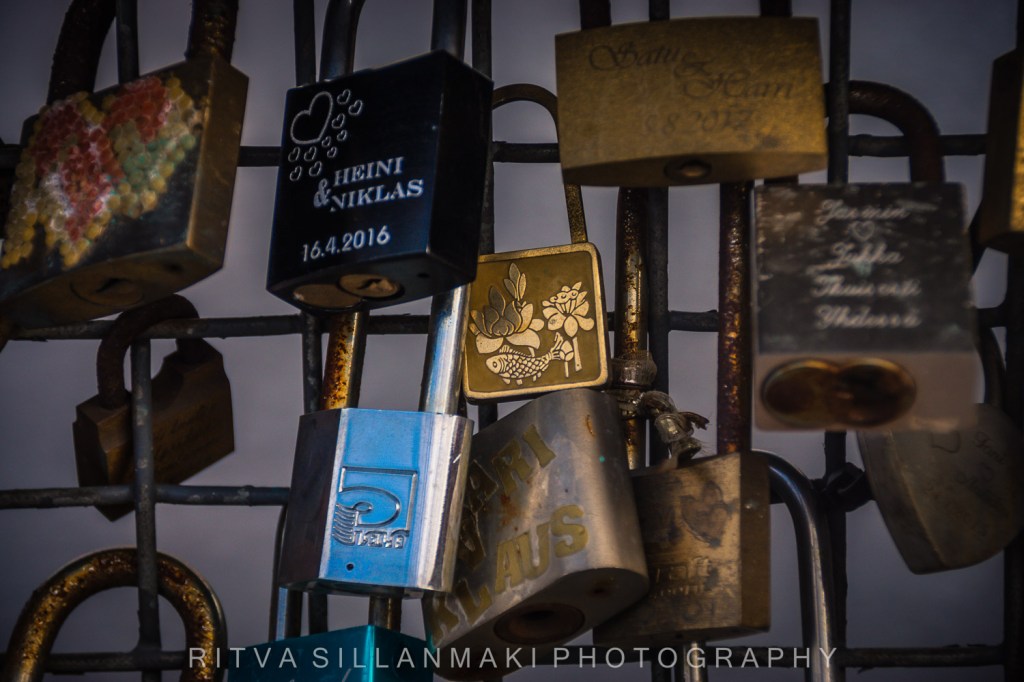
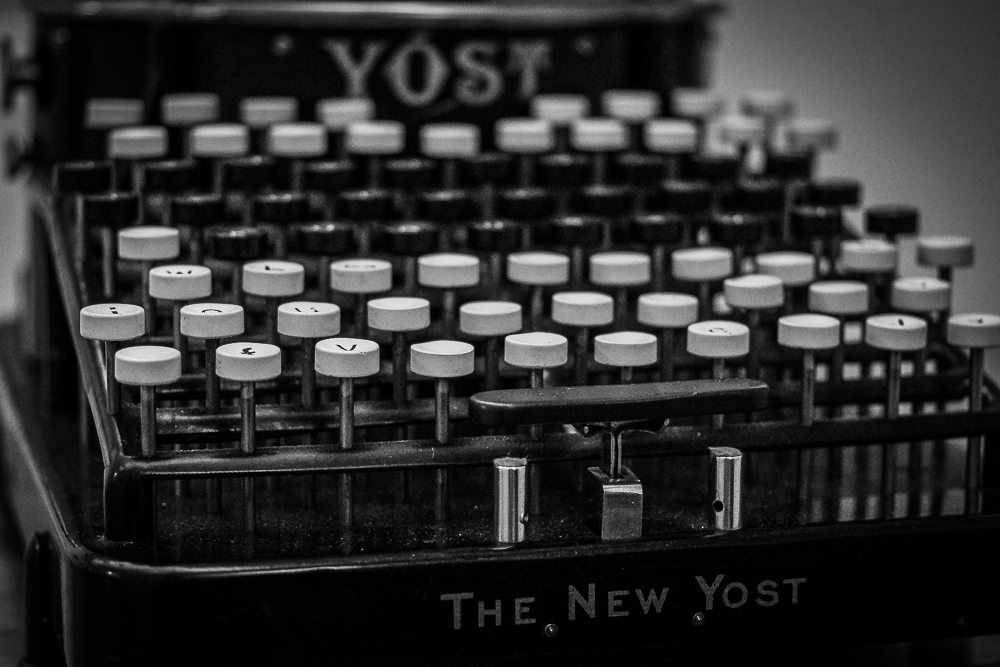
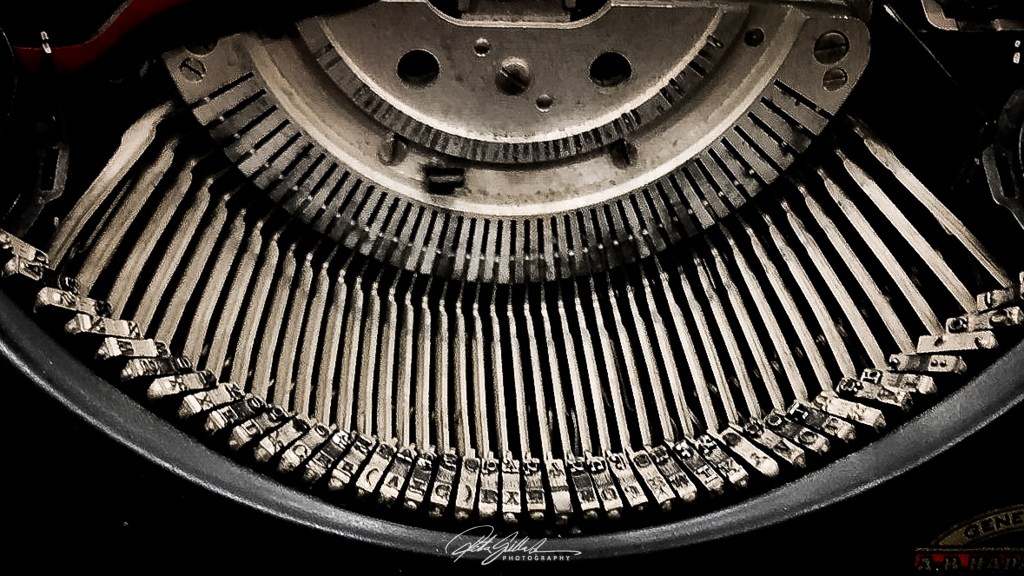
I love taking photos of machinery, rust the photographic details there are to be found

Hands at work

Hairdo

52 Frames: Week 42:  Black and White Minimalism!

This week we’re combining two distinct genres to form Black and White Minimalism. Black and White photos, inherently feel a little minimalistic. Using a composition that’s minimalistic, like having negative space, really adds to this unique shooting style.

Simply doors, as interestingly as I could
Negative space

Black and White minimalism usually yields a very clean and clutter-free aesthetic. A strong subject will draw the viewer’s eye, and a lot of negative space around your subject will support the main “star” of your frame. 

OLYMPUS DIGITAL CAMERA

You can create minimalism with negative space, and you can also use light and shadow by only lighting your main subject and leaving the rest of the frame in shadow (low key) or by lighting your background bright as well to create a high-key look.

But, in particular for this challenge, do remember that: Less Is More 🙂

October landscape
  • Be Direct: Simple does not mean boring. try to tell a story and convey emotion with as little clutter as possible.
  • Negative Space: Take advantage of negative space. The “empty” space in your photo will draw the attention of the viewer towards the main subject, without being distracted by other items in the photo.
  • Leading Lines: Use concepts like leading lines to guide your viewer’s eye to the image.
  • Shoot in B/W: Many cameras have a black and white mode – use that to help make things simpler when previewing the shot you’ve just taken rather than having to post-process later.
  • Tones and Contrast: There are a multitude of shades and tonal ranges that can be adjusted to bring out depth and textures, especially in a Black And White shot. Consider adjusting those for different looks for your image.

Fishnet
Winter ribbon

52 Frames: Week 41:  Shoot Through Something!

Shooting Through Something – basically have something between your lens and your subject that “interferes” with the viewer’s view of your subject. It could be something as simple as leaves in front of your lens. Or if you wanted a more dramatic effect, you could use a piece of glass like a lens ball, a prism, a magnifying glass, etc.

I went out to to capture nature, carrying two camera’s, nearly broke the other by dropping it on the ground, if I’d succeeded it would have been my third camera I dropped and broke. I went out with the intention of trying to shoot behind the trees and leaves, I also did that. I brought some plastic wrap with me to use as a prop. I took this shot placing it on the lens, shooting towards the sun so the flare came nicely on the shot and also gave the shot a misty quality. The autumn colors play a big part in this image of an inlet in Kirkkonummi.

Through cling film

A thin plastic bag or kitchen plastic film (cling film / Saran wrap) over your lens can produce some very creative looking effects too, but you really don’t NEED any special props this week. The idea is that if something is very close to your lens, and your focus is further away, you will create a dreamy, shoot-through effect. This is of course more exaggerated with a shallow depth of fields (wide aperture, smaller f/ number). Go ahead and experiment and have fun! 

You could do portraits or street photography by shooting through a window with some reflections showing up, or go the creative route and use vaseline on an old lens filter

The idea is that your foreground, even if it’s blurry, becomes part of your story. So, let’s get creative in a new way.

autumn colors through cling film

Grandchild through beer glass

TIPS:

  • Refraction: There are tons of ways to use glass to bend and shape light – a wineglass, a magnifying glass, a prism, a lens ball, shooting through a colored pane of glass etc.
  • Use Nets: A net or thin grid can add some creative effects. If you’re too close, of course, you might not see the effect, so distance yourself appropriately.
  • Use Plastic: Kitchen film wrap can be used creatively – you can draw on the film to make creative colors and interference patterns without ever harming your lens. How about that empty plastic bottle of water you were about to toss away? That can work too.
Through cling film
fallen leaves under water
wet misty window and sunrise

52 Frames: Week 40:  Rule Of Odds!

 Rule Of Odds. Simply put, there’s a school of thought that multiple subjects in a shot are more pleasing if there are an odd number of them, as opposed to even. Think 3, 5, 7, etc.. The number “one” is technically odd, but I don’t think that’s what this “rule” is referring to.

Often an odd number of subjects creates symmetry in your shot – use an odd number of things for the viewer to focus on without making it too cluttered. If you have people subjects, go for 3 or 5; maybe food photography is your thing and you want us to check out some tacos you’ve just made. Or if you’re out and about – maybe you spot 3 birds sitting on a wire. Oh look, it’s five canoes moored together at the lake – all it takes is for you be to a touch more aware of what you see and try and train your mind to compose in odds.

Buy your tickets here

Remember not to over-crowd the image with too many elements. The average human brain has a better chance of feeling attracted to arrangements of 3 or 5 elements, but as you increase that number, this rule will be less relevant.

Still life

TIPS:

  • Movement: Add dynamism and a feeling of movement by composing shots with good space on the correct side, usually more space in the direction of the movement.
  • CroppingConsider using cropping in your editing software to improve the composition. When done correctly, it can improve things immensely.
  • Positioning: Try to align vertical elements such as buildings, people walking on the street or a solitary tree along a gridline to generate more visual interest.
  • Less Is More: 3 to 5 objects of interest in a scene usually work best. Avoid making your image cluttered.
  • DoF: Use an appropriate Depth Of Field to ensure good sharpness across all your subjects.

Three generations

52 Frames: Week 39: Letters!

It’s all about your creativity and what you come across. You could shoot some cool looking signs in your neighborhood or capture the emotion of someone reading a heartfelt greeting card.

This week’s challenge is more about getting the feel of the story than anything else – like the sheer happiness of reading a college admission acceptance letter or contemplating wabi-sabi in an abandoned carnival sign.

Buy your tickets here

Capturing emotion in an old-school task of penning one’s thoughts to paper is about patience and composure – your own as well as that of your subject.  So, just breathe and take a think about what it is you want your viewer to see through not just your eyes but also your subject’s.

Getting typography shots isn’t something you might have thought of shooting earlier , but here’s your chance to try something new. Look out for cool and funky letters and fonts that are worth a dekko – you never know what you’ll find unless you start looking.

Visiting the circus In Helsinki
  • DoF: Depth of field can play a role here to show just a single line or word while blurring out the rest. Or to ensure that you’re in focus, front to back.
  • Contrast: Consider playing around with local contrast to give that extra boost to individual letters.
  • Cropping: If you want to showcase shapes that look like letters, cropping down is essential to eliminate other clutter.
  • White Balance: Modifying white balance can alter the tone of your shot. Use warmth, cooling and tints to give mood and depth to your image.

Here are some letter I’ve picked either this week, some from further back. My Signature is letters?? so I added it here. This weeks fresh letters are from the circus and I decided to go with the one with the first shot. I would have loved to use some of the older ones, but that would be cheating. So

52 Frames: Week 38:  One Light Source!

This week it’s One Light Source. I’m talking directional light – your subject ought to be lit by light coming from a single source – think speedlight or a shaft of sunlight coming through half drawn curtains. It’s the light source and direction that you need to think of first, before you set up your subject and decide on a composition.

This challenge is all about reminding ourselves of what it takes to paint with light – directional light need not be a harsh burst to produce sharp shadows. You can arrange for soft light to come through for a more pleasing look as well.

Look to place light at angles you’d normally not think of – a full side profile or light streaming down from a bare bulb on the ceiling, maybe a night shot illuminated by a neon sign or the perennial favourite of Silhouette Photography – it’s time to be creative and play with the light.

This was my entry

Well, this is what happens every night. My husband reads the latest news before going to sleep. Once again, I had lots of ideas, but ended up taking the easy way out. I was thinking of what to shoot and there it was laying next to me, mobile phone as a light source, so I took my phone and took a shot of a situation I see daily. How more real can you get, a documentary shot. Thanks babe, once again for being a good sport.

I also took a shot with my grandson holding a candle, and match being scratched

  • Set-up: Plan your lighting and concept before thinking about the actual composition.
  • Time Of Day: If you’re planning on shooting using daylight/sunlight as your source, experiment with how the light and shadows will play out at different times.
  • Modifiers: Reflectors, blockers and light modifiers are going to be key here to help shape the light.
  • Exposure Compensation: Consider using Exposure Compensation to expose the image as you think fit and not as your camera’s AI / sensor does.
warmth of a match

52 Frames: Week 37:  Portrait Of A Stranger!

Portrait Of A Stranger.

Well, there’s more to it than meets the eye, of course – your location, time of day, and the willingness of a stranger to be kind enough to take some time out of their life to help you (a stranger yourself to them). But there’s magic in a camera – some people just open up when they know they’re the focus of a well-crafted photograph.

There’s creative and technical hurdles here too – one of the more important ones being time – you’ll have far less time to compose and take your photo(s) than you would if you had pre-arranged a shoot. You could grab a candid shot or something more glamorous; go low-key to get a moody and intense look. It’s portraiture after all and the images you can get are as varied as there are humans on the planet.

You’re about to experience a shared moment with someone you’ve never met before.

Please don’t shoot from the hip. Talk to a person. If your palms get sweaty just thinking about it, like me, then go with an easier subject, like your local coffee barista, mailperson, or waiter.

Don’t over think this one, other people are just you in a different rental. 

Visiting a nice Italian restaurant in Lahti, I asked our pretty waiter if I could take her photo. She kindly agreed. Haven’t been out much this week as it’sbeen rather rainy, so the chances of taking photos once again happened nearly at the last day. I thought of cropping it to a more portrait, but as it was an at during her work time ,capturing a moment photo, in her busy shift, I wanted it to show the place and to highlight what her job was ,to give context to the shot. Iussed thhe last photo in this post.

warmth of the golden hour

TIPS:

  • Be Friendly: A warm welcoming smile can work wonders
  • Be Patient: People might be busy or not trusting a stranger. That’s ok. Respect their space and choice and look for someone else.
  • Be Prepared: Keep your camera ready with appropriate settings. Scour out cool backgrounds or locations near by.
  • Be Mindful: Do not shoot someone without appropriate permission especially children. Be respectful of people, places and occasions where it might be considered impolite or discourteous to be shooting – like funerals or religious places.
Golden hour by the sea

52 Frames: Week 36: Golden Hour!

Warmth, Tranquility, Contentment… just a few things I tend to feel when I’m watching a low Sun 🌅. I hope you do too, this week during Golden Hour – soft, golden light that happens twice each day. Golden Hour, or “Magic Hour”, is usually considered to be the first “hour” after sunrise and the last “hour” before sunset. 

Golden Hour is when light is diffused and soft and the shadows are long and less harsh than during the day.. Golden Hour offers pretty directional light, so your composition needs to account for the angle and direction of the sun. You could use light flares as a creative choice and shoot into the light or use the shadows to add more depth and dimension to your scene.

Remember, the length of golden hour will vary with where you are on the planet and the time of year.

I seem to leave this always to the last moment. Golden hour, Saturday evening I had an epiphany, I have not taken this shot. Sunset. where I live , was at 8PM, I left the house at 7:30 seaching for a place where I could capture the golden hour. I did not head west, as I was not trying to capture sunset. East that is the direction I drove to. I had half an hour to get the shot. These are some that I considered for the challenge.

warmth of the golden hour

TIPS:

  • Stability: Use a tripod for longer exposures – you would need a stable platform for the camera to avoid shake
  • Get creative: Consider using the lighting in a variety of ways – as fill light or as rim lighting to highlight a subject. (the sun BEHIND the subject)
  • Plan ahead: Be mindful of the time – good light can disappear just as quickly as it can reveal a new facet of the scene.
  • Color Tone: White balance is quite important – whether you’re shooting RAW and then post-processing or editing JPGs straight from your camera.
Golden hour by the sea

52 Frames: Week 35:  Edited By Someone Else!

This week we want you to release your artistic expression by having your image Edited By Someone Else.  The point of this challenge is to gain insight into the creative process of another person and see how their interpretation would perhaps differ from your own.

Seeing different creative strokes can not only help to broaden our own understanding of other styles, but also help us to grow on our photo journey. I want to thank Pirjo Tuominen as she kindly edited my photo for this weeks challenge.

Pirjo Tuominen edited this photo of me.

Below you can se the original and the three different edits, I am sure you are able to pick the original easily that has no edits at all 🙂 I did not take time taking this mobile phone shot, I had my phone in the position that I have while i read something on it and I took the picture. I didn’t have other makeup than I had done my eyes 🙂 Now that I look at it, a foundation would have made a difference to the skin.

52 Frames: Week 34: Peace!

Through the hustle and bustle or the humdrum everyday lives we lead and see around us, we come across small moments in time that make us stop, take a deep breath and slow down. We’d like to see you capture a moment of Peace ☮ this week.

Have a little think about any places or scenes that calm you down or center you – a tranquil lake setting, a walk through a wooded path with a close one or something close to home like your grandpa taking his afternoon siesta. It’s all about the image evoking a feeling of serenity, calm and tranquility.

August Sunset at the countryside, this was my choice this week

The idea doesn’t necessarily need to be minimalistic , all that matters is whether the viewer understands the point of view and story your photo ought to be showing. The lighting and overall color tone of the scene will be important too, so please spare a thought for those aspects too.

There are tons of places, people and scenes that can convey this purest of emotions; so as we usually say, take a few deep breaths, center yourself and take your shot.

Peaceful moment at the beach

I have been at my summer house. One word, that can be said about the place is that it is peaceful. Hardly any neighbors, no traffic sounds. Silence, if you do not take to account the natures sounds. I took shot of this tail of the sunset ( aiming the camera towards northwest) the colors towards west were so vibrant, even if the moment was peaceful the colors would not convey that. So I turned towards the more muted tones. I had several ideas for this week, but did not get anything done towards making them become reality, planning is not enough. I hope this shot still shows peace.

The shots below show the vibrancy of the sunset and even if it was peaceful the colors do somehow tell the story, or what so you think? The blues in the last shot say it better, no ?

Peaceful moment at the lake

52 Frames: Week 33: Water!

Water – just like us humans, comes in all sorts of shapes, sizes and even colors. It’s universal and something that is absolutely essential to life on this planet. We hope you’re inspired enough to make the most of the topic.

If you have follwes me for a long time, you should know I love the sea, lakes and all water views, I take lots of photos of photos of them. I have also come into a habit of taking shots of water bottles in restaurants and cafes

You could, of course, go with a classic landscape / seascape bringing a sense of majesty to your image or perhaps go with a more down-to-earth shot of kids having a pool party

the turquise sea in Australia
water
Sea in Florida

Maybe a shot showing off your technical chops with water droplet macro photography is more your style. Why not showcase the immense power of water crashing against a shoreline or go entirely the other way and take a serene shot of tranquil and still waters in a long-exposure image?

Splash in a glass 3

Don’t feel restricted by needing an external location either – you can get epic water shots inside your home too. Try getting a creative still life shot by using water as a prism. Or use it to enhance a portrait or with food photography.

The possibilities are boundless. 💦

The shimmering sea
Water and juice

ISO: There’s a lack of light – so remember to adjust your ISO settings appropriately, the higher you go, the more digital noise you will encounter.

Long Exposure: To compensate for the lack of light, long exposures work well for getting sharp images of static subjects like cityscapes and smoothening water ripples. Anything under 1/125 you want to rest your camera on a hard surface or tripod.

Light Shaping: Use lights to shape the exposure – you can isolate your subjects more easily since the background will most likely be darker due to the absence of ambient daylight.

Shoot Manual Mode: Consider shooting in Manual mode to correctly adjust parameters to get your desired exposures.

White Balance: Artificial light in urban areas can add different color casts to your image. See if adjusting the white balance can add more depth to your image.

52 Frames: Week 32: Night Photography!

it’s Night Photography this week.

This was last weeks challenge, but here I am posting about it now. I have several night shots that I like, but not being able to use them. And as I was visiting relatives at this time I was not able to go and take photos during night time. On our drive home I took this shot of the moon, think about it from a moving car, not too bad, slightly painternly look it has, but all and all, I am rather happy with it.

Somewhere in Southern Finland on the road home, this moon lit the way for us

The thing about not having that sun around, is that everything is darker! In order to get more light to your sensor, you’ll want to slap that camera onto a tripod. or rest it on a flat surface, and set your shutter speeds to lower settings, like multiple seconds, and the night scenes in front of you will come alive!

Taking shots, illumination of neon signs or street lights lend a completely different look and feel to the very same location than if it were shot in daylight.

Hong Kong night life

Ever taken portraits at night of a subject lit by a storefront window? Not all night shots need to be taken outside the house – some very creative shots can be taken inside too. Have a think on that!

Shop keeper in Nice

Get creative with light painting or try and capture the moon- night time is just magical for photography. 

If you live in a part of the world where the 🌞 is still up when most other places are much darker, that’s cool too.

Summer evening

TIPS:

  • ISO: There’s a lack of light – so remember to adjust your ISO settings appropriately, the higher you go, the more digital noise you will encounter.
  • Long Exposure: To compensate for the lack of light, long exposures work well for getting sharp images of static subjects like cityscapes and smoothening water ripples. Anything under 1/125 you want to rest your camera on a hard surface or tripod.
  • Light Shaping: Use lights to shape the exposure – you can isolate your subjects more easily since the background will most likely be darker due to the absence of ambient daylight.
  • Shoot Manual Mode: Consider shooting in Manual mode to correctly adjust parameters to get your desired exposures.
  • White Balance: Artificial light in urban areas can add different color casts to your image. See if adjusting the white balance can add more depth to your image.

52 Frames: Week 31: Choose Color!

Look around and we’ll see something we take for granted – color. Our wonderful world is filled with it, so this week we’re asking you to Choose A Color. Make that color the theme and inspiration behind your image. Colors evoke moods and feelings – how you choose to compose and use them is what will guide the viewer through the image.

Choosing to focus on a single color in particular is both creative and good use of light, contrast and saturation is what can make or break an image. Pick a color and make it the dominant and outstanding and leave no doubt about which color you wanted to make the main point of your shot.

I am having huge problems with my computer, so much that I need to buy a new one, so these are old shots that I have here already used in my previous posts over the years. I am not able to access my computer files, or additional hard drives to add photos or load new ones from the camera disk. I am able to access the internet for now, so I am using these here this week.

Think landscapes of rolling green hills, or food shots of red chilli peppers or the all encompassing golden color at sunset – there’s a noticeable dominant color there and that’s what we’re looking for.

orange
Green
  • Composition: Compose your shot so there’s no doubt as to which color you’re trying to use. Think about any emotions or moods your photo can evoke and bring that to the forefront. You could use a lot of negative space to direct interest to your subject or go in full-tilt and fill the frame
  • Lighting: Lighting and shadows add depth to an image and can change an image dramatically. An underlit and underexposed image brings to mind a different mood than a bright, well-lit one.
  • White Balance: . Using and adjusting white balance while taking your photos will be valuable
  • Contrast: If there are multiple colors and shades in your image, ensure that there’s one that’s visibly up front and recognizable – it contrasts and stands out from the other shades and tone of the image.
  • Post-processing: Feel free to go nuts with post-processing and editing to render some cool color effects. But remember, less is more.
Blue

52 Frames: Week 30:  Single Focal Point!

This time around, we want you to look closer at a Single Focal Point. This is not a technical challenge, it’s more compositional in nature – guide your viewer’s eye to a distinct part of your image. There are a number of ways that this can be done – depth of field can make it so a subject is in focus while almost everything else is blurred; or you could use negative space and a minimalist composition to draw in the viewer to one part of the image. Sometimes you can also use light as a frame to guide the viewer’s perspective to your subject – think spotlight and light shaping.

These photos I took from a car ferry while on my way to visit a small island of Högsåra were one of my ideas to this topic. Strong Focal Point: This is pretty much the crux of the challenge – but it matters the most: choose a strong focal point that’s easily identifiable as the main point of interest of your shot.

It’s all about tuning out the distractions and taking your viewer to the exact spot in your image you want their eyes to well… focus on. You might also want to consider getting some help from your editing software with vignettes, color pops and contrast to make your desired subject stand out. Even better, use a combination of these techniques and other skills to get this challenge sorted.

Depth Of Field: Use a shallow depth of field to isolate your subject. You might also want to consider getting some help from your editing software with vignettes, color pops and contrast to make your desired subject stand out. Even better, use a combination of these techniques and other skills to get this challenge sorted. That’s what I tried here with my strawberry shots.

Leading Lines: Think of using leading lines to guide the viewer to your intended point of interest.

Leading Lines to guide the viewer to your intended point of interest in mind I took these images of old buildings and this lush road. Consider using some sort of frames to bring in the watcher’s attention – a window, slats of a fence or some tree branches; shooting through something can also work to steer attention to your focal point.

Color Contrast: Contrasting colors help the eye to easily differentiate the subject from the background

I had this n mind when I took this image from an old mill window in Mathildedal, contrasting colors help the eye to easily differentiate the subject from the background.

52 Frames: Week 29: Common Object!

This week, we’re looking to shoot a Common Object. And isn’t that what photography is all about, really? Taking the mundane and shining a different light on it. Highlighting an object or scene that we normally pass by with no notice, and making it something special.

Think about all the common objects you can see around you right this moment – a bottle, socks, a pen, eggs, coffee mugs, perfume vapor, cell phone – the list of subjects you have this week are endless.

beads

I once again left this to the last minute, being on holiday it is all about being lazy, or not if you are married to a man who needs something done every day. So this week we have re-arranged our sauna / guest room furniture, got rid of some stuff, bought some new to replace the old one. Re arranges the kitchen cabinets, put up new shelfs. We gave a away a car load of old furniture to be recycled to a flee market. A car load of stuff to the be recycle center. Busy with ordinary, common objects, but it never crossed my mind to take photos. Today, last day to give in the submission I took some photos of common objects.

I often wear costume jewelry, so common to me. I drink coffee, wine and my hubby enjoys whisky. These are some finds from the cottage. Also these old glasses I found whilst our cleaning spree.

Now the challenge is to simply make the ordinary look extra ordinary, or at least photographed well. You could try focusing on a particular detail or texture. Or perhaps show how you use it in your day-to-day life. Tell a story about how something mundane and ordinary can be a valuable part of your day.

Sailing at sunset

what is life with a occasional glass of wine or a cup of coffee

Old coffee cups

TIPS:

  • Selection: Start at the very beginning – pick an object that speaks to you – whether it’s your car keys that you pick up everyday, or the chef’s knife you use to prep dinner.
  • Composition: Arrange things how you want them – the great thing about common objects is that you can arrange them as you see fit; you’re not restricted by an inability to pick things up and move them around.
  • Tones & Colors: The overall look and feel of the colors in an image evoke different senses and emotions – do pay attention to the composition of colors and overall tones in your image, in terms of being complementary or adding contrast.
  • Balance: This is all about the visual weight- obviously, larger objects that fill the frame are meant to hold the viewer’s attention the most. Certain items can add nuance and help balance a frame without taking away from the main subject.

52 Frames: Week 28: Silhouette -v2

Photography is drawing with light and this week’s Silhouette challenge firmly shows us that. A silhouette is about bringing together contrasts of a well-lit background against a dark subject, making the subject’s shape and outline as the main point of focus. A silhouette balances what the viewer sees alongside the darker toned facets of the subject that are intentionally kept hidden from the light.

Silhouettes are a great way to tell a story while leaving it up to the imagination of the viewer – there aren’t visible features to express emotion, so your viewer will fill in details depending on the context of the image – use this to direct your viewer’s line of thinking.

Waiting for the rain to stop

This is a lesson in exposure, composition and creativity all coming together. While silhouettes are outline.. Portraits, Still Life, Architecture and Nature typically make for good silhouette genres.

Silhouettes can often convey some kind of mystic story. By leaving the details in the dark, the story becomes compelling and the viewer is more engaged with the picture.

A boy and a fox

I was nearly ready to cheat, until my youngest grandson said he would let me take a photo of him. It was a rainy day and he sat by the window with a cuddly fox. Here was my opportunity to capture a silhouette

Alone

52 Frames: Week 28: Silhouette!!

Photography is drawing with light and this week’s Silhouette challenge firmly shows us that. A silhouette is about bringing together contrasts of a well-lit background against a dark subject, making the subject’s shape and outline as the main point of focus. A silhouette balances what the viewer sees alongside the darker toned facets of the subject that are intentionally kept hidden from the light.

People waiting for sunset in Crete

Silhouettes are a great way to tell a story while leaving it up to the imagination of the viewer – there aren’t visible features to express emotion, so your viewer will fill in details depending on the context of the image – use this to direct your viewer’s line of thinking.

waiting for the sunset

This is a lesson in exposure, composition and creativity all coming together. While silhouettes are commonly shot in the day and at golden / blue hours, you can absolutely shoot silhouettes at night too. This will work best when the object being shot is recognizable through their well-defined shape and outline.. Portraits, Still Life, Architecture and Nature typically make for good silhouette genres.

Silhouettes can often convey some kind of mystic story. By leaving the details in the dark, the story becomes compelling and the viewer is more engaged with the picture.

Sailing at sunset

I would have loved to use these shots I took at Crete as they would have suited this challenge perfectly, but no, still I think they are great examples of silhouette! But I will have to come up with something new for the challenge or I could cheat… no, I won’t do that.

Waiting
Palm trees at sunset

TIPS:

  • Background Choice: Very often, we blur out the background and pay less attention to it. Here, pay a little extra attention to your choice of background. Make it contrast with the shape of your main subject.
  • Narrow Aperture: Shoot with a relatively narrow aperture of f/8 or higher to reduce the amount of light falling on your sensor, getting great Depth Of Field and also reducing chromatic aberrations especially if you’re shooting into the light.
  • Metering: We want to “trick” our camera into intentionally under-exposing the subject. So use spot metering or expose for the background.
  • Post-processing: Use software wisely – in post processing, it’s generally helpful to boost the contrast in your image, add more saturation, and increase the blacks slightly to improve a silhouette shot.

52 Frames: Week 27: Negative Space!!

 Less is more. This week’s Negative Space challenge is what those words are all about. Make your composition’s subject stand out by ensuring you eliminate clutter, distractions and sometimes even a background.

Peony in monochrome

Many minimalistic photography images have a great deal of negative space to isolate the subject. There are tons of genres and ideas that would make for very compelling shots – architecture, landscapes, portraits, food photography, abstracts and so much more. Think about the story or emotion you’d like to convey to your viewer and compose your shot after taking some time to think about it.

Daisy

We’re looking for clear, un-cluttered images where the space surrounding the main subject or idea enhances your shot by taking the viewer’s eye straight there. That little bit of extra space allows for breathing room and leaves no doubt as to what the main point of interest is.

Alone with bokeh

There’s magic in negative space, when used wisely, so think, breathe, shoot…

TIPS:

  • Zoom with your feet: Move around to get the best composition for your photo.
  • Different shooting angles: Because everything else is simplified in your frame, you have more license to “break” the rules of typical composition, for example where your subject is placed in the frame, or where they are looking.
  • Find your background first: Go on a hunt for a red brick wall, or a blue garage door, then place your subject in front of it.
  • Balance: Use the negative space to balance out the main subject. Don’t go overboard with the negative space, making it hard for the viewer to understand and absorb the main focus point of your shot.
  • Shoot wide open: That dreamy, creamy bokeh is a great way to simplify your subject’s background, and keep the frame more minimalistic.
Negative space with daisies

I would have loved to use some of the shots I took at Crete as they would have suited this challenge perfectly, but no, still I think they are great examples of negative space.

52 Frames: Week 26: Pattern!

For many of us, seeing a Pattern comes quite naturally – after all, it’s just something being repeated in a pleasing way. That’s why so many of our creations use patterns – whether it’s the crimped crust of a pie or some beautiful inlay mosaic work on floor tiles – patterns and repetition of shapes stands out to us.

I had lots of ideas, but well I run out of time and took an easy way out, because patterns are everywhere, but to get an interesting shot of it, is an other thing altogether. I went with the fern this time as the shot of peaches and butterfly are not new and the challenge is to take a new photo every week. If I had had the energy I could have tried to capture similar shots again. Not this time 🙂

Maple leaves

Let the patterns to tell a story and that’s where the creativity comes in. Look for geometric and sharp angular patterns if you want to compose something using a pattern of shapes. You could also seek out patterns with colors. This challenge can overlap with other sub-genres like Repetition or Textures. Other genres like Abstract Photography or Architecture are also great ideas to find patterns.

Fern leaves

One final thought – Most, if not all, patterns have repetition. But not all repetition forms a pattern. Just think about that for a bit.

Extra Challenge: Found In Nature

The wings of a butterfly

Tips and Tutorials

TIPS:

  • Shooting Angle: Consider taking your shot at an unconventional angle – the human brain perceives patterns differently when shown in different perspectives.
  • Shape Patterns: Hunt for shapes and geometrical forms that draw the eye in. Use those to direct the viewer to where you want.
  • Color Patterns: In a world of color, look for collections and bunches of distinct colors that are recognizable.
  • Go Wide: A wider field of view may help get more subtle patterns to be more noticeable.
  • Make Your Own: Using a prism or reflective surfaces can make for some amazing portraits.
  • Break The Pattern: Try and create a contrasting point of interest by breaking the pattern and having an object of focus in the midst of your composition.

Peach

52 Frames: Week 25:  What is it!

What the heck is that?

That is what, I have tried to figure out, how to shoot it. That is between my coughing fits, this flu or what ever it is very strong and persistent.

If that’s the reaction your photo gets, then that means you did it right! Did i succeed in anyways?

Guess?

This week we are diving into the abstract, the macro, the hidden angle, the way the light touches an object, or even getting inside an object, and giving a different view of a familiar world in order to challenge our viewer into figuring just WHAT IT IS that we photographed!

can you guess?

You do not need to shoot macro or up close, you can mask certain details using light (or shadow) to show what you want and hide what you don’t!

Is it a whisk? A spoon? A grain of sand?

What the heck is that?

what is that

52 Frames: Week 22: Everything In Focus!

We’ve all seen wonderful images where a particular subject is in focus and the rest of the image is soft, so our eyes are drawn to the main element. This week, we want to see Everything In Focus. This is where your choices of subject, composition, lens selection and depth of field all come together to give us sharp images front to back.

Took this in Crete, it is from the entry to the Samariá Gorge. The gorge is situated in the National park of Samaria, in the White Mountains in West Crete. This majestuous gorge is considered one of the great attractions of Crete. It was created by a small river running between the White Mountains (Lefká Óri) and Mt. Volakias.
I took some with f/22, but as I did not have a tripod, the are a bit shaky. I think this is a sweet spot for these shot f/14

Samariá Gorge
  • Stability: Use a tripod or some sort of support to eliminate any chance of camera shake.
  • Shutter Speed: A high enough shutter speed to freeze any motion in your shot will get rid of blurs caused by movement.
  • Depth Of Field: Focusing to infinity at the highest aperture (f/22) isn’t always the best choice. Picks an aperture that’s at the sweet spot of your lens – usually a few stops below the max.
  • Focus Point: Try focusing at different points – one third of the way in or half the way in and see which gives better results.
  • Focus Mode: Single will usually be a better choice than continuous. Also, consider using manual focus to get sharp images.
  • Live View: Use live view and zoom in to your focus point to see if it’s sharp enough and lock in your focus.

52 Frames: Week 19: Architecture !

We’re shooting Architecture this week. Go out to places and shoot structures that we might not pay enough attention to – the sleek glass façade of a modern skyscraper, or maybe something with an art-deco frontage from decades earlier. Architecture isn’t all about the outsides alone, there are many places with magnificent interiors from churches and temples to a modern airport lounge.

Old medieval church and new built modern Library in Kirkkonummi, Finland

The church and Fyyri library (2020) were reconciled with the help of building materials and so that the reading room and café opened towards the church. A large glass wall visually connects the church into the library.
Kirkkonummi’s medieval stone church is located in the center of Kirkkonummi. The exact time of construction is unknown, but work apparently began in the 15th century. Kirkkonummi Church is named after St. Michael the Archangel.

Originally, the Church was small. In addition to stone, brick was used as the material. In the 18th century, the church began to expand, and in the mid-19th century it was transformed into its present form as a cruciform church. The church bell tower was built in 1824.

Window detail of the library

It’s not just all about shots of buildings either – things like bridges and underpasses, tall radio masts, dams, windmills can all be amazing subjects. There’s also a lot of character in structures that are old or run-down: wabi-sabi is a concept that explores beauty in the imperfect and that ties in very well with many different kinds of structures.

old and new in color

Find an archway or opening you can use to frame a shot. Or use the architecture to create leading lines, symmetry, and repetition of shapes. Take your time, scope out your composition – maybe walk around a bit, looking for a nice perspective and shooting angles that work. A little bit of thought will make for some compelling and creative architecture images.

52 Frames: Week 18: Flat Lay !

Time for a genre that’s rather popular on social media in recent times – Flat Lay photography has simple rules – take a shot of items or objects laid out on a flat surface from immediately above. Basically, a bird’s-eye view of a set of objects that make up a cohesive whole.

I thought that I would share a little bit about myself for those who are new to my blog. I have painted with different mediums since I was a teenager, and still continue with various art hobbies. Acrylic- and oil painting, pastels drawings, oil inks, aquarelles etc. I also do sculpture. As I am not a great cook, or my art is not setting the table beautiful. I took out some of my brushes and color tubes. I even tried do a self portrait, but I did it with an old photo of me.

Think of it like setting up a mood board or if you’re into food photography, setting up a dinner table with dishes, accessories and food. You could show off things that speak to you in your hobby – like a set of gardening tools or knitting yarn and needles. How about a top-down view of your desk – are you a neat freak or a proponent of organized chaos? Go for understated minimalism or bold maximalism – the choice is yours.

Perhaps you could include a bit of portraiture by putting yourself in the shot along with some outfits and hats that you adore and take a self-portrait. Take things a step further with knolling – laying everything out at perpendicular, straight angles to each other. Don’t be restricted to indoor shots either. You can grab some cool shots with organic, natural ground as your flat-lay background.

52 Frames: Week 17: Leading Lines!

Time for a compositional challenge, this week – it’s Leading Lines.

I was walking in a flea market and came across this old calculator covered with dust, but as I was not able to clean it, it shows old dust, dirt, but he lines leading to the name are clearly to be seen. I took it as a black and white as an a period piece I thought it would be appropriate and well the dirt is less visible this way.

The other choice was an old typewriter, but as you can guess I chose to post the calculator, did I make a right choice?

Leading lines are lines that guide the viewer from the edge of your frame towards your subject, usually coming from a corner (s).

Look for things in your scene that effortlessly takes your viewer’s eye straight to your intended subject. We’re trying to direct the viewer to a part of our image that is most important in the composition. Think staircase railings, paths and roads in a landscape, bridges and jetties leading off into the distance all make for excellent ways to incorporate leading lines in your shot.

Feel free to think out of the box… Remember leading lines don’t need to be straight. Curving streams, rice paddies and long-exposure car taillight streaks can all look very cool in a shot. Patterns and textures can also form leading lines to take your viewer straight to the action. Just be alive to your surroundings and you’re sure to see leading lines for your next epic shot!


52 Frames: Week 16: Lamp!

While we like to focus on the lighting used in photos, we want to include a lamp this week! That means including a lamp IN your photo, not just the suggestion through lighting.

 This simple little device has so many forms – Perhaps you could share a story of your own little reading nook where you enjoy some solitude or showcase a scene where the lamp is the hero of the image.

I had an idea, but in the end I was too lazy to do it. I have done nothing this week, well related to photography that is, I did manage to do this.

I took an easy route, I took a photo of one of the lamps in my entrance, did not even dust of the lamp before the shot, well it does a tell a story of the owner for one. To be honest, I think it has a story in it, a story of a girl sitting and reading under a lamp. That is why my art statue, is placed there and I am rather happy with this one.

Some of the suggestions to guide me were: Maybe you could do your own take on some classic art with chiaroscuro lighting. You could even try to use wabi-sabi concepts to bring out the beauty of a much used object, go for a low-key style with lots of shadow in the shot, or take an HDR shot with multiple exposures to illuminate your composition thoroughly. Don’t just take a snapshot, take a photograph that tells a story.

Was mine just a snapshot?

52 Frames: Week 15: Extreme Closeup!

this week I have been taking close-up shots. Time to get up close and personal with an Extreme Closeup. If you are thinking this is the MACRO challenge, it is NOT. If you go to the dictionary, you’ll find a closeup is  1. a photograph, movie, or video taken at close range and showing the subject on a large scale. “a closeup of her face” or 2. an intimate and detailed description or study.

I did the winter worn hydrangea again, as the date on the picture has to be same as the weeks challenge. I took shots of the dry flower I had in in bouquet I had couple weeks back. I also have shots of my cat Tinka, but I have to look them thought and edit.

What can you tell your viewer by pushing in close? 
What do you want to bring attention to?
Try to find an interesting detail or feature – heck, the most mundane of objects can have something striking if you look closely enough. That’s what this challenge is all about – take a moment to look closer and see those details that are often overlooked.

so simply put, move in and fill your frame with your subject.  The idea is to get right into a subject, and have that subject fill the entire frame. You can zoom in with any lens you have, and your feet also make an excellent zoom feature, just walk close to your subject! 

PS. This week like last has been hoping and praying that the snow would melt, but it is happening so SLOW!!!! The southern facing slops are free of snow, but our backyard, come on this has 0-40 cm snow. So not much to spot of the spring wonders that delights me every year…