Prompted by lovely Margaret, for Leanne’s Monochrome Madness. What she’s asking for are photos of subjects you’d normally choose to shoot in colour exactly because of their vibrant colours. The challenge lies in translating these vivid visuals into the stark yet expressive world of black and white photography. Can you transform these familiar hues into a captivating monochrome experience that holds its own allure? It’s an exciting test of creativity, pushing the boundaries of one’s artistic vision. Let’s see how I do in this intriguing endeavor, experimenting with contrasts, shadows, and textures to create images that resonate even without their natural colours.
Do you care for some strawberry cake? I found red rather tricky, so it did not appear too dark.
When considering the color purple, one might wonder how to make it truly pop without resorting to the use of stark white. There are various ways to enhance its vibrancy and create a more lively appearance. Utilizing textures or patterns alongside can also enhance its visual appeal, ensuring that it stands out while maintaining its rich character.
Cows are so cool, either way. No?
Art, when transitioning to monochrome, demands a keen understanding of color nuances and their emotional impact. This absence of color reveals the core essence of a subject, challenging artists to express their vision through shades of black, white, and gray. The monochromatic style highlights form and texture, encouraging deeper viewer engagement and interpretation, making it a compelling exploration for both artists and audiences in a colorful world.
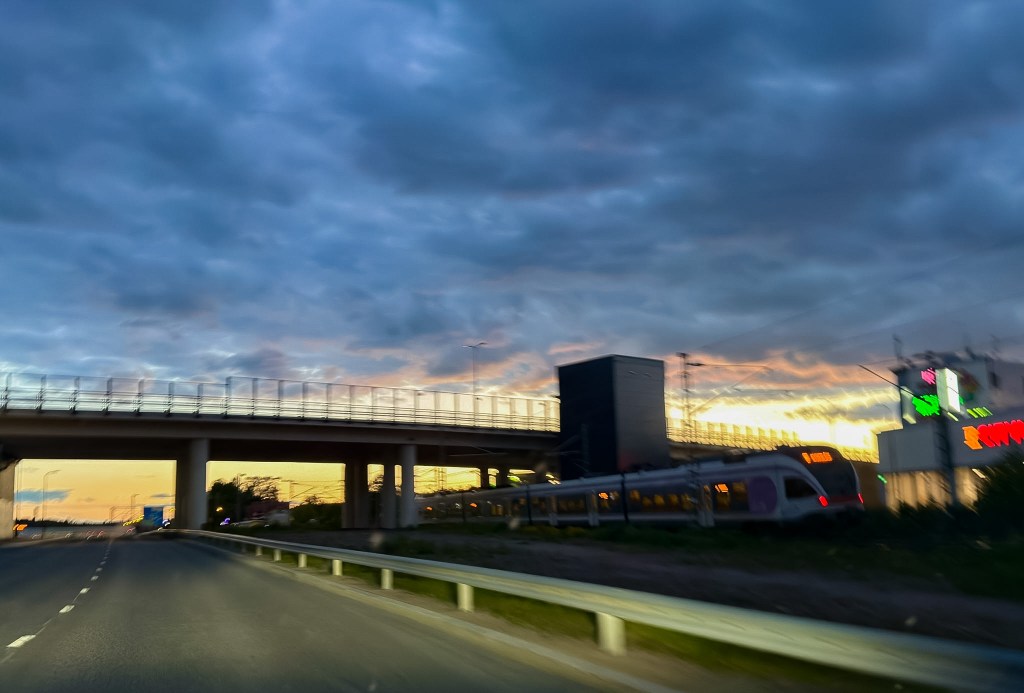
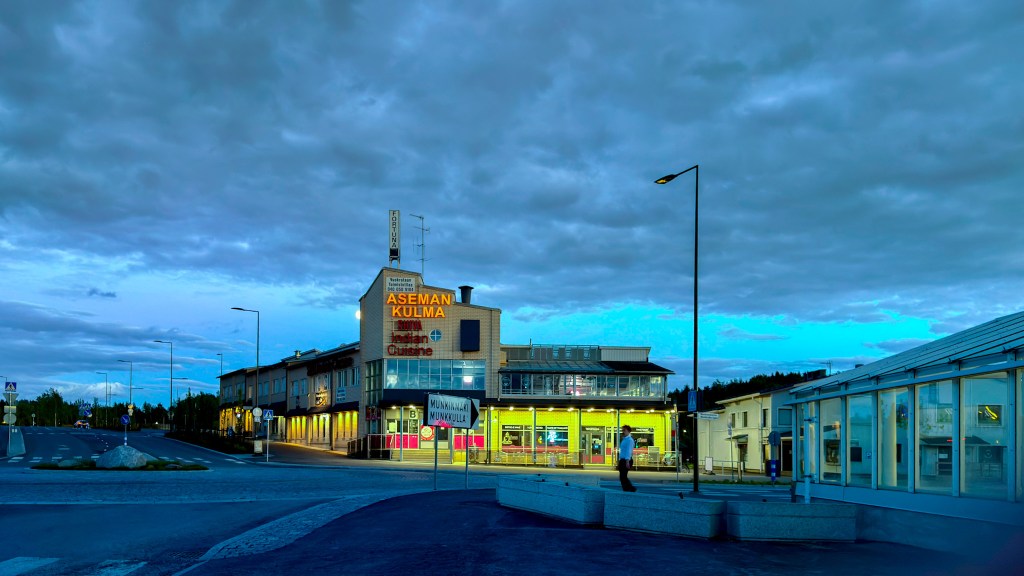
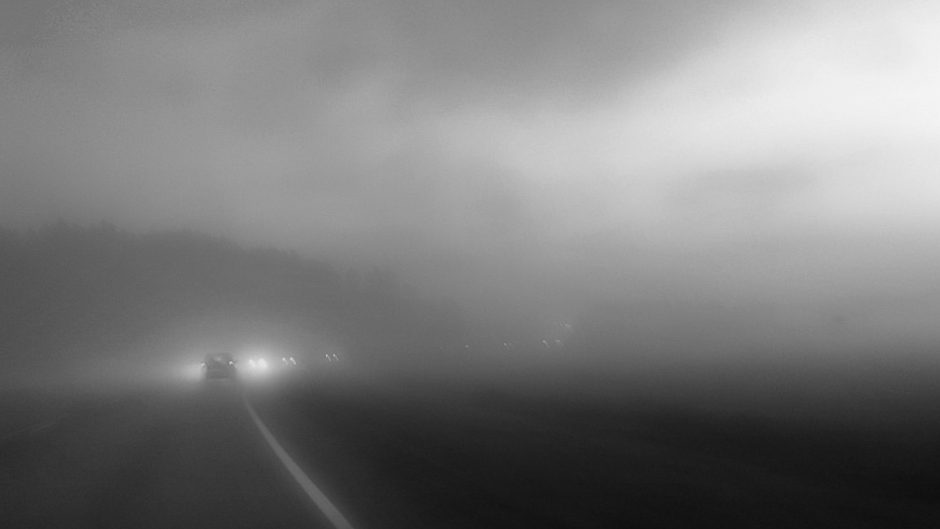
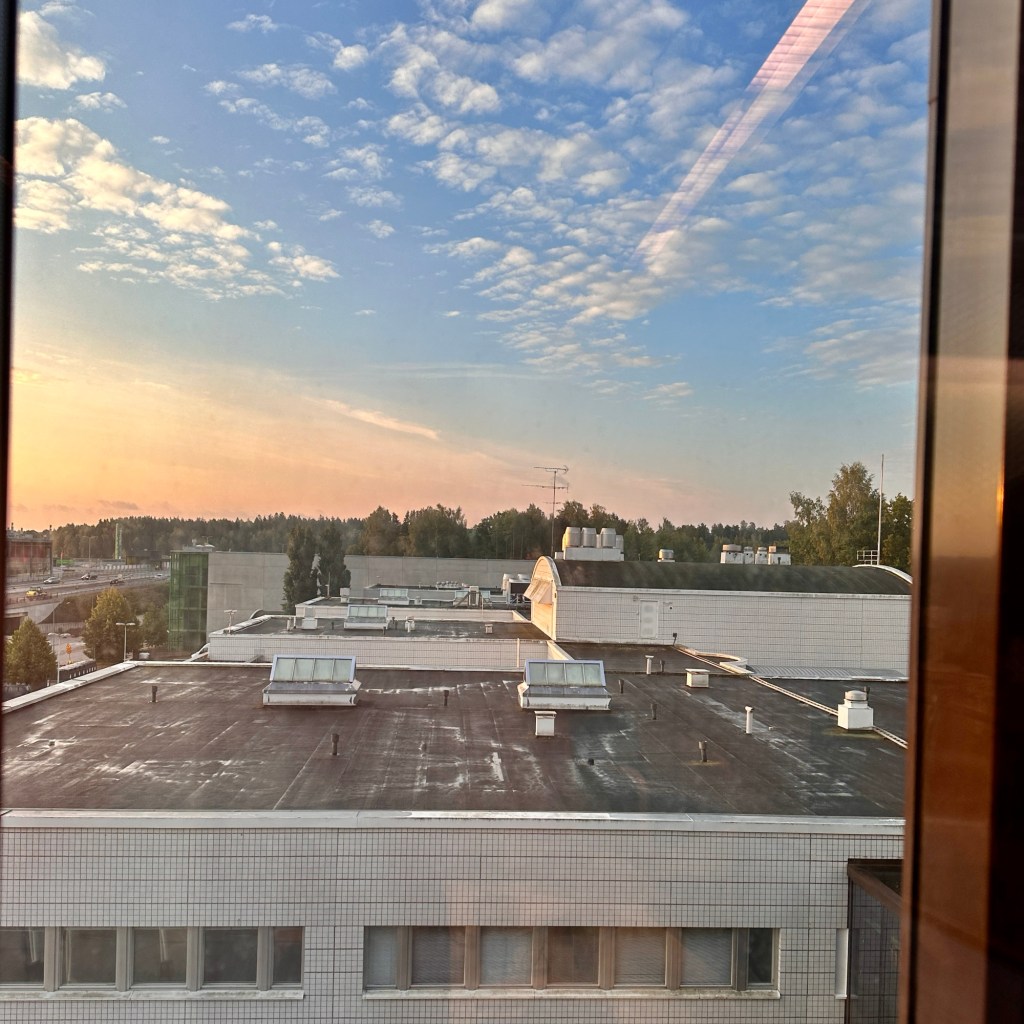
For John’s Cellpic Sunday. I Post photos from few days back, I went to pick up my husband from the train so I took the opportunity to take few photos. I know I shouldn’t take photos while I drive, but the roads were empty of traffic
Dark clouds at 11PMThe train arrived on time The streets are empty
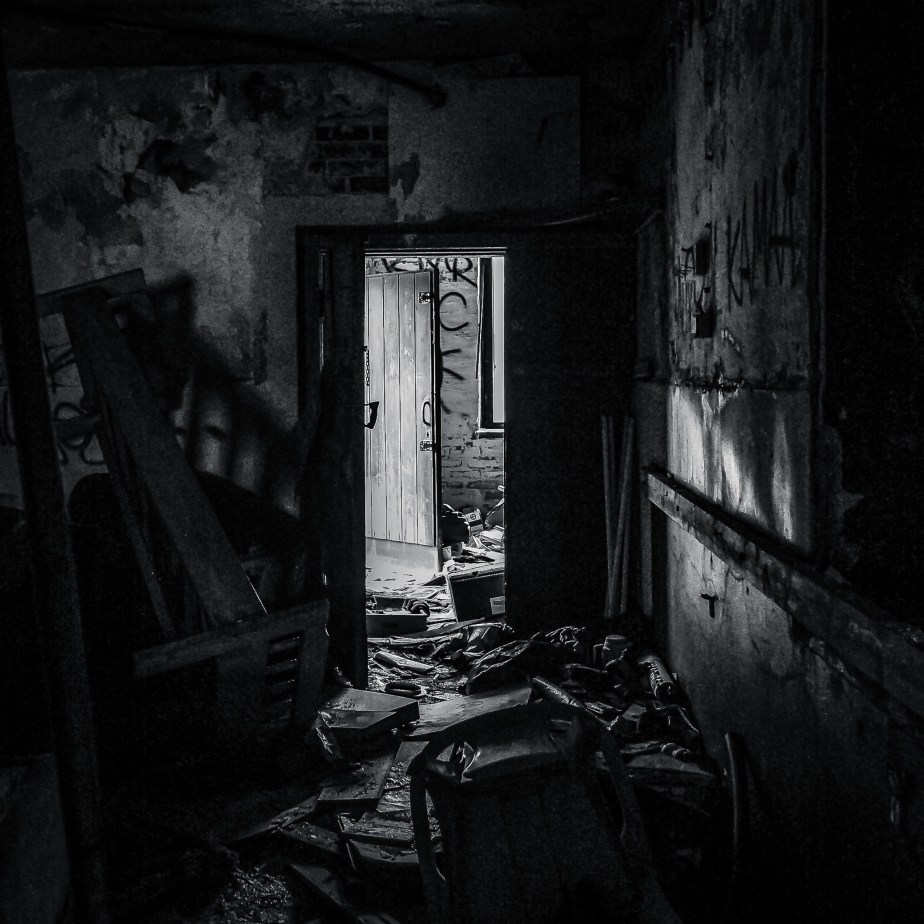
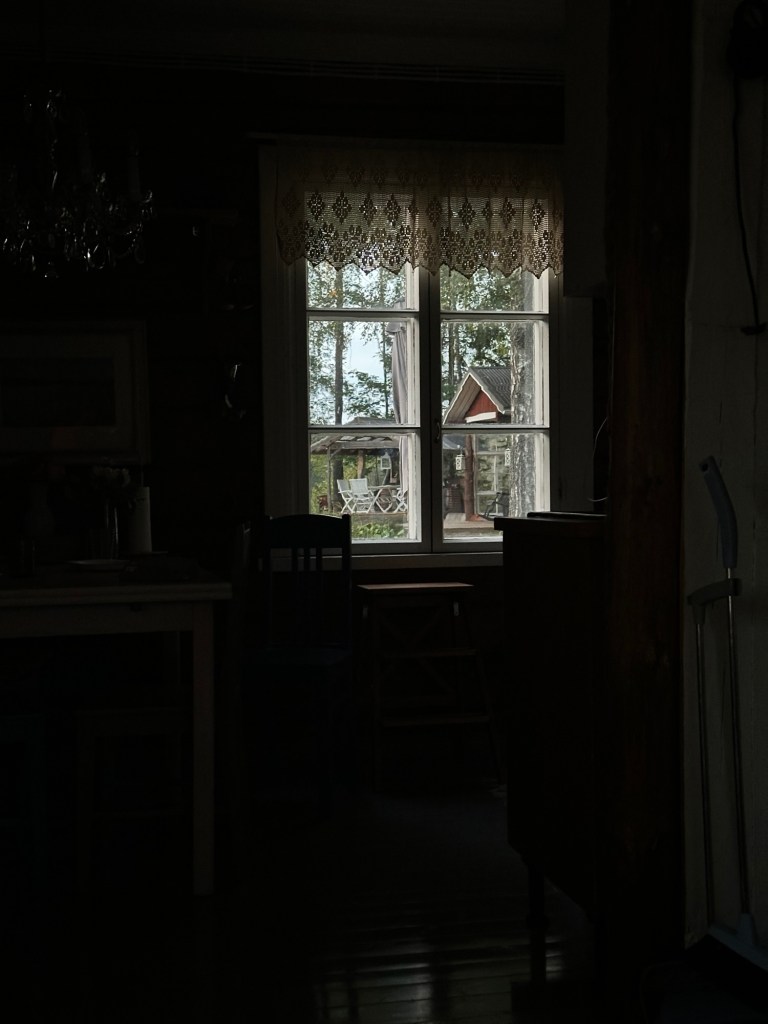
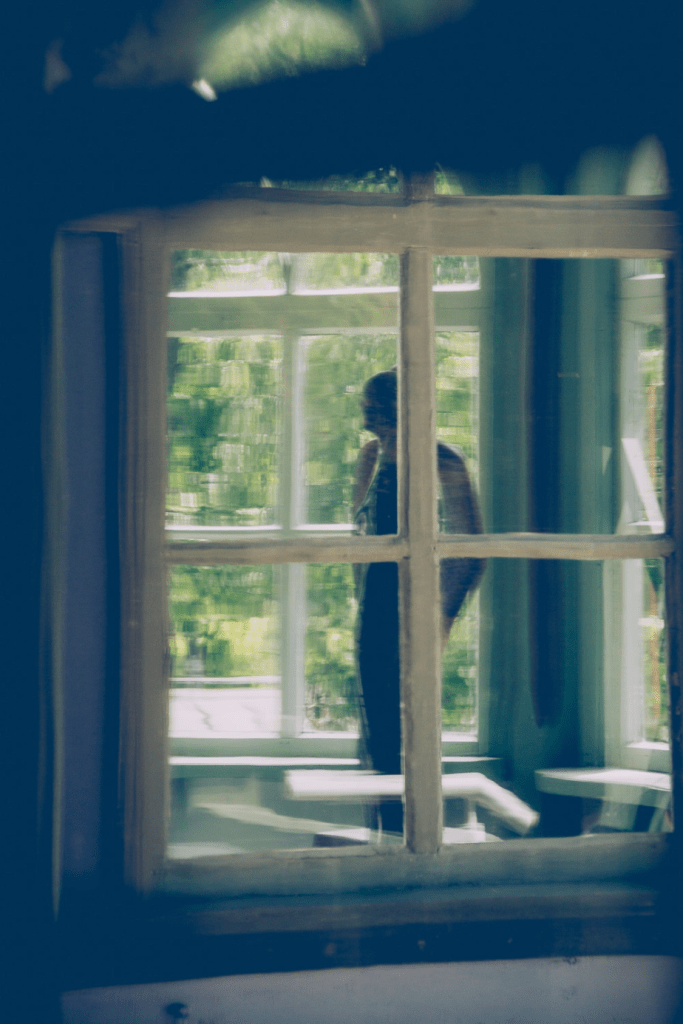
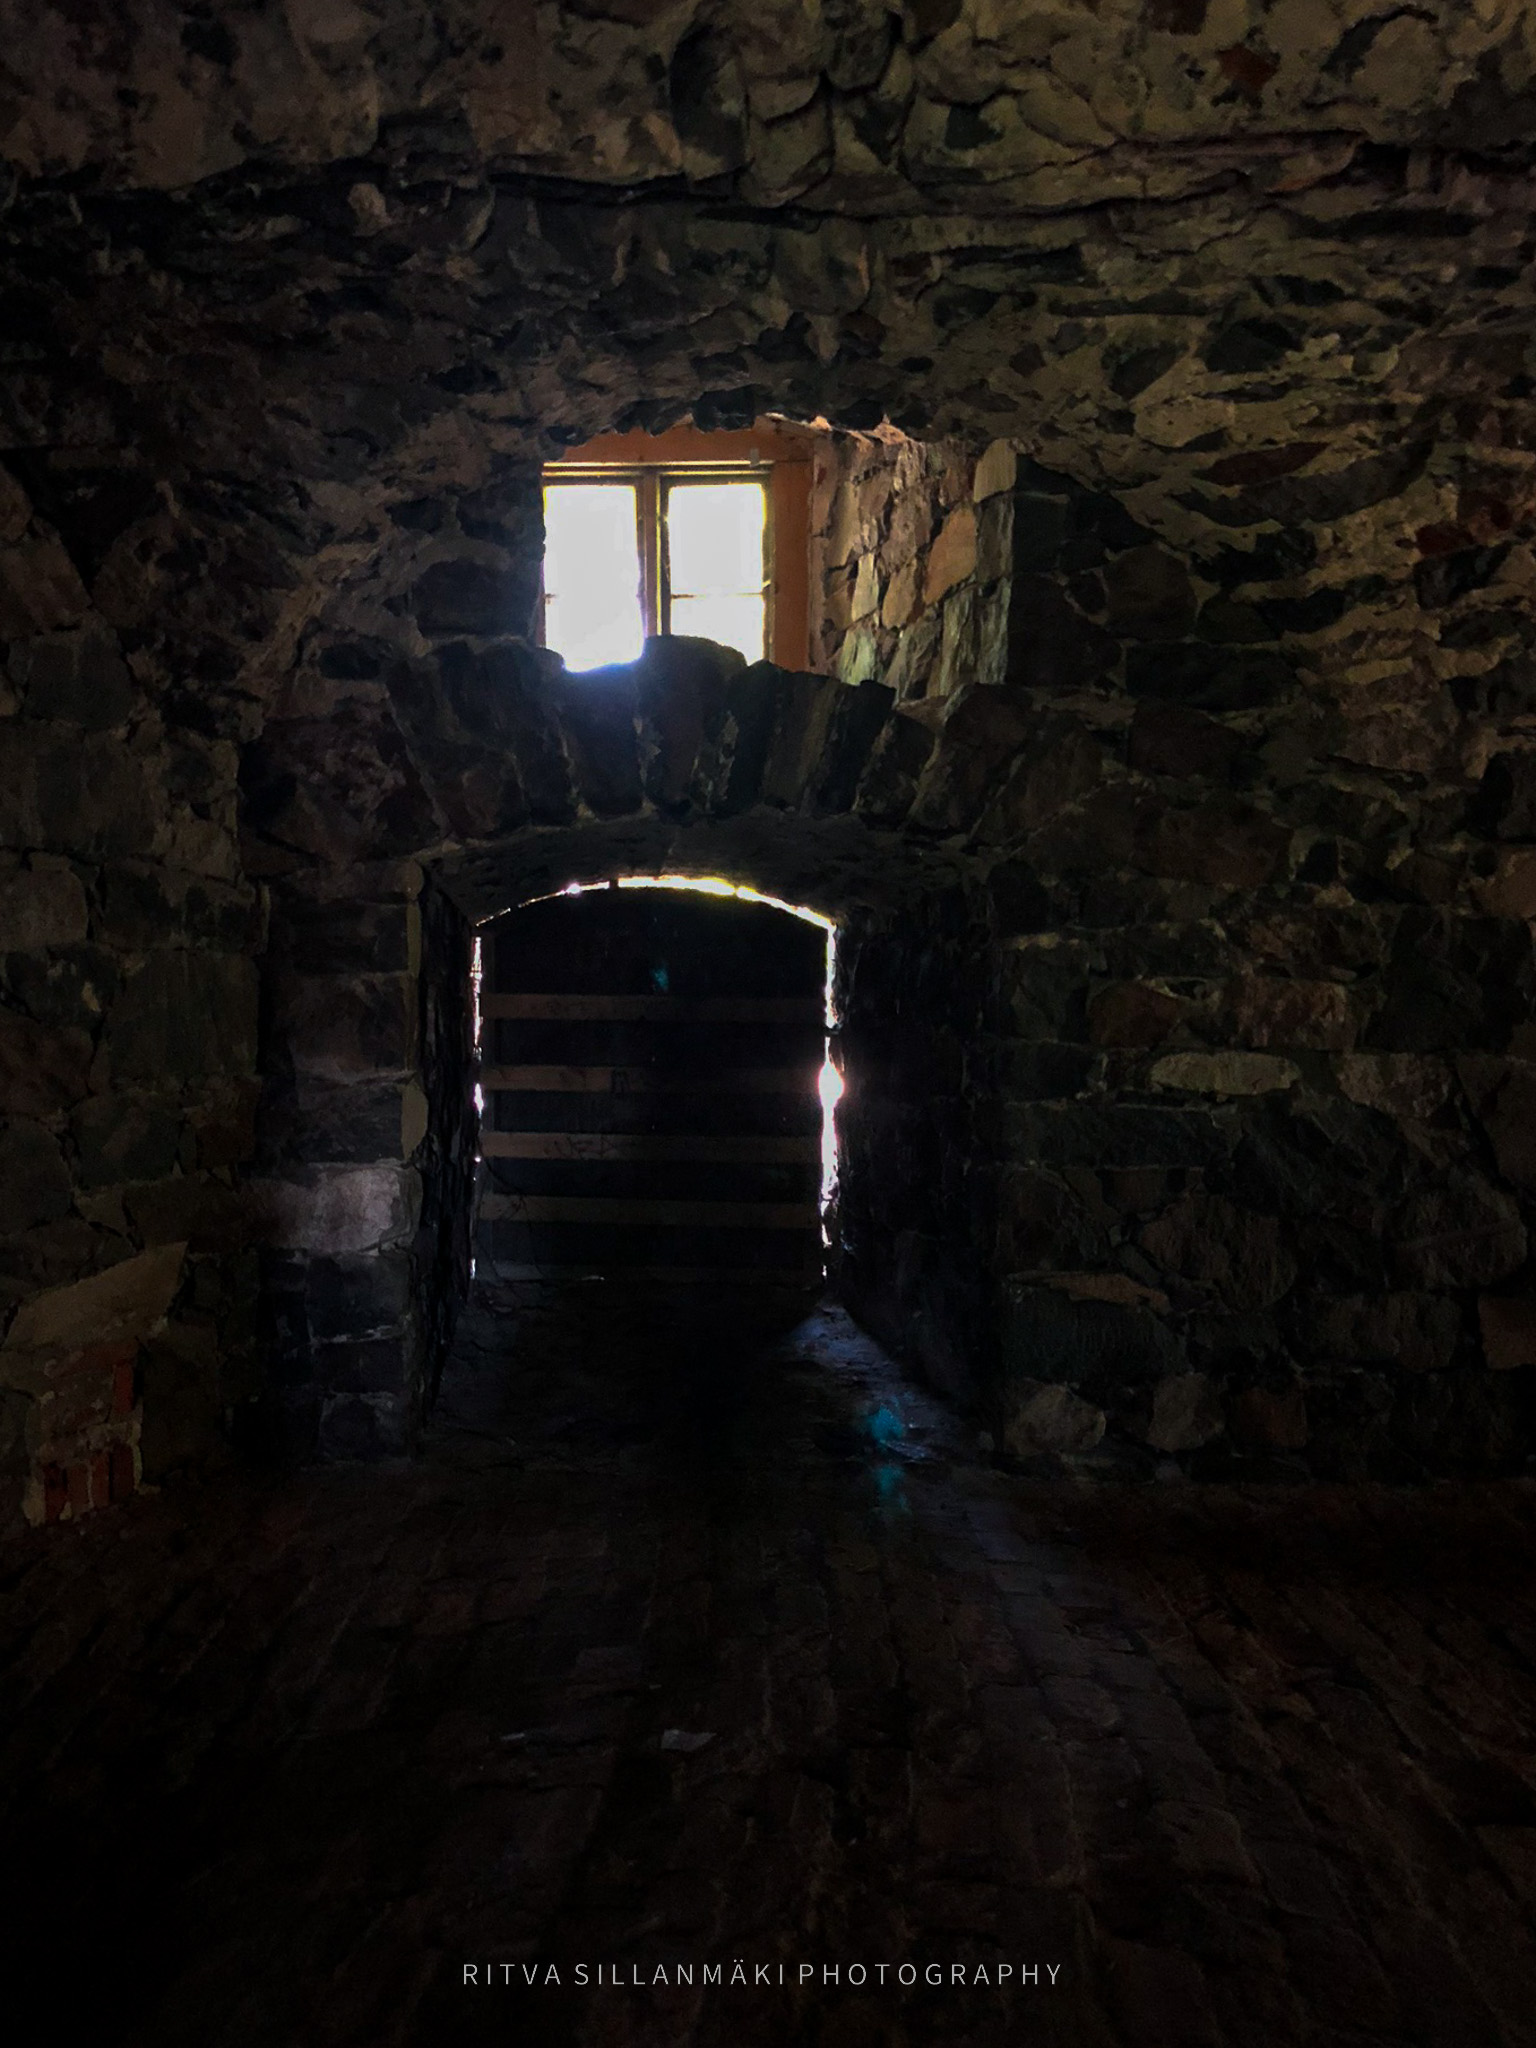
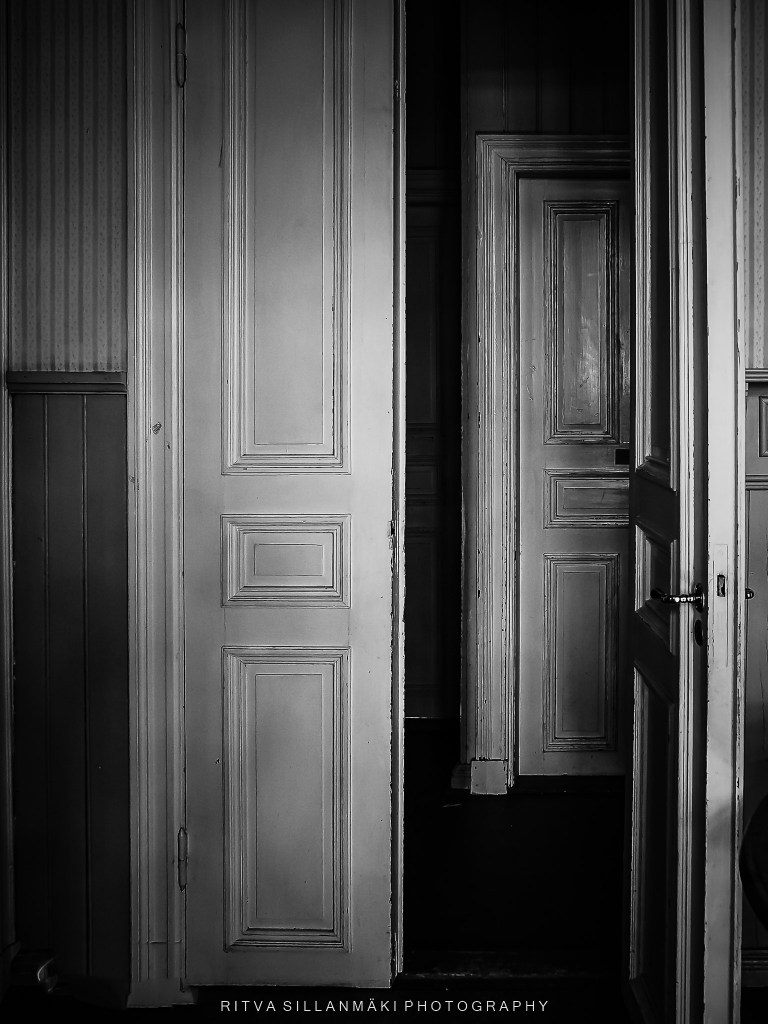
I’m still hanging out in the deserted barn in Veklahti, Kirkkonummi, which has been charred for years. Over the weekend, I found out that it’s a protected structure and that a film crew was on site—apparently shooting a war movie. This information was shared with me, though I haven’t verified it myself, but my source is trustworthy! 😀
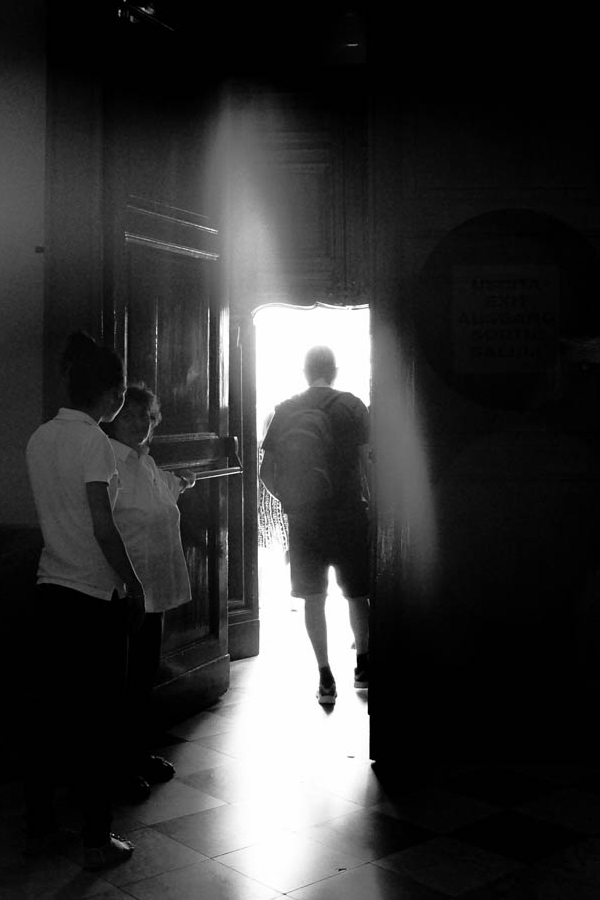
A dimly lit hallway in a dilapidated building, featuring a doorway illuminated in the background.
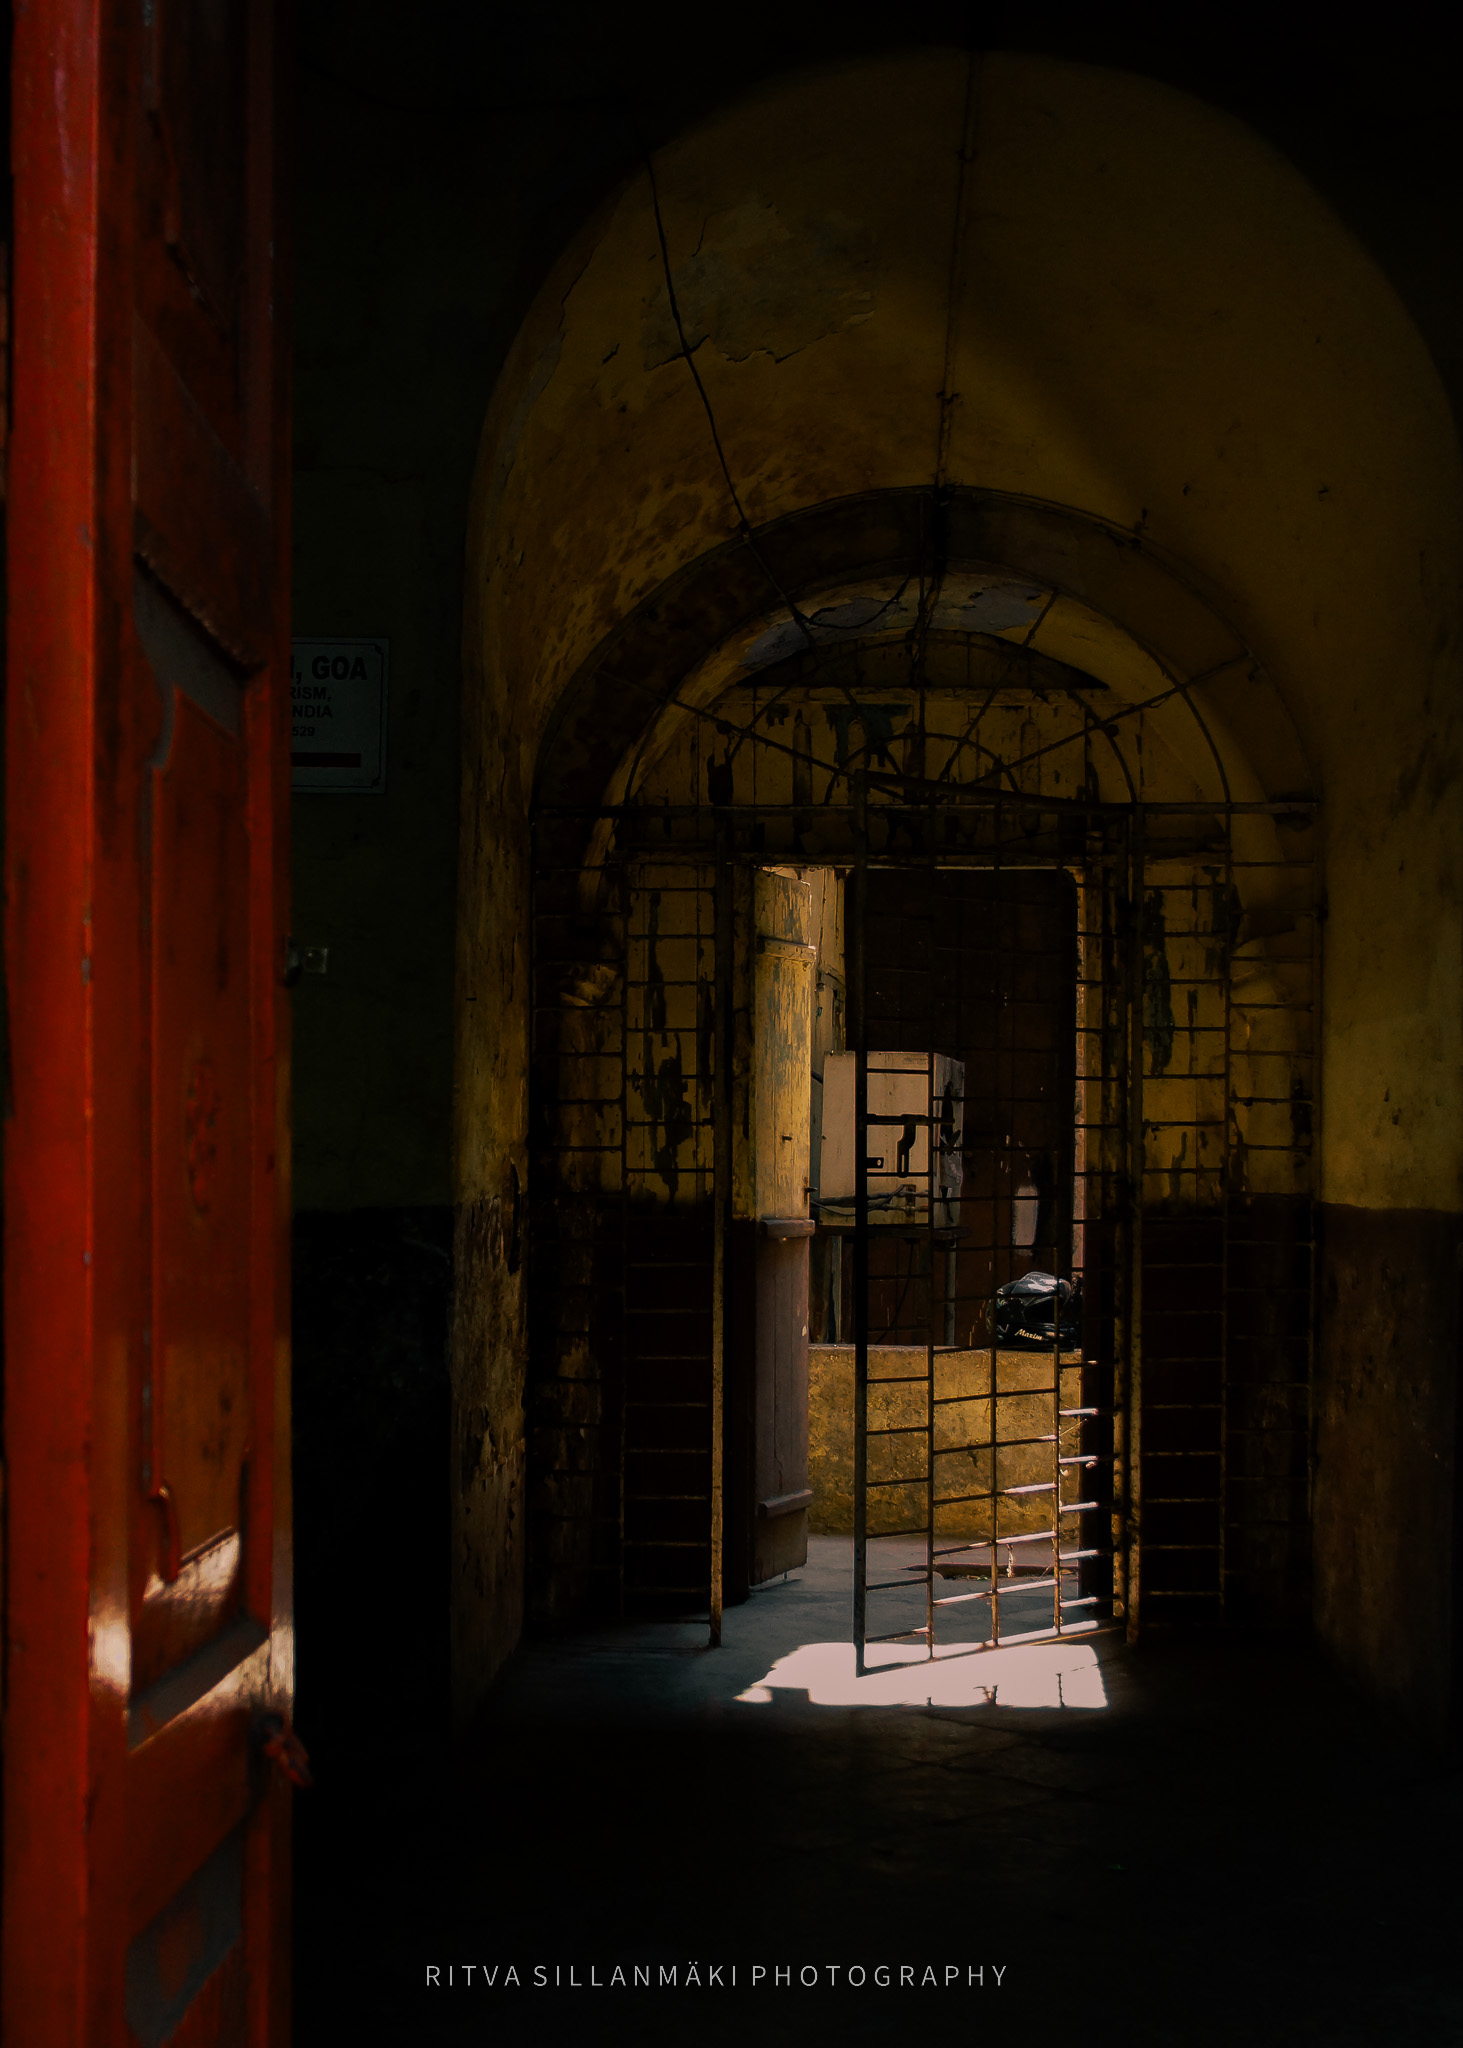
The place is a photographer’s dream, and I have SO many shots to share! The views are absolutely stunning, with every angle offering something unique to capture. I really like these images, both in black and white and color, as they evoke different moods and feelings. I enjoy how the light streams in, illuminating the scene while shadows adds depth to each shot. Also, all the junk scattered around lets one’s imagination run wild, inspiring countless stories in one’s mind. There’s endless possibilities here that truly fuels creativity. Do you agree with me?
A dimly lit, cluttered hallway leading to a door, illustrating decay and neglect.
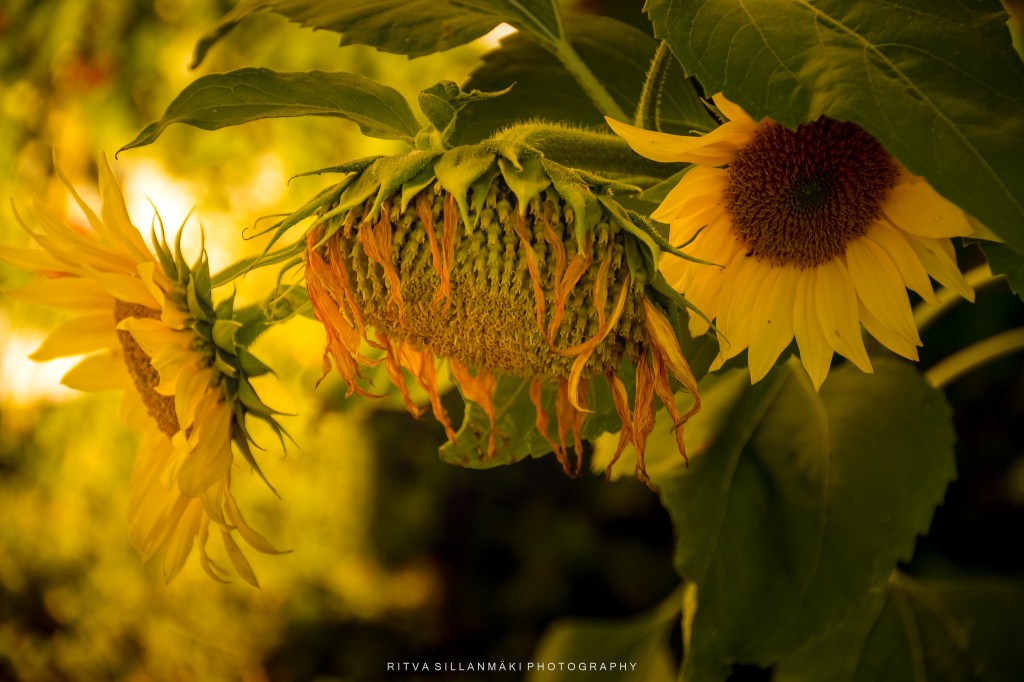
The sunflower whispers softly about the inevitable decay of its vibrant petals, a reminder that beauty is fleeting and even the brightest blooms must fade.
I posted this originally 2013 and as I was looking for photos to show of what I have learned in photography and blogging I found out tons. This was post was so bad that had to redo it altogether. I have not edited the photos. But the post had only one view… that says all what can be said about learning curve.
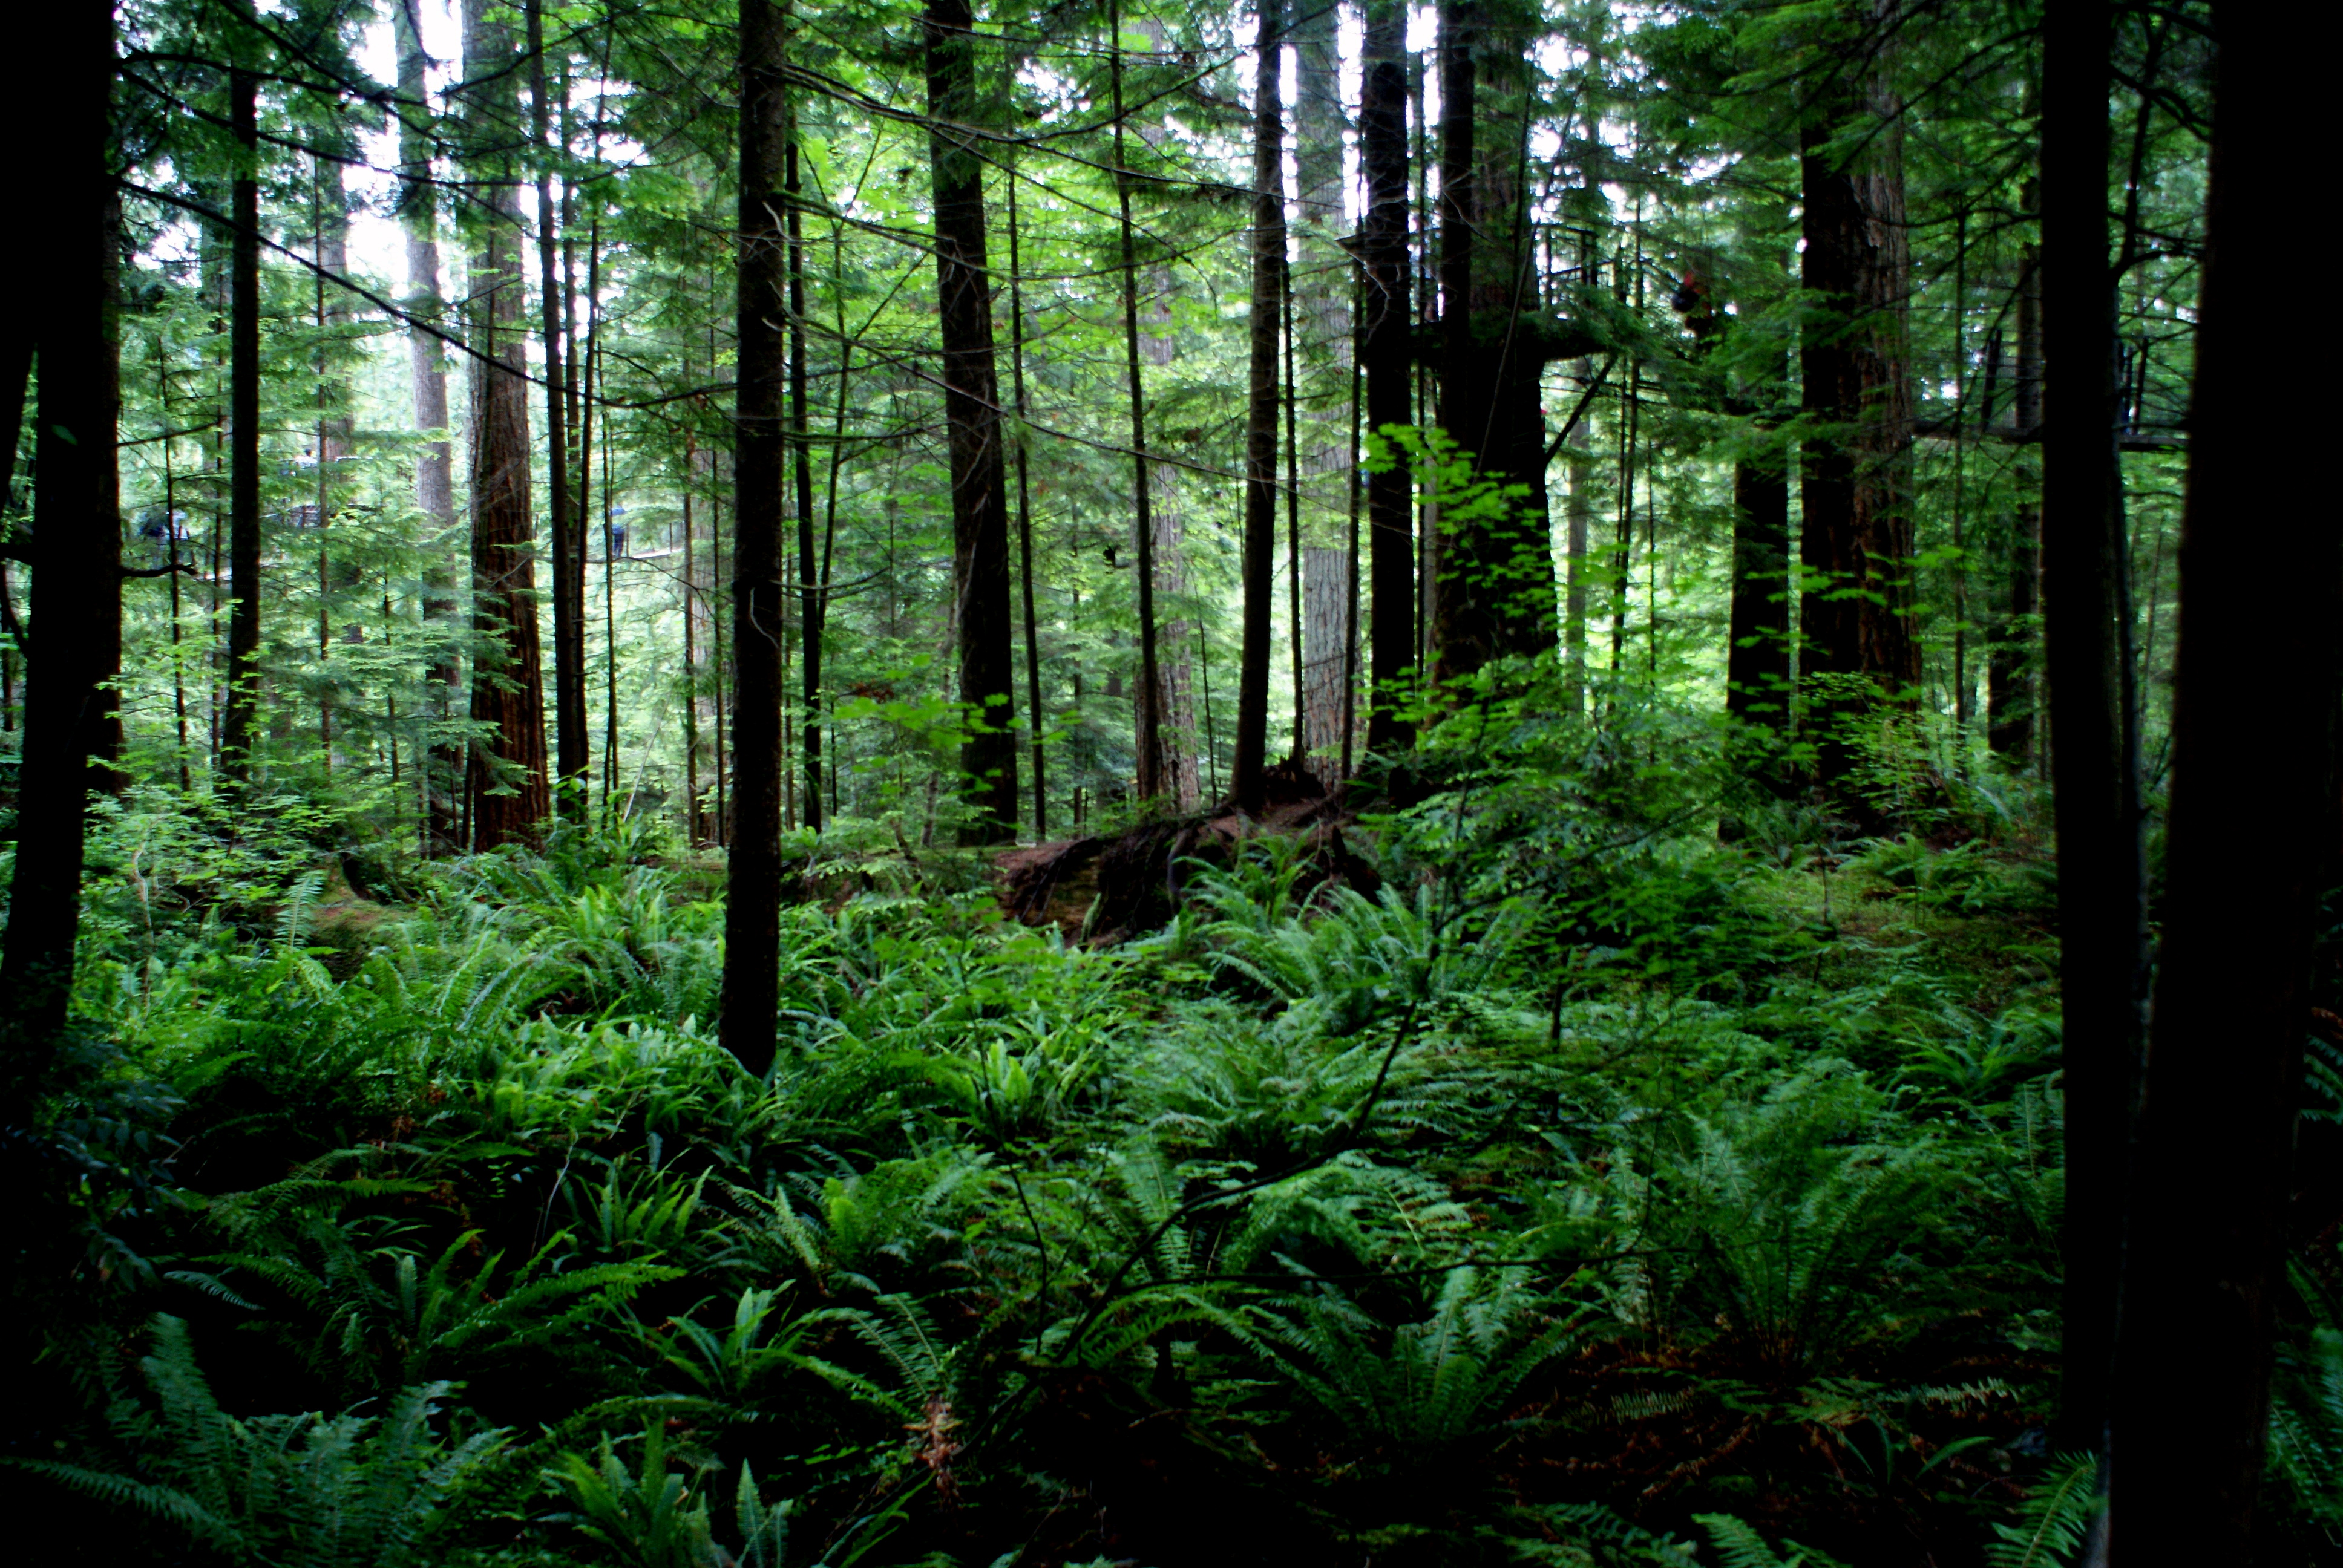
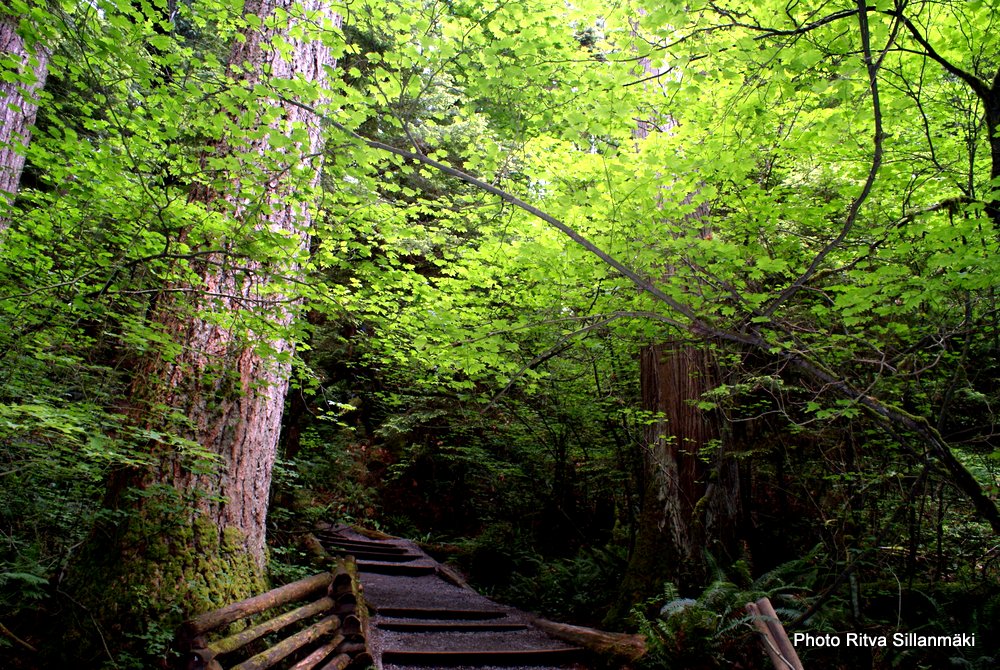
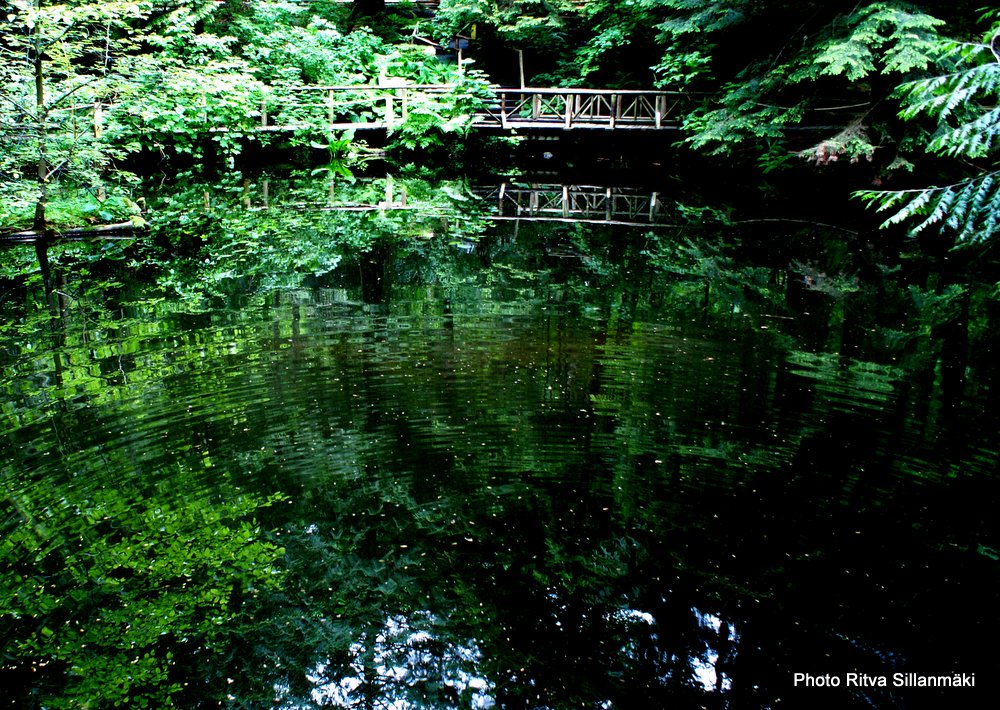
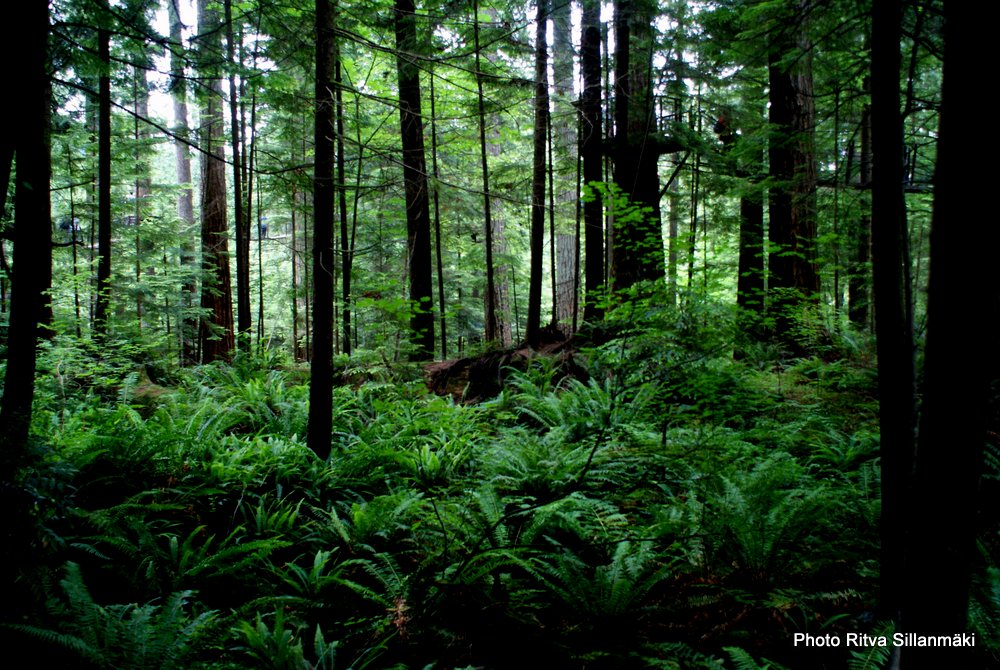
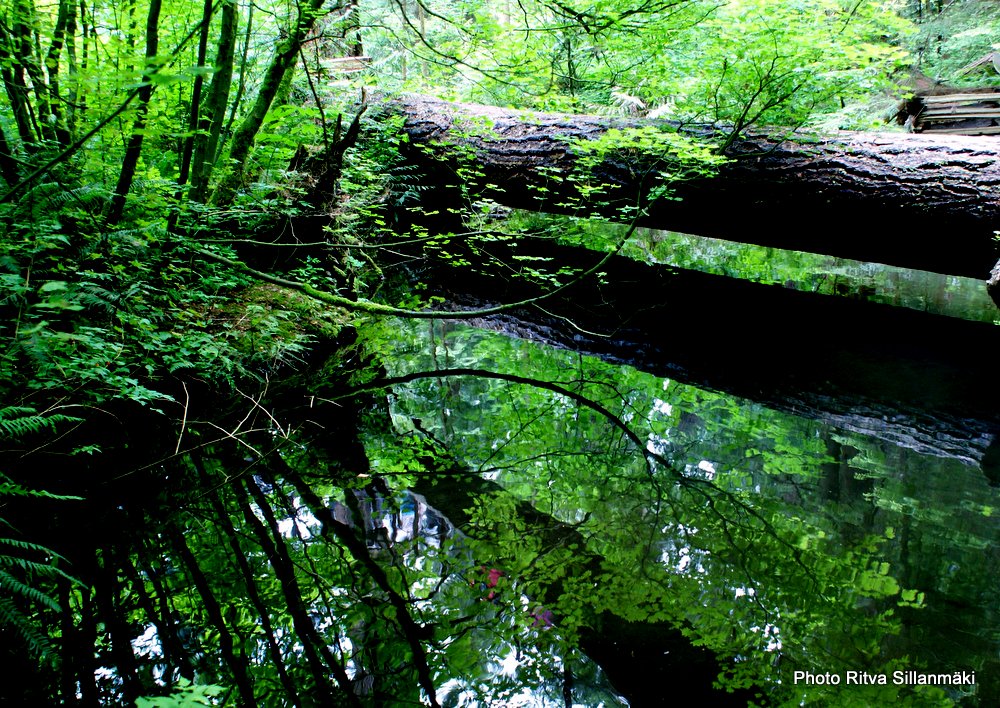
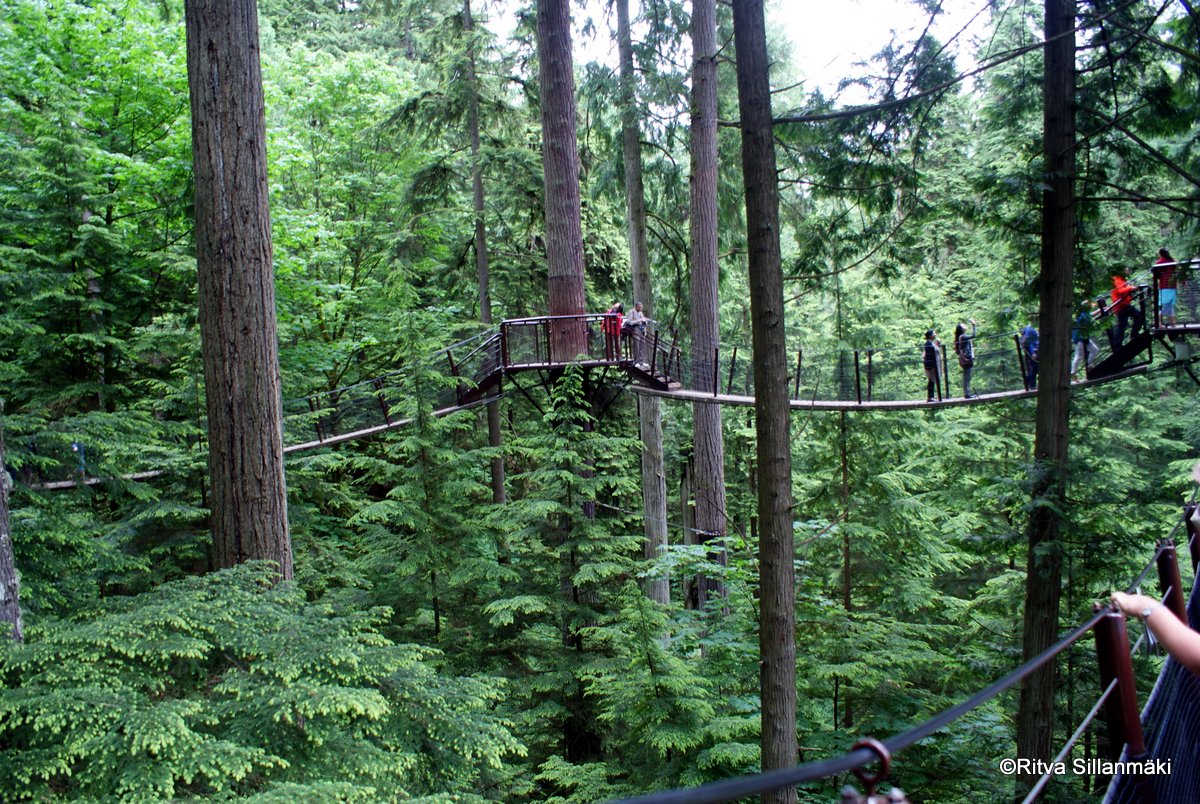
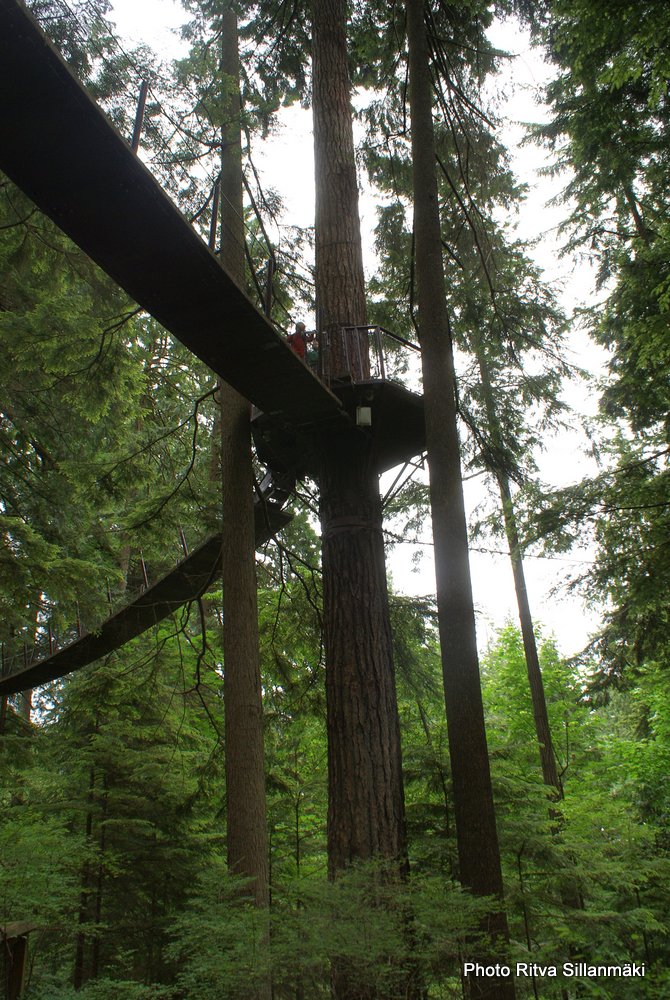
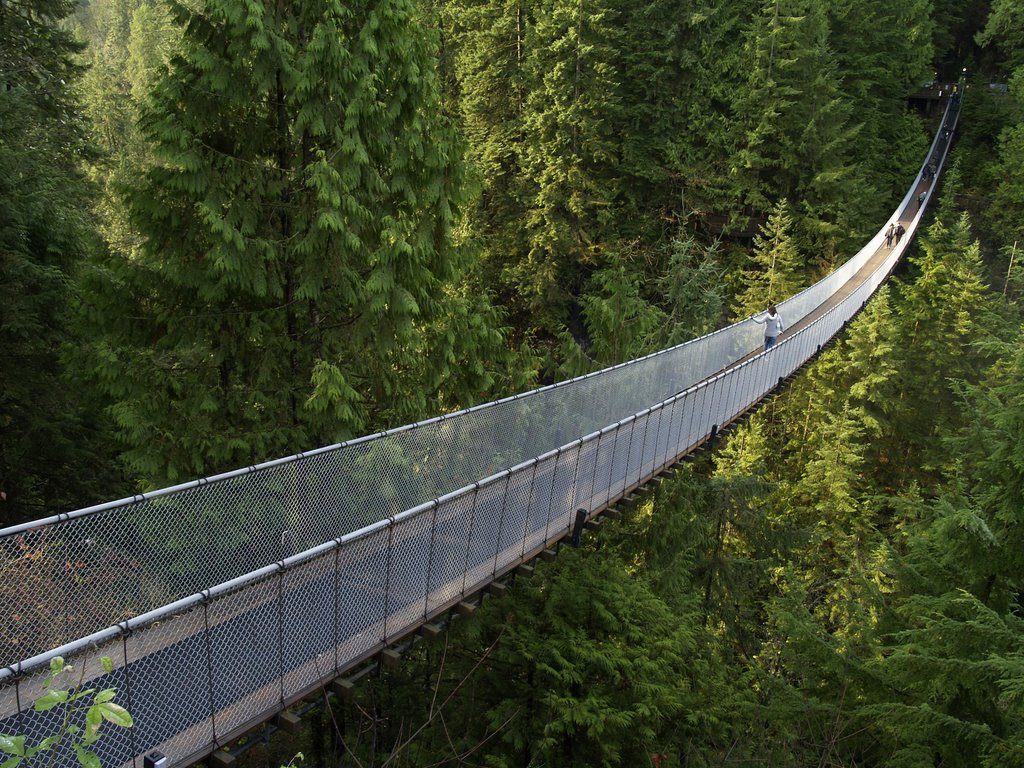
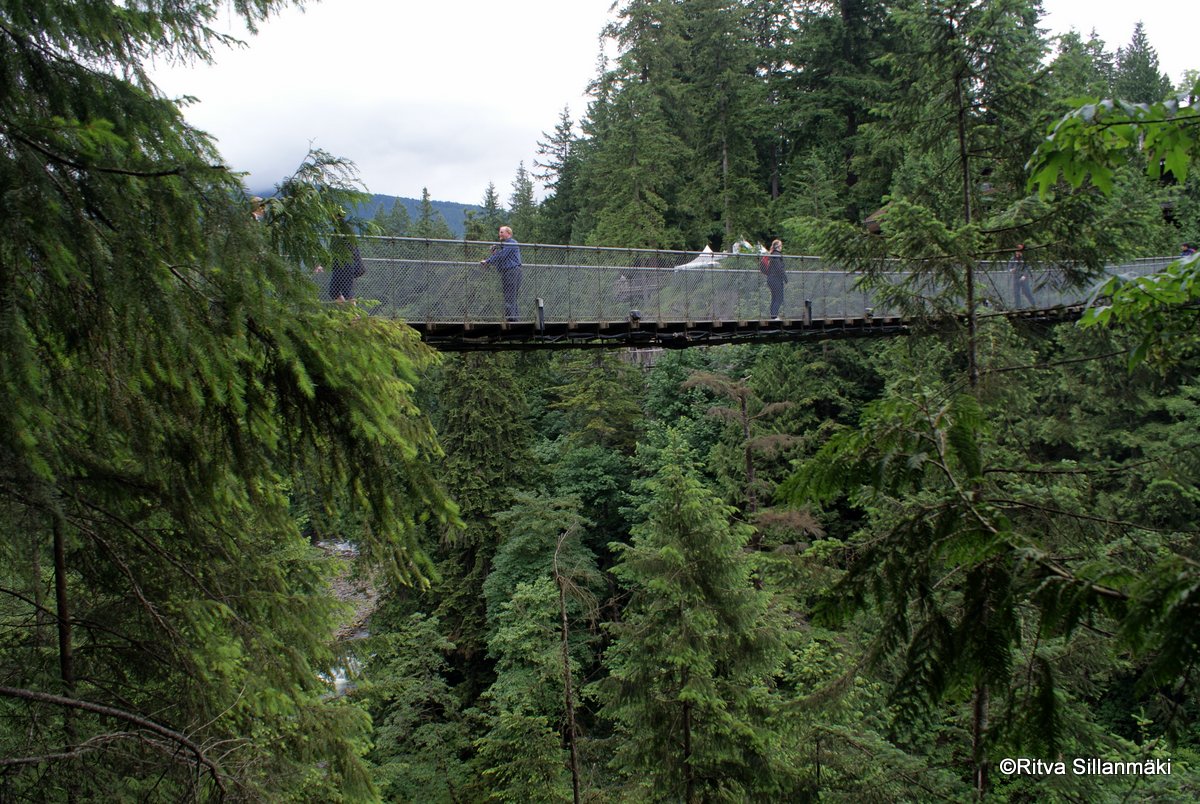
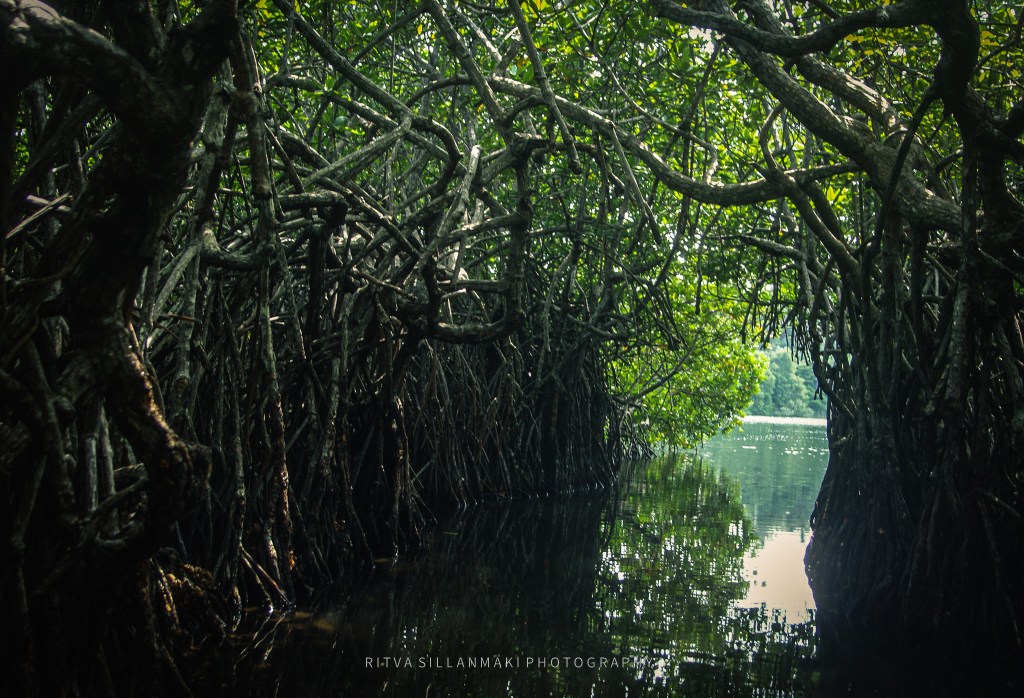
Capilano Suspension Bridge takes you to the serenity of a West Coast rainforest, where lush greenery envelops you and the sounds of nature can be heard all around. As you walk across this iconic bridge, suspended high above the emerald waters below, you’ll be mesmerized by the breathtaking views of towering trees and the rich biodiversity of the area. The bridge stretches 137 meters (450 feet) across the Capilano River and is one of the longest and highest suspension bridges in the world, offering an exhilarating experience for visitors.The experience is not only about the bridge itself; the surrounding park is home to various walking trails, treetop adventures, and informative exhibits that celebrate the local ecology and history, making it a must-visit destination for nature lovers and adventure seekers alike.
The experience is not only about the bridge itself; the surrounding park is home to various walking trails, treetop adventures, and informative exhibits that celebrate the local ecology and history, making it a must-visit destination for nature lovers and adventure seekers alike.
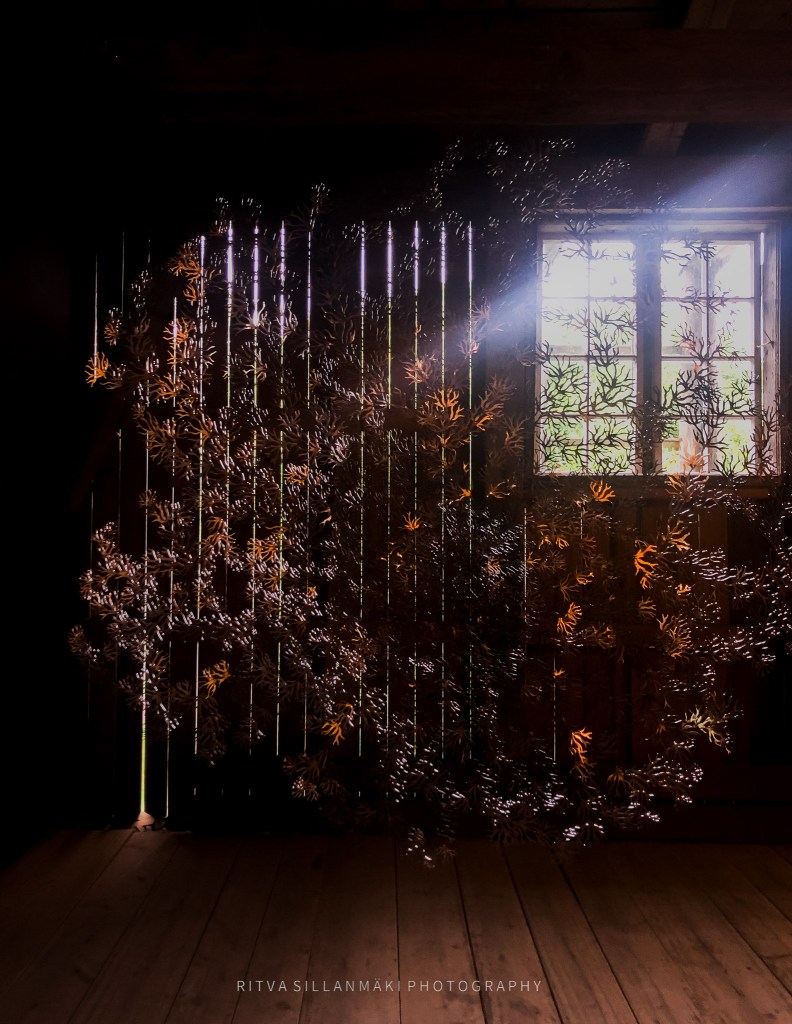
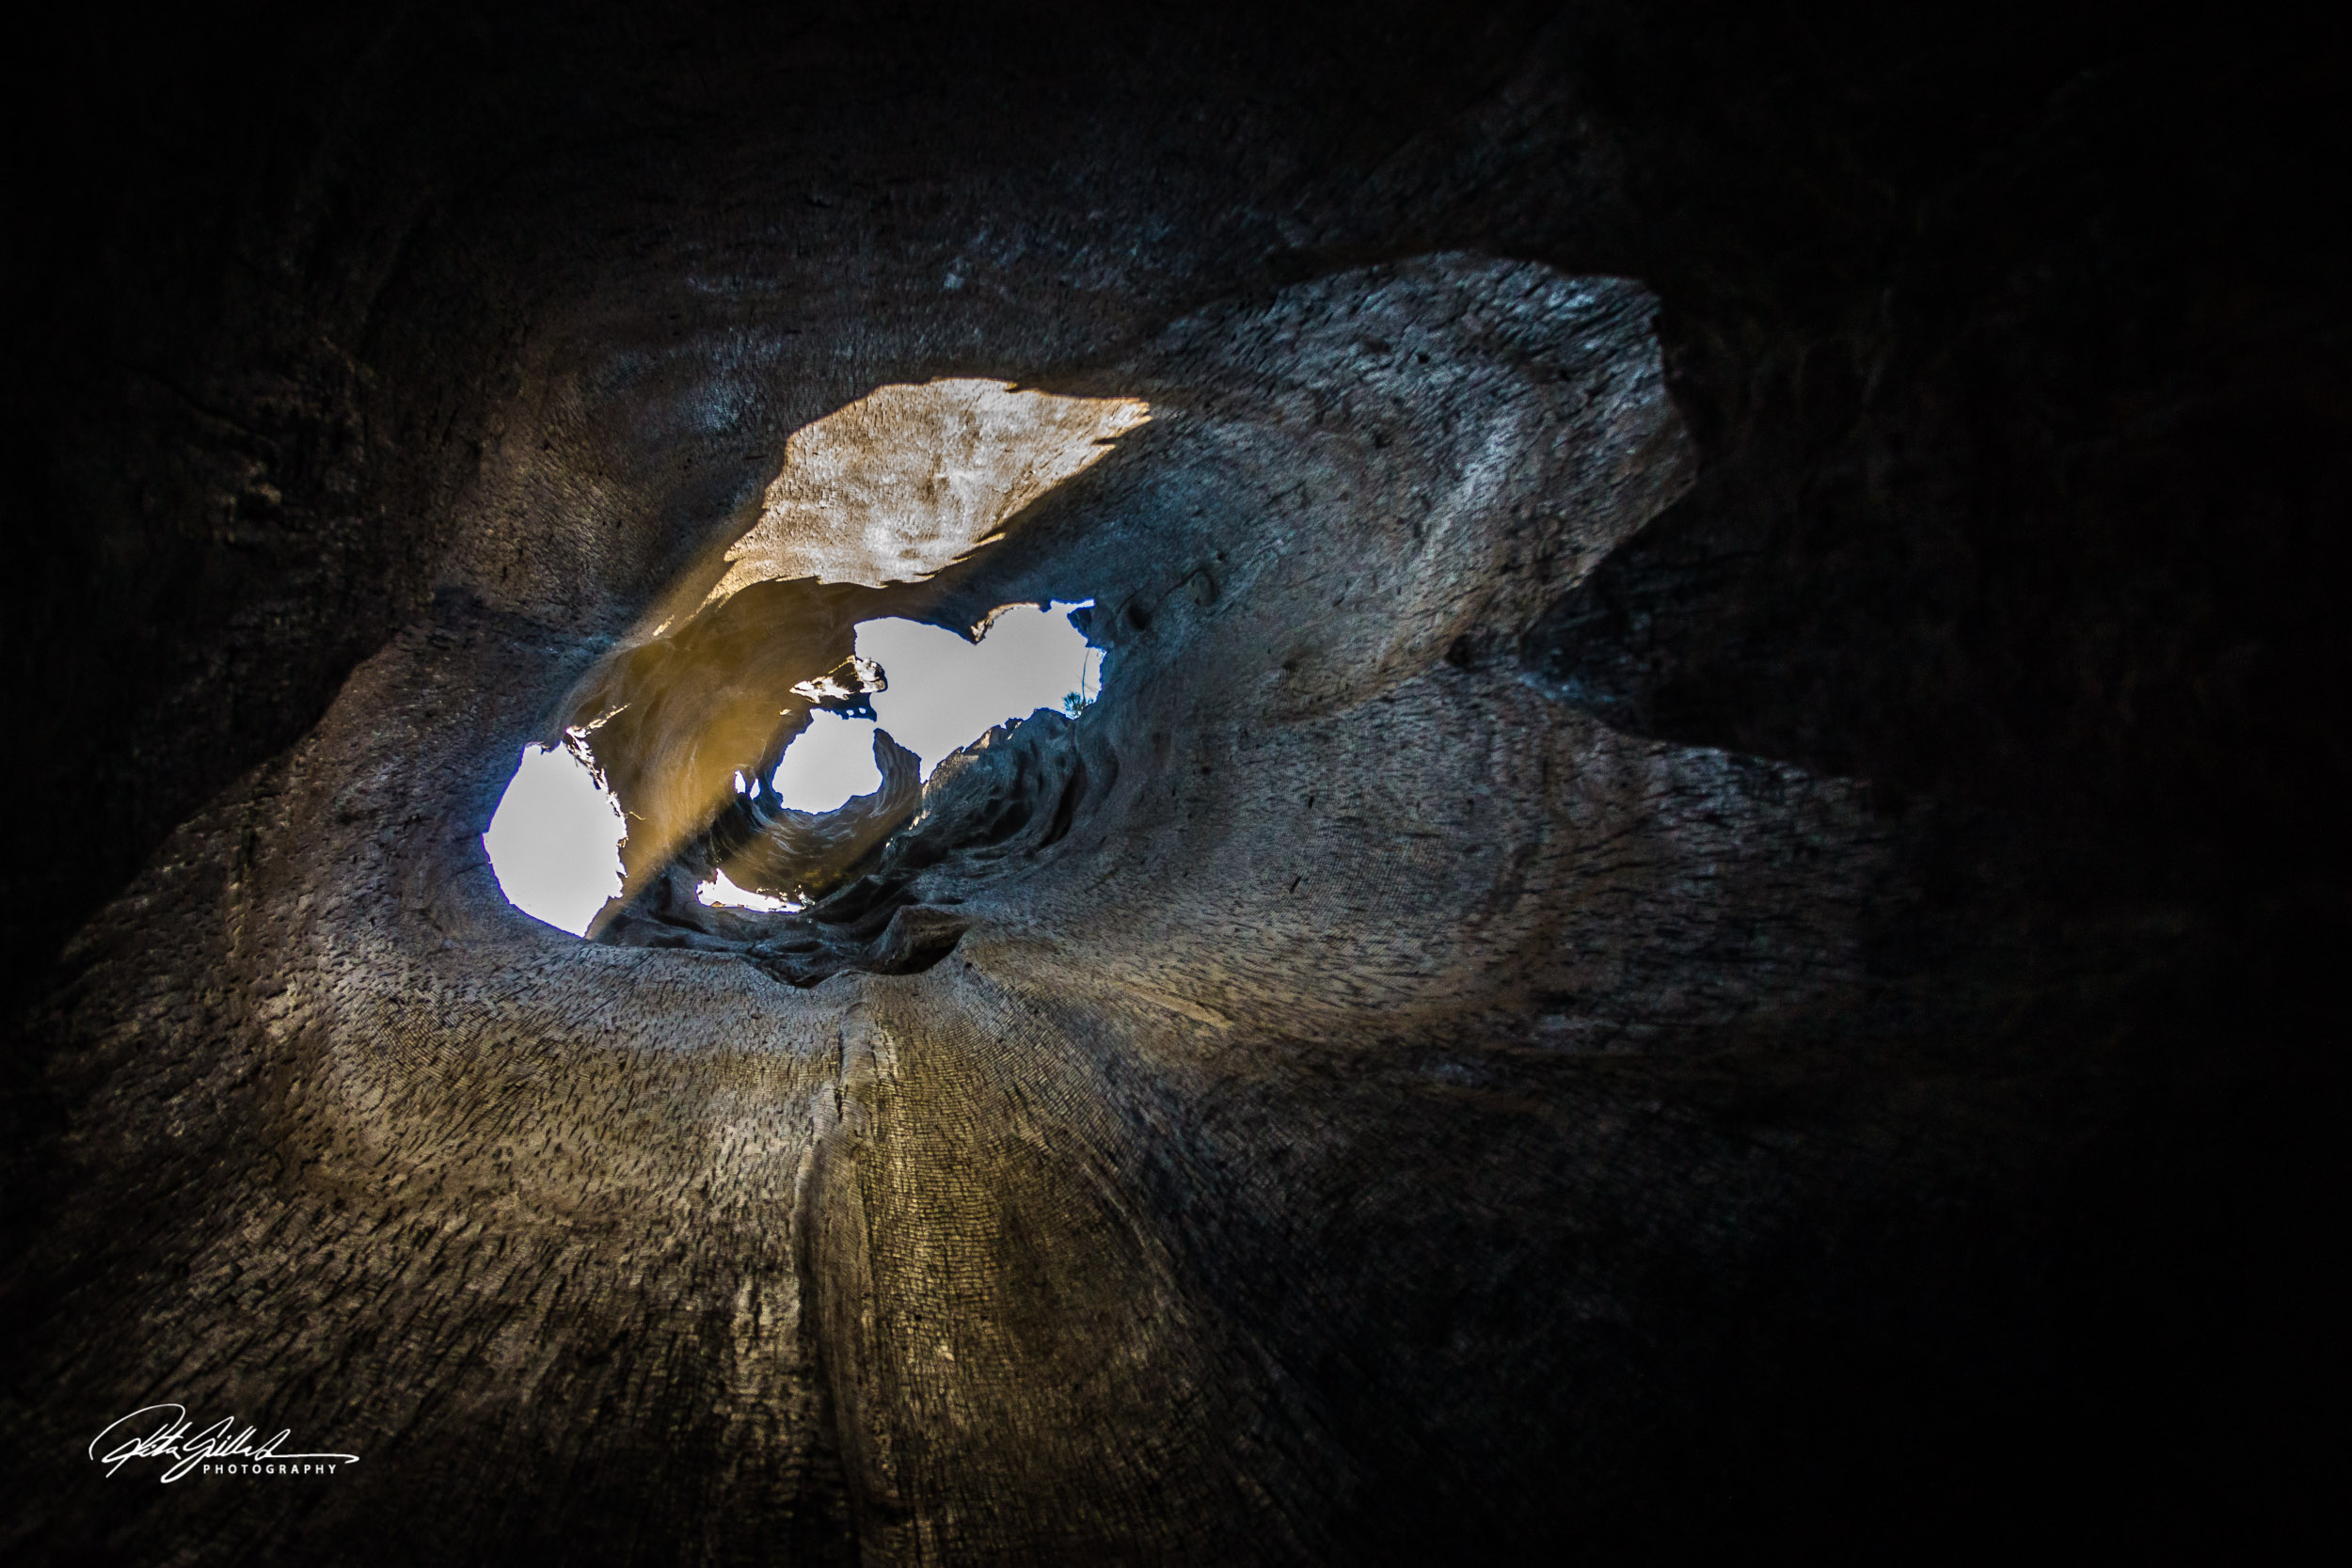
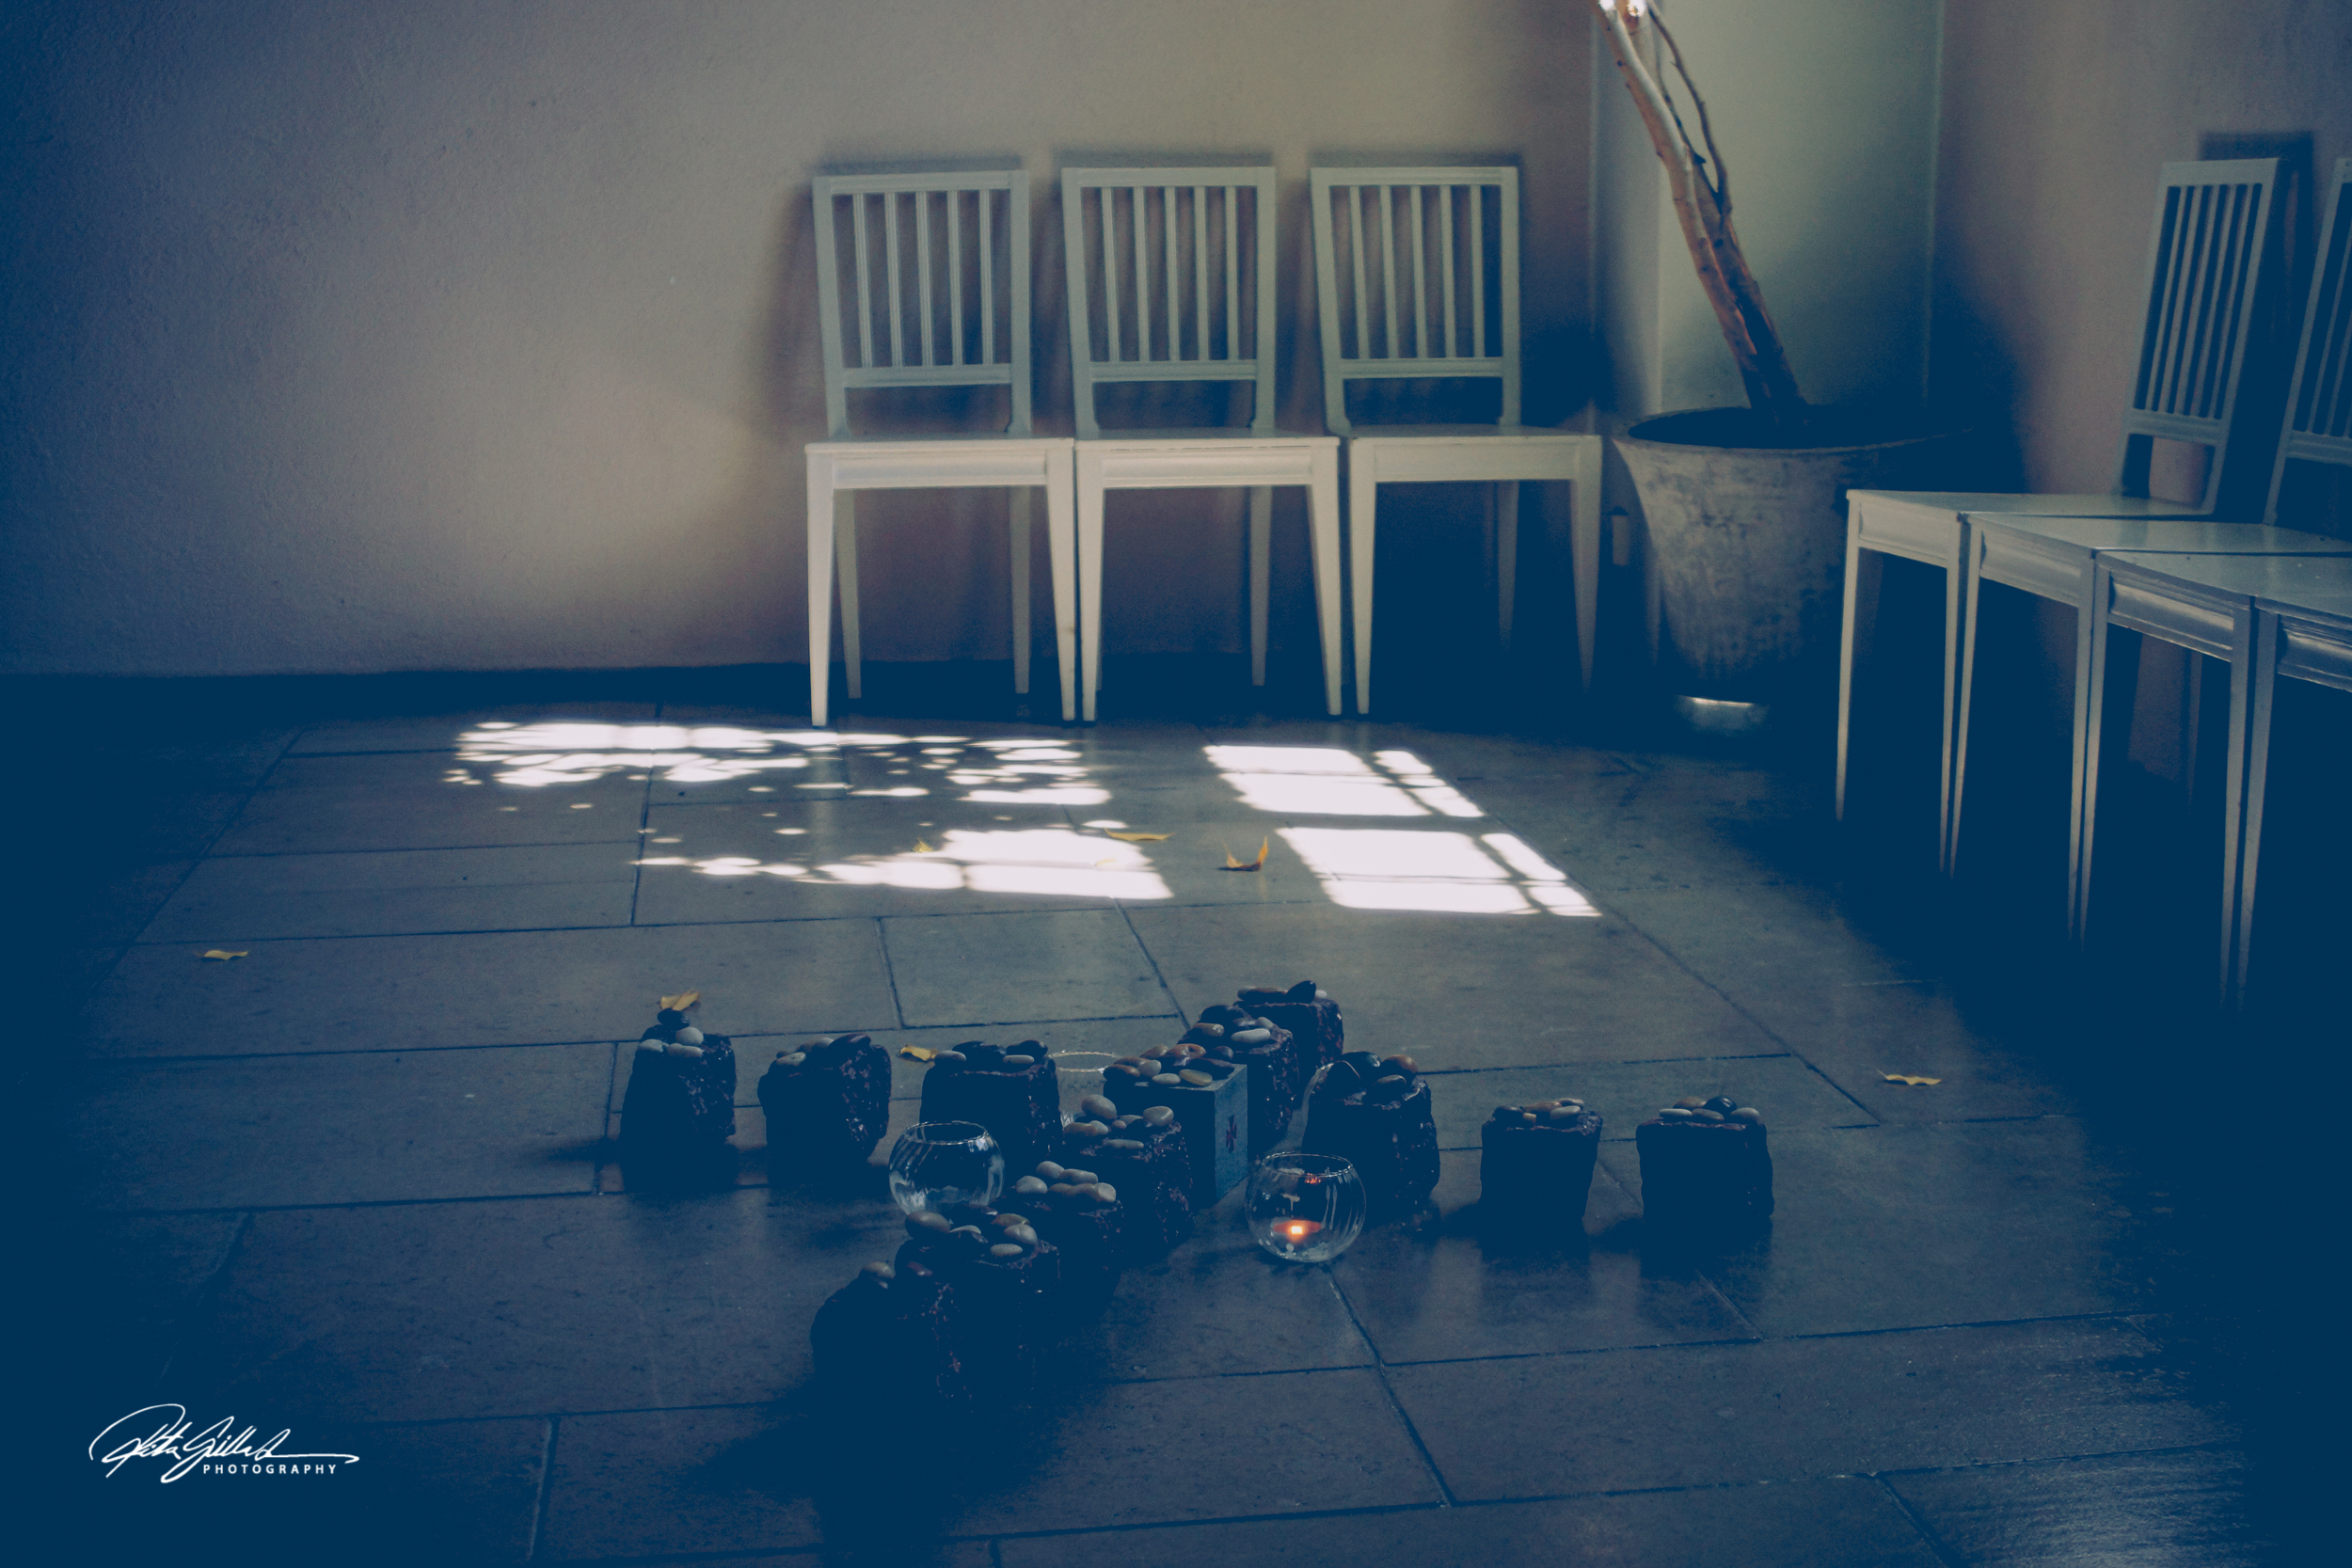
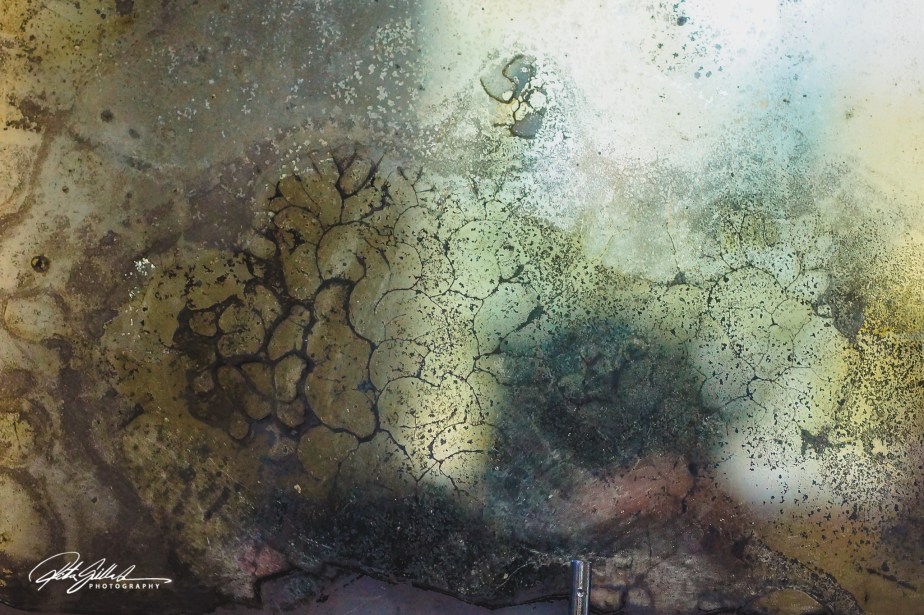
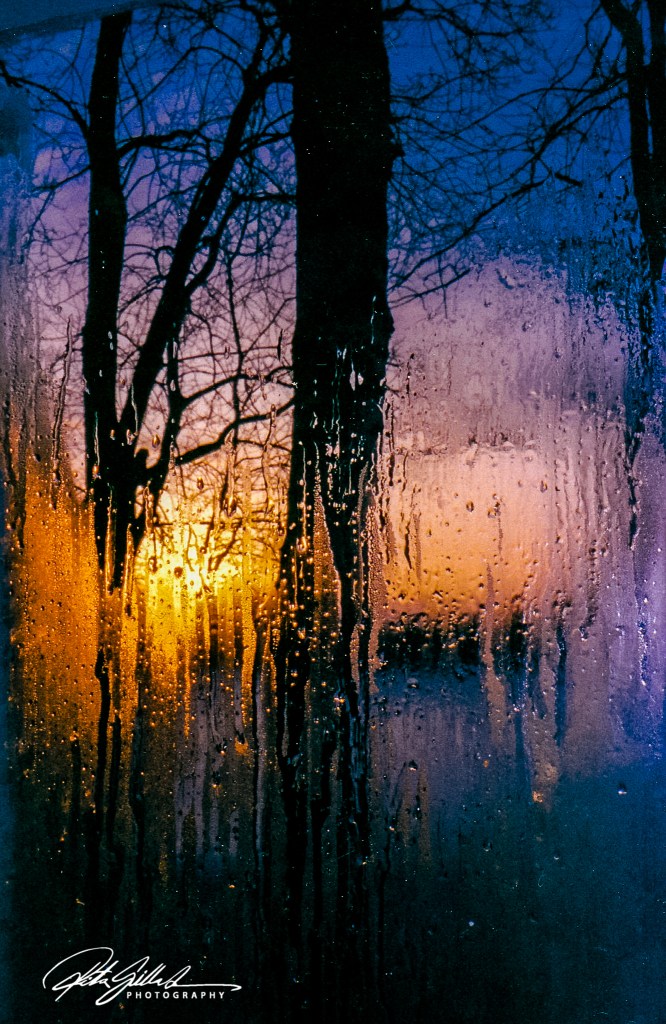
I have taken this shot several years ago, and ignored the possibilities of it to be anything more than a simple snap I took in a moment of spontaneity. Now, as I was looking for something else, I find myself wondering why I had dismissed its potential. Upon closer inspection, I discovered that this shot is truly hopeful; the light is pouring in, illuminating the intricate details of this piece of art in a way that breathes life into it. The way the shadows dance around , the dialogue between light and dark, urging to pause and reflect. It makes me realize that sometimes, in our rush to capture the moment, we overlook the beauty and stories waiting to be told in the simplest of images.
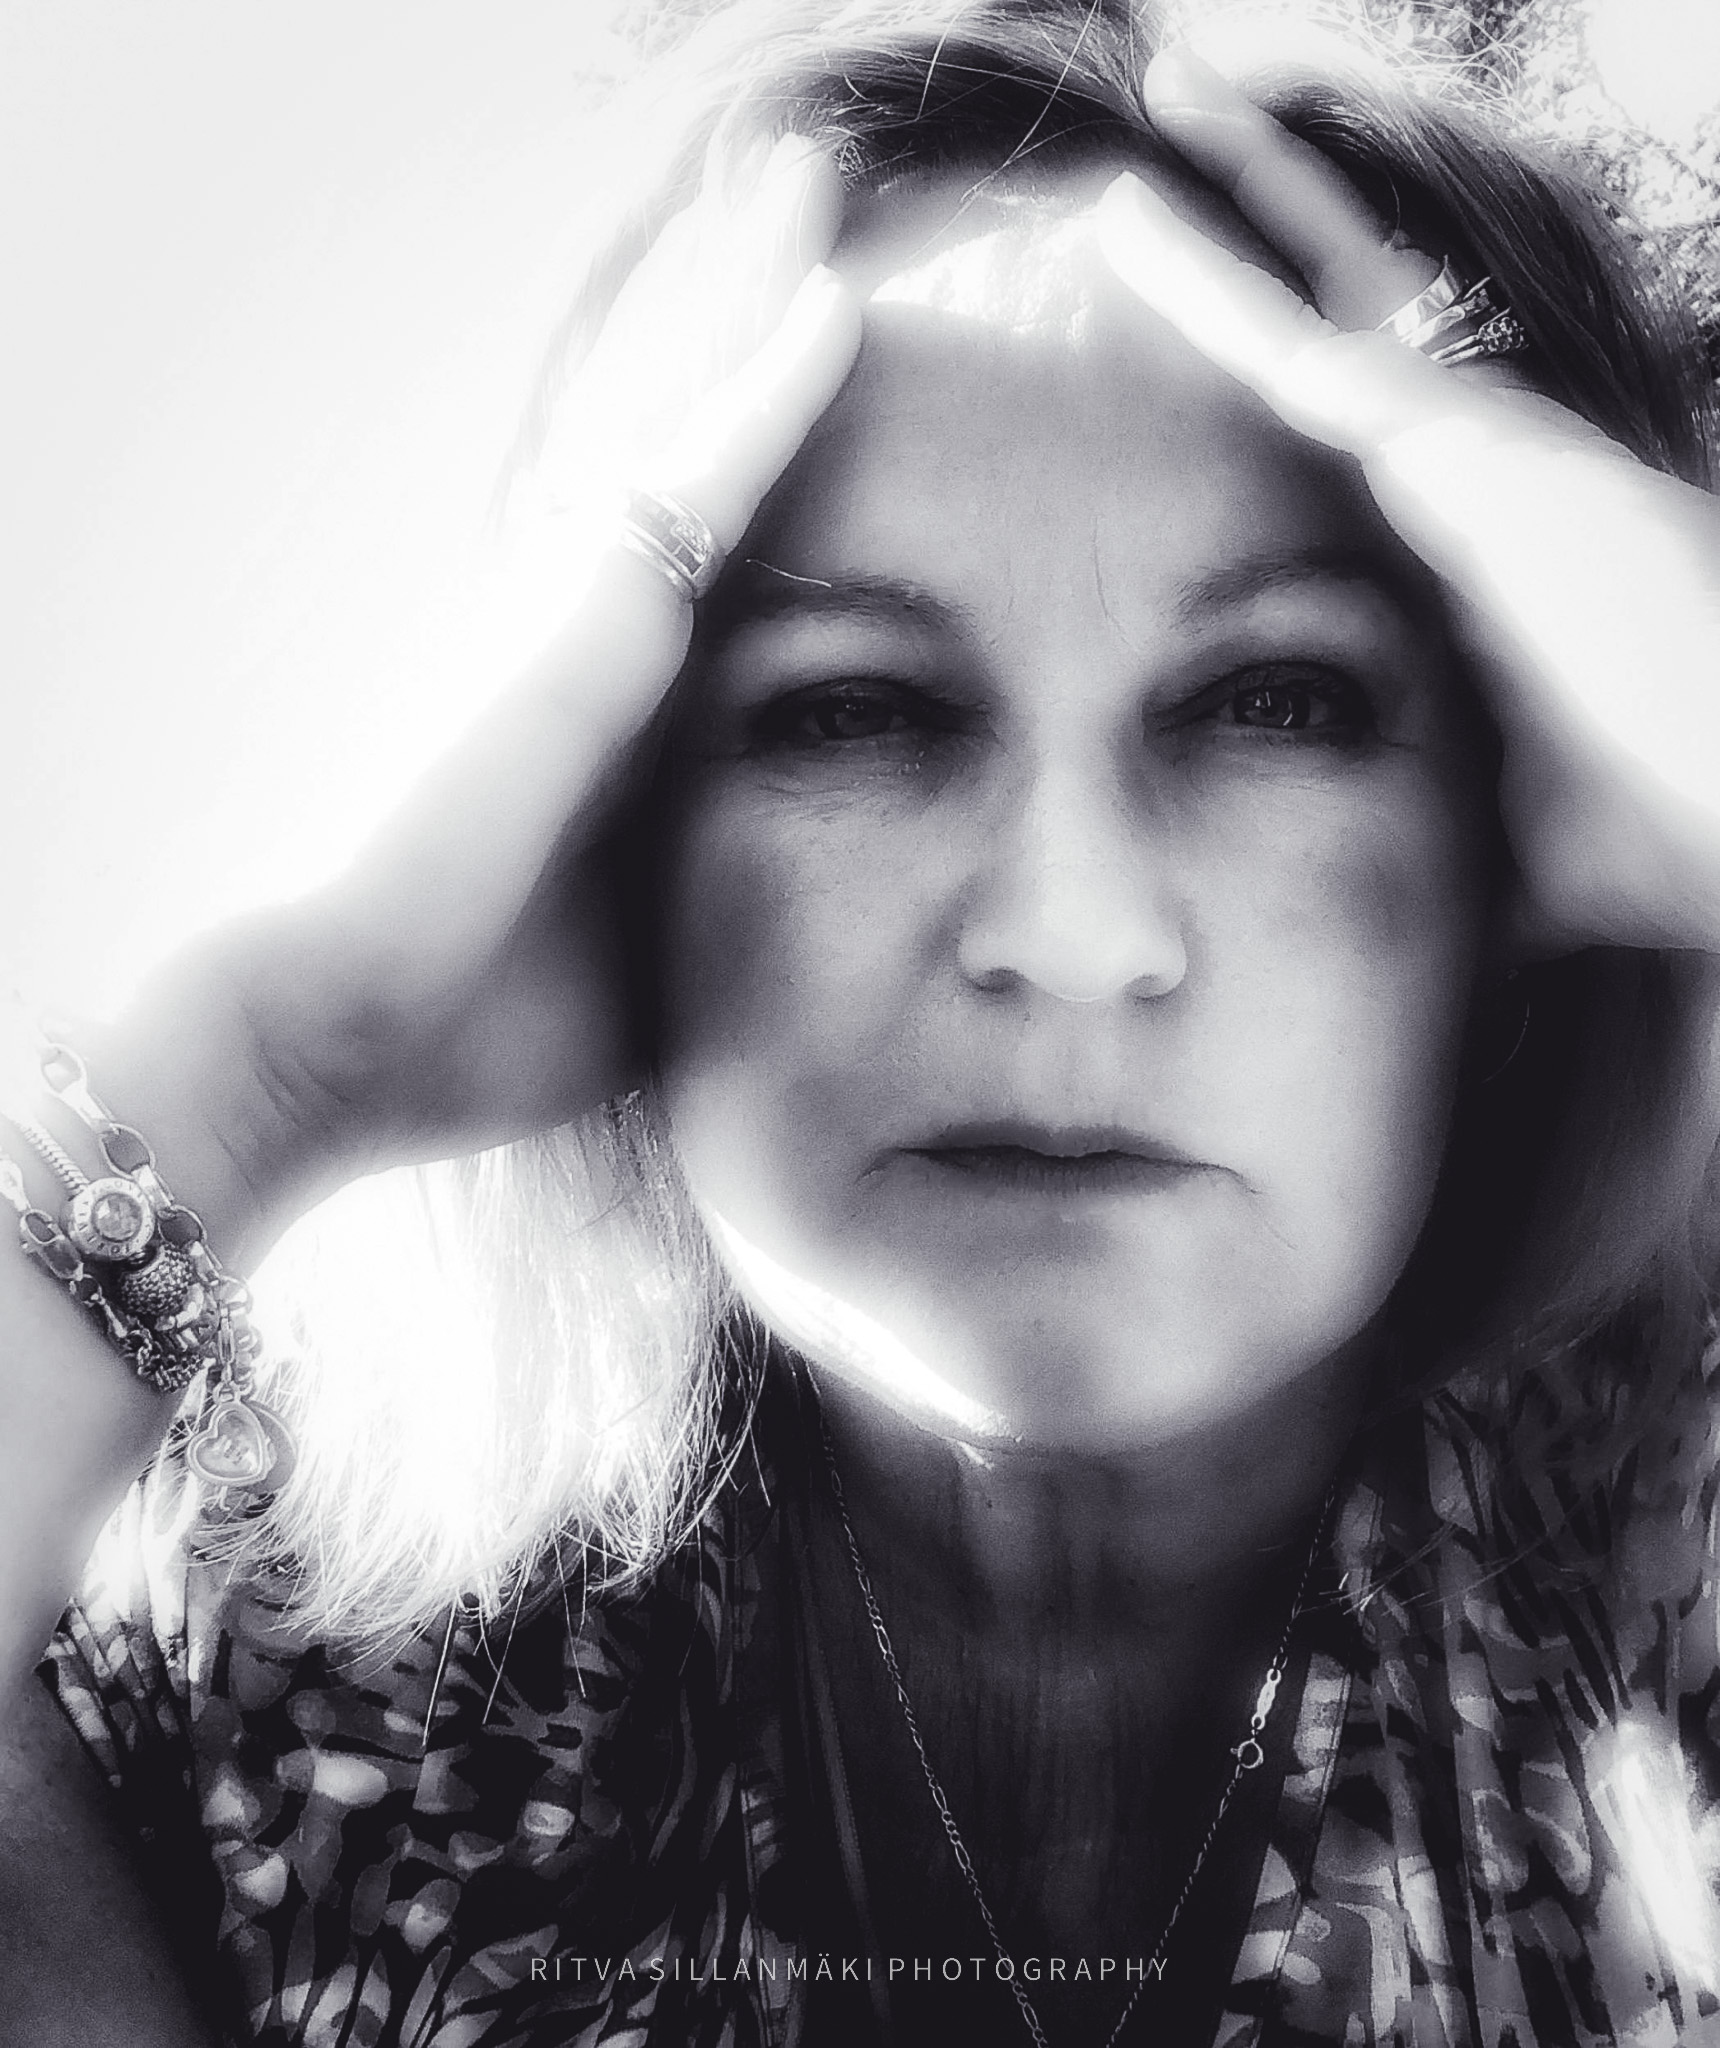
My idea revolves around Leonard Cohen’s saying, “Everything has a crack, that’s how the light gets in.” which encourages reflection on life’s imperfections. These cracks signify struggles but also hope and the potential for healing, reminding us that embracing our flaws can lead to a more fulfilling life. This concept also applies to images, where imperfections reveal true beauty and emotion.
Overall, these lyrics reflect Cohen’s characteristic blend of melancholy and optimism, emphasizing that beauty and wisdom often arise from our struggles and imperfections.
Ring the bells that still can ring Forget your perfect offering There is a crack, in everything That’s how the light gets in
My challenge this time is this part of the poem; Everything has a crack, that’s how the light gets in. There is deep symbolism in this sentence that can be interpreted in many ways. Figurative or metaphorical interpretation requires us to think deeply.
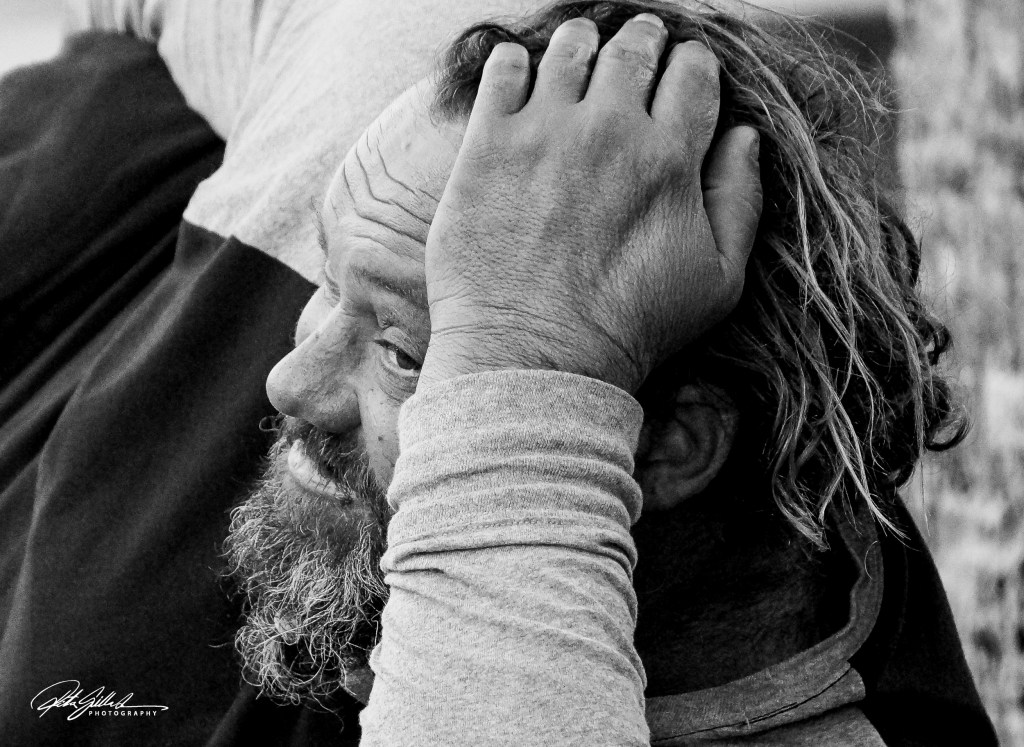
As I looked again at this post, after first draft, I noticed how I often use and have hands in photos with emotion.
Imperfection and Vulnerability: The “crack” represents the flaws and brokenness that are part of life; everyone has imperfections.
Hope and Redemption: The phrase “that’s how the light gets in” suggests that through our flaws and vulnerabilities, we can find hope, healing, and understanding.
Spiritual Insight: Spiritually, the light symbolizes truth, love, and peace. The cracks show that even in our toughest times, there is still a chance for positivity and light to come into our lives.
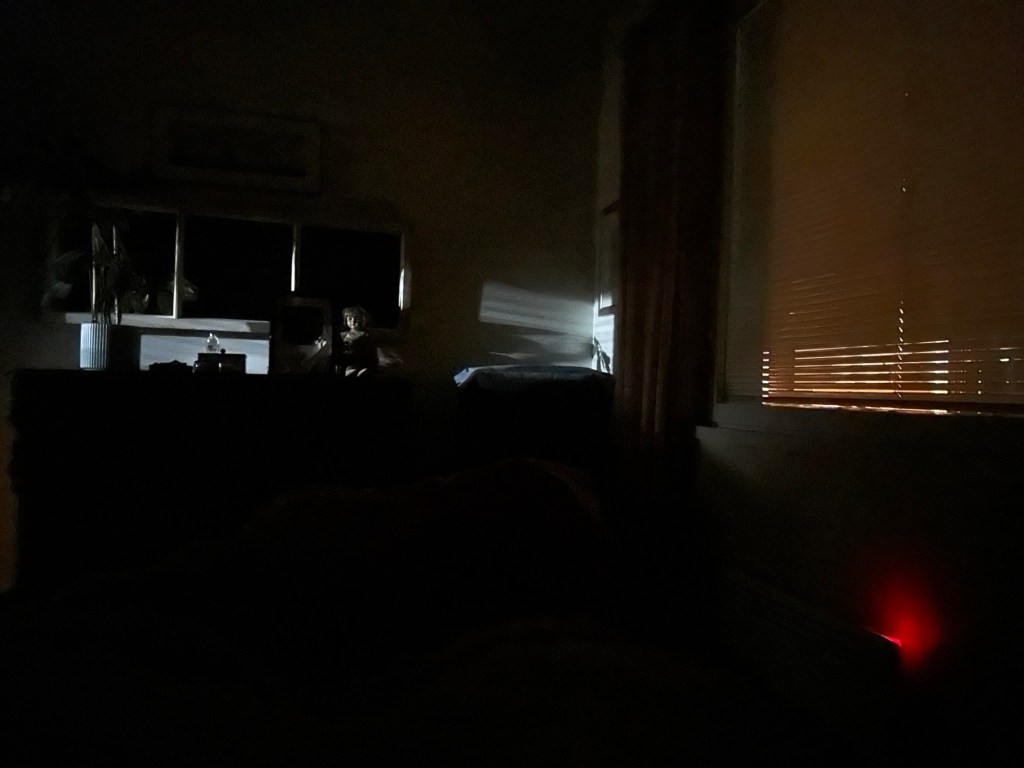
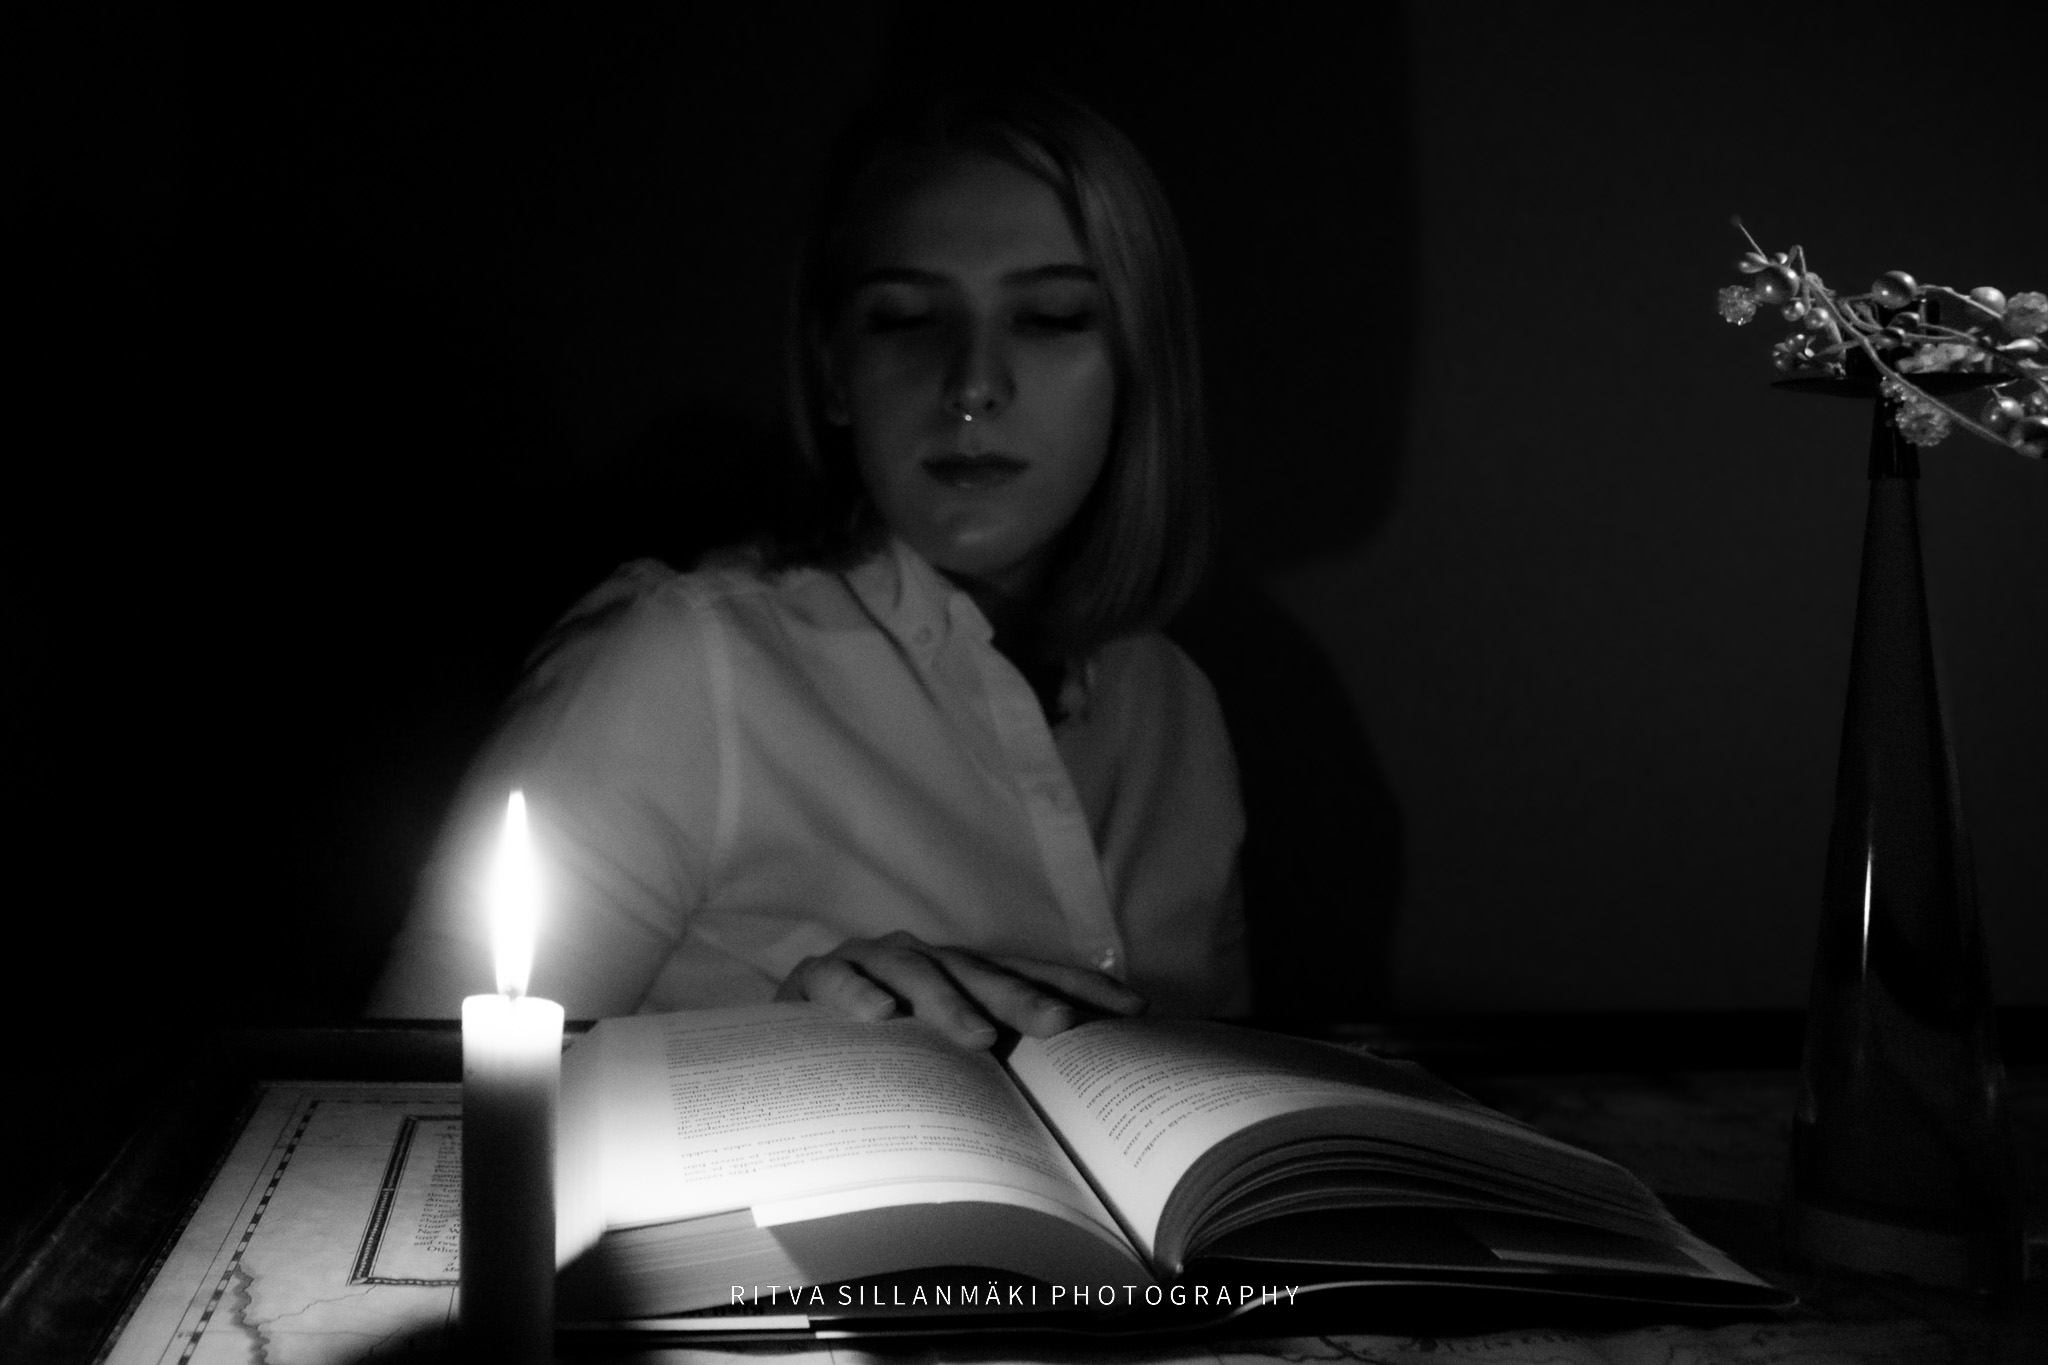
Figurative language can be exactly what the sentence contains, hoping to convey the profound concepts of hope, light, and life emanating from a small crack in darkness. This imagery evokes a sense of resilience and beauty, illustrating how even the faintest glimmer can inspire hope and ignite a passion for life. A comprehensive visual project can be built around this captivating idea, as it often is, exploring various artistic mediums , to depict the interplay between shadow and light, ultimately capturing the essence of optimism that arises from seemingly insignificant openings in our world.
Light filters in to a dark room
I would like participants to take a new photo or find a photo in their archives that would express that sentiment.
Your creative take can be completely different from what others envision, as this endeavor is open to many interpretations and methods of expression. These images should reflect your unique perspectives and personal narratives, fostering community connections through shared stories of vulnerability and resilience.
By sharing these images, we not only showcase our individual stories, but also create an opportunity for dialogue and connection. Let each image tell a story, convey an emotion, or illustrate a moment of seeing light.
Thank you Anne, for sending us on an artistic approach to photography with ICM, it was fun to do and fun to see what we were able go with this style. Next week Egídio leads us to something new again, please visit his inspirational blog to see more.
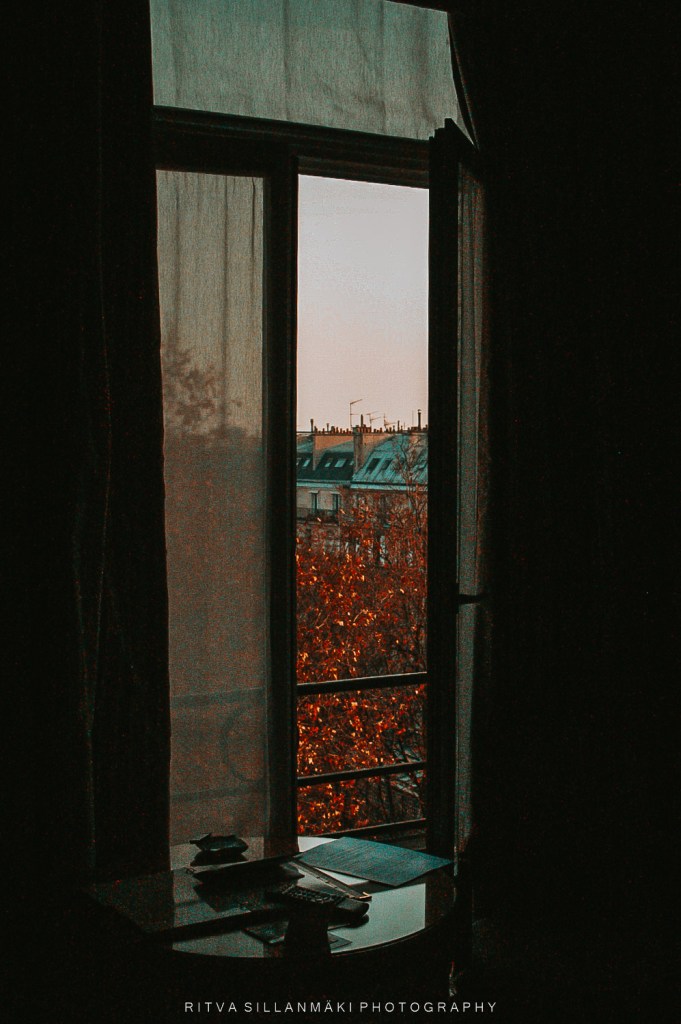
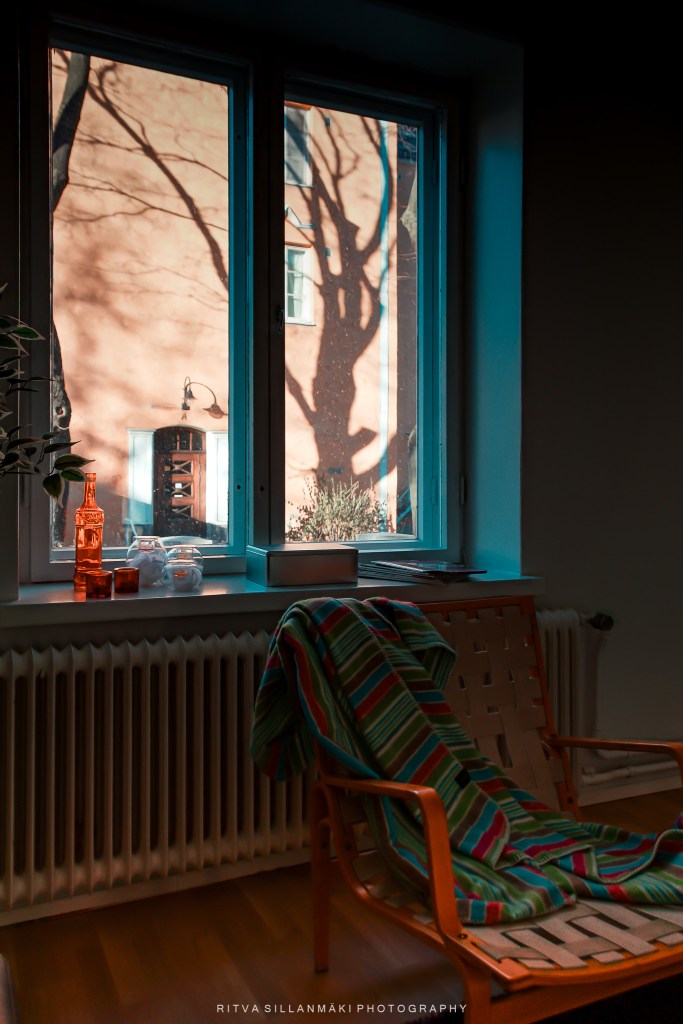
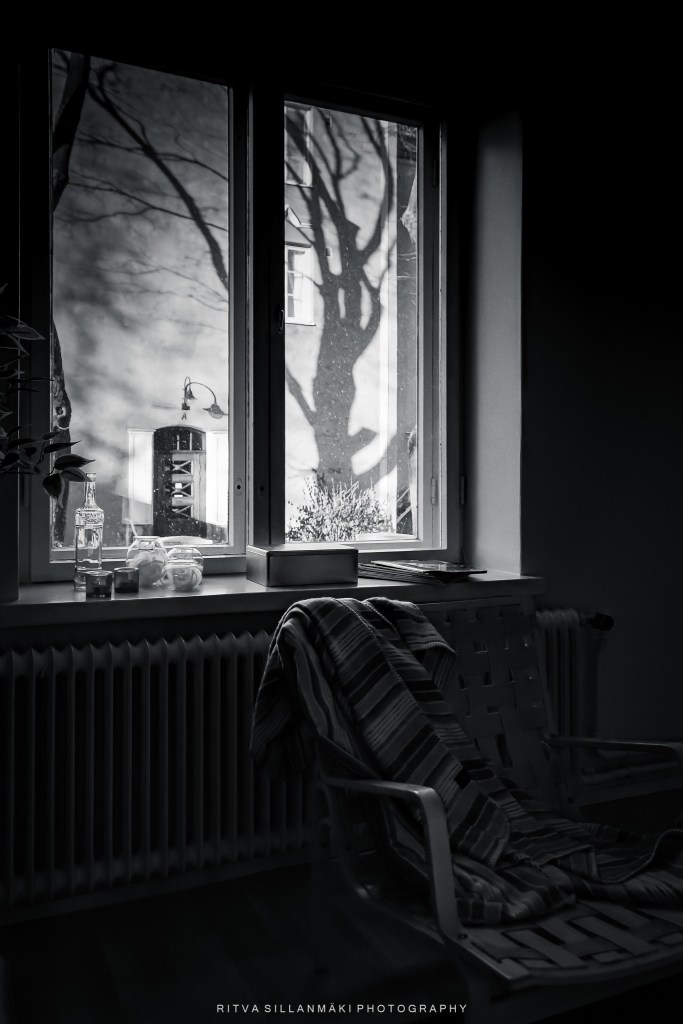
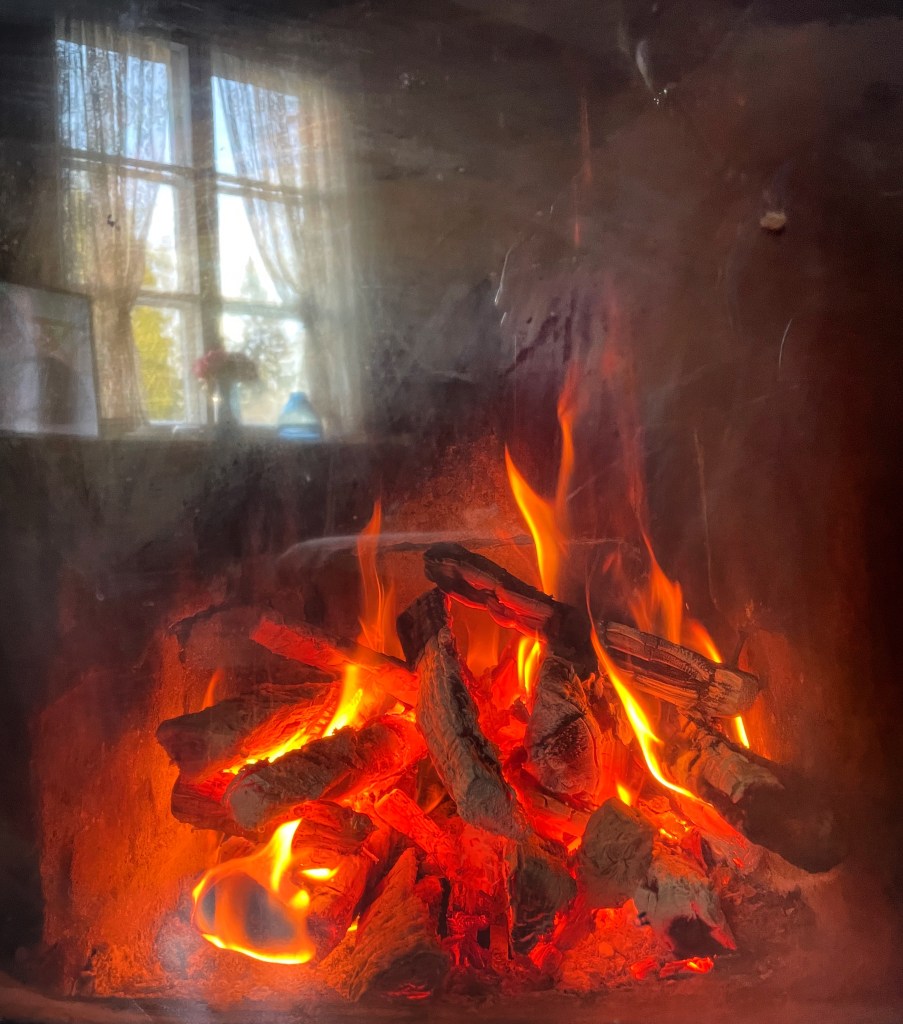
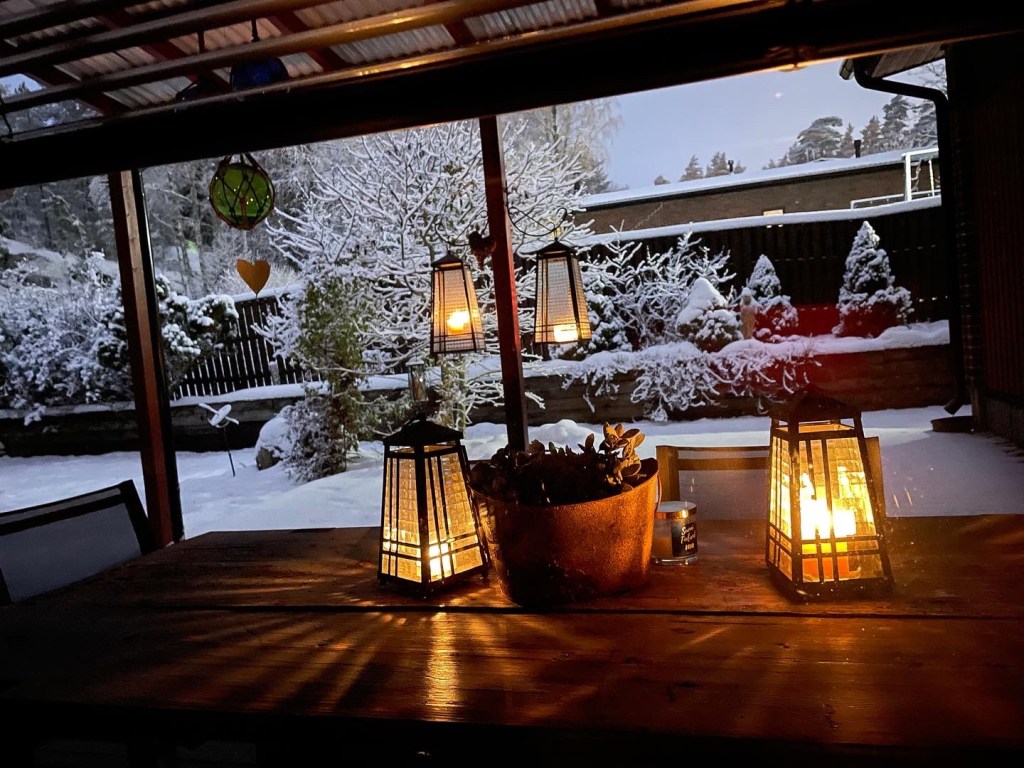
I was happy to able be to capture a cozy corner of a room during the golden hour. The warm hues of sunlight filter through a window, casting intricate shadows of tree branches on the across the street wall. This natural artwork becomes the focal point, drawing viewers into a dance between light and shadow. It’s interesting due to its serene ambiance and beautiful interplay between light and shadow.
And the same image in the monochromatic palette adds to the tranquil ambiance, inviting to pause and appreciate the beauty of stillness and simplicity.
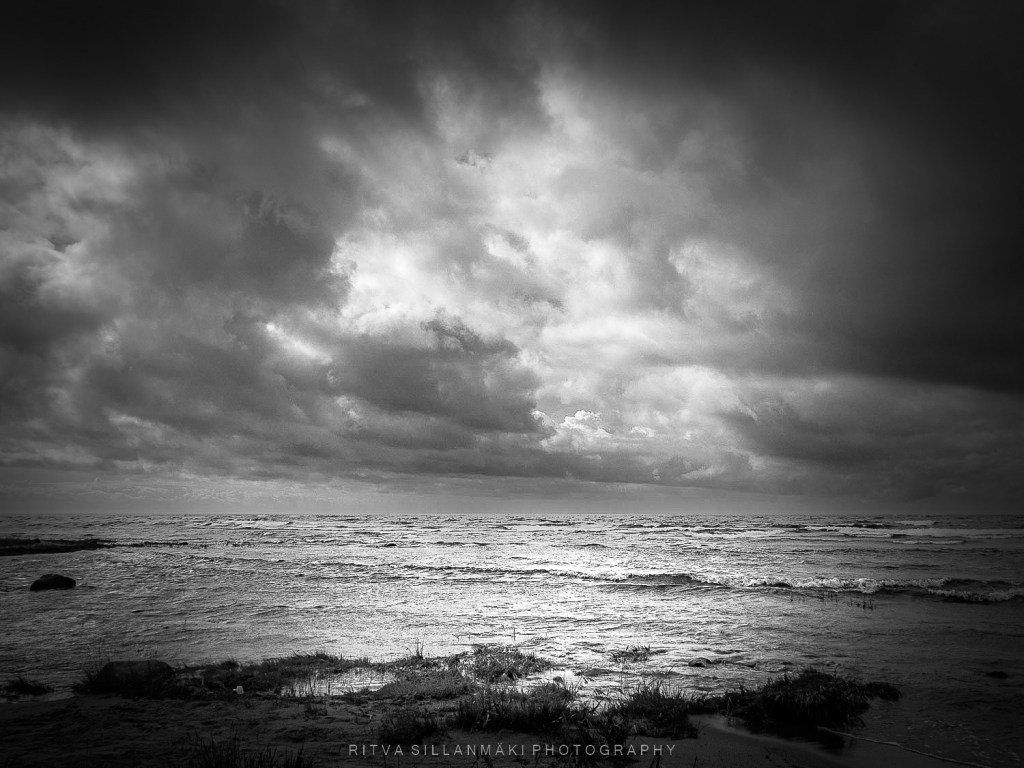
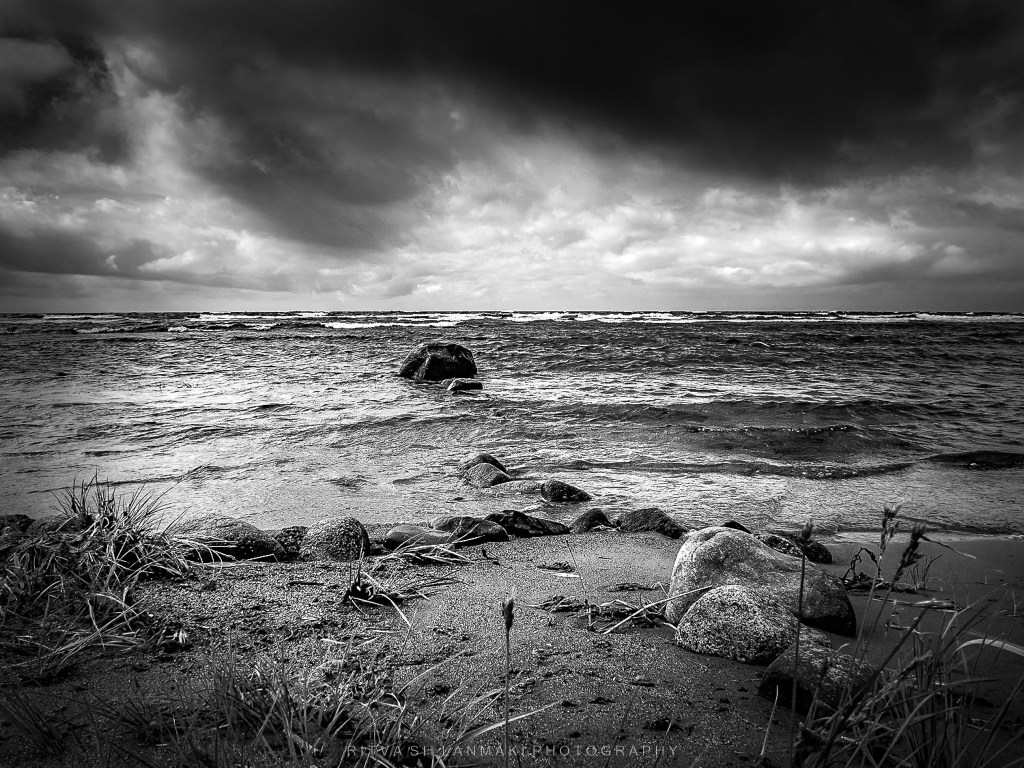
Clouds are a timeless muse, offering a canvas of ever-changing patterns and colors to capture. Whether they serve as a stunning backdrop to a landscape or take center stage as the main subject, clouds bring a sense of dynamism and depth. There’s something truly captivating about the interplay of light and shadow within the billowing forms of clouds, particularly when the gentle rays of sunlight peek through, creating a mesmerizing contrast of brightness and darkness.
Dark clouds over the bay
“Clouds in the sky very much resembles the thoughts in our minds! Both changes perpetually from one second to another!”
Last week was truly an enjoyable experience as I delved into the world of quotes and poems for Ann- Christine. Selecting only few images was a challenge for me 🙂
This week Sofia gave us a fun challenge to showcase the difference between day and night. As Sofia mentioned, now that we’ve passed the Winter Equinox, the days are gradually getting longer, and we can finally bid farewell to the never-ending nights. We still have a good month or two to truly savor the increasing light, but we’re on the right track. So, here I am, sharing summer photos in the midst of winter… It won’t be long now, summer is on its way! Thank you to Sofia for inspiring us with Day and Night.
Not to be totally biased, I am also showing photos from cities little further away. Only due to that, do I have more than ten photos 😂
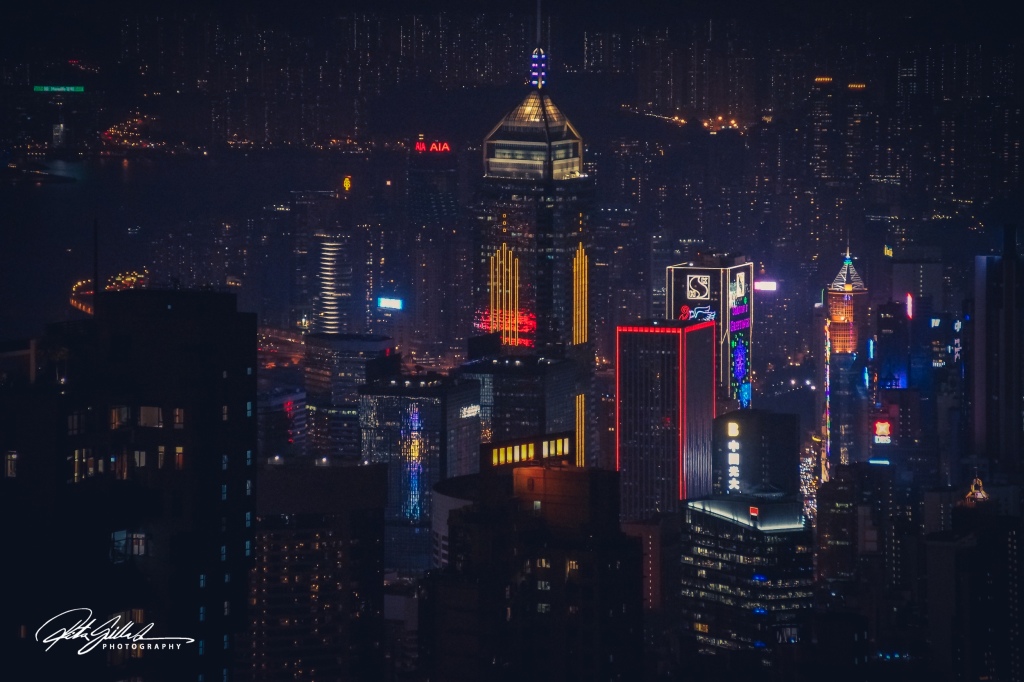
Hong Kong – view from Victoria Peak, known simply as The Peak, is a must-see Hong Kong destination — both day and night — offering iconic views of skyscraper-flanked Victoria Harbour, Kowloon peninsula and craggy mountain peaks.
The day light is still softly around, soft mist in the background, them blue moment arrives to slowly turning the day to night, the lights of the skyscrapers coming more visible changing the mood. Then darkness folds out the dark shield that hides out the scenery leaving the buildings in the lighted glory as main point.
Blue hour at the peakCity lights from the peak
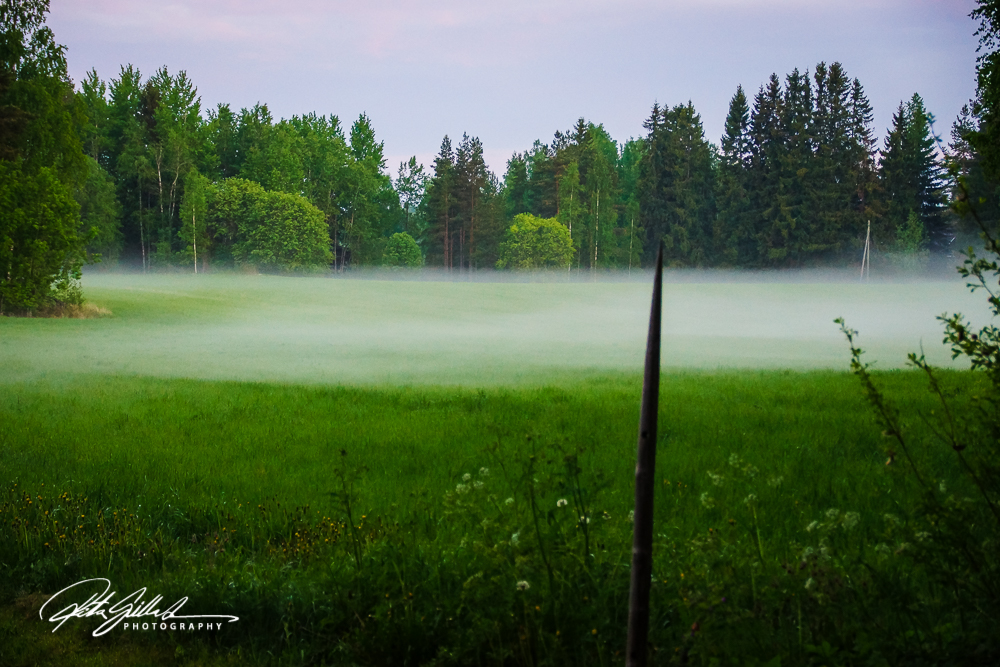
White nights at a cosy Finnish summer house right by the water, relaxing baths at the sauna, skinny dipping in the clear lakes, magical moments in nature glowing in 50 shades of green and many more.
Finnish summer speciality is the fascinating natural phenomenon called Midnight Sun.
When nights are as bright as the day, you can do the same things you would like to do during the day. Go outside the house and enjoy the light and the calm. The purely magical moment is when the sun tries to set, and it paints the horizon from red to yellow and pink to purple. Everything around you is surrounded by beautiful bright light.
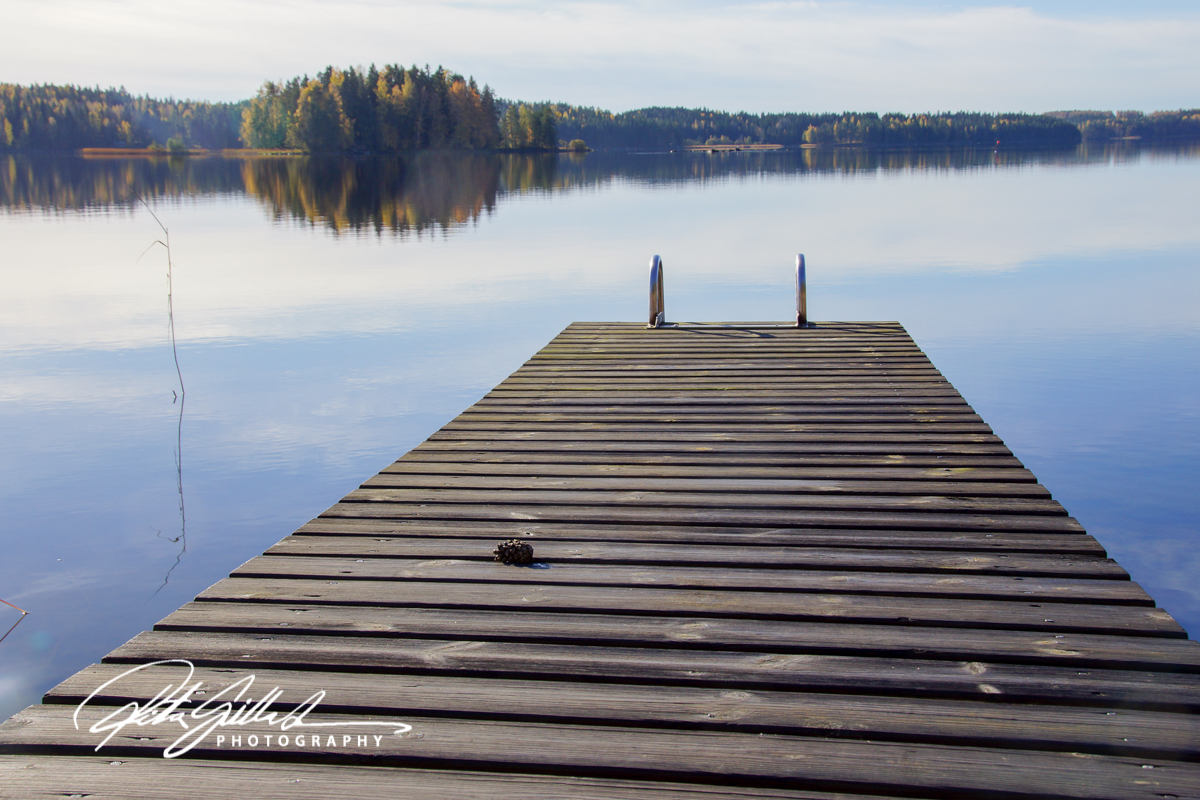
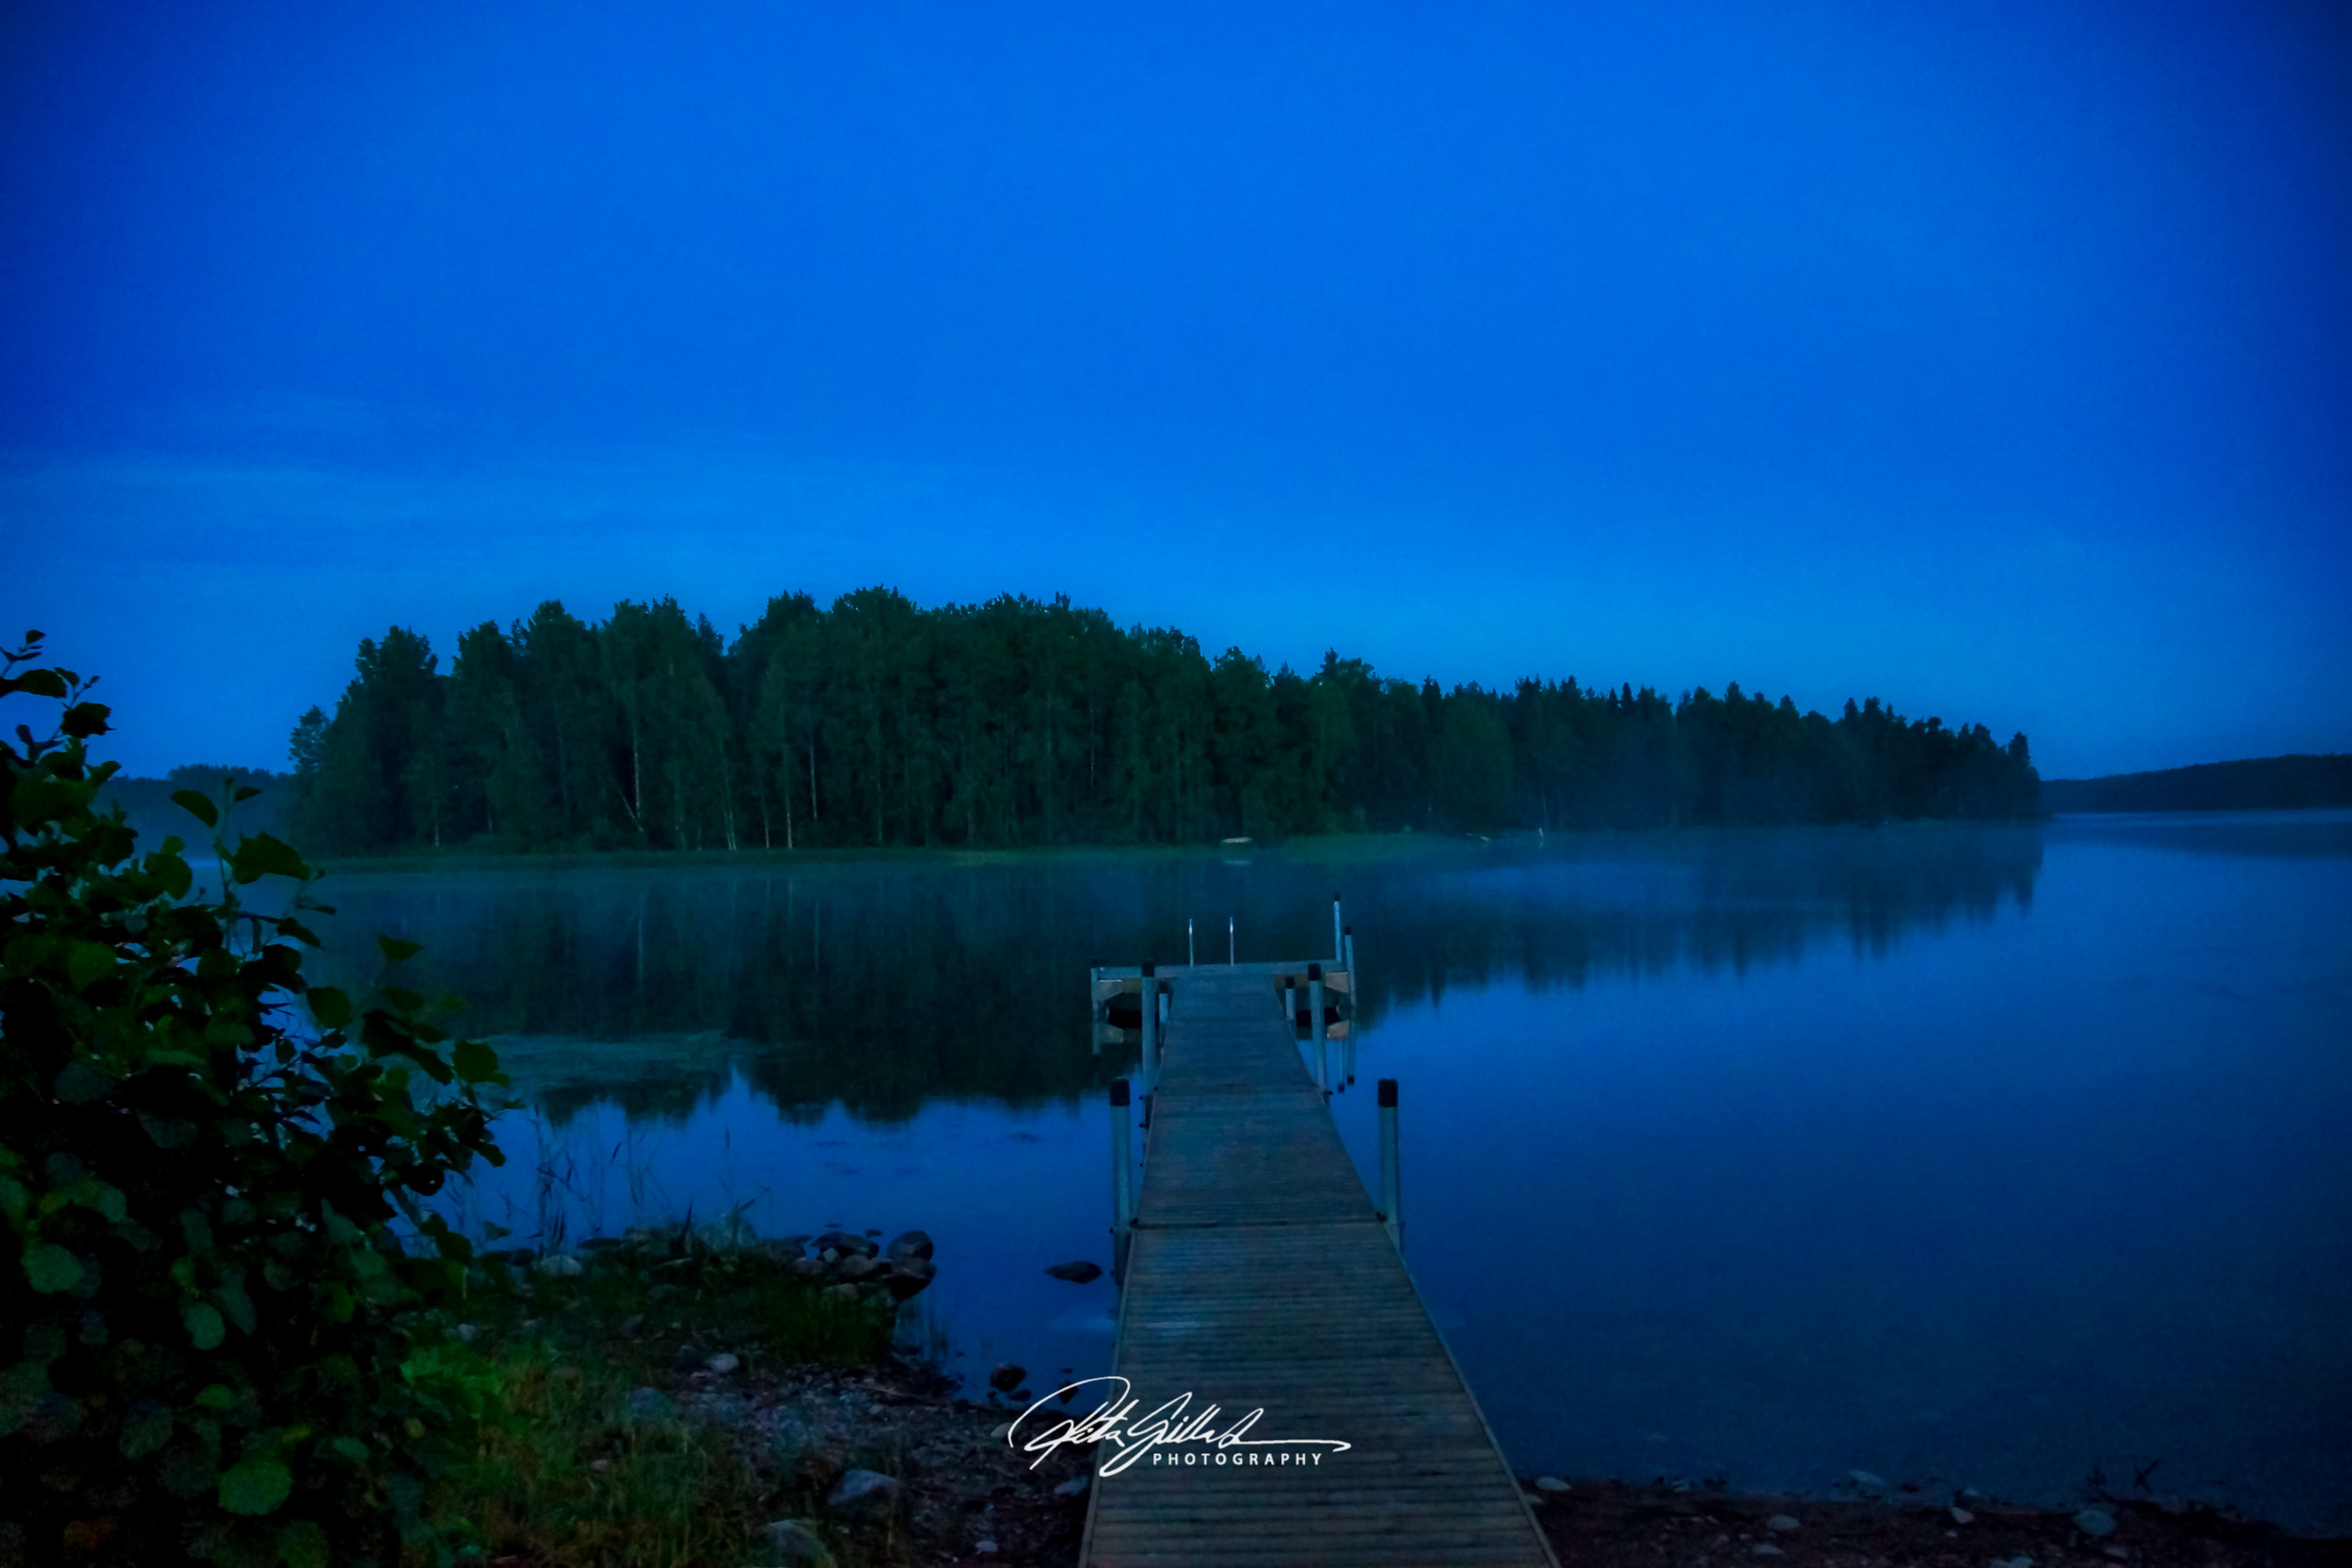
The Nordic region is known for its unique light conditions, influenced by drastic weather and daylight changes. The sun’s low position in the northern areas creates long shadows and side-oriented daylight, while the summer evenings are distinguished by a diffuse light. The distinct quality of Nordic daylight lies in its low angles and the gradual, breathtaking transitions of long sunrises, sunsets, and the enchanting “blue hour.”
People have developed a special relationship with light, intricately intertwined with the seasons and the variations in light. The high variability of light throughout the day, and especially between the winter and summer seasons, influences people’s traditions, color preferences, and overall connection to light. I for one, feel guilty in the summer if I spend too much time inside. When you have it you need to be outside.
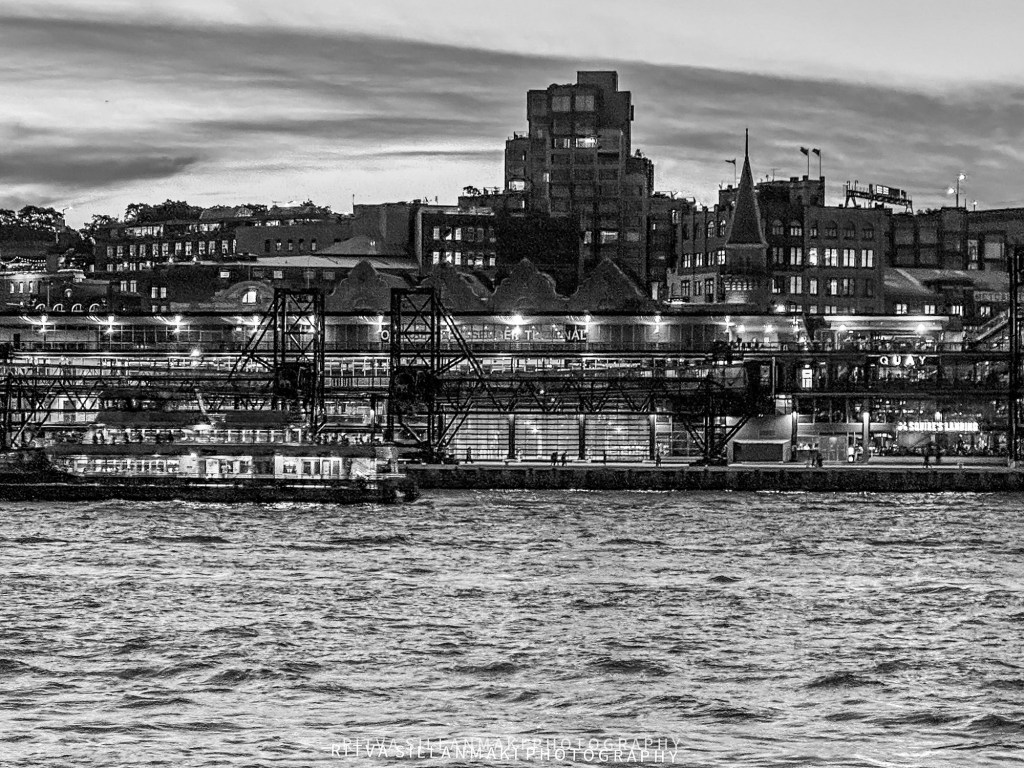
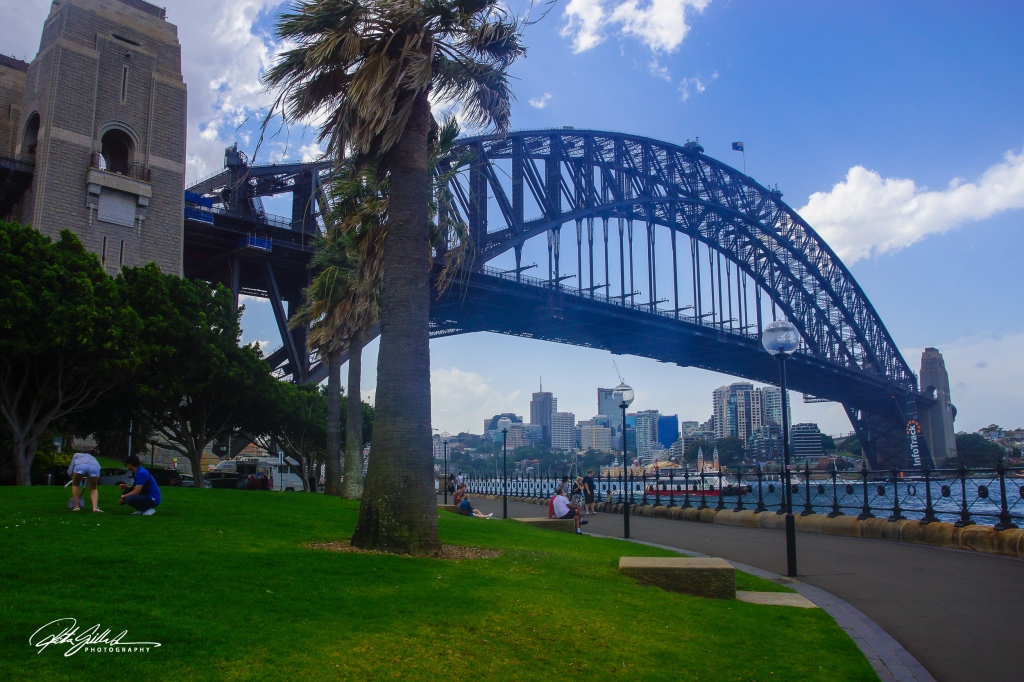
Day, evening and night image from Sydney Harbour
Night and day in Níce
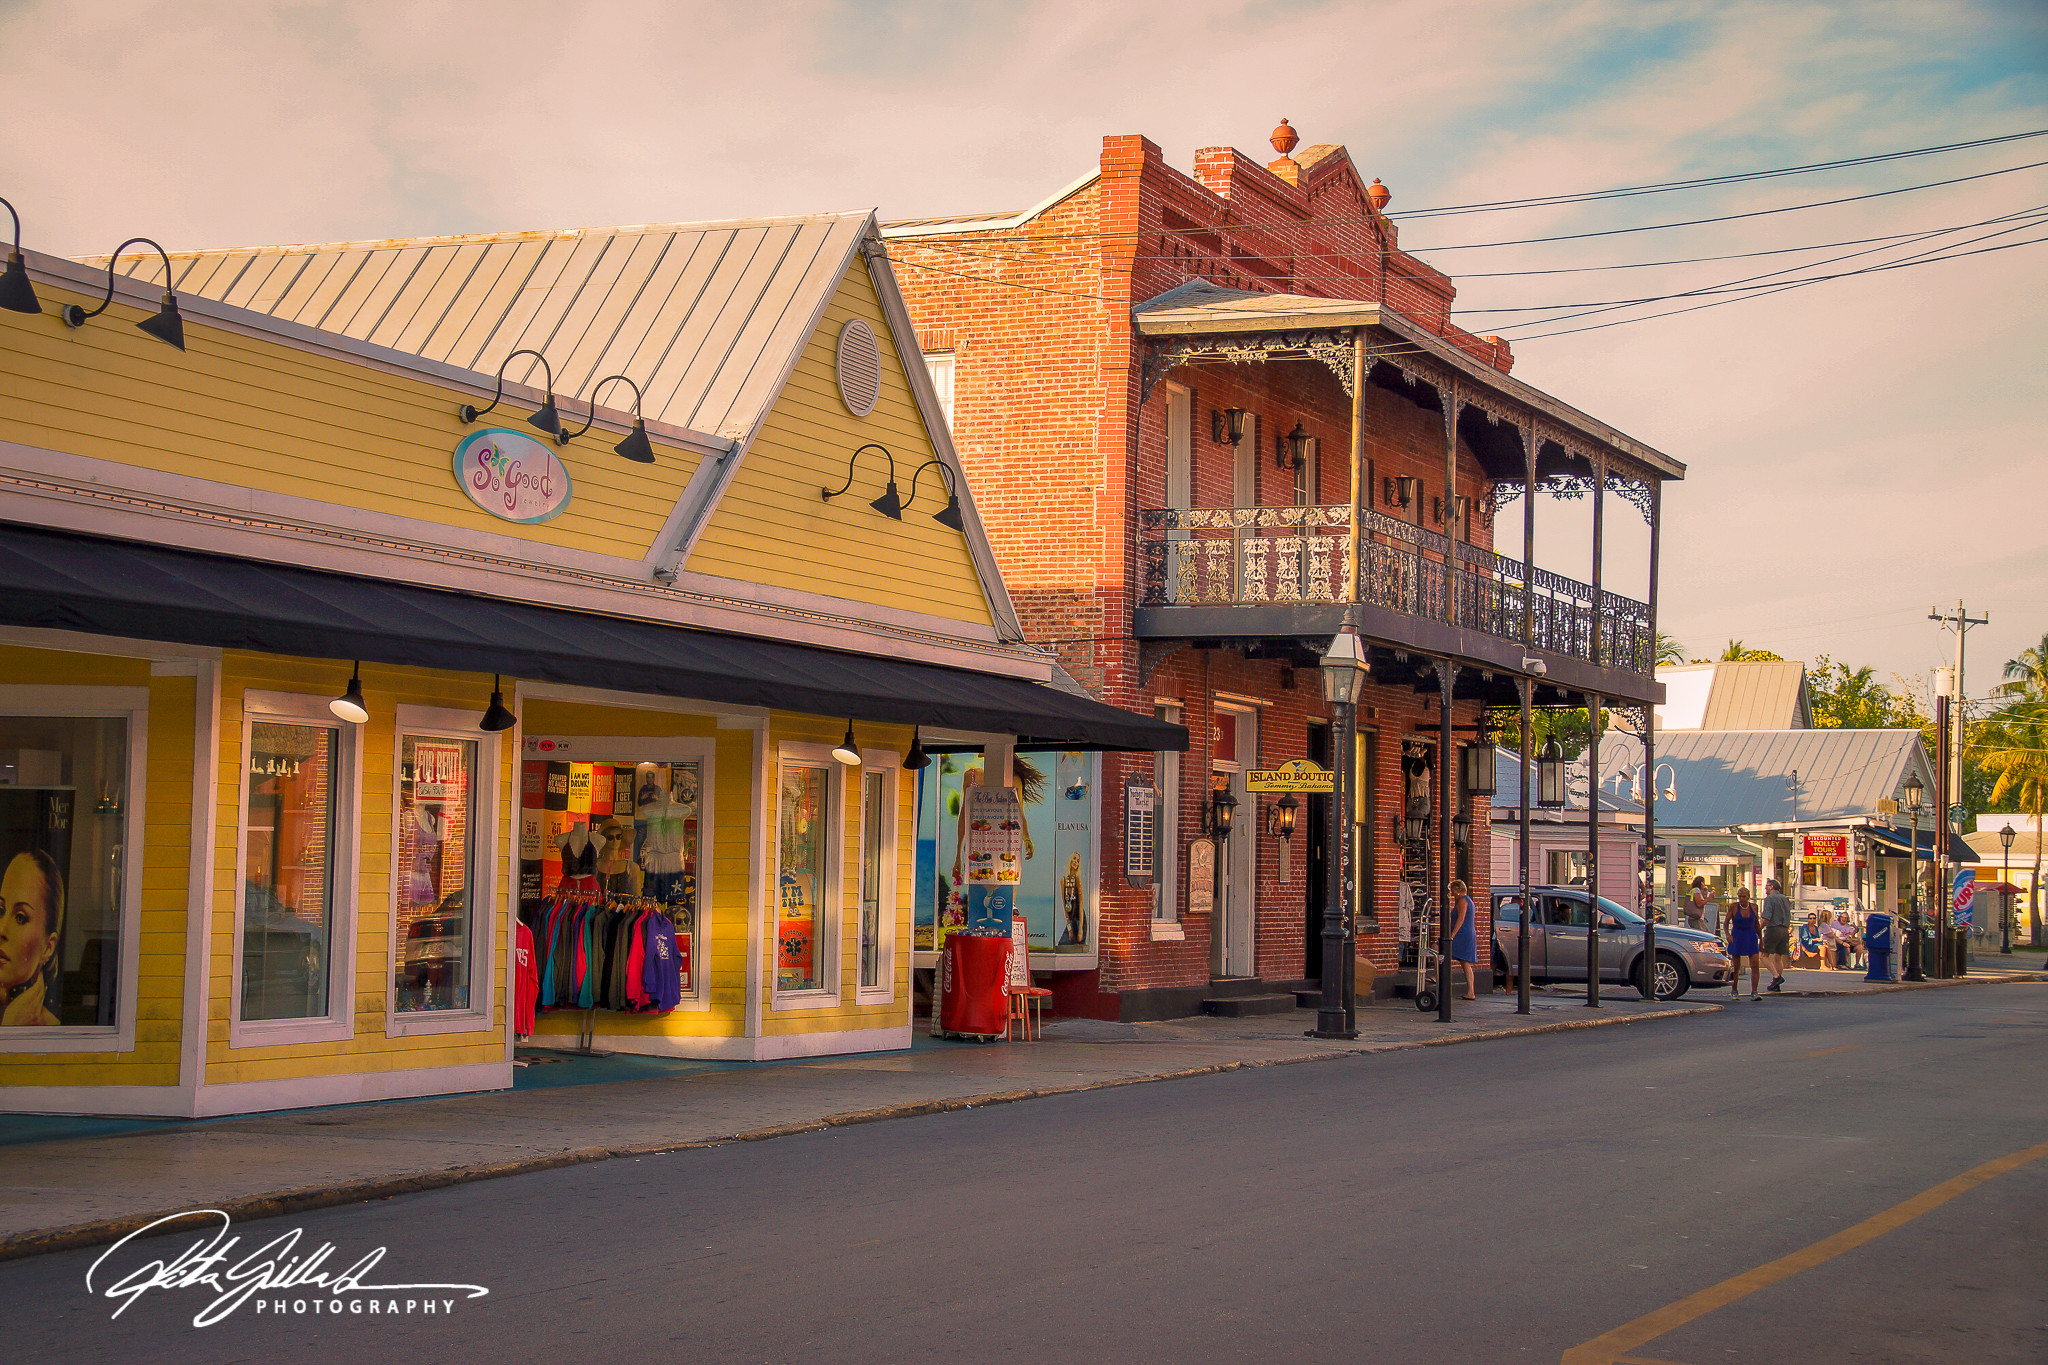
Key west day and night
To participate in this challenge, you should link to or leave a comment on the week’s host’s original challenge post and please use the #Lens-Artists tag in your own post, so the post is easily found in the Reader.
Thank you to Sofia for inspiring us with Day and Night. Be sure to visit her beautiful examples for the challenge.
Next week,Egidio (Through Brazilian Eyes) will host his first official challenge with the Lens-Artists. His topic is Warm colors .Be sure to visit his inspirational site for more!
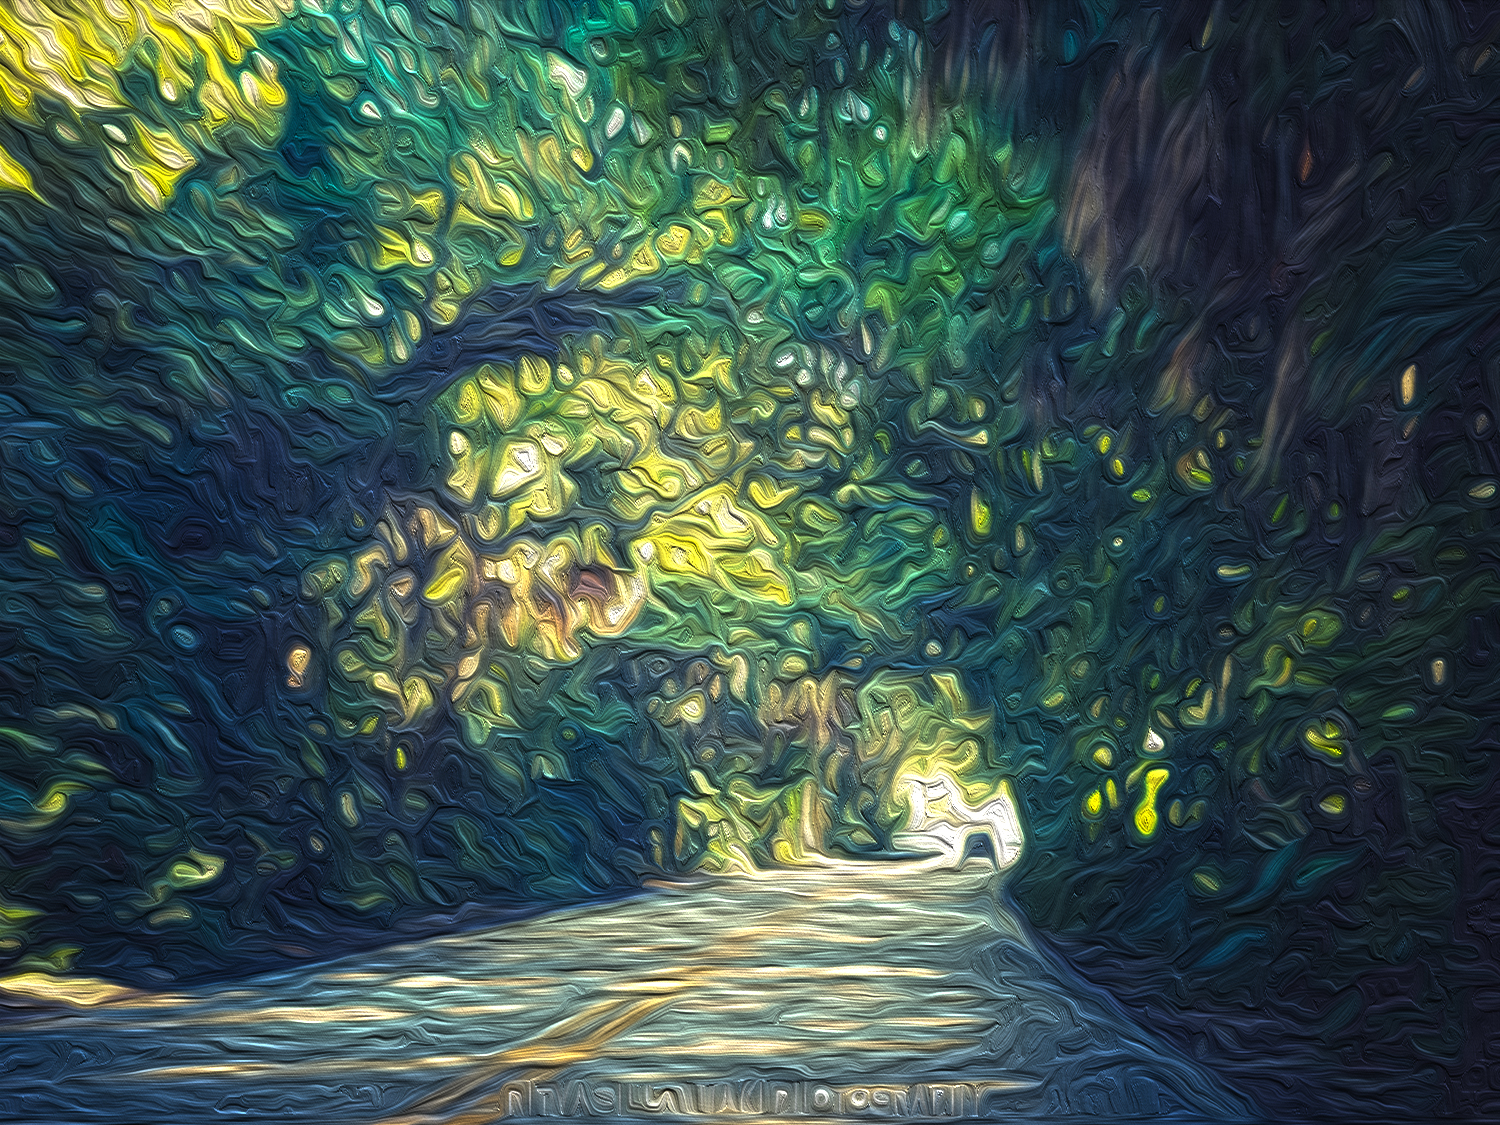
To start with he photos were not all that good, but I liked the light in them, so I made the in to art.
Same road, photos taken right after each other, so the light is little different, I used two different brushes to get a different outcome by thete texture.
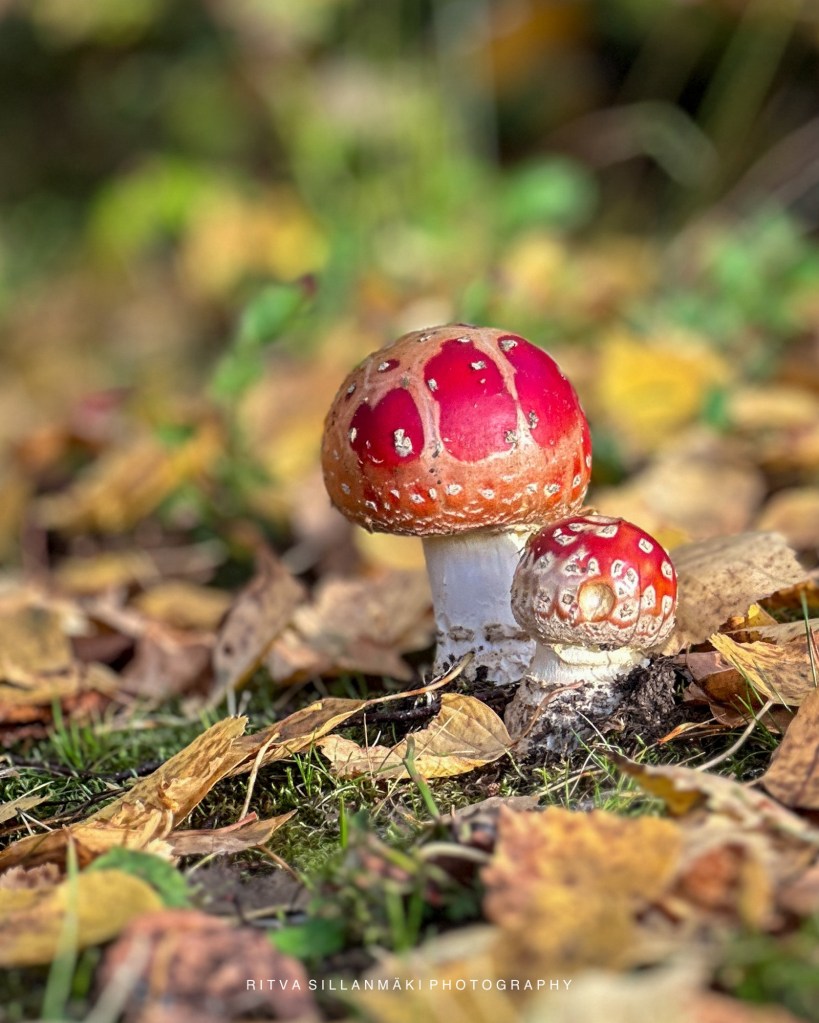
Take a moment. Look at something, anything around you – what do you see? What do you notice? That’s right – our eyes take in the big picture, but then move in closer to see the Details. That’s just how we humans work – we instinctively want to look at things and then parts of those things.
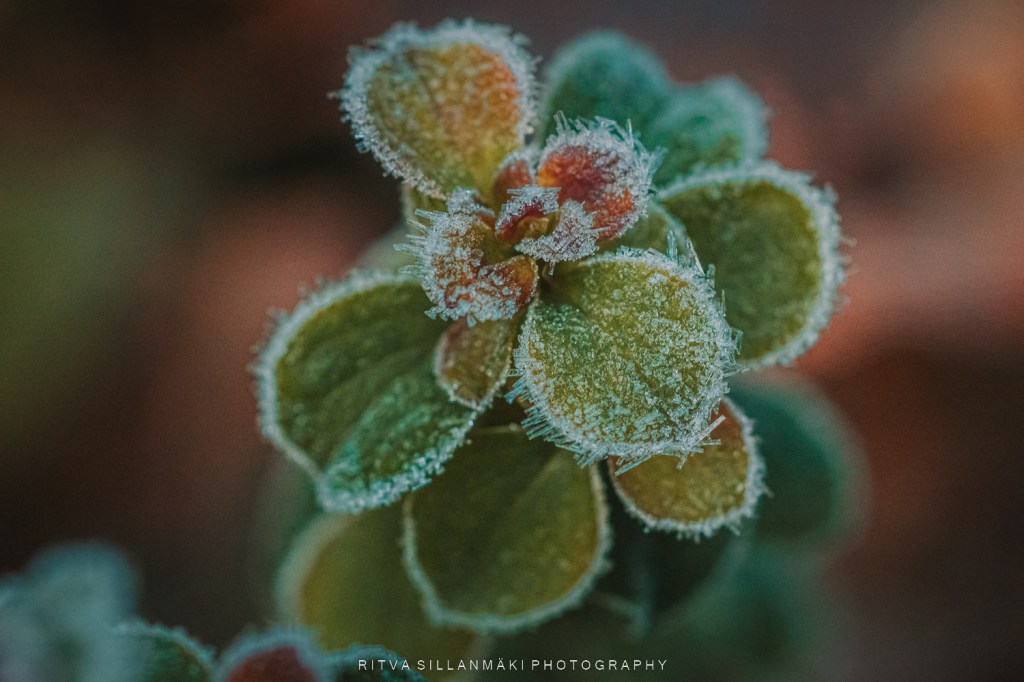
Frost on leaf pedal
I am often post details, one of my favorite ways to show you how I see the world around me. So much beauty can found near and far in small or sometimes big details.
I have taken macro shots of nature this week and it fits this topic ever so well. The others are from my archives.
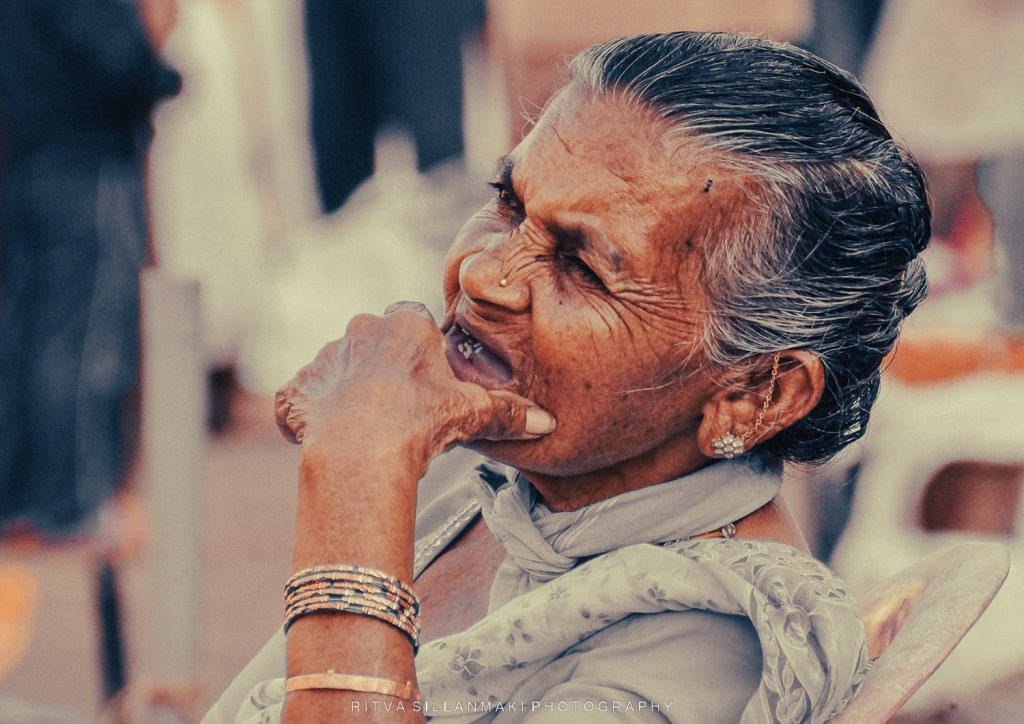
The wrinkles, special features and texture of our faces in portrait. Capturing fine, rarely seen details in a macro shot – maybe abstract, or in Nature. Maybe it’s that detail on the building you pass every day, but rarely take a moment to notice.
wrinkes around the eys
rough life?
Craft an image that shows off the details of your choice of subject. Focus, contrast and composition will play a key role , so it’s both a creative and technical challenge
By capturing an image and looking for the picture within a picture, you’ll be able to capture exquisite details that you’d probably normally overlook. When you start noticing the details, a world of new and possible images opens up to you.
I love taking photos of machinery, rust the photographic details there are to be found
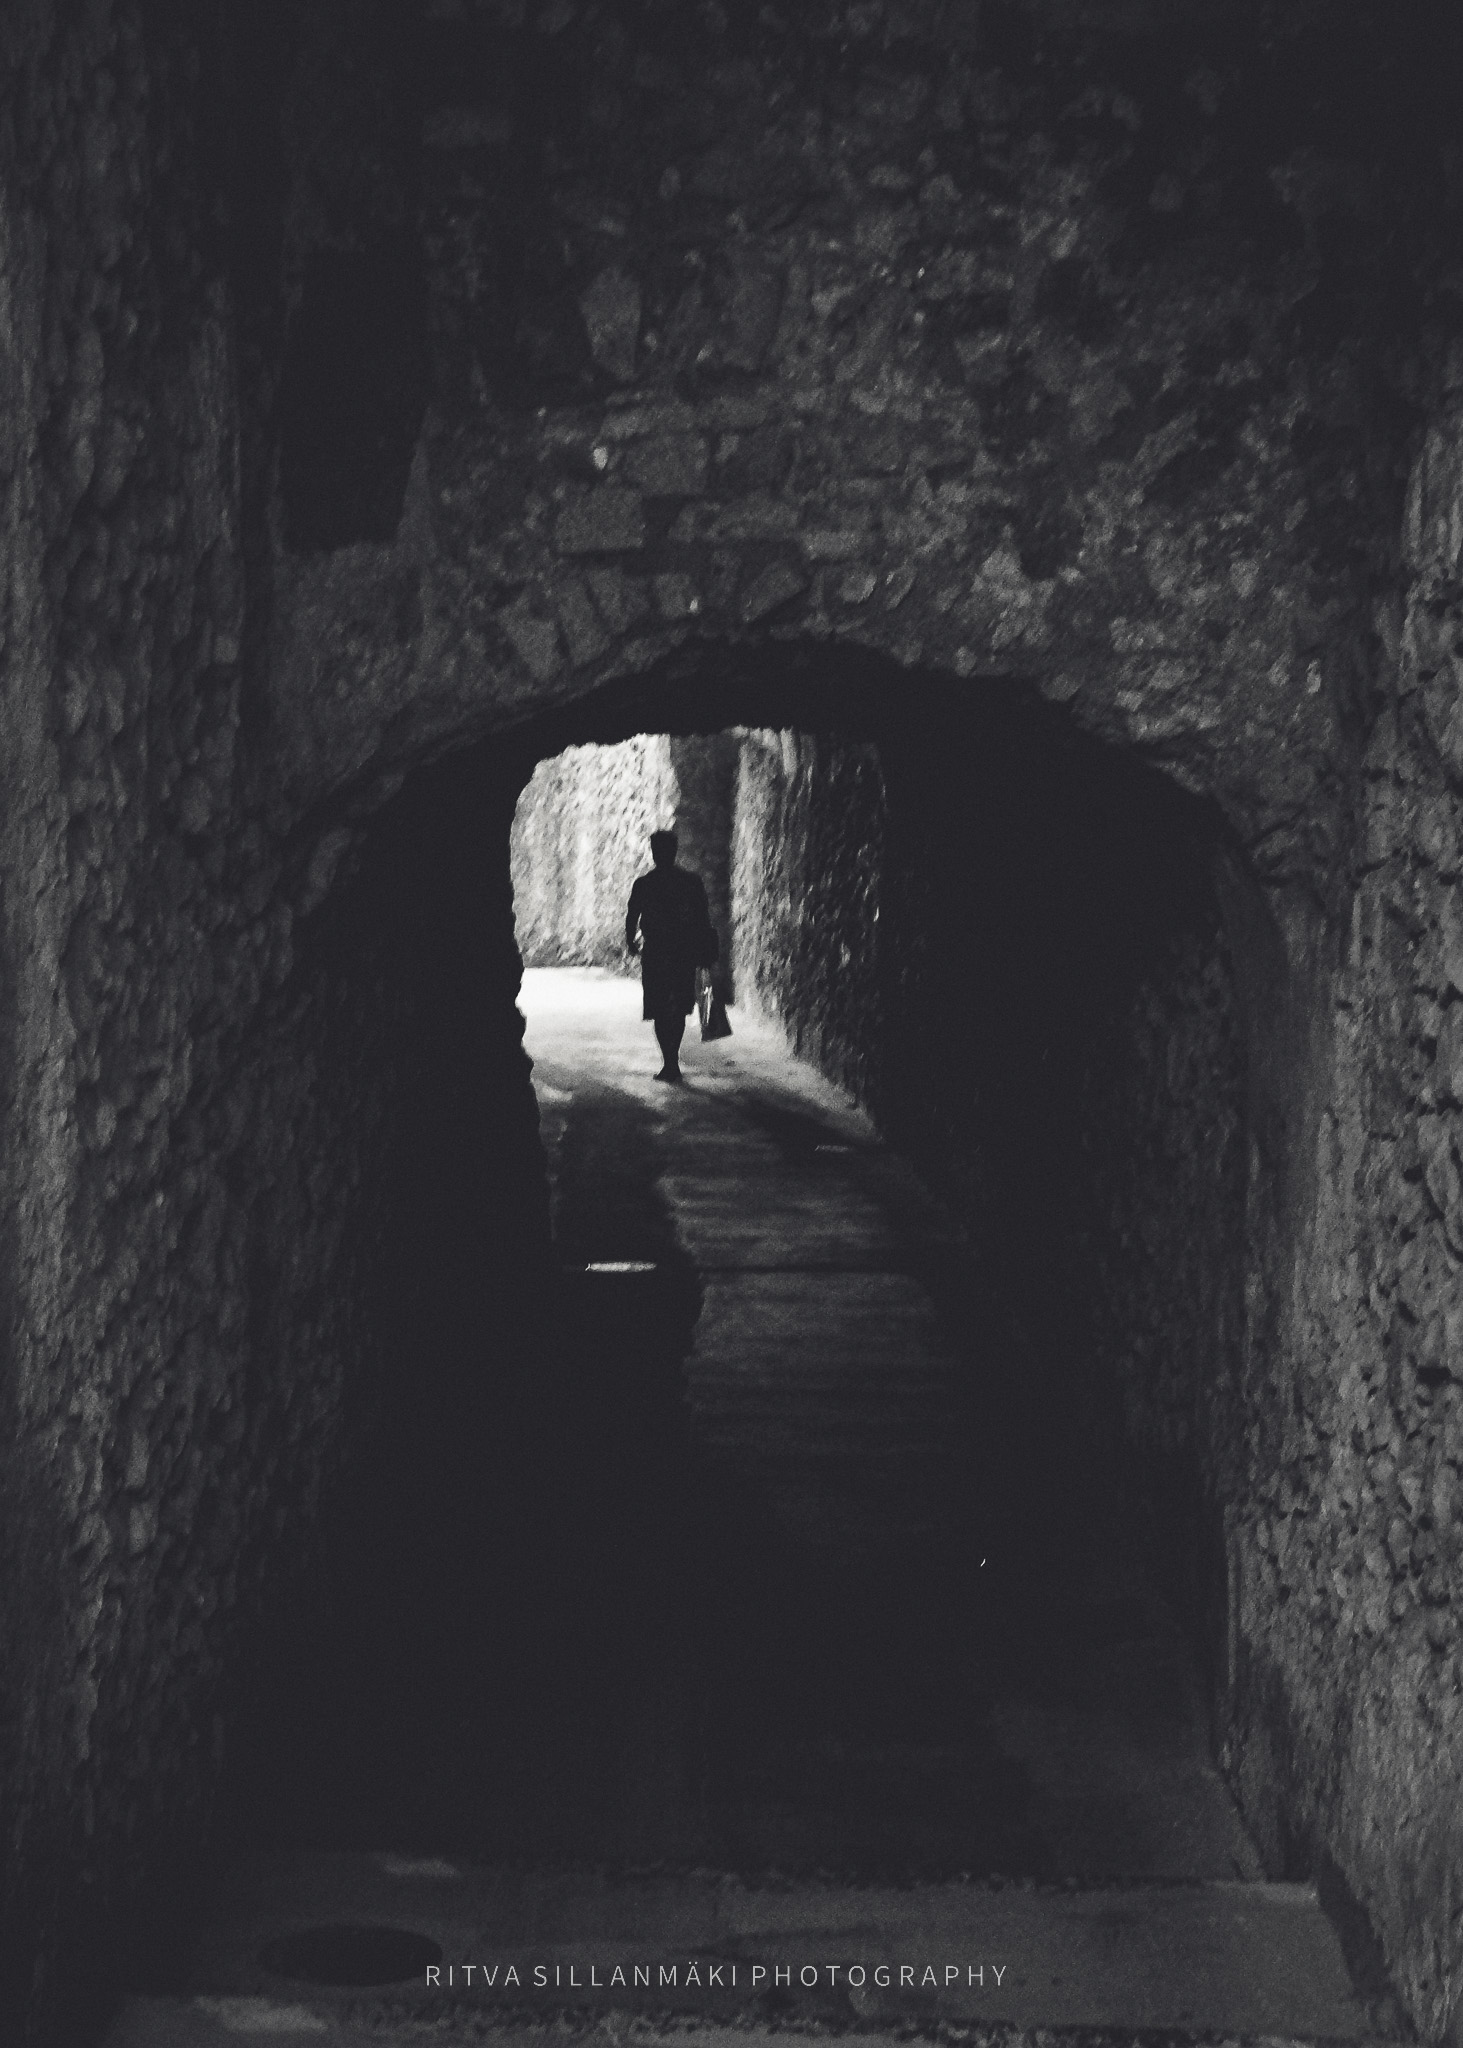
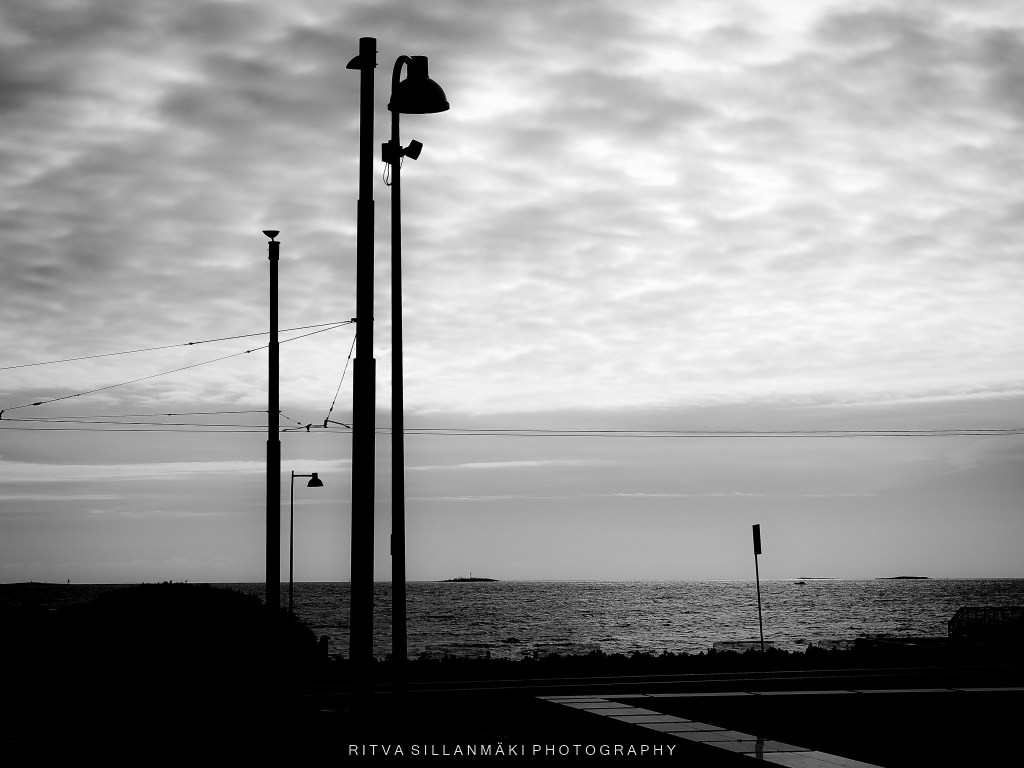
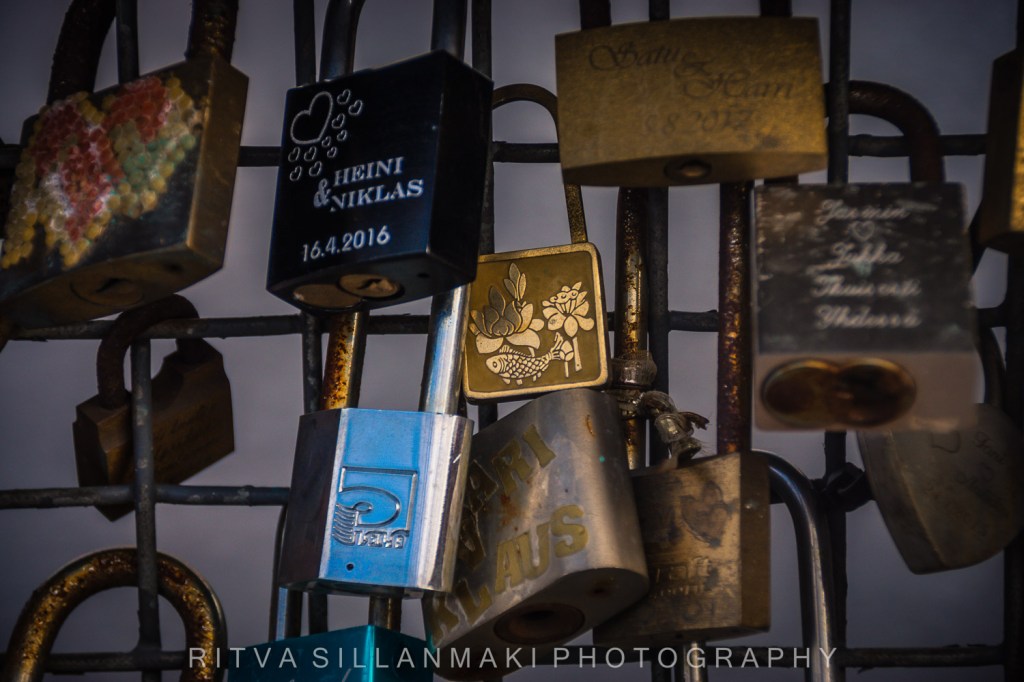
This week we’re combining two distinct genres to form Black and White Minimalism. Black and White photos, inherently feel a little minimalistic. Using a composition that’s minimalistic, like having negative space, really adds to this unique shooting style.
Simply doors, as interestingly as I could
Negative space
Black and White minimalism usually yields a very clean and clutter-free aesthetic. A strong subject will draw the viewer’s eye, and a lot of negative space around your subject will support the main “star” of your frame.
OLYMPUS DIGITAL CAMERA
You can create minimalism with negative space, and you can also use light and shadow by only lighting your main subject and leaving the rest of the frame in shadow (low key) or by lighting your background bright as well to create a high-key look.
But, in particular for this challenge, do remember that: Less Is More 🙂
October landscape
Be Direct: Simple does not mean boring. try to tell a story and convey emotion with as little clutter as possible.
Negative Space: Take advantage of negative space. The “empty” space in your photo will draw the attention of the viewer towards the main subject, without being distracted by other items in the photo.
Leading Lines: Use concepts like leading lines to guide your viewer’s eye to the image.
Shoot in B/W: Many cameras have a black and white mode – use that to help make things simpler when previewing the shot you’ve just taken rather than having to post-process later.
Tones and Contrast: There are a multitude of shades and tonal ranges that can be adjusted to bring out depth and textures, especially in a Black And White shot. Consider adjusting those for different looks for your image.
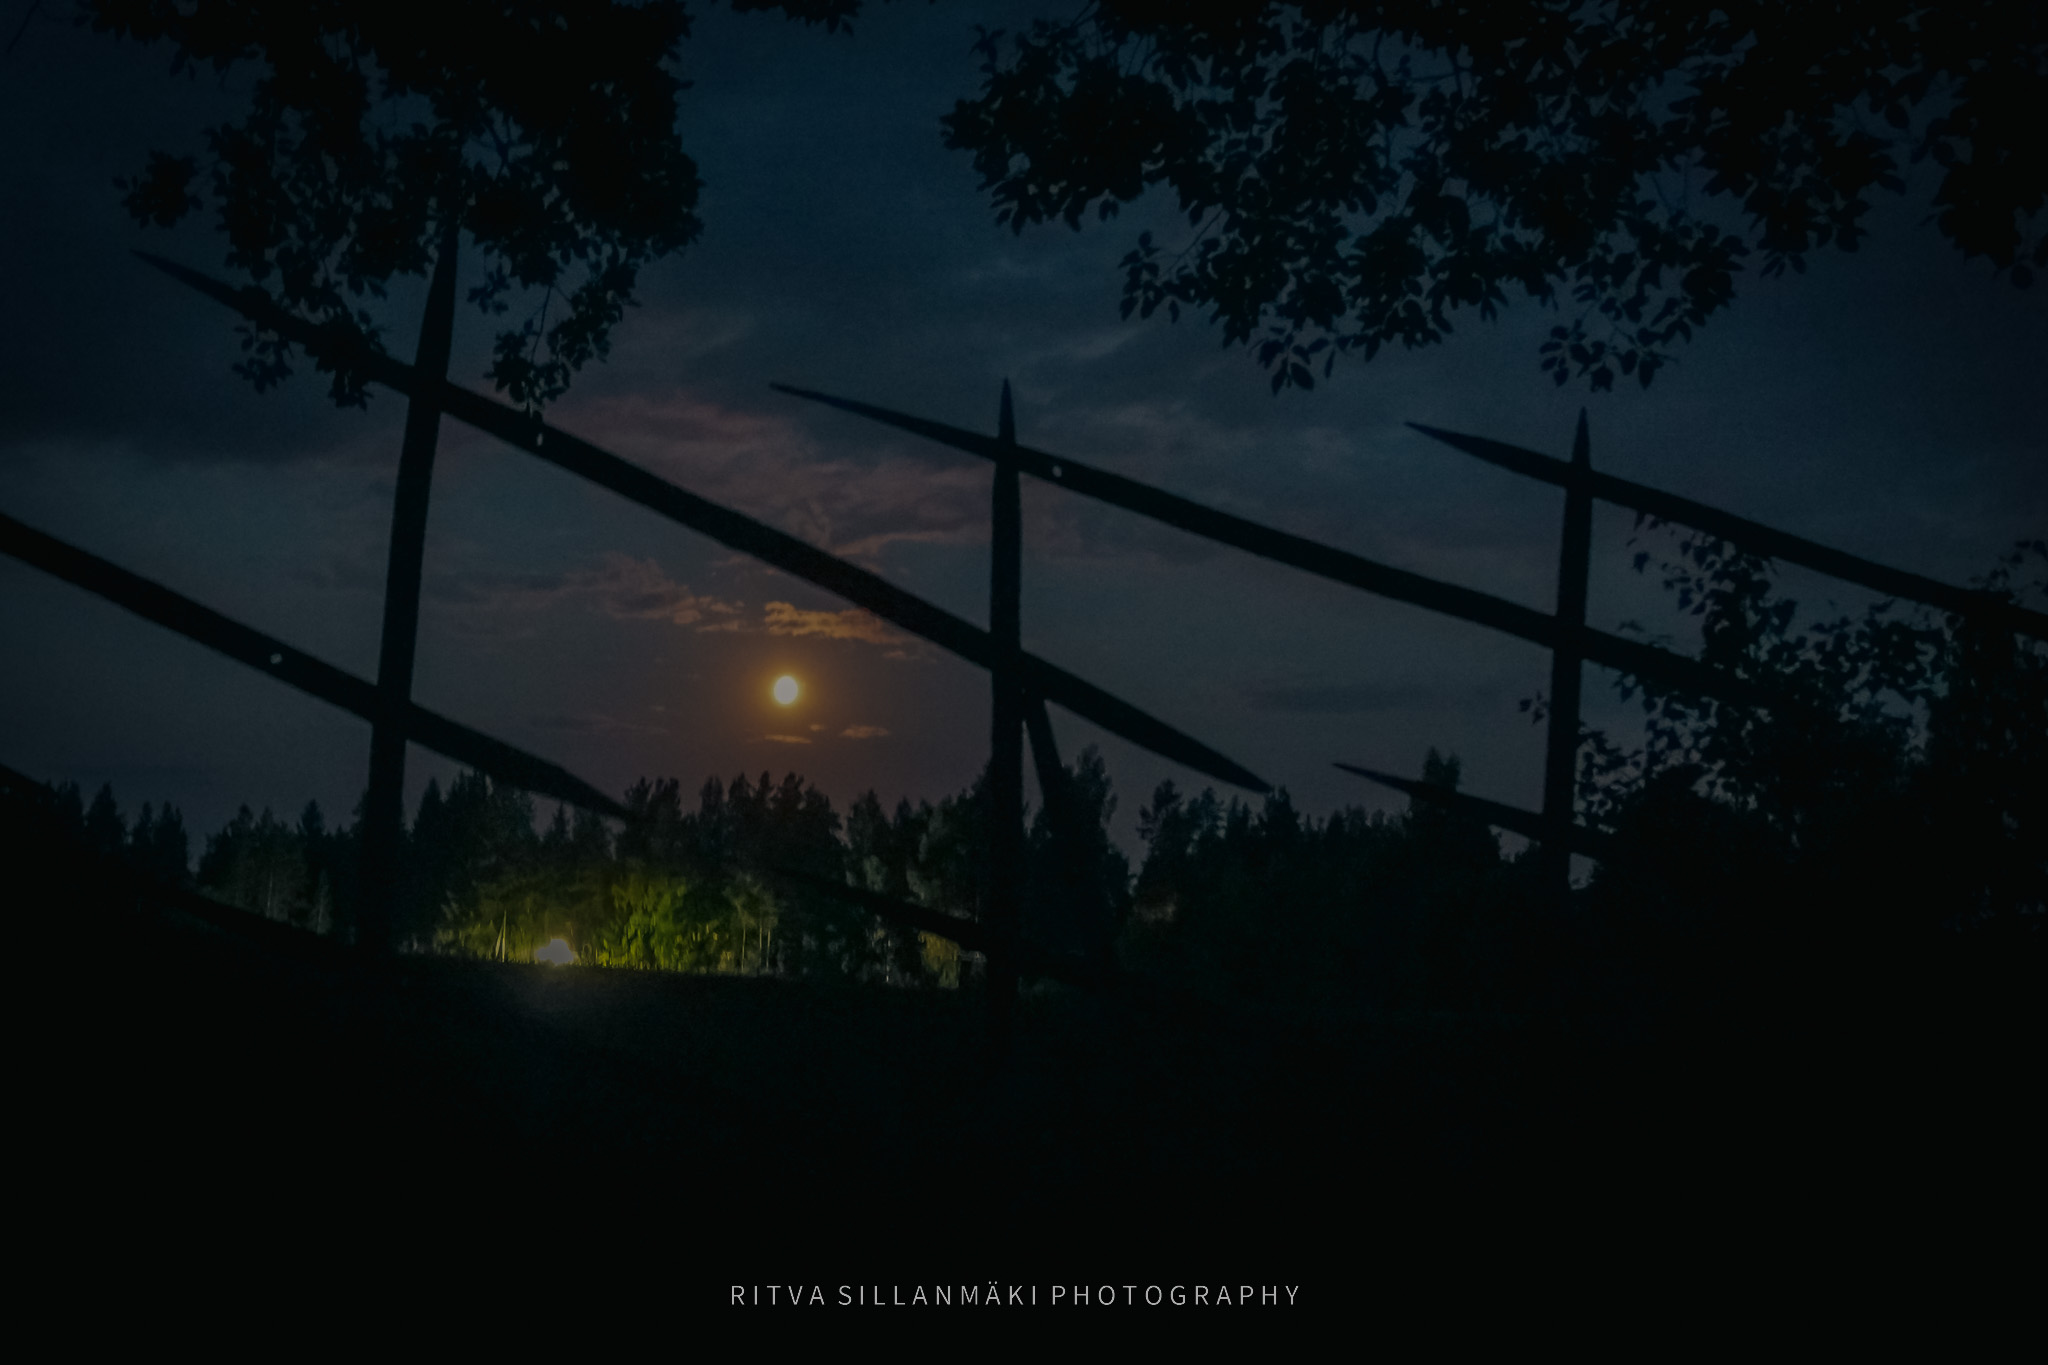
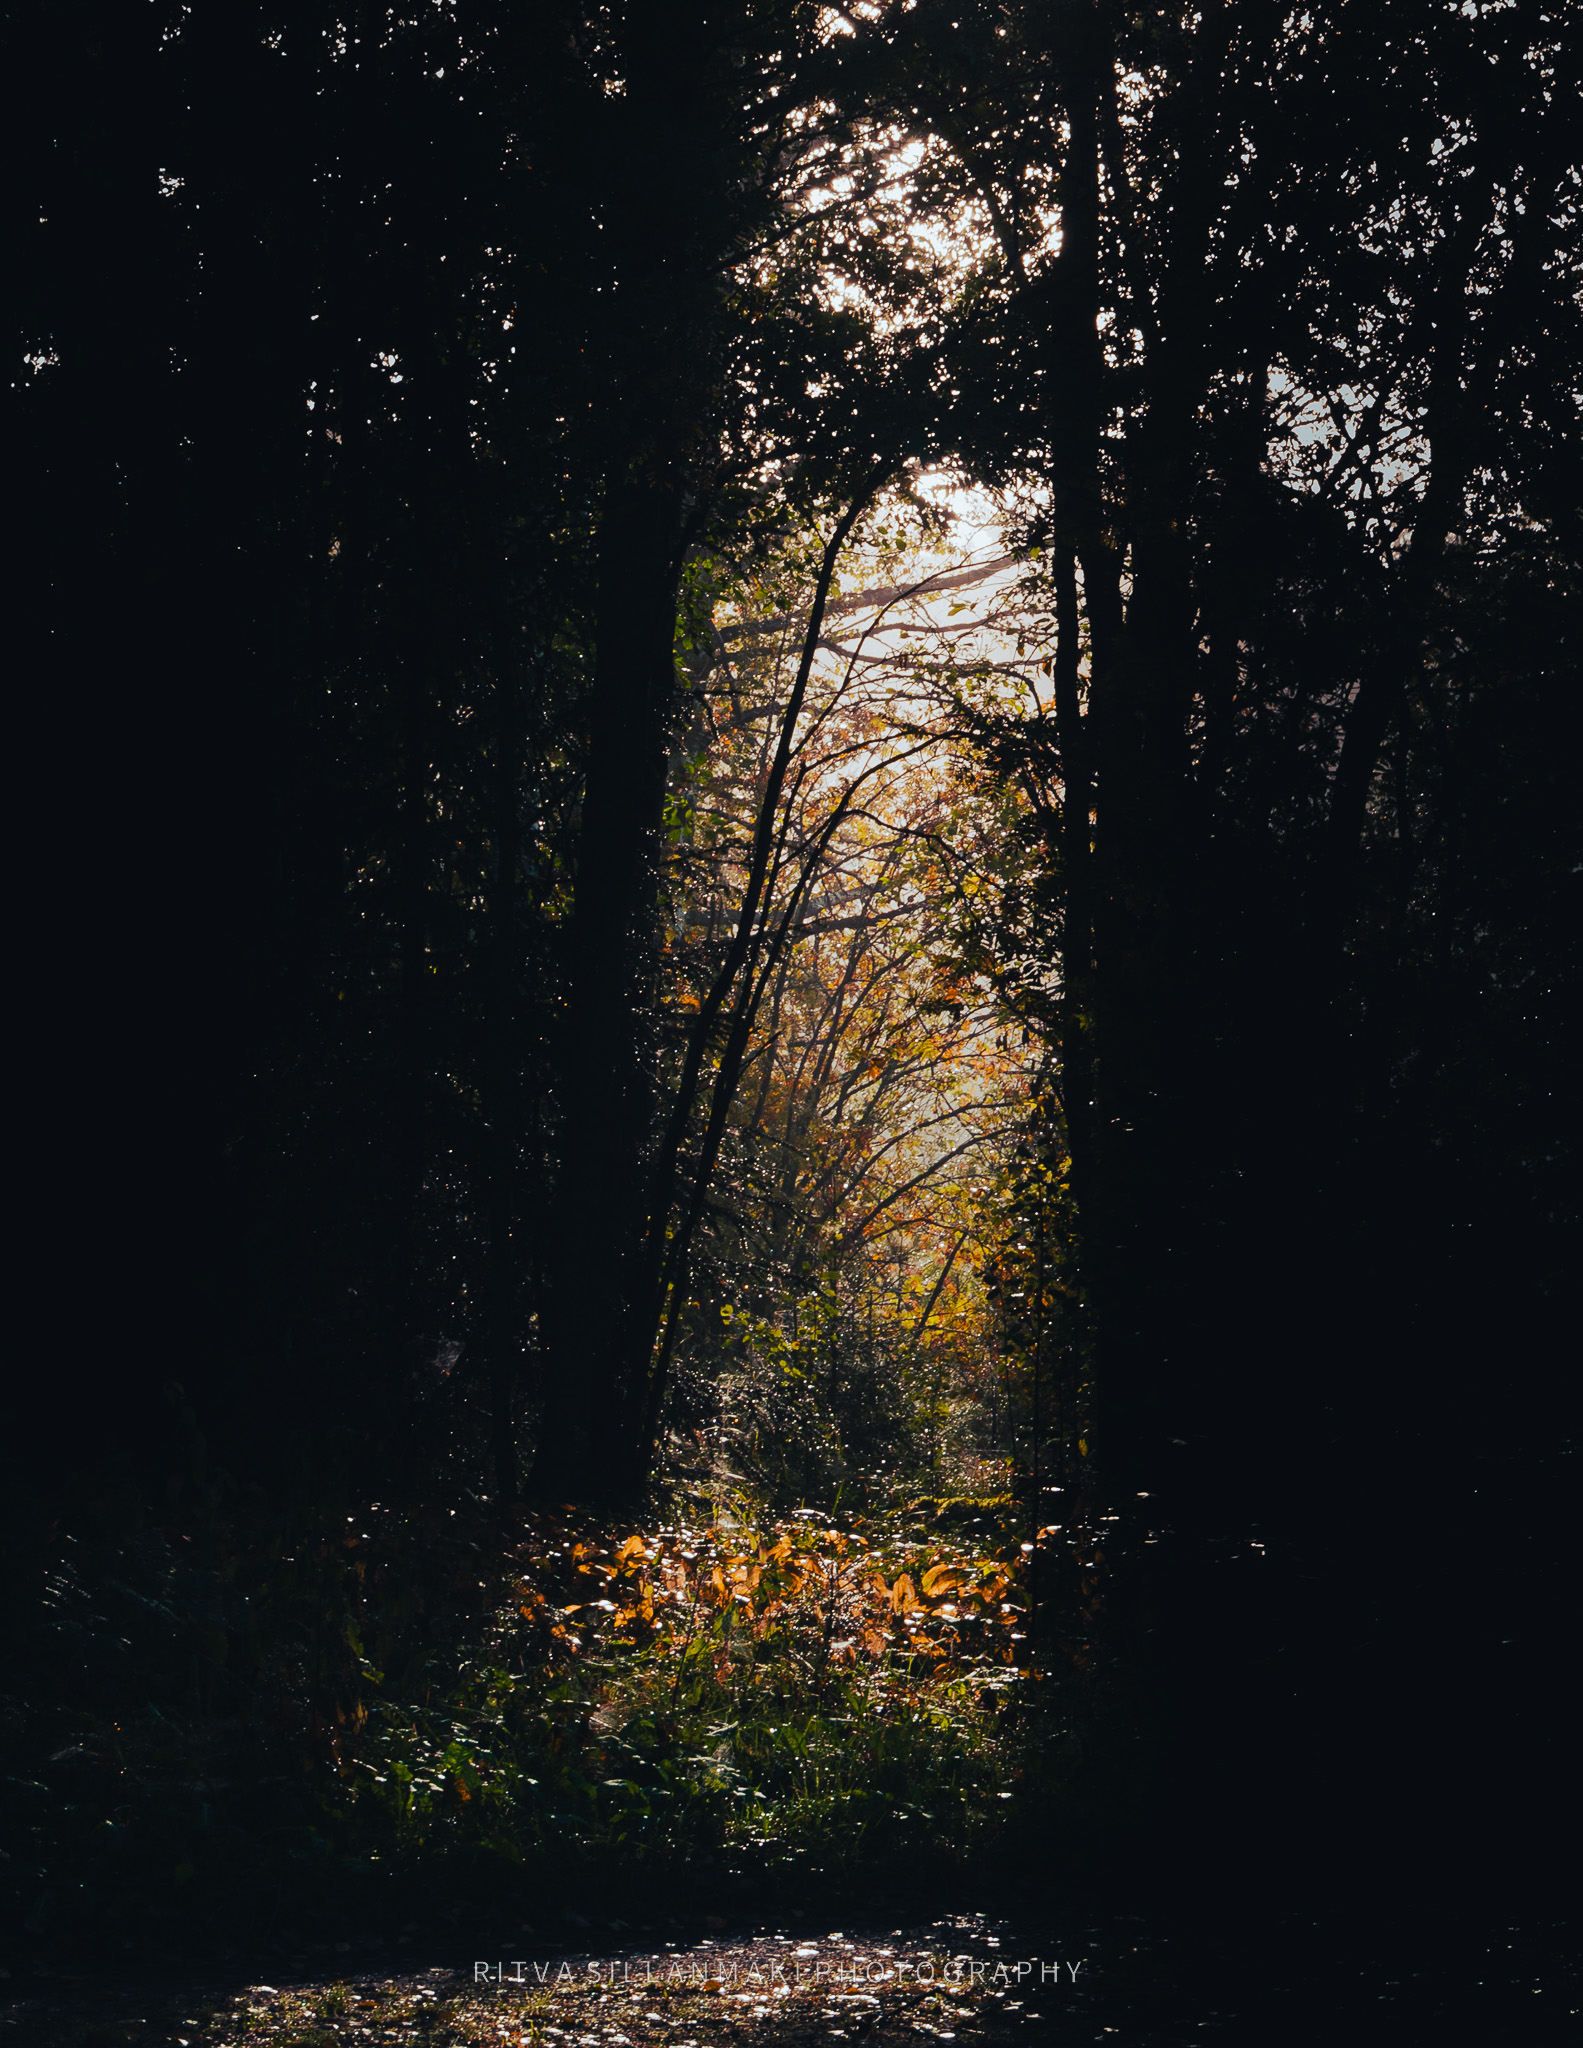
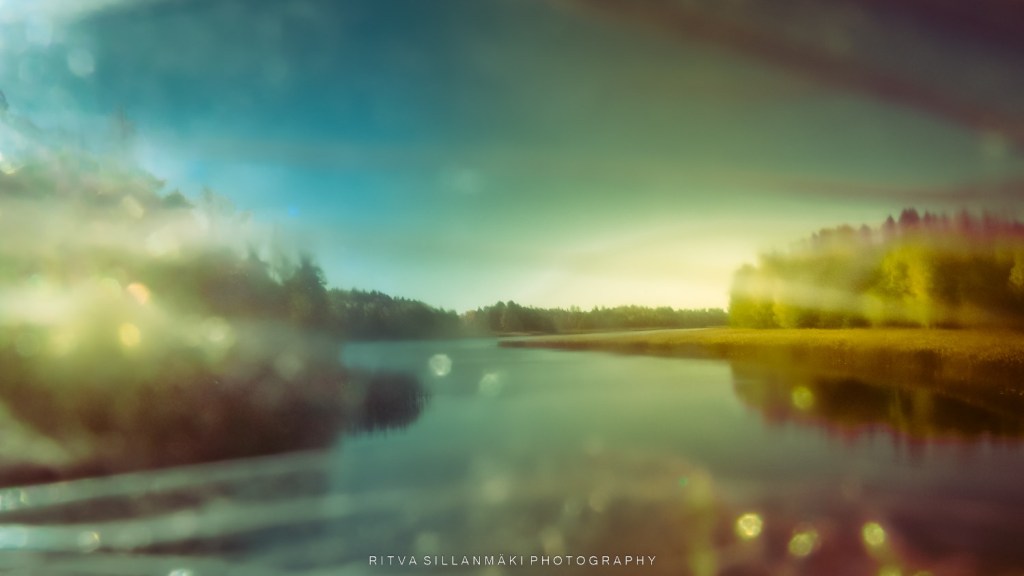
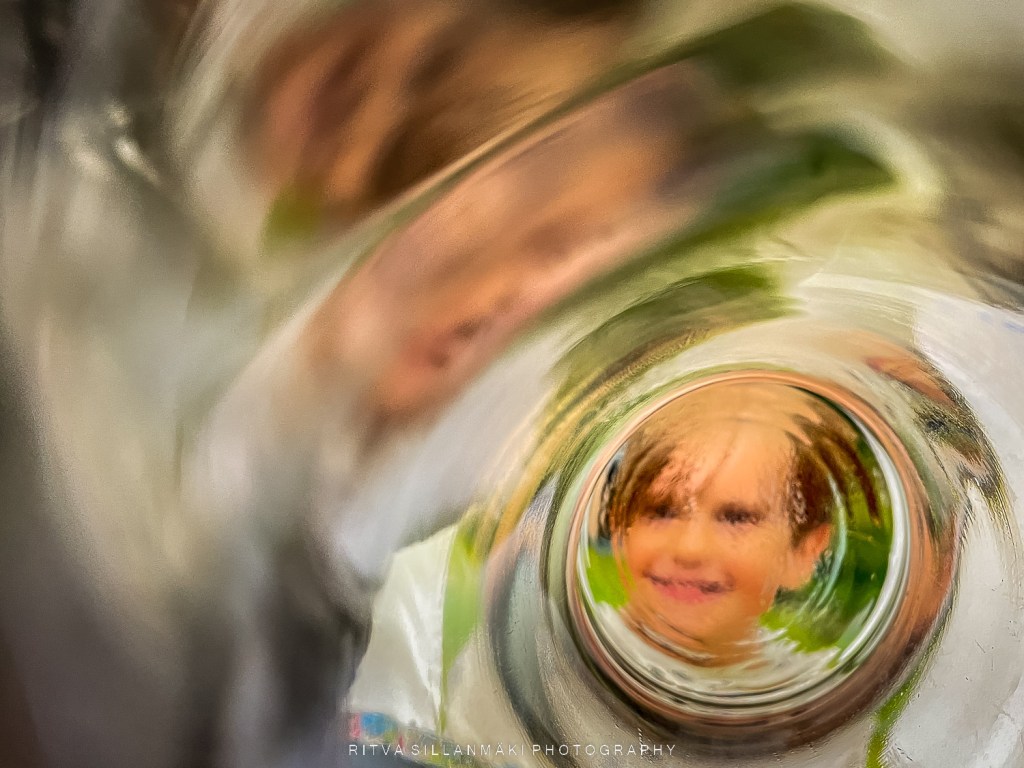
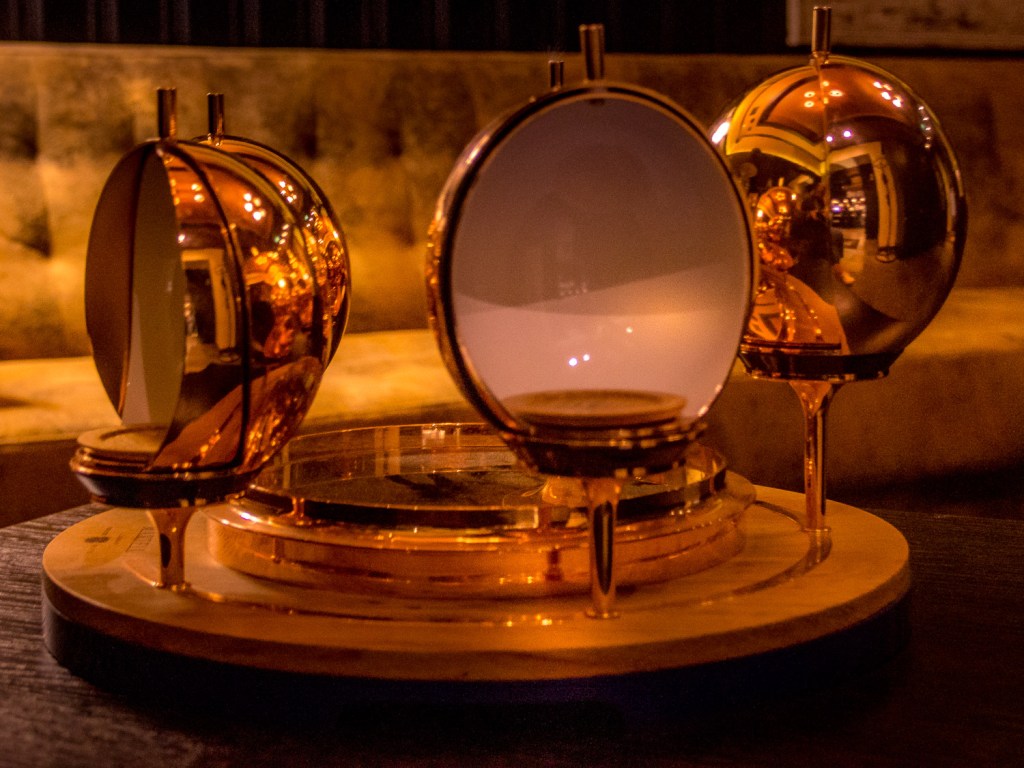
Shooting Through Something – basically have something between your lens and your subject that “interferes” with the viewer’s view of your subject. It could be something as simple as leaves in front of your lens. Or if you wanted a more dramatic effect, you could use a piece of glass like a lens ball, a prism, a magnifying glass, etc.
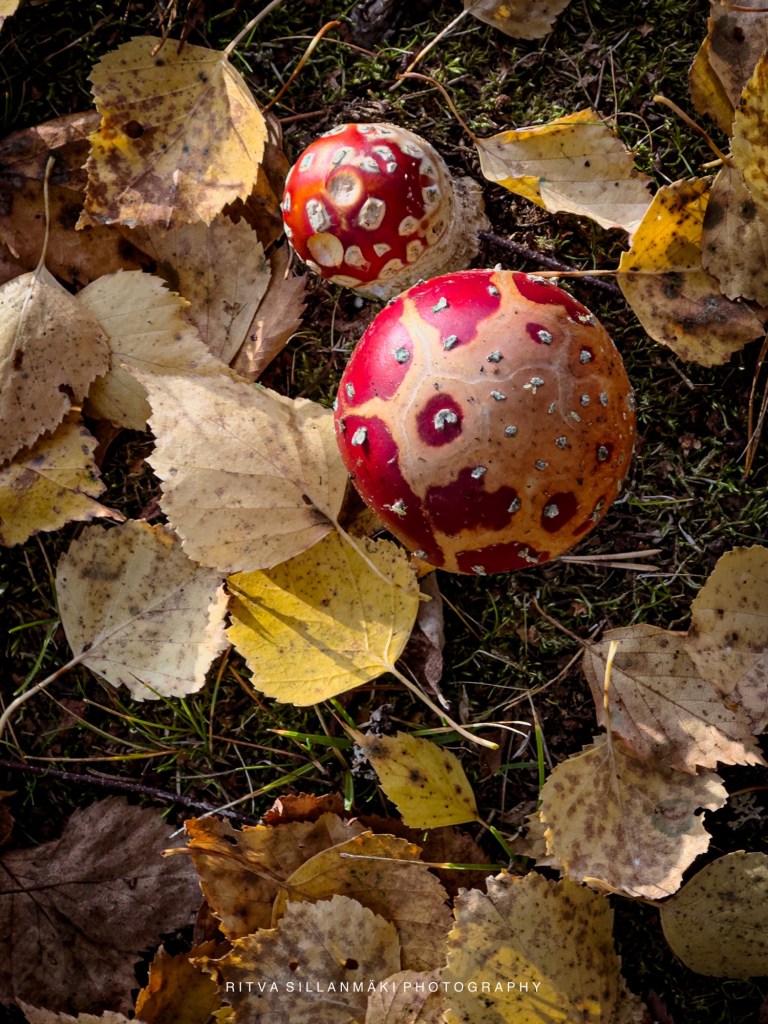
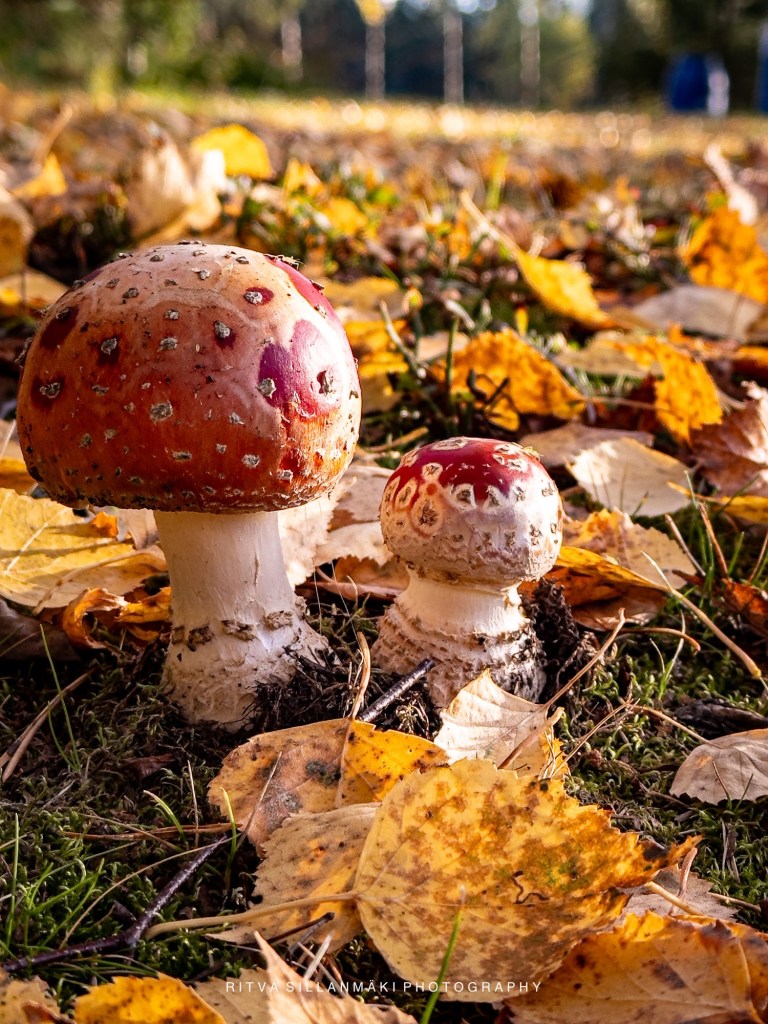
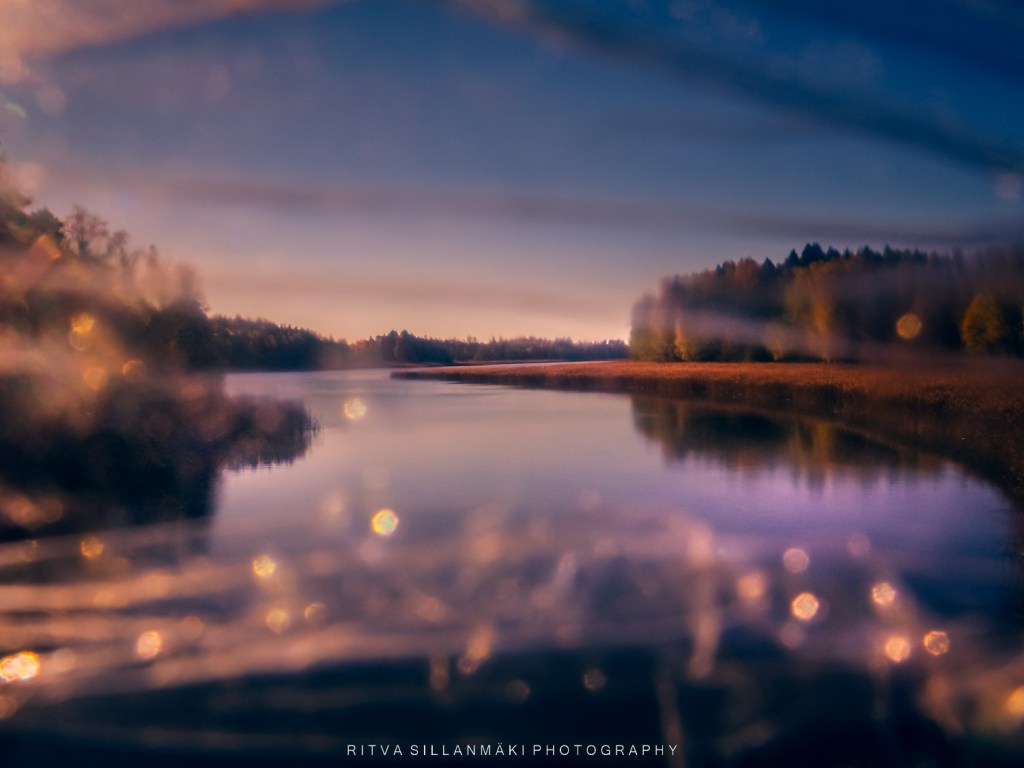
I went out to to capture nature, carrying two camera’s, nearly broke the other by dropping it on the ground, if I’d succeeded it would have been my third camera I dropped and broke. I went out with the intention of trying to shoot behind the trees and leaves, I also did that. I brought some plastic wrap with me to use as a prop. I took this shot placing it on the lens, shooting towards the sun so the flare came nicely on the shot and also gave the shot a misty quality. The autumn colors play a big part in this image of an inlet in Kirkkonummi.
Through cling film
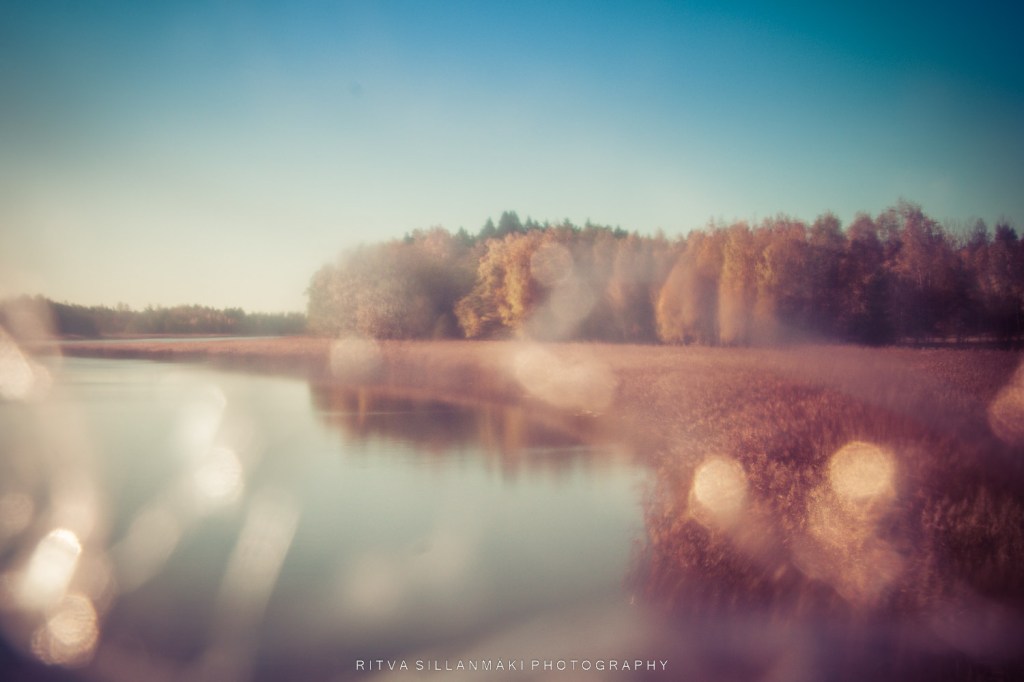
A thin plastic bag or kitchen plastic film (cling film / Saran wrap) over your lens can produce some very creative looking effects too, but you really don’t NEED any special props this week. The idea is that if something is very close to your lens, and your focus is further away, you will create a dreamy, shoot-through effect. This is of course more exaggerated with a shallow depth of fields (wide aperture, smaller f/ number). Go ahead and experiment and have fun!
You could do portraits or street photography by shooting through a window with some reflections showing up, or go the creative route and use vaseline on an old lens filter
The idea is that your foreground, even if it’s blurry, becomes part of your story. So, let’s get creative in a new way.
autumn colors through cling film
Grandchild through beer glass
TIPS:
Refraction: There are tons of ways to use glass to bend and shape light – a wineglass, a magnifying glass, a prism, a lens ball, shooting through a colored pane of glass etc.
Use Nets: A net or thin grid can add some creative effects. If you’re too close, of course, you might not see the effect, so distance yourself appropriately.
Use Plastic: Kitchen film wrap can be used creatively – you can draw on the film to make creative colors and interference patterns without ever harming your lens. How about that empty plastic bottle of water you were about to toss away? That can work too.
Rule Of Odds. Simply put, there’s a school of thought that multiple subjects in a shot are more pleasing if there are an odd number of them, as opposed to even. Think 3, 5, 7, etc.. The number “one” is technically odd, but I don’t think that’s what this “rule” is referring to.
Often an odd number of subjects creates symmetry in your shot – use an odd number of things for the viewer to focus on without making it too cluttered. If you have people subjects, go for 3 or 5; maybe food photography is your thing and you want us to check out some tacos you’ve just made. Or if you’re out and about – maybe you spot 3 birds sitting on a wire. Oh look, it’s five canoes moored together at the lake – all it takes is for you be to a touch more aware of what you see and try and train your mind to compose in odds.
Buy your tickets here
Remember not to over-crowd the image with too many elements. The average human brain has a better chance of feeling attracted to arrangements of 3 or 5 elements, but as you increase that number, this rule will be less relevant.
Still life
TIPS:
Movement: Add dynamism and a feeling of movement by composing shots with good space on the correct side, usually more space in the direction of the movement.
Cropping: Consider using cropping in your editing software to improve the composition. When done correctly, it can improve things immensely.
Positioning: Try to align vertical elements such as buildings, people walking on the street or a solitary tree along a gridline to generate more visual interest.
Less Is More: 3 to 5 objects of interest in a scene usually work best. Avoid making your image cluttered.
DoF: Use an appropriate Depth Of Field to ensure good sharpness across all your subjects.